Wooden Plugs for Screw Holes: 7 Pro Tricks for a Flawless Finish

Wooden plugs for screw holes are one of the only “hide the screw” methods that still feels like real woodworking when you’re done—because the patch is actual wood, not filler.
If you’re building anything people will handle up close—tiered tray stands, serving trays, tray rims, side rails—plugs are the difference between “I can see every screw” and “that looks purpose-built.”
If you’re comparing options first, start with my guides on ways to hide screws in wood and how to cover screw holes in wood.
Contents Here
- 1 What a wooden plug is (and why it works better than filler)
- 2 When plugs are the right choice (and when they’re not)
- 3 Plug types: what to use and why
- 4 Tools and materials (simple, shop-tested)
- 5 Safety notes (quick but important)
- 6 The “right way” sequence: install wooden plugs for screw holes (step-by-step)
- 6.1 Step 1: Mark screw locations with edge distance in mind
- 6.2 Step 2: Drill the pilot hole first
- 6.3 Step 3: Choose your plug-hole style (counterbore beats countersink)
- 6.4 Step 4: Drive the screw and confirm the joint is tight
- 6.5 Step 5: Dry-fit the plug (don’t skip this)
- 6.6 Step 6: Align the grain so the plug “disappears”
- 6.7 Step 7: Glue sparingly—on the sides, not in a puddle
- 6.8 Step 8: Seat the plug with light taps
- 6.9 Step 9: Trim flush safely
- 6.10 Step 10: Sand flush and blend
- 7 A quick sizing guide (so your plugs look proportional)
- 8 Finishing tips so plugs match (especially under stain)
- 9 Troubleshooting: common mistakes (and fast fixes)
- 10 Where plugs make the biggest difference on tiered tray builds
- 11 Smart buying guide (commercial, but actually useful)
- 12 FAQs about Wooden Plugs for Screw Holes
- 13 Wrap-up
What a wooden plug is (and why it works better than filler)
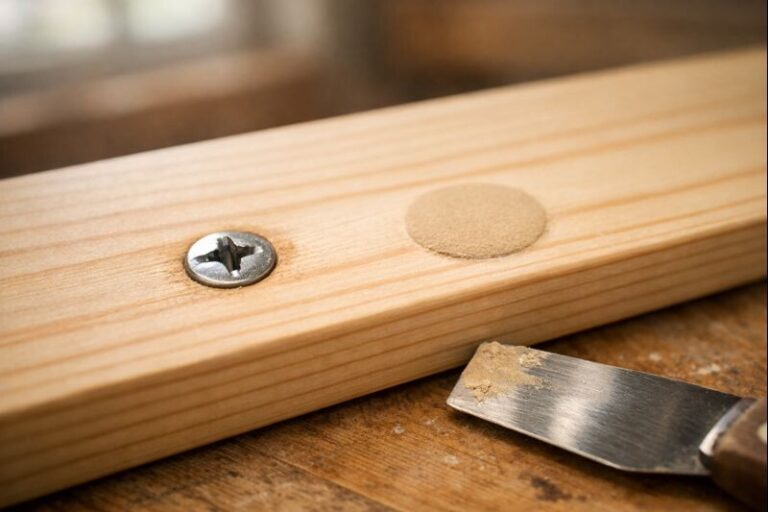
A wooden plug is a small, fitted piece of wood that fills a counterbore/countersink after the screw is installed. Once trimmed and sanded flush, it becomes part of the surface.
Why it works so well:
- It sands cleanly without crumbling.
- It takes stain and clear coat more like the surrounding board than putty does.
- It holds up better on edges and corners that get bumped or wiped.
Plugs are especially worth it on tiered tray stands because they’re constantly handled, moved, and cleaned. (If you’re planning a new stand build, see how to make a tiered tray stand.)
Also see: Screw Wood Plugs: 9 Pro Tricks for Seamless, High-End Screw Hides
When plugs are the right choice (and when they’re not)
Plugs shine when…
- The surface will be stained or clear-finished (filler often “ghosts”).
- The area gets handled a lot (tray rims, bases, carry points).
- You want the joint strong and the face clean.
Plugs are a headache when…
- The part is thin and you can’t afford much hole depth.
- You’re close to an edge and drilling risks blowout.
- The project is painted, and a good filler/prime system will be faster.
If you are painting, you’ll still want tight prep. My workflow for a clean painted surface is here: smooth painted finish without brush marks.
Plug types: what to use and why
Here’s the quick pick list. (I’ll show the exact install sequence right after.)
| Plug type | Best for | Why I use it | Watch-out |
|---|---|---|---|
| Tapered plug | Handheld drilling, real-world holes | Seats tight, forgiving fit | Forcing it can split thin stock |
| Straight plug | Flat-bottom counterbores | Predictable flush sanding | Needs a clean flat-bottom hole |
| Shop-made face-match plug (cut from your project wood) | Clear coat + stain projects | Best color/grain match | Takes a little setup time |
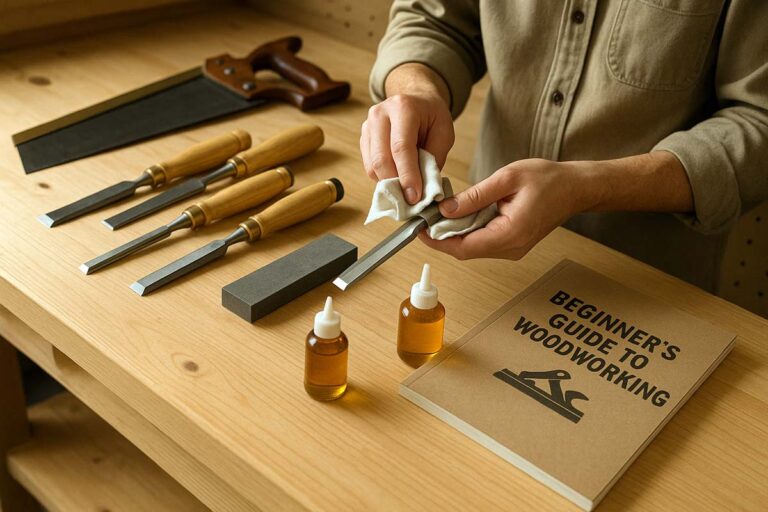
Tools and materials (simple, shop-tested)
Must-haves
- Drill/driver
- Counterbore or countersink method (details below)
- Plugs (pre-made or shop-cut)
- PVA wood glue
- Flush-cut saw or sharp chisel
- Sandpaper: 120 → 150/180 → 220
Nice-to-have upgrades (these make plugs look “pro”)
- Depth stop collar for repeatable holes
- Drill press (best alignment and clean cuts)
- Painter’s tape for glue control
If you’re new to screw joints, it’s worth a fast refresher on how to screw into wood and how to stop wood splitting when screwing—a clean plug starts with a clean, straight screw.
Safety notes (quick but important)
- Wear eye protection when drilling and trimming plugs.
- Clamp small parts—never hold a tray rim strip in your fingers while drilling.
- Use dust control when sanding (especially hardwoods and MDF).
- When trimming plugs with a chisel, cut inward toward the plug—never toward your hand.
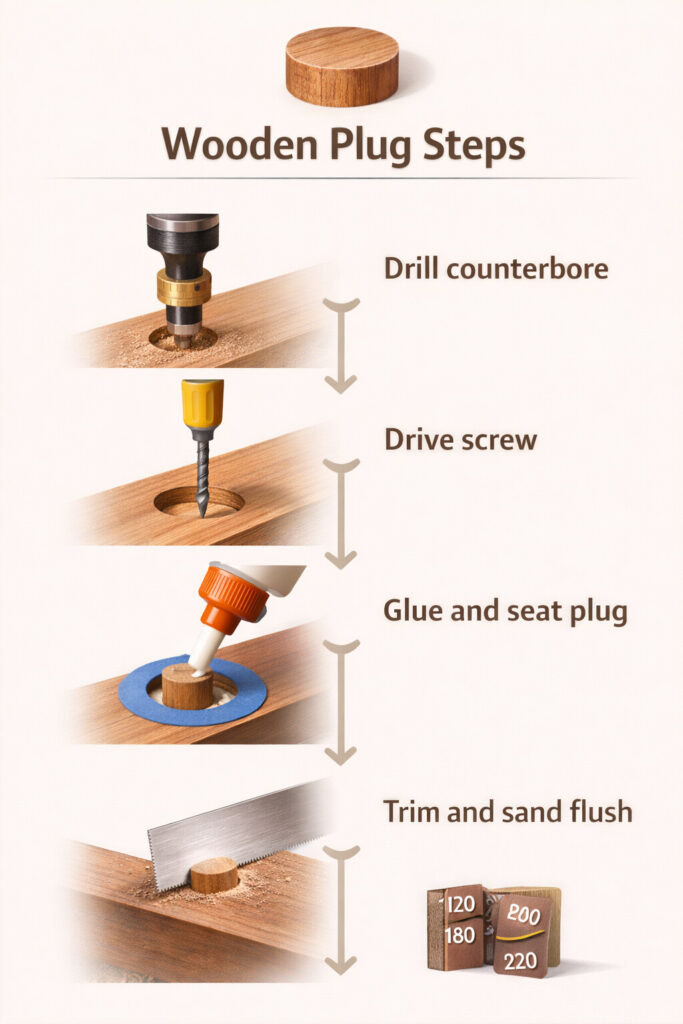
The “right way” sequence: install wooden plugs for screw holes (step-by-step)
This workflow prevents the two most common plug failures: misaligned holes and glue/stain halos.
Step 1: Mark screw locations with edge distance in mind
Keep plug holes away from edges. On tray stands, I center fasteners on the base plate and keep plugs clear of thin rims.
Step 2: Drill the pilot hole first
Pilot holes keep the screw straight and prevent splitting. A crooked screw can pull the head off-center, and then the plug looks “off” even if you sand perfectly flush.
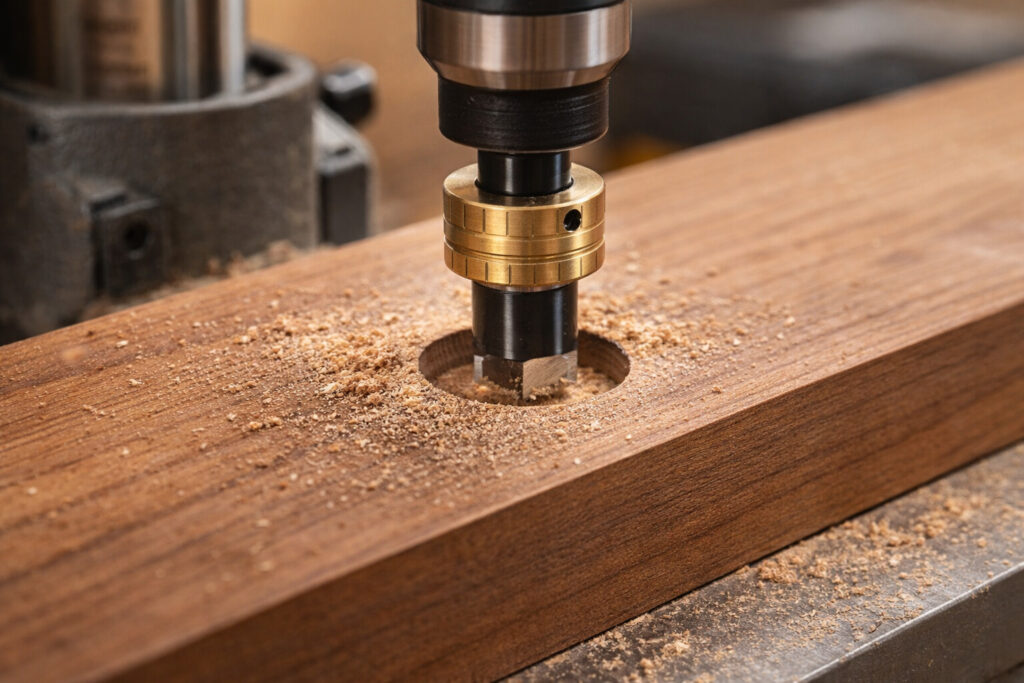
Step 3: Choose your plug-hole style (counterbore beats countersink)
You’ll get cleaner plug fits with a flat-bottom counterbore:
- Drill a flat-bottom pocket with a Forstner bit (or a true counterbore bit).
- Then drill the pilot hole in the center of that pocket.
A classic countersink cone works better for hiding the screw head than it does for fitting a straight plug. If you’re using tapered plugs, a countersink can still work, but flat-bottom pockets are more predictable.
Depth rule I use: plug thickness + about 1/32″ extra for sanding flush.
Step 4: Drive the screw and confirm the joint is tight
Tighten until the joint closes with no gap. Don’t overdrive—stripped holes should be repaired before you plug.
If you do strip it, fix it first:
Step 5: Dry-fit the plug (don’t skip this)
Your plug should press in with firm hand pressure or light taps. If it drops in loose, it can pop later. If it needs heavy hammering, you’re risking splits.
Step 6: Align the grain so the plug “disappears”
Rotate the plug until the grain direction matches the board’s grain. This one step makes the difference between “dot” and “invisible.”

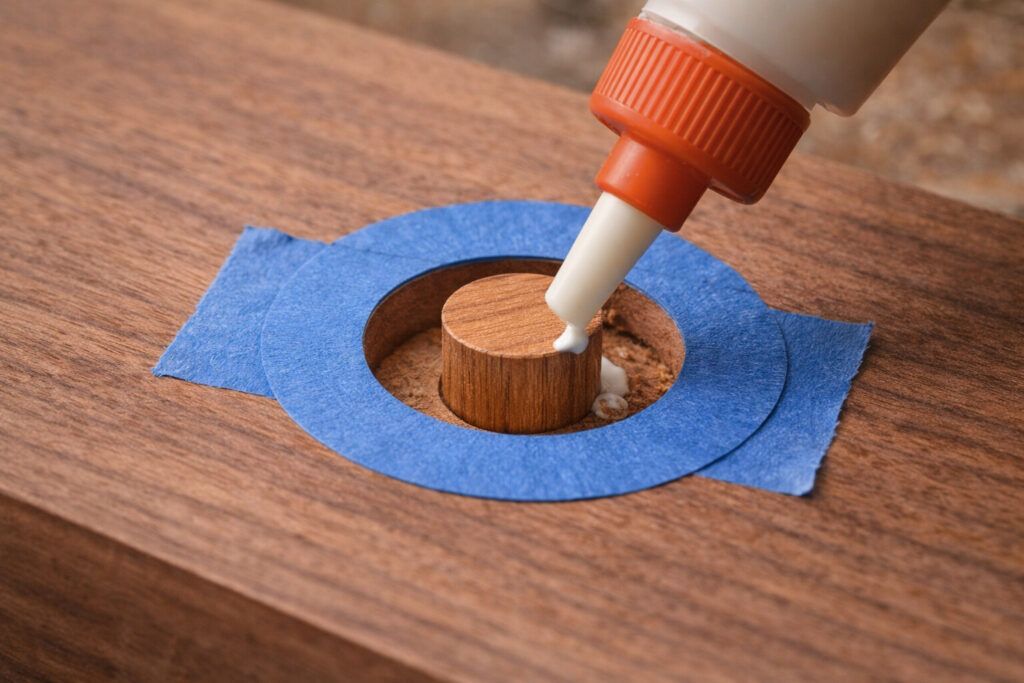
Step 7: Glue sparingly—on the sides, not in a puddle
I apply glue to the side walls of the hole or the sides of the plug, not the bottom. Bottom puddles create squeeze-out that soaks into grain and can cause a finish halo.
Clean trick: ring the hole with painter’s tape before gluing.
Step 8: Seat the plug with light taps
Use a mallet and a scrap block. Stop when seated—especially with tapered plugs.
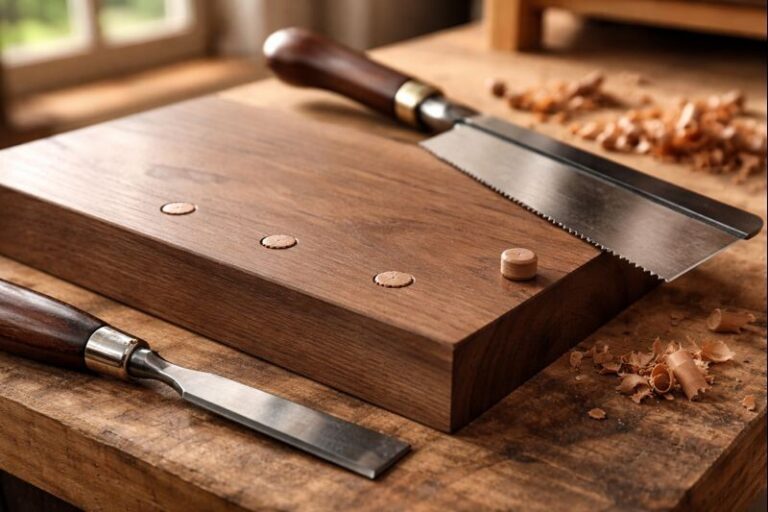
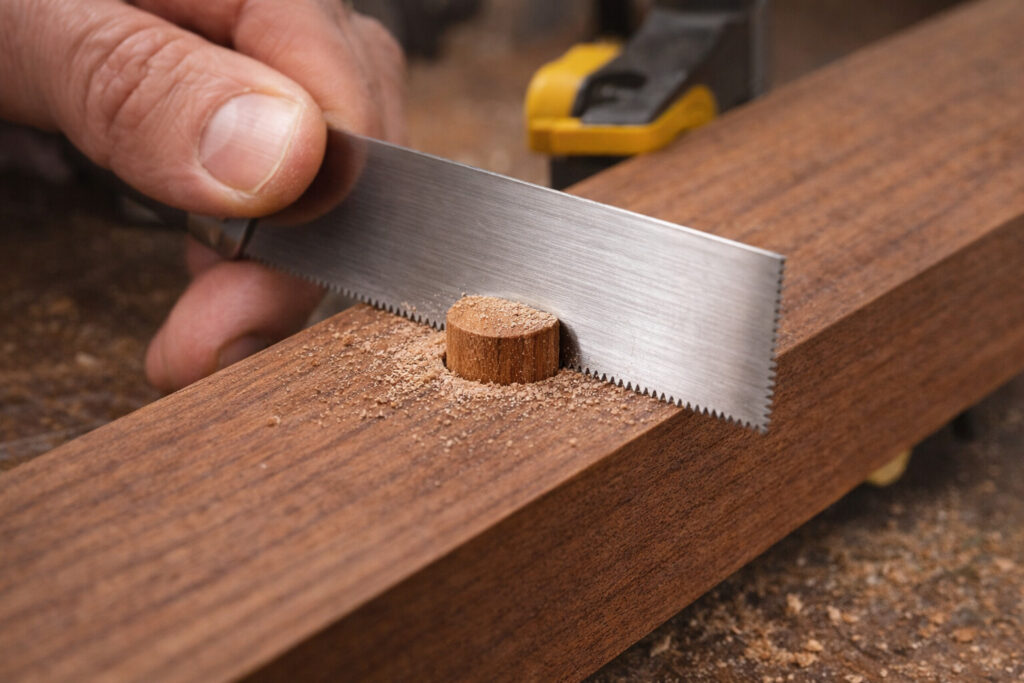
Step 9: Trim flush safely
Let the glue set firmly, then:
- Use a flush-cut saw (teeth set to one side to reduce scratching), or
- Pare with a sharp chisel from the outside toward the center.
Step 10: Sand flush and blend
Start with 120 only if needed, then move through 150/180 and finish at 220. Keep your sanding flat—don’t dish the surrounding surface.
If your project includes end grain near the plugged area (tray rims, legs), this helps: how to sand end grain smooth.
A quick sizing guide (so your plugs look proportional)
Most small furniture and tray work looks right with 1/4″–3/8″ plugs.
| Common plug diameter | Typical use | Notes |
|---|---|---|
| 1/4″ | light trim, small parts | minimal wood removal |
| 3/8″ | tray stands, small furniture | “workhorse” size; covers most screw heads cleanly |
| 1/2″ | thicker stock, bold look | avoid near edges on thin boards |
If you’re choosing screws from scratch, these guides help you match everything cleanly: what is a wood screw and how are screws sized.
Finishing tips so plugs match (especially under stain)
Stain is where a plug job either looks seamless—or announces itself.
Here’s what works reliably:
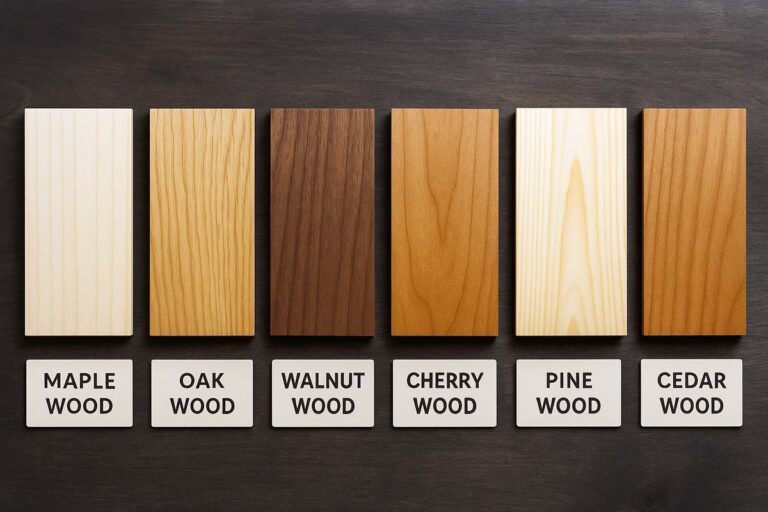
- Cut plugs from your project offcuts whenever you can (best color match).
- Use a light washcoat before staining to reduce contrast.
- Always test your stain on a scrap board with a plugged hole.
If you’re staining pine, blotching is the big issue—handle it before you blame the plug: how to prevent pine from blotching.
For serving trays, finish durability matters. Start here:
Troubleshooting: common mistakes (and fast fixes)
The plug won’t sit flush
- Cause: hole bottom has debris, or plug is too long.
- Fix: clean the hole, deepen slightly, or trim the plug.
A glue “halo” shows after staining
- Cause: squeeze-out soaked into open grain.
- Fix: sand back, then washcoat before staining. Next time, tape the hole.
The plug pops out later
- Cause: loose fit or not enough side contact.
- Fix: re-drill clean and use a properly fitted plug; glue the sides.
The plug looks like a dot
- Cause: grain mismatch or wrong species.
- Fix: shop-cut from offcuts and align grain before gluing.
Where plugs make the biggest difference on tiered tray builds
If you build tiered tray stands, plugs are perfect for:
- Base-to-upright screw joints (clean look on the base)
- Underside fasteners that still get seen when the stand is lifted
- Side rails where a visible screw kills the finish
For wood selection that finishes nicely and stays sturdy, see best wood types for sturdy tiered tray stands.
Smart buying guide (commercial, but actually useful)
If you’re shopping for plug gear, these are the purchases that noticeably improve results:
1) Plug cutters (for shop-made plugs)
Look for:
- Sharp, thick cutters (cleaner walls, less burning)
- Common sizes (1/4″, 3/8″, 1/2″)
- A cutter style that matches your work: tapered for forgiving fit, straight for flat-bottom pockets
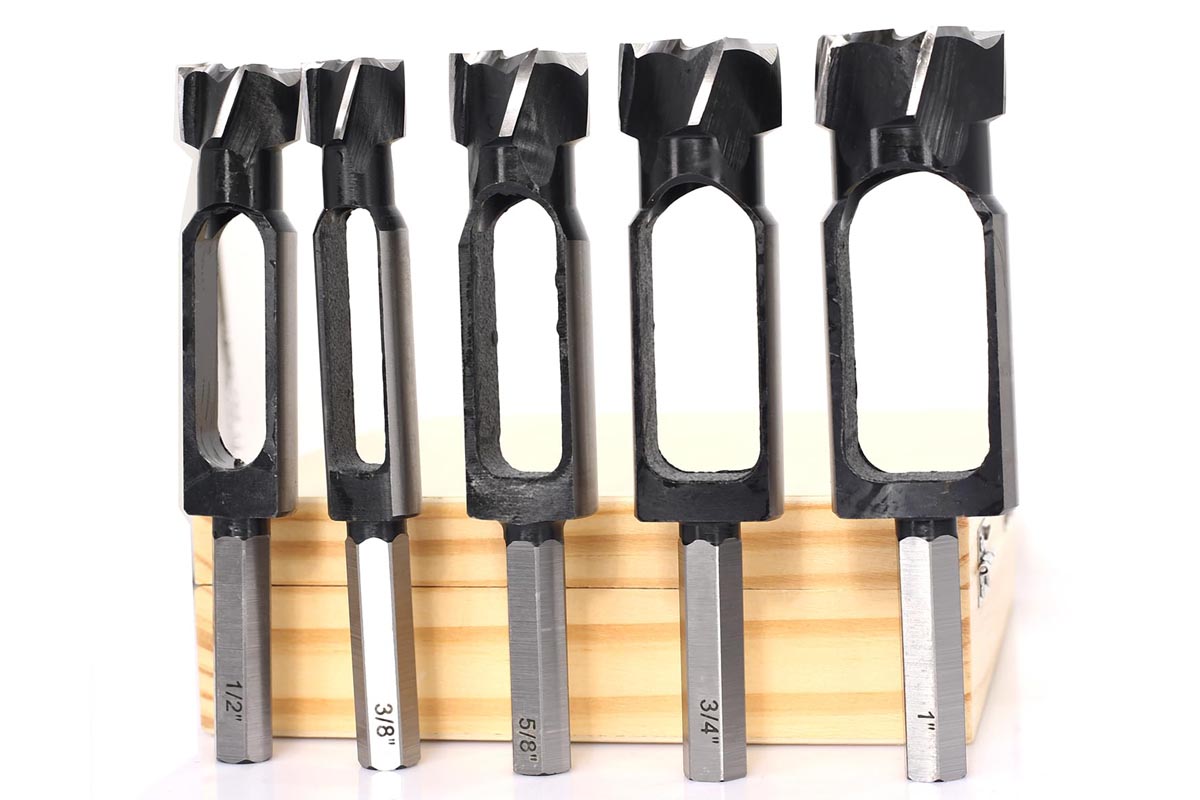
SICWOOD 5PCS Wood Plug Cutters Set
Best Value Plug Cutter Set for Clean, Precise Wood Plugs
Clean, smooth plugs with a steady drill-press feed. Useful size range in a handy box, and the hex shanks grip securely. Great DIY set for tenon plugs and repairs.
$73.99 at Amazon2) Pre-made plug assortments (for speed)
A small assortment in common species (oak/maple/walnut) saves time on quick builds. Dry-fit and color-check before gluing—species labels don’t guarantee a perfect tone match.
3) Counterbore/countersink kit + depth stop
A depth stop is the quiet hero. Consistent hole depth makes every plug look intentional, not random.
4) Flush-cut saw
A good flush-cut saw reduces surface scratches and speeds up cleanup.

SUIZAN Flush Cut Saw
Best Flush Cut Saw for Clean, Scratch-Free Trims
SUIZAN’s pull-saw action feels light and precise, leaving a cleaner edge than most push saws. Razor-sharp Japanese steel makes flush cuts easy on plugs and trim.
$19.80 at AmazonFAQs about Wooden Plugs for Screw Holes
Are wooden plugs stronger than wood filler for screw holes?
Yes. A plug is solid wood and supports the surrounding fibers. Filler is primarily cosmetic and can chip on edges—especially on tray stands that get handled often.
Should I install plugs before staining or after?
Before. You want sanding and surface leveling done as one flat plane, then you finish everything together.
Can I use a dowel as a plug?
You can, but dowels often stand out because the visible face and grain rarely match the project surface. A plug cut from project offcuts blends better under stain and clear coats.
Do plugs make sense on painted projects?
Sometimes. On high-wear edges, plugs hold up well. But if speed matters and the surface won’t be inspected up close, quality filler plus primer is faster.
What’s the most common plug size for tray stands?
3/8″ is the workhorse size for most tray stands and small furniture because it covers typical screw heads and looks proportional.
Wrap-up
Wooden plugs aren’t complicated. They’re just picky about sequence.
Drill clean holes, tighten the joint first, fit the plug well, align the grain, and keep glue under control. Do that, and the plug stops looking like a patch and starts looking like the board was built that way. That’s the difference between “homemade” and “clean craft.”