How to Make a Tiered Tray Stand: Easy DIY Guide for Home Decor

If you’re here, it’s likely because you’re looking to make a beautiful, functional tiered tray stand, right? Whether you’re planning to use it to display seasonal decor, organize your kitchen counter, or even sell a few of your creations, a well-crafted tiered tray stand can add elegance and a personal touch to any space.
I’m writing this article to help anyone build a strong, good‑looking tiered tray stand at home. You’ll get exact sizes, detailed steps, and downloadable line‑art for each stage. Follow along from start to finish—build, finish, decorate—and use the quick fixes if something goes sideways. Stay connected with TrayEdit.
So grab your tools, and let’s get started!
Why Make Your Own Tiered Tray Stand?
Before we cut wood, here’s why doing it yourself pays off. You choose the exact sizes, woods, and finish so it fits your space, and the build is sturdier than most store‑bought versions. Plus, you can tighten or refresh it any time.
- Customization: Pick diameters (e.g., 16″/12″/8″) and spacer height (7″) for your space.
- Strength & repairability: A threaded‑rod core stays square and can be tightened or rebuilt.
- Cost control: Baltic birch + common hardware is affordable; upgrades are optional.
- Style flexibility: Swap to farmhouse, turned posts, or modern flat spacers anytime.

Plus, there’s something immensely satisfying about crafting something with your own hands.
At‑a‑glance Specs
Here are the key sizes and hardware so you can price materials quickly or shop online in minutes. Use this as your pre‑build checklist.
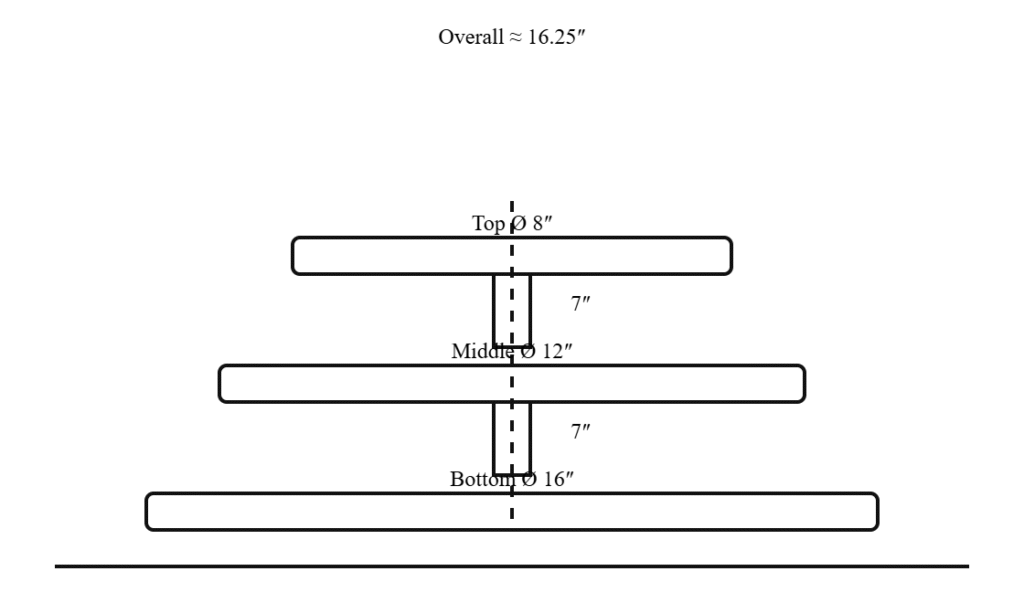
- 3‑tier diameters (bottom → top): 16″, 12″, 8″ (406, 305, 203 mm)
- Material thickness: 3/4″ (19 mm)
- Spacer height: 7″ (178 mm) between tray surfaces
- Hardware: 1/4″‑20 threaded rod (close fit drill #F 0.257″, free fit Letter H 0.266″) or M6 rod (normal fit 6.6 mm)
- Rod length (3‑tier): about 18.25″ (464 mm) including hardware allowance
Materials You Need
Here’s the exact shopping list with the sizes that work. Swap the placeholder links for your preferred stores when you publish.
Required (through‑rod build)
- Tray disks (3/4″ / 19 mm): Ø16″, Ø12″, Ø8″ — or cut from sheet goods
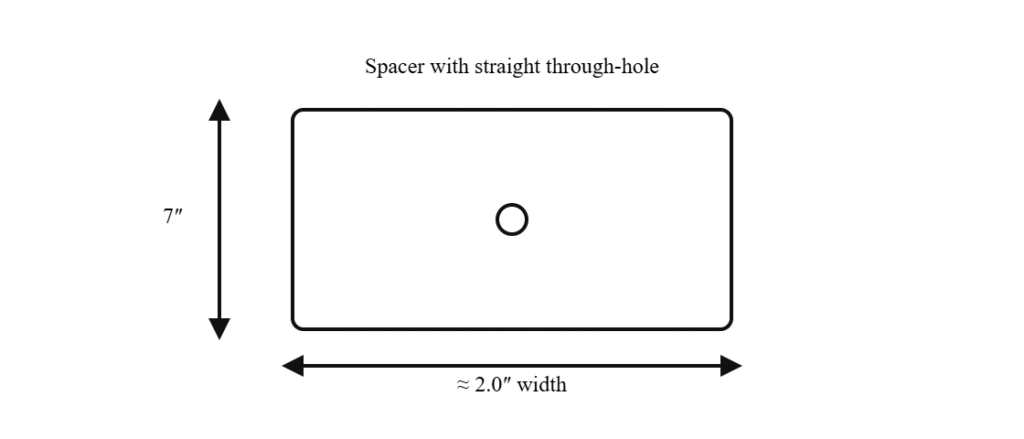
- Spacers/posts: 2 pieces, 7″ (178 mm) tall × ~2″ (50 mm) wide, through‑hole
- Threaded rod: 1/4″‑20 × ~18.25″ (464 mm) or M6 × ~464 mm
- Flat washers: 6–8 pcs, match rod size
- Hex nuts: 4–6 pcs, match rod size; optional acorn/knob on top; optional jam‑nut under base
- Finish (pick one system): water‑based polyurethane or mineral‑oil/beeswax
Consumables (required)
- Sandpaper: 80, 120, 180, 220 grits (discs or sheets)
- Painter’s tape: for cleaner router/bandsaw edges
- Lint‑free rags / shop towels: for finish and cleanup; optional tack cloth
- Felt or rubber pads: optional but recommended to protect counters
Optional & variations
- Wood stain or dye + compatible topcoat (only if you want color)
- Edge banding for plywood rims (if you want a solid‑wood look)
- Spacer blanks: turned wooden cups or decorative turned posts
Alternative joinery (only if you choose it)
- Hidden screws: #8×1‑1/4″ or #10×1‑1/2″ + washers; tiny dab of wood glue on spacer ends
- Dowels/Dominos: 8 mm or 3/8″ dowels, or 6×40 mm Dominos + wood glue
- Threaded inserts + machine screws: 1/4″‑20 or M6 inserts + matching screws
Read more: Best wood types | DIY substitutes | Affiliate disclosure
Tools & PPE
These are the tools I actually use in the shop and the safety gear I trust. No router? Cut with a jigsaw a hair outside the line and sand to size. Wear your PPE and clamp work before every cut.
Tools
- Cutting circles: Router + circle‑cutting jig or jigsaw/bandsaw + sanding block/disc sander
- Drilling: Drill press or hand drill with bits → Letter H (0.266″) or 17/64″ for 1/4‑20; 6.6 mm for M6; countersink bit; optional 9/32″ (7.0 mm) for a light ream if needed
- Sanding: Random‑orbit sander (80→120→180→220)
- Measuring & layout: tape measure, compass, combination square, awl/center punch
- Clamping & workholding: 2–4 clamps; scrap backer board for clean drill exits
- Hardware setup: two wrenches, hacksaw/cutoff wheel, small file/deburr tool
- Reference flat (optional but helpful): granite tile or glass shelf for leveling checks
- Dust collection: shop‑vac or extractor (recommended)
PPE
- Safety glasses, hearing protection
- Dust mask/respirator (N95/P2) for sanding
- Nitrile gloves for finishing (never near spinning tools)
Also See: Essential safety gear for tray stands
In short, here is the quick shopping list:
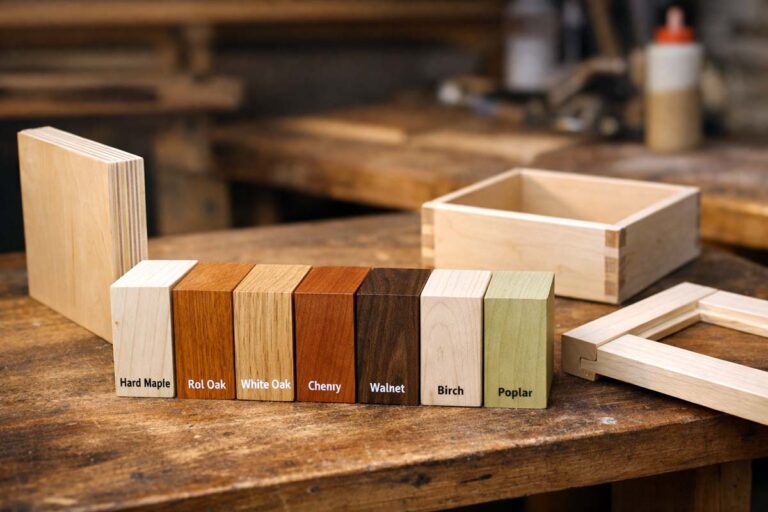
- Wood: I recommend using hardwood like oak, maple, or pine for sturdiness and ease of work.
- Wooden Dowels: These will form the central posts to support the tiers.
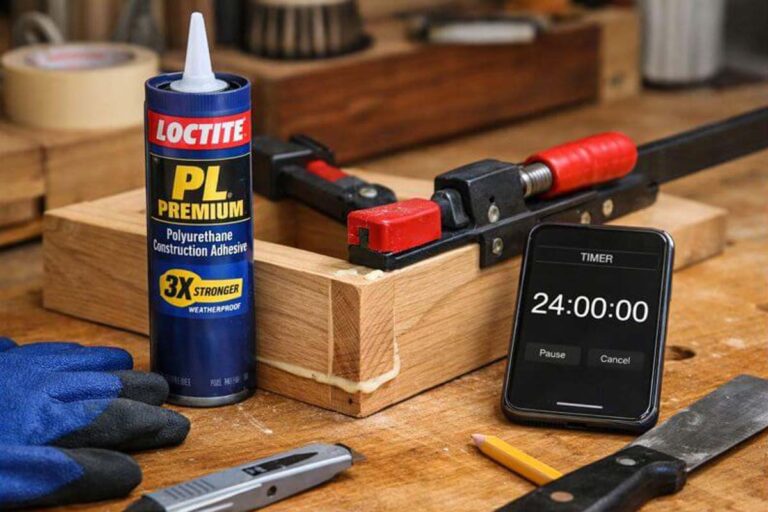
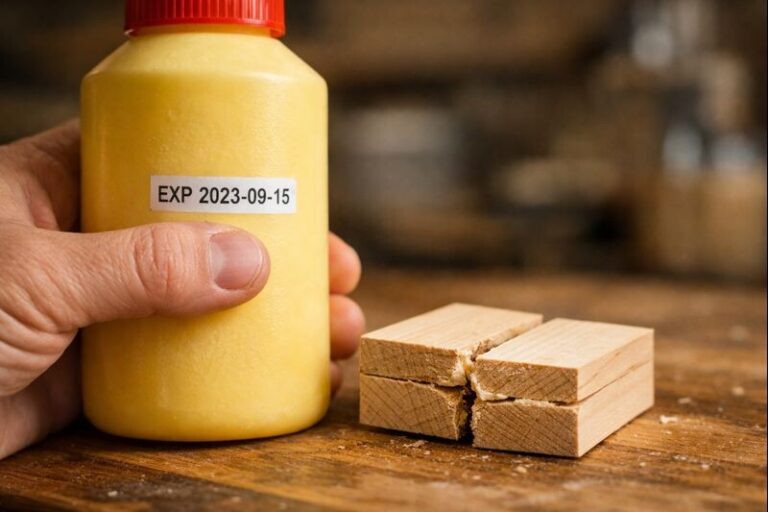
- Wood Glue: A high-quality wood glue will help hold everything together firmly.
- Screws: You’ll need these to secure the dowels to the trays.
- Sandpaper: To smooth out your wooden surfaces.
- Paint or Wood Stain: Optional, depending on the finish you want.
- Clear Wood Sealer: To protect your tray stand.
- Tools: A saw, drill, measuring tape, and a screwdriver are all essentials.
Bill of Materials & Cut List
Print this table and check off each part as you go. Measurements are in inches and millimeters so anyone can follow.
| Part | Qty | Dimensions (in) | Dimensions (mm) | Notes |
|---|---|---|---|---|
| Bottom tray | 1 | Ø 16″ × 3/4″ | Ø 406 × 19 | Centered clearance hole |
| Middle tray | 1 | Ø 12″ × 3/4″ | Ø 305 × 19 | Centered clearance hole |
| Top tray | 1 | Ø 8″ × 3/4″ | Ø 203 × 19 | Centered clearance hole |
| Spacers | 2 | 7″ tall × ~2″ wide, through‑hole | 178 × ~50, through‑hole | Hole matches rod |
Plan your sizes (3‑tier default)
Use 16″, 12″, and 8″ trays with two 7″ spacers. This keeps the base wide for stability and the top small for reach. A 2‑tier option is below.
Cut the round trays
Use a router circle‑cutting jig for perfect disks. Set the pivot to the radius (half the diameter). Take shallow passes (~1/8″ / 3 mm). Bandsaw/jigsaw also works; sand to the line.

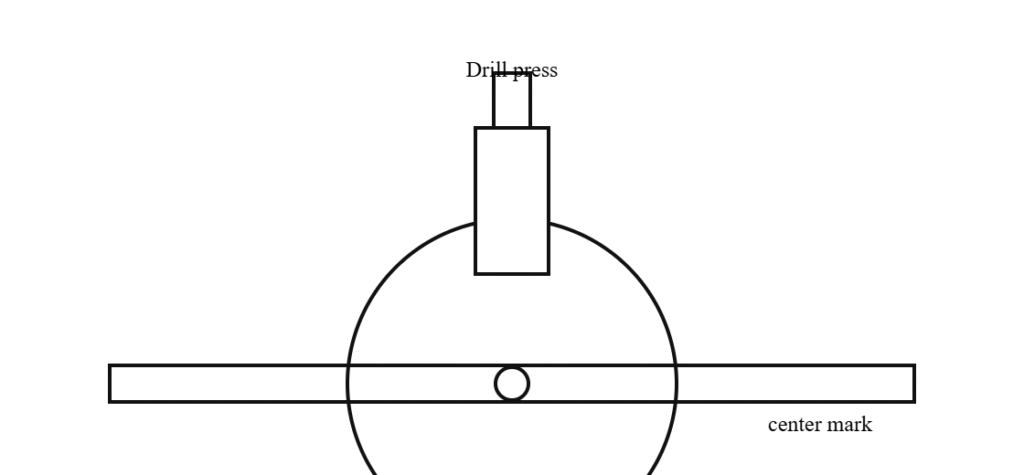
Find true centers; drill clearance holes
Mark center with perpendicular bisectors of two chords. Drill perpendicular using a drill press. For 1/4″‑20 rod, use Letter H (0.266″) for a free fit (or 17/64″). For M6, use 6.6 mm for a normal fit. Lightly chamfer to break edges.
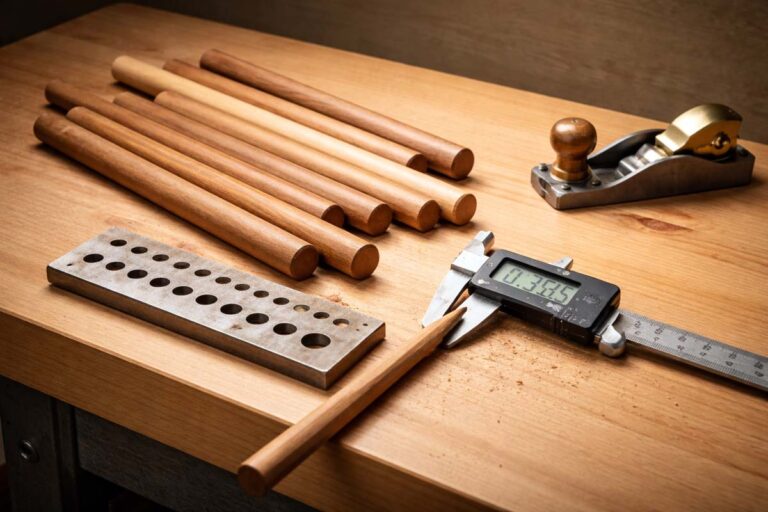
Make the spacers (posts)
Rip to ~2″ width. Cut two pieces 7″ long. Drill a straight through‑hole that matches your rod size. Turned spindles are optional.
Dry‑fit on the threaded rod
Cut the rod to ~18.25″. Deburr ends. Stack bottom → top: washer + nut (under bottom tray) → bottom tray → washer → spacer → washer → middle tray → washer → spacer → washer → top tray → washer → top nut/knob.

Sand all surfaces
Sand 80 → 120 → 180 → 220 grit. Ease the sharp edges with a tiny round‑over or chamfer. Keep faces flat so trays sit flush.

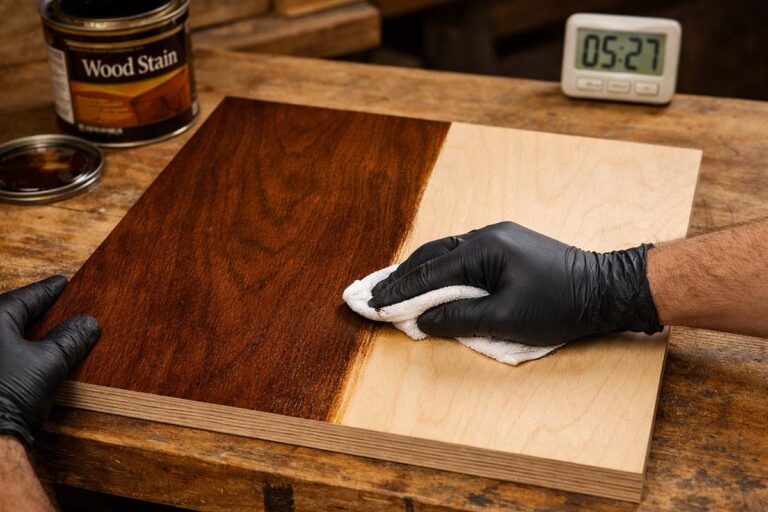
Finish
Option A: Food‑safe oil/wax (mineral oil + beeswax, or polymerized linseed/tung). Wipe thin coats; buff. Option B: Water‑based polyurethane for durable decor—2–3 thin coats, de‑nib with 320 between. Safe for incidental food contact after full cure.

Final assembly & lock‑up
Re‑stack with washers against wood. Tighten snugly with two wrenches. Add a jam‑nut under the bottom tray if you want extra vibration resistance. Don’t crush the wood fibers.

Level & de‑wobble
Set the stand on a dead‑flat surface (countertop or granite tile). If it rocks, sand three equidistant spots on the bottom rim or add thin pads. Confirm trays are parallel.

2‑tier variation
Use 14″ and 10″ trays with a single 7″ spacer. Rod length ≈ 10.5″ including hardware allowance. Build steps are identical.

Joinery Alternatives (No Through‑Rod)
If you don’t want a visible center rod, pick one of these methods. I lay out when it makes sense, what hardware you need, and the exact drill/pilot sizes so your joints pull tight and stay square.
1) Threaded inserts + machine screws
- Why: Clean look; trays/spacers can be removed for finishing or repair.
- Hardware: M6 or 1/4‑20 threaded inserts in the trays; matching machine screws up into spacer ends.
- Drilling: Use the insert maker’s pilot size; drill perpendicular; add a tiny chamfer to avoid chip‑out.
- Notes: Best with hardwood spacers; avoid over‑torque. Test in scrap first.
2) Wood screws from below (hidden)
- Why: Fast, cheap, invisible from above.
- Hardware: #8 × 1‑1/4″ or #10 × 1‑1/2″ wood screws + flat washers.
- Pilot sizes: #8 → 1/8″ hardwood / 7/64″ softwood; #10 → 9/64″ hardwood / 1/8″ softwood. Optional shank clearance in tray so the screw pulls the spacer tight.
- Notes: Pre‑drill spacer ends dead‑center; keep at least 3× screw diameter from edges.
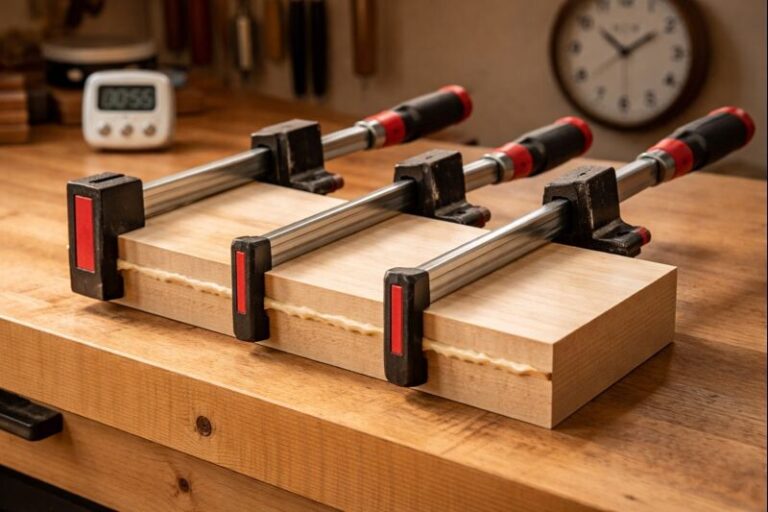
3) Dominos, dowels, or loose tenons (glue‑only)
- Why: Seamless look with no metal; strong when clamped and cured.
- Setup: Two 8 mm dowels or a 6×40 mm Domino per joint; dry‑fit before glue.
- Notes: Non‑disassemblable. Pre‑finish nearby areas to avoid squeeze‑out headaches.
Tolerances, Clearances & Safety
Use these numbers to keep parts square and assembly smooth. Staying inside these ranges prevents wobble, splits, and finish problems.
Clearances & fits
- Center hole (through‑rod): 1/4‑20 → drill Letter H (0.266″) or 17/64″ for a free fit. M6 → 6.6 mm normal fit; 7.0 mm if you want easier assembly.
- Perpendicularity: Keep drill within ≈ 1° of square to avoid visible tilt.
- Circle accuracy: Diameter within ±1/32″ (±1 mm) keeps tiers concentric.
- Spacer length match: Keep pairs within ±1/32″ (±1 mm) so trays end up parallel.
- Countersink: Add a light ~1/32″ chamfer to reduce tear‑out and ease assembly.
- Jam‑nut lock: Double‑nut under the base if desired; snug, don’t crush wood fibers.
Pilot & clearance for wood‑screw builds
- #8 screws → pilot: 1/8″ hardwood, 7/64″ softwood; optional shank clearance in tray 11/64″.
- #10 screws → pilot: 9/64″ hardwood, 1/8″ softwood; optional shank clearance in tray 3/16″.
- Rule of thumb: pilot ≈ root diameter in hardwood; ~15% smaller in softwood.
Safety & finishing
- Router: Clamp securely; shallow passes; feed against bit rotation; hands clear of the pivot.
- Drilling: Use a backer board to prevent blow‑out; wear eye and hearing protection.
- Finishes: Thin coats; ventilate; dry oil‑soaked rags flat (fire risk). Film finishes are food‑safe only after full cure.
Troubleshooting
If something acts up, start here. I list each symptom, the likely cause, and the fastest fix so you can keep moving.
- Stand wobbles: Confirm the countertop is flat. True the bottom rim with light sanding or add three felt pads at 120°. Check that spacer lengths match.
- Tiers not parallel: Washer or spacer end not square. Re‑seat, replace a distorted washer, or shim with thin card; verify spacer lengths.
- Rod won’t pass through: Re‑drill to the next size up (e.g., 9/32″ / 7.0 mm). Add a light chamfer both sides.
- Hole tear‑out: Use a backer board and a sharp bit; add a small countersink to clean the rim.
- Hardware loosens over time: Add a jam‑nut under the base or a nylon‑insert lock nut on top; snug with two wrenches.
- Finish still tacky: Coats were too heavy or cold/humid conditions. Increase airflow, wait longer, de‑nib with 600‑grit, re‑coat thin.
- Visible off‑center top: Enlarge the tray hole slightly and re‑center on the rod; tighten with washers to hide the correction.
Decorating Your Tiered Tray
Now that your tiered tray stand is complete, it’s time to get creative! One of the best parts of a tiered tray is how versatile it is. You can decorate it for different seasons, holidays, or themes. Here are a few ideas:
- Spring: Add faux flowers, small pots, and pastel-colored items for a light, airy feel.
- Fall: Use small pumpkins, mini pinecones, and candles for a cozy autumn vibe.
- Christmas: Think about mini Christmas trees, ornaments, and festive candles.
- Kitchen: Use your tiered tray stand for kitchen items like spices, napkins, or coffee pods.
Use the posts below for seasonal sets that are easy to swap.

FAQs about DIY Tiered Tray Stand
Final Thoughts
There you have it—a complete step-by-step guide to making your own tiered tray stand. It’s a rewarding project that’ll add personality and style to your home. Plus, you’ll have the satisfaction of knowing you made it yourself!
By following these steps, you can craft a high-quality, durable tiered tray stand that is not only functional but also a true work of art. Remember, the key to success in any woodcraft project is patience and attention to detail. So take your time and enjoy the process!
Happy crafting!
Last Updated: November 21, 2025