Farmhouse Tiered Trays: 8 Space-Saving Decor Ideas
Farmhouse tiered trays are one of those small decor pieces that quietly pull a whole room together. You can load them with candles, mugs, greenery, or seasonal bits and they still don’t take much space. I’ve made and styled more of these trays than I care to admit, and they always get comments from visitors.
In this article I’ll walk you through what they are, why they’re so popular, how to build one, and how to style it so it actually feels useful, not cluttered. Think of this as a friendly shop chat, just in written form for you today.
What is a farmhouse tiered tray?
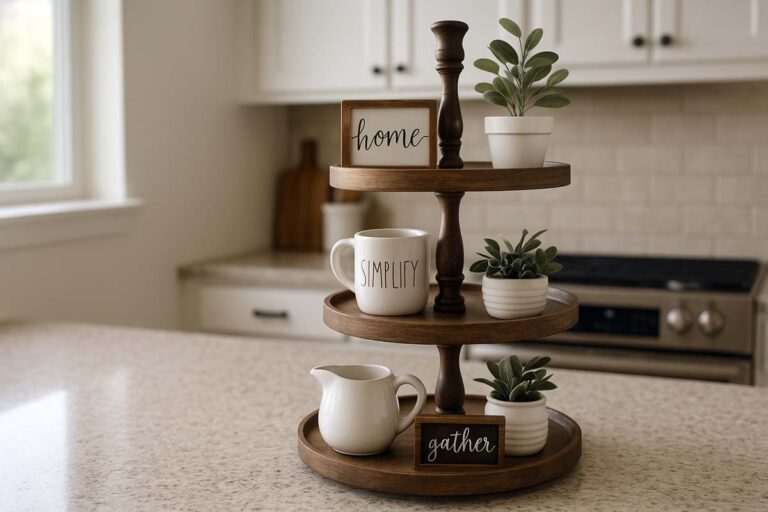
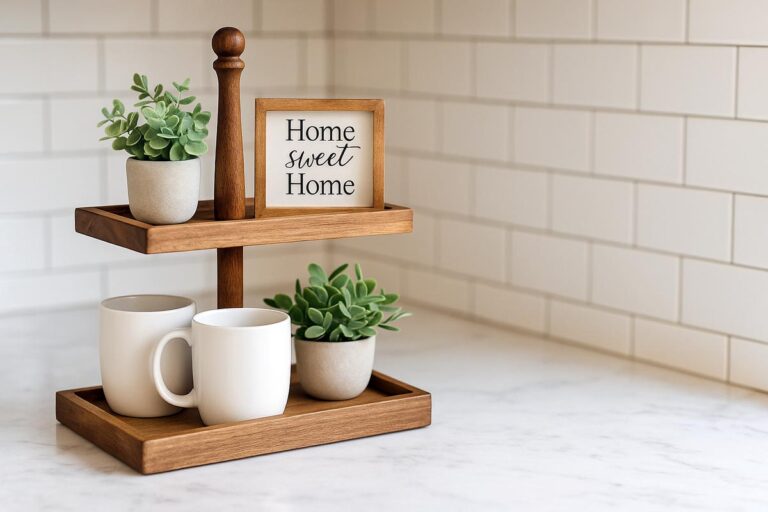
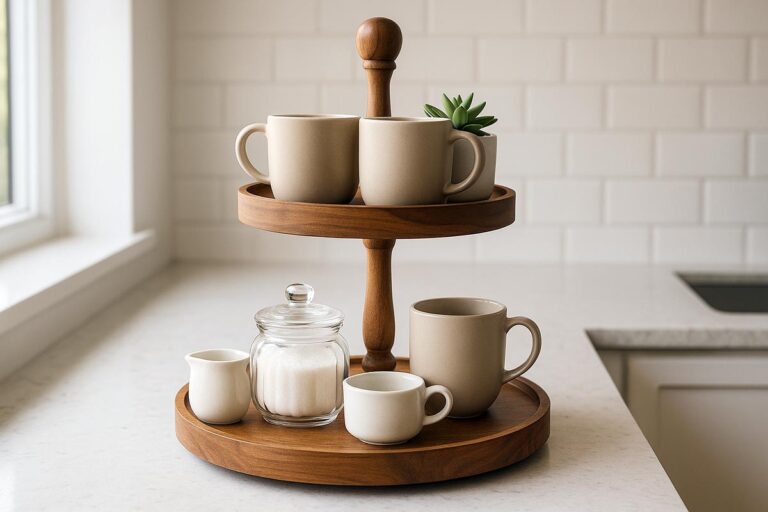
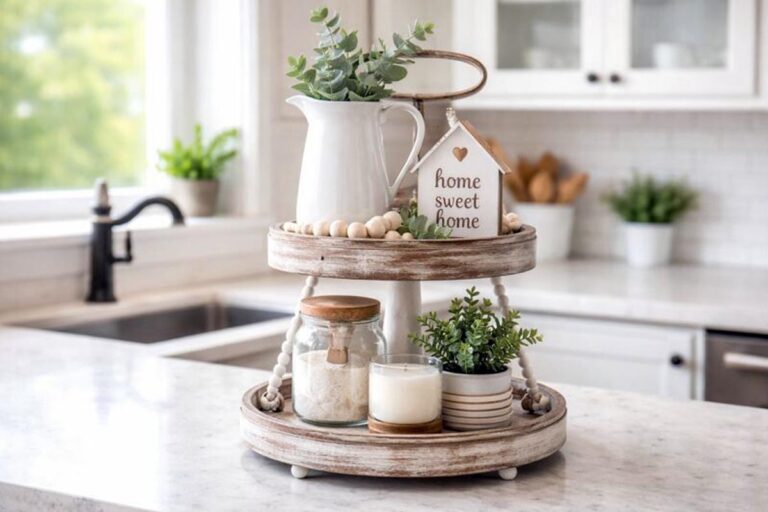
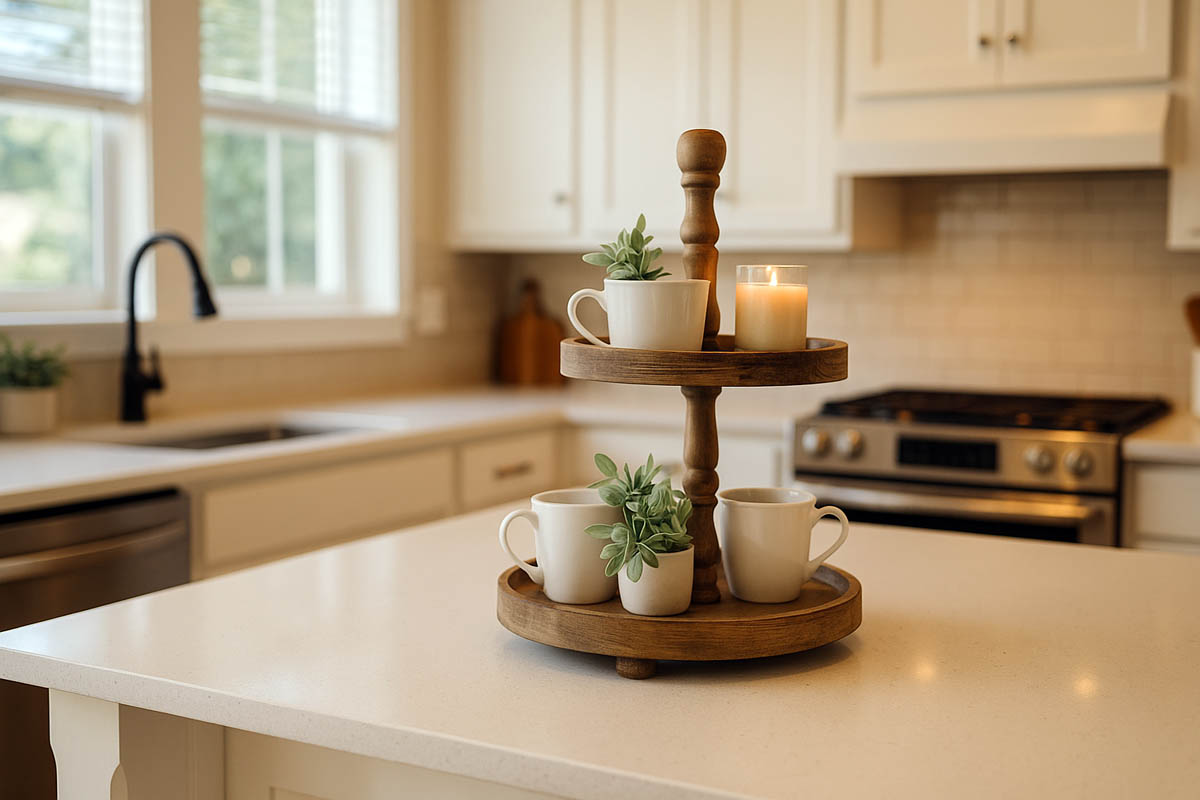
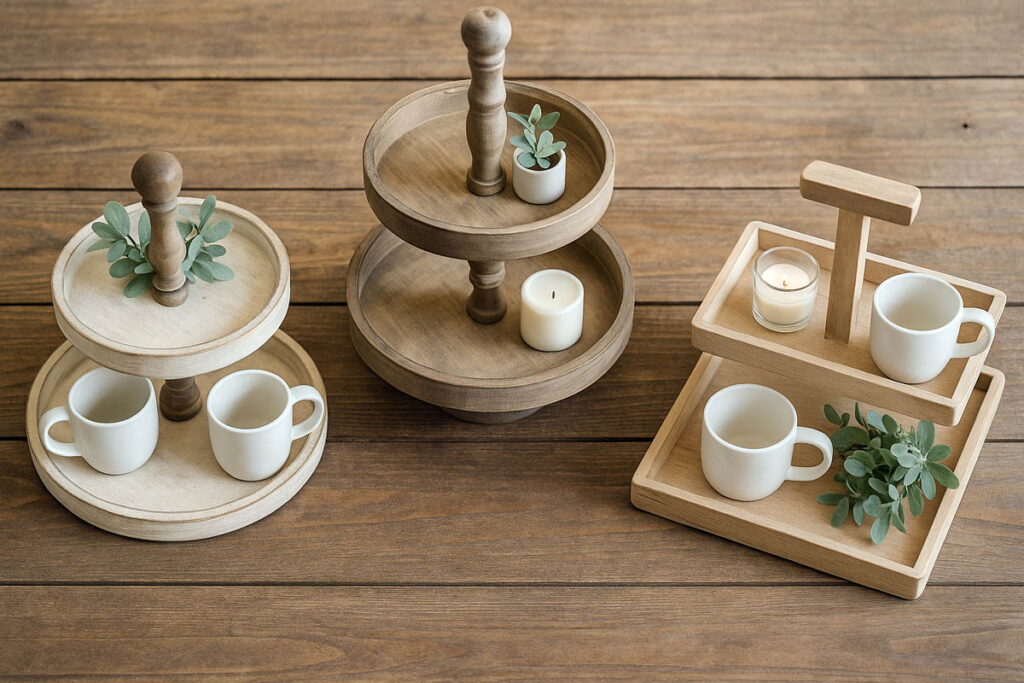
A farmhouse tiered tray is basically a multi-level stand, usually two or three circular or rectangular trays stacked vertically with a center post. It’s often made from wood and has a rustic or vintage look. You’ll see them on kitchen counters, dining tables, coffee bars, and entry tables.
Most of the time, the details are what give it that “farmhouse” feel:
- Slightly distressed finish
- Soft, neutral paint or stain (white, cream, gray, warm brown)
- Turned center post or chunky spindles
- Simple metal hardware, if any
Functionally, it’s just a space saver: you stack vertically instead of spreading decor or items across the whole surface. That’s why people like using it for coffee stations, snack setups, or seasonal displays.
Why people (and I) like using them
When I build or use a tiered tray, I’m after three main things: extra storage, visual height, and personality.
1. Extra storage in small spaces
You can fit a lot of items on a two- or three-tier stand compared to a single flat tray. If someone has a small kitchen or a tight apartment, this matters.
2. Visual height and balance
Flat surfaces look boring when everything is at the same level. A tiered tray adds height without blocking sight lines. On a dining table or island, that matters — you still want to see the other people.
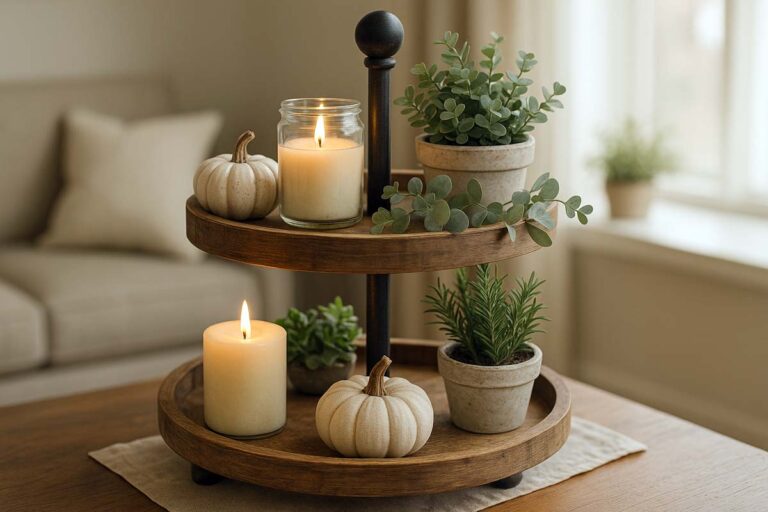
3. Easy to change with the seasons
You (plural) can swap out a few pieces and the whole thing feels different: fall pumpkins, winter greenery, spring florals. You don’t have to redo the whole room. He can keep the same tray and just rotate decor.
4. It feels “finished” with low effort
If you’re not great at decorating, a tiered tray gives you structure. You’re just filling a few small zones instead of styling a whole table.
Possible drawbacks and how to avoid them
They’re handy, but they’re not perfect. Here are the main drawbacks I’ve seen in my own house and in friends’ homes.
1. They can look cluttered fast
If you throw too many small items on there, it starts to look like a junk pile.
How to avoid it: use fewer, larger pieces; repeat colors; leave a bit of open space on each tier.
2. Hard to clean under and around
Crumbs and dust collect underneath, especially on kitchen counters.
How to avoid it: pick a design that’s easy to lift with one hand, and wipe under it when you wipe the counter.
3. Stability issues
A tall, skinny tray with heavy items at the top can tip.
How to avoid it:
- Use a wide base.
- Keep heavier items on the bottom tier.
- Use strong hardware to attach tiers and center post.
4. Food-safety confusion
Not all finishes are food safe.
How to avoid it: either use a food-safe finish on bare wood or keep food in separate containers (plates, ramekins, jars) and treat the tray as a decorative riser.
Where to use a farmhouse tiered tray
You don’t have to be a hardcore decorator to use one. Here are simple, real-world spots where they work well:
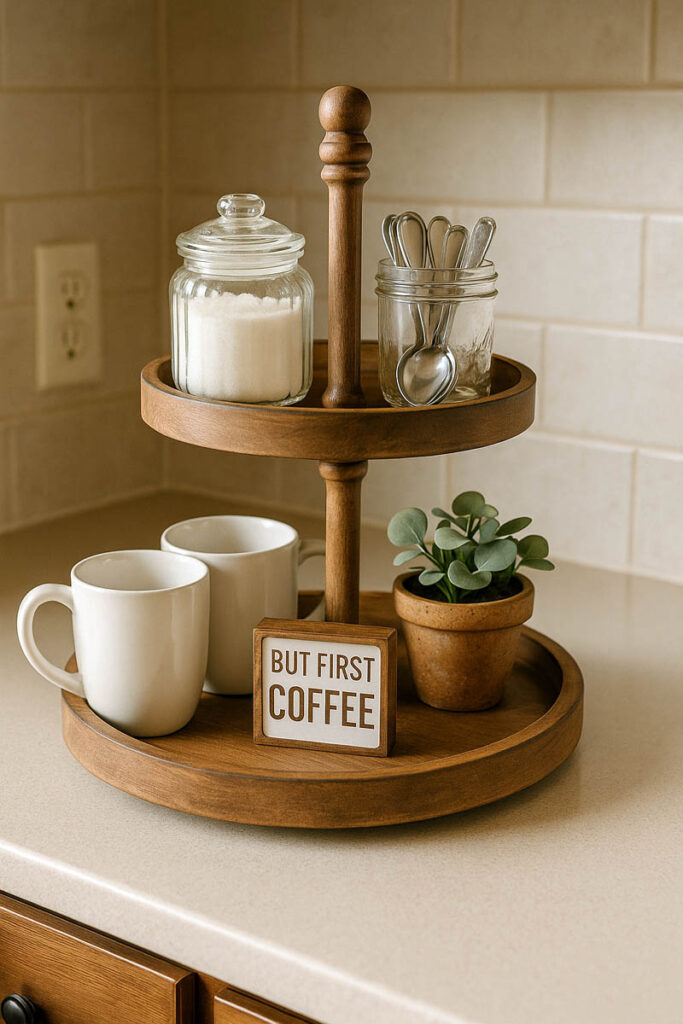
Kitchen counter
- Coffee bar: mugs, sugar jar, spoons, small plant.
- Tea station: tea tins, honey, small pitcher.
Dining table or island
- Centerpiece: candles, greenery, salt and pepper, napkins.
- Party setup: cupcakes, snacks in bowls, utensils in jars.
Entry table
- Keys, sunglasses, wallet, mail, small plant.
- This keeps “everyday carry” items contained instead of scattered.
Bathroom
- Cotton pads, q-tips, soaps, rolled washcloths.
- Use glass jars to keep it neat.
Living room
- Remote controls, coasters, a candle, maybe a small stack of cards or game pieces.
- Once you start using one, you’ll catch yourself thinking of new spots to add another.
Learn more: 2-Tier Farmhouse Tiered Tray Decor Ideas
How I design a tiered tray step by step
When I build one from scratch in my shop in Eugene, I follow a simple design process instead of winging it.
Step 1: Decide where it will live
Kitchen counter? Dining table? Small apartment shelf? The location sets the maximum width and height.
Step 2: Pick the number of tiers
- Small kitchen or tight space: 2 tiers.
- Larger island or buffet: 3 tiers.
Step 3: Choose tray shapes and sizes
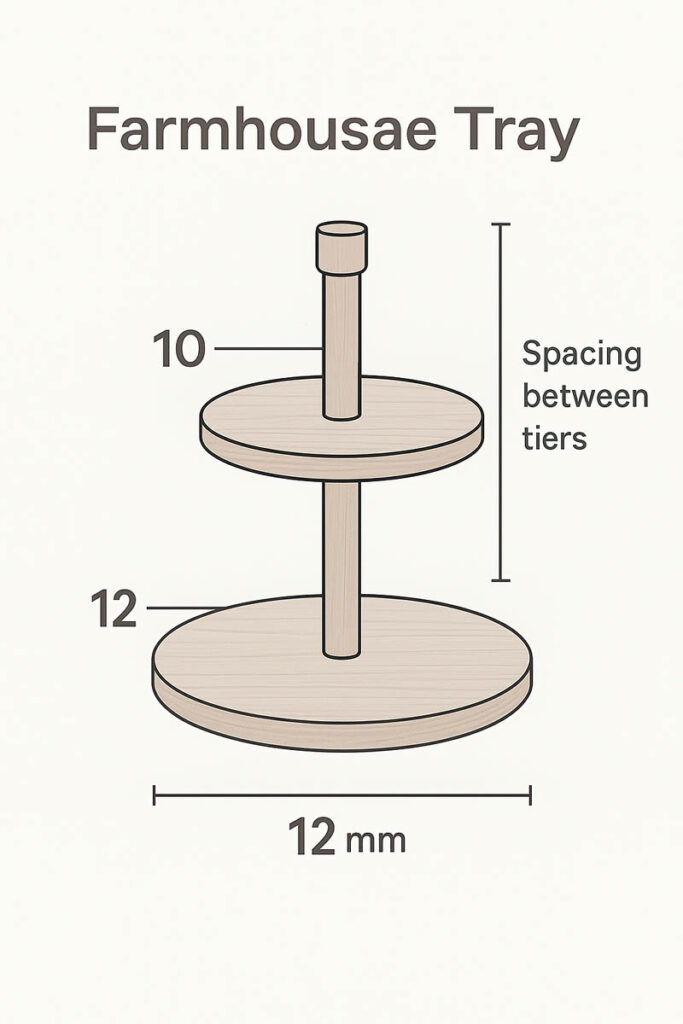
A common setup I use:
- Bottom: 12″ circle
- Top: 9″ circle
You can also do 10″ and 8″ for smaller spaces. Rectangles work well for narrow counters.
Step 4: Plan spacing between tiers
Measure the tallest item you want to use (for example, a standard mug or small jar) and add at least 1–2″ above it. That gives you room to move things around.
Step 5: Pick materials
- Trays: pine, poplar, birch plywood, or hardwood if you want it to last forever.
- Center post: turned spindle, dowel, or a chunky square post.
- Hardware: threaded rod or long wood screws, plus washers if needed.
Step 6: Choose finish
- Stain and clear coat for a warm farmhouse look.
- Chalk-style paint, then a light sanding on edges for a worn vibe.
- For food use, consider a food-safe oil or keep food on separate plates.
Once I know these details, the build goes pretty quickly.
Know more: Functional Farmhouse 2 Tier Tray Stand
Step-by-step build: simple wooden farmhouse tiered tray
Here’s a straightforward build for a two-tier tray. You can adjust sizes, but the process stays about the same.
Tools
- Jigsaw, bandsaw, or router with circle jig
- Drill and bits
- Sander (or sanding block)
- Clamps (helpful but optional)
- Measuring tape and pencil
Materials
- 1 board or piece of plywood large enough for two circles (for example, 1×12)
- 1 wooden dowel or turned spindle (about 10–12″ long)
- 1 screw for bottom into center post
- 1 screw for top into center post
- Wood glue
- Stain or paint and topcoat
Cut list (example)
- Bottom tray: 12″ diameter circle
- Top tray: 9″ diameter circle
- Center post: 10″ long
Way to Build Farmhouse Tiered Trays
1. Mark and cut the circles
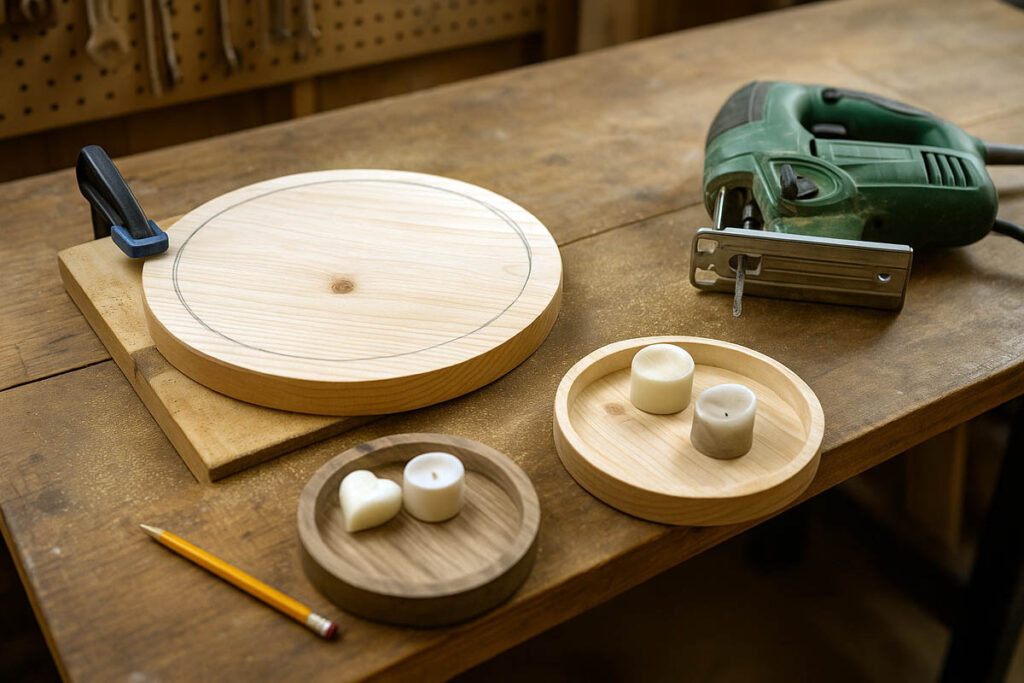
- Find the center of your board width.
- Use a compass or a string-and-pencil trick to draw your circles.
- Cut carefully with a jigsaw or bandsaw.
2. Sand the trays
- Smooth all edges and faces.
- Break the sharp edges with a light hand-sanding so it feels good in the hand.
3. Mark centers and drill pilot holes
- Measure and mark the center of each tray.
- Drill a small pilot hole through the center of both trays.
4. Prep the center post
- Cut your dowel or spindle to length.
- Drill pilot holes in the top and bottom ends of the post, centered.
- Make sure your screws will bite solidly but not poke through the trays.
5. Attach the top tray to the post
- Drive a screw from the top tray down into the top of the post.
- Keep the screw head slightly recessed if you plan to fill it or hide it under decor.
6. Attach the bottom tray
- Flip the assembly over.
- Run a bit of glue on the bottom of the post.
- Line up the bottom tray’s pilot hole with the post and drive a screw from underneath into the post.
- Check that everything is straight before the glue sets.
7. Fill holes (optional)
- If you want a perfectly smooth top, use wood filler on the screw head.
- Sand smooth once it dries.
8. Finish the tray
- Wipe off dust.
- Apply stain or paint according to the instructions.
- After it dries, add a clear protective coat.
- Let it cure fully before putting anything heavy on it.
You can add a handle or knob to the top tray for easier lifting, but make sure it’s centered and secure.
Also learn: How to make a farmhouse tiered tray stand.
How to style your tray so it looks intentional
This is where most people overthink things. Here’s how I keep styling simple.
1. Pick a theme or purpose
- Coffee station
- Seasonal decor (fall, Christmas, spring)
- Everyday kitchen items
Knowing the purpose stops you from throwing random objects on it.
2. Use a color palette
Stick to 2–3 main colors plus neutrals. For example: white, green, and wood tones. This keeps it from looking messy.
3. Mix heights and textures
On each tier, I like:
- One taller item (small vase, jar, or mini sign)
- One medium item
- One low, wide item (small bowl, candle, or plant)
4. Leave breathing room
Don’t feel like every inch needs something on it. A bit of empty space makes the rest look better.
5. Keep it practical if it’s in a high-use area
If your tray is on the kitchen counter, don’t let decor take over. Put items you actually grab every day: salt, pepper, sugar, spoons, napkins.
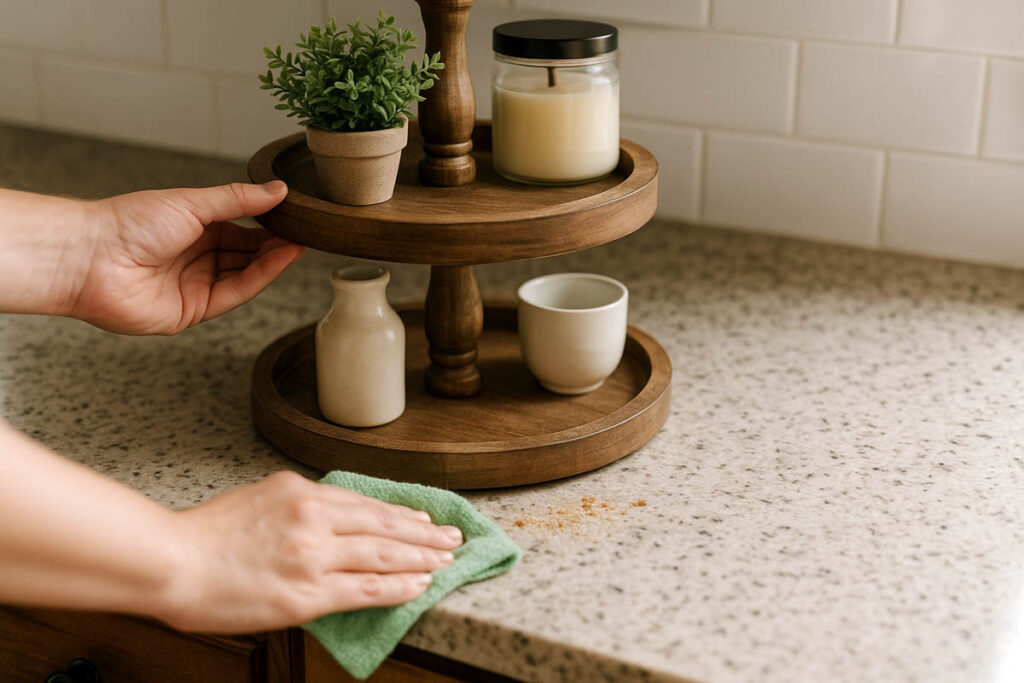
Care, cleaning, and safety
A tiered tray is low-maintenance if you keep a few things in mind.
- Wipe regularly: Dust or wipe with a slightly damp cloth. Avoid soaking the wood.
- Avoid standing water: Don’t let water sit on the trays; it will raise the grain and ruin the finish.
- Lift, don’t drag: When you clean the counter or table, pick the tray up instead of sliding it to avoid scratching surfaces.
- Watch the sun: Direct sunlight all day can fade paint or stain. Rotate the tray once in a while if it sits near a window.
- Food safety: If you want to place food directly on the wood, use a food-safe finish or add a plate/liner under the food.
FAQs about Farmhouse Tiered Trays
What size should a farmhouse tiered tray be for a kitchen counter?
For most kitchen counters, keep the bottom tier around 12″ in diameter, the top tier 8–10″, and the overall height under 16″. That size fits under standard upper cabinets and leaves enough usable workspace on the counter.
What wood is best for building a farmhouse tiered tray?
Use a stable hardwood such as maple, walnut, or oak for a durable tray. For a painted finish, choose straight, dry boards in pine or poplar. Always seal the tray with a durable, food-safe finish if dishes or cups will sit on it.
Can I use a farmhouse tiered tray for serving food?
Yes, but treat it as a stand, not a plate. Use food-safe finishes on the wood and place food on dishes, liners, or boards rather than directly on the tray surface, especially for anything wet, greasy, or strongly colored.
How do I stop my tiered tray from wobbling?
First, tighten all hardware and confirm the center rod is straight. Then check the bottom tier for flatness and sand any high spots. If the counter isn’t perfectly level, add felt pads, cork, or small shims under the base until it sits solid.
Is a two-tier or three-tier tray better?
For standard kitchen counters, a two-tier tray is usually the better choice because it fits under cabinets, is easier to reach, and feels less crowded. Choose a three-tier tray only when there is plenty of vertical clearance and a need for extra display space.
Final thoughts
For me, farmhouse tiered trays are one of those projects that hit a sweet spot: simple to build, genuinely useful, and flexible. I’ve watched people who “aren’t into decor” end up loving them because they solve real problems — cluttered counters, flat tabletops, wasted space.
You don’t have to follow every design trend or copy every picture online. If the tray holds what you need, fits your space, and makes you smile when you walk past, it’s doing its job.
Farmhouse tiered trays combine function and style in a way that works in almost any home. You can buy one, sure, but building your own lets you control the size, finish, and details so it fits your space perfectly.
If you take your time with the design, build it solid, and style it with intention, you’ll end up with a piece that actually earns its spot on the counter, not just another thing to dust.