2 Tiered Tray for Coffee Bar: 7 Must-Try Styling Tricks
A 2 tiered tray for a coffee bar sounds like a small thing, but it can change how that whole corner of the kitchen feels and works. Done right, it keeps the counter clear, puts the good stuff within reach, and still looks like something you’re proud to show guests. The key isn’t just buying a tray and piling mugs on it. The key is picking the right tray, setting it up with a plan, and keeping it easy to use day after day. That’s what this guide walks through, step by step, without extra fluff.
What exactly is a 2 tiered tray for a coffee bar?
A 2 tier tray is simply a stand with two levels (usually stacked vertically) that holds coffee gear and decor in a compact footprint. On a coffee bar, it normally lives near the machine, grinder, or electric kettle.
You’re basically trading counter spread for vertical storage.
What it usually holds:
- Mugs or espresso cups
- Coffee pods or ground coffee canisters
- Sugar, sweeteners, and stir sticks
- Syrup bottles or small pumps
- Little decor items (plants, signs, candles)
Why people like using one
- Saves space on a small counter
- Keeps the coffee station looking “finished” instead of messy
- Makes it easy for guests to find everything
- Lets you decorate by season without redoing the whole kitchen
Main drawbacks
- Easy to overfill and make it look cluttered
- Cheap trays can wobble under weight
- Tall items may not fit under the top tier
- If the tray is too big, it crowds the machine or sink
So the goal isn’t just “buy a tray.” The goal is to choose a tray that fits your space and then set it up so it’s both practical and nice to look at.
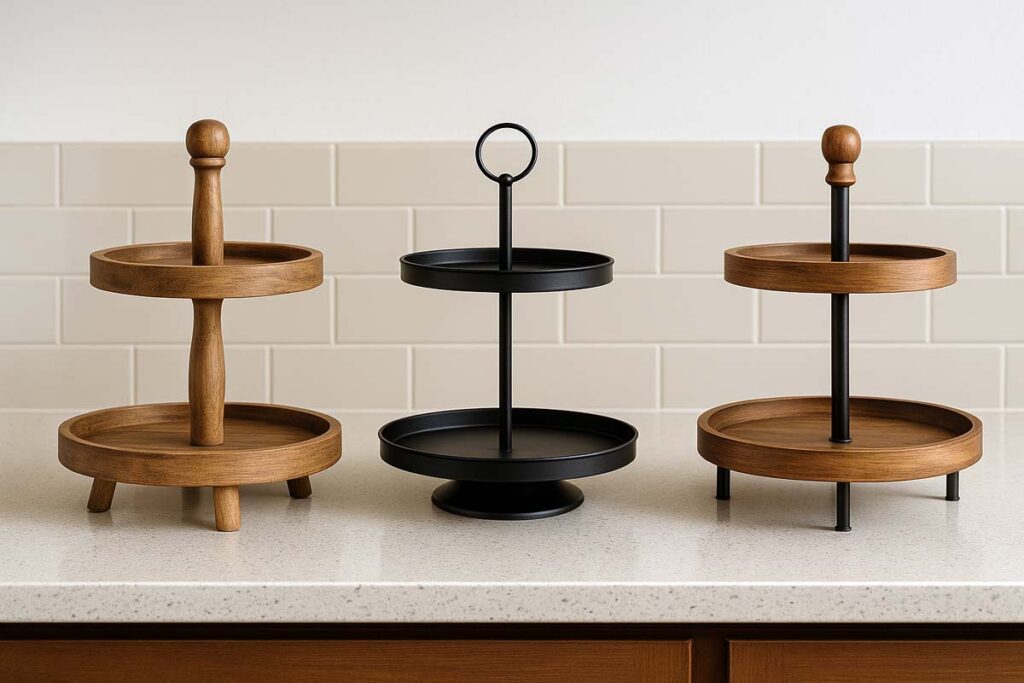
Choosing the right 2 tier tray for a coffee bar
Start with three things: space, material, and style.
1. Measure your coffee bar space
Grab a tape measure and check:
- Counter depth (front to back)
- Open width where the tray will sit
- Vertical height to any cabinet above
For most home setups:
- A tray around 12–16 inches wide works well.
- If you have low cabinets, keep total tray height under 18–20 inches so tall mugs still fit.
If you’re unsure, a basic 2 tier tray stand size range usually fits standard kitchen counters without feeling oversized.
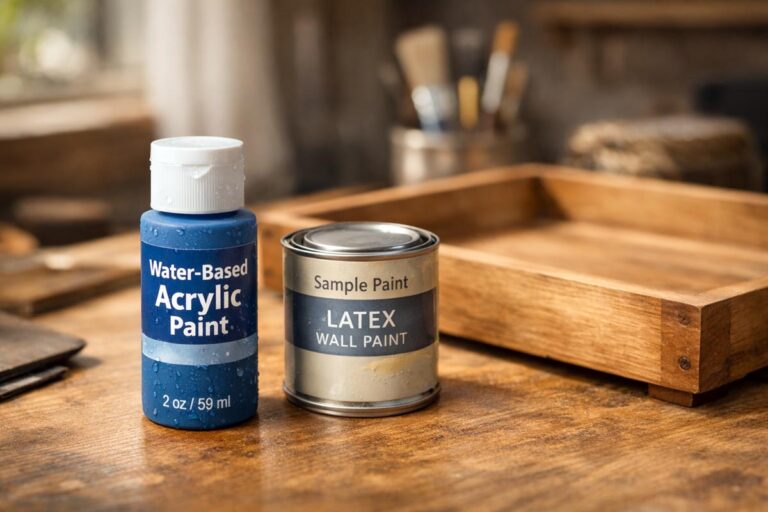
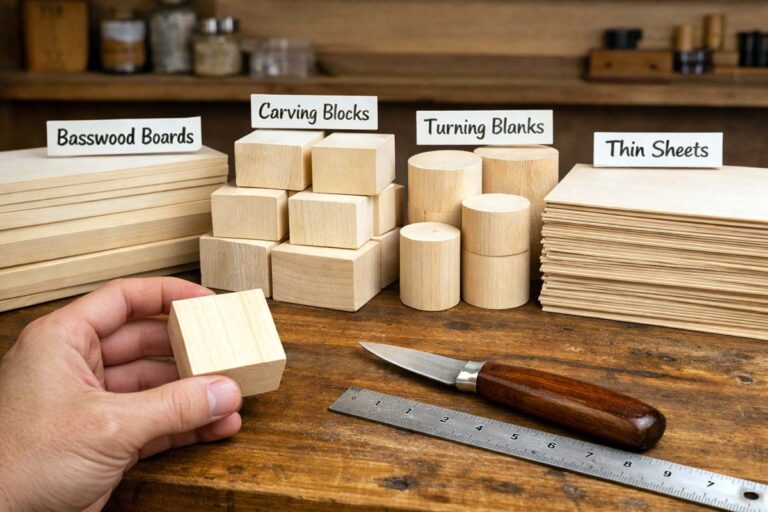
2. Pick the right material
Here’s a quick comparison to keep things simple:
| Material | Look & feel | Pros | Cons | Best for |
|---|---|---|---|---|
| Solid wood | Warm, classic, farmhouse | Strong, repairable, easy to refinish | Needs wiping if coffee spills often | Everyday family coffee bars |
| Metal | Modern, industrial | Very durable, thin profile, easy to clean | Can feel cold, noisy when mugs clink | Minimal or modern kitchens |
| Wood + metal | Mixed, balanced look | Good combo of warmth and strength | Slightly heavier | Most general coffee stations |
| MDF/particle | Budget painted look | Affordable, lightweight | Swells with moisture, chips easily | Light use, decor-first setups |
If the coffee bar gets real daily use, solid wood or wood + metal is worth it. It handles weight better and doesn’t mind warm mugs as much.
3. Match the tray style to your setup
Think about what’s already there: backsplash, cabinet color, hardware.
- White or distressed wood → fits farmhouse, cozy setups
- Dark walnut or black metal → better for modern or espresso-bar vibes
- Rectangular trays → typically sit flush against a wall, good for narrow counters
- Round trays → good for corners and islands
If you like changing decor year-round, a neutral base (simple wood, off-white, or black) is easier to style. Bright colors lock you into a certain look.
For extra decor ideas beyond coffee setups, a page about 2 tier tray decor can help you think in themes and color palettes.
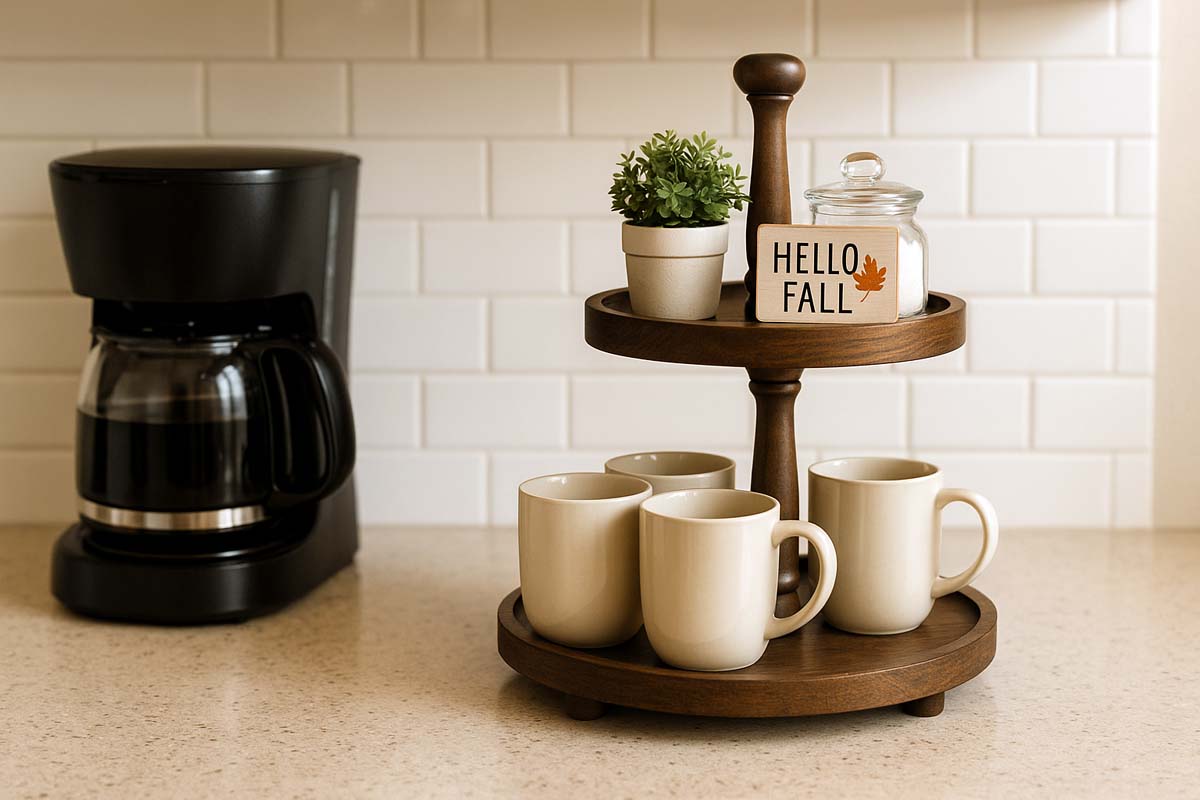
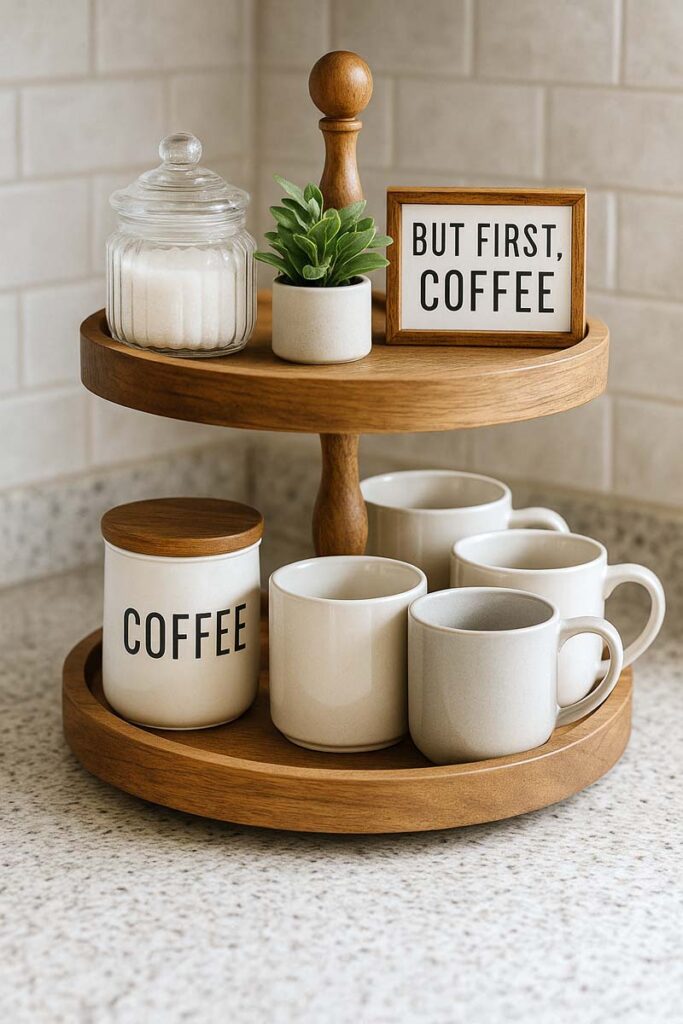
What should actually go on the tray?
A 2 tier tray for a coffee bar works best when it’s split into essentials and extras.
Everyday essentials
These are the items that get touched almost every time someone makes coffee:
- Mugs or espresso cups
- Coffee pods, beans, or ground coffee container
- Sugar, sweeteners, or honey
- Stir sticks or spoons
- Napkins
Nice-to-have extras
These make the tray look good and feel personal:
- Mini plants (real or faux)
- Small sign (“But first, coffee”, etc.)
- Tiny clock, candle, or small diffuser
- Seasonal pieces (pumpkins, ornaments, hearts)
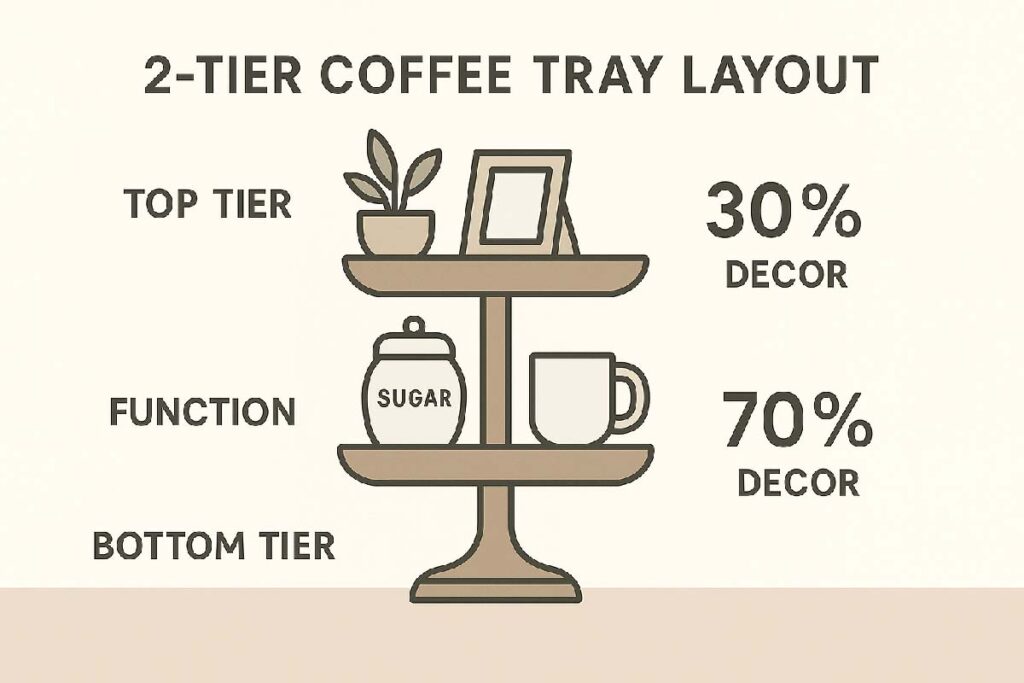
The best mix: about 70% useful, 30% decor on a daily coffee station. That way it doesn’t turn into a purely decorative shelf that nobody wants to touch.
Step-by-step: setting up a 2 tier coffee bar tray
Here’s a simple process that works for almost any kitchen.
Step 1: Protect the counter and place the tray
- Wipe the counter clean.
- Add a thin mat or cork pad if the tray has rough feet.
- Set the tray close to the coffee maker, but leave enough space to fill the water tank and open any lids.
If you’re right-handed, putting the tray on the right of the machine usually feels more natural; left-handed folks often prefer the opposite.
Step 2: Decide what lives on the tray (and what doesn’t)
Pull out everything you might want there, then sort it into three piles:
- Daily – used every morning
- Weekly – flavored syrups, special mugs, seasonal items
- Occasional – rarely touched gadgets or novelty items
Only daily and weekly items deserve a home on the tray. The rest can live in a drawer or cabinet.
Step 3: Assign each tier a “job”
A simple layout rule that works for most people:
Bottom tier = heavy and often-used items
- Mugs
- Coffee canister or pod organizer
- Syrup bottles (if they fit)
Top tier = lighter and decorative items
- Sugar jar
- Small plant
- Napkins in a small holder
- Sign or small framed art
This keeps the center of gravity low so the tray feels stable when someone grabs a mug.
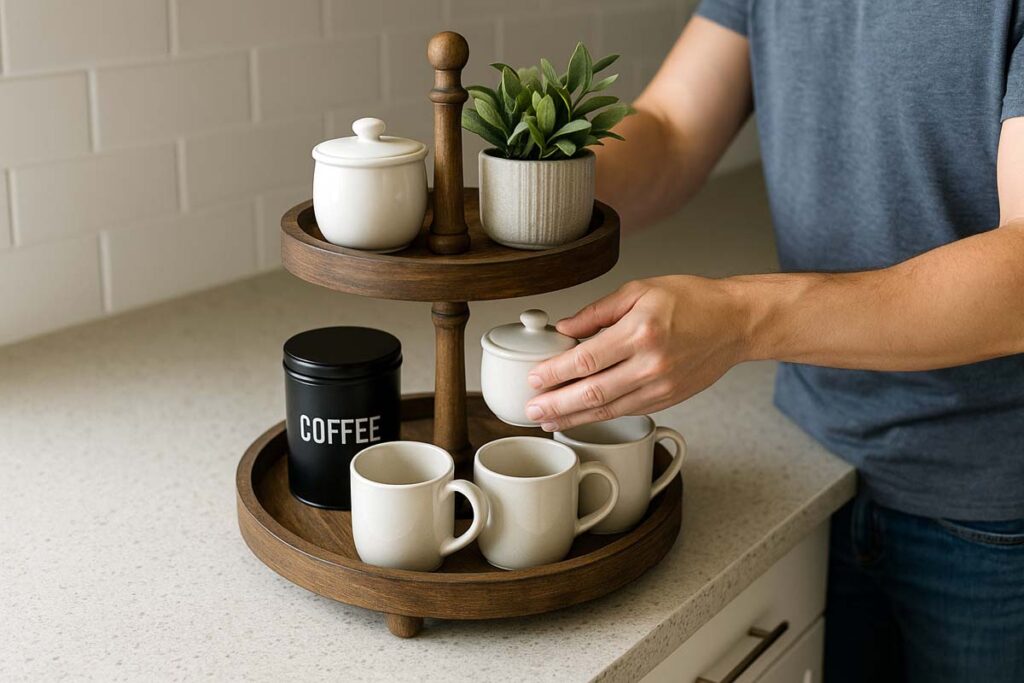
Step 4: Load the bottom tier
Start with the biggest, heaviest pieces:
- Place mugs toward the front so they’re easy to grab.
- Put coffee containers or pod holders toward the back.
- If using syrups, line them up on one side, not all around the circle or edge.
Leave at least two fingers of space between groups of items. That gap is what keeps the whole tray from reading as clutter.
Step 5: Build up the top tier
Now treat the top level more like a little display:
- Add one practical item: sugar jar, sweetener caddy, or napkin holder.
- Add one “soft” item: plant, tiny vase, or small canister.
- Fill any remaining gap with a sign or a small decorative piece.
Aim for varying heights: one short item, one medium, one tall. That’s what makes it interesting without getting busy.
If you want a deeper dive into arranging tiers, there’s a full how to decorate a tiered tray breakdown that applies directly to coffee setups too.
Step 6: Step back and edit
Once everything is loaded:
- Look at the tray from the doorway, not just standing over it.
- Take one photo on your phone.
- Remove one item that feels unnecessary.
That last part makes a bigger difference than most people expect. One less item can make it feel clean instead of crowded.
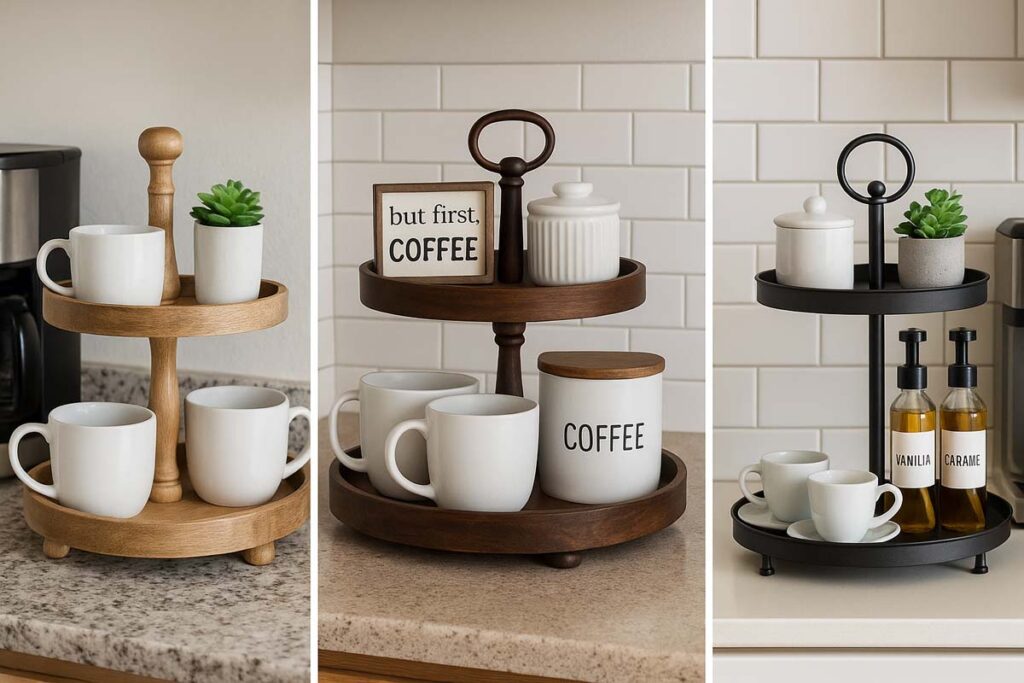
Coffee bar layout ideas for different situations
Everyone’s kitchen and routine are a little different, so here are a few setups that tend to work well.
Small apartment or tight counter
- Use a smaller-diameter tray, around 10–12 inches.
- Keep only two mugs on display; store extras elsewhere.
- Put pods or grounds in one air-tight jar instead of several containers.
- Decor = one plant and one small sign, nothing more.
Family coffee station
If several people use the coffee bar:
- Put the most-used mugs front and center on the bottom tier.
- Keep sugar and stirrers at kids’ eye level if they use hot cocoa.
- Use labels on canisters if there are different roasts or decaf.
- Avoid breakable decor that can get knocked off during morning rush.
Espresso or specialty drink setup
For folks who love flavored drinks:
- Use the bottom tier for three to four syrup bottles plus mugs.
- Top tier gets espresso cups, sugar, and a small knock box if it fits.
- Keep tampers, scales, and other gear beside the tray instead of on it, so it doesn’t look like a workbench.
Seasonal and style tweaks without starting over
You don’t need to rebuild the whole tray every month. Keep the core pieces the same and rotate just a few accents.
Simple swap ideas:
- Fall: add a mini pumpkin and warm-tone napkins.
- Winter: small evergreen sprig and a simple ornament.
- Spring: pastel mug and a small floral stem.
- Summer: brighter napkins and a citrus or beach-style sign.
By changing 2–3 items at a time, the tray feels fresh but doesn’t eat up your weekend.
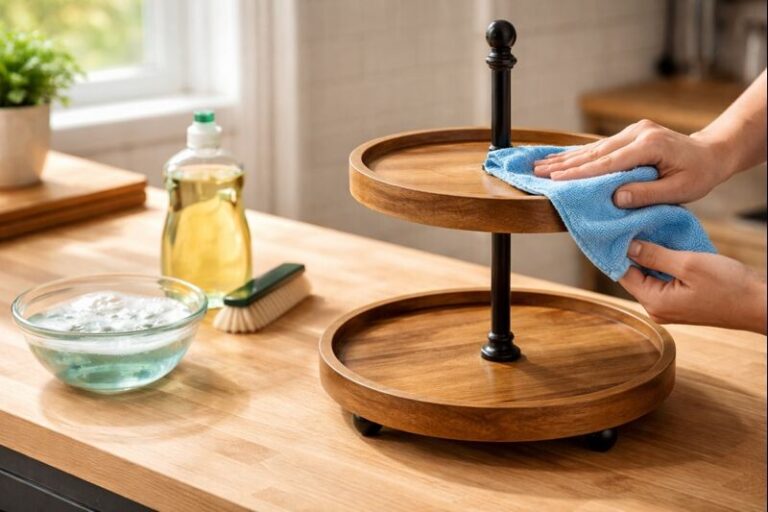
Keeping your 2 tier tray safe and low-maintenance
A coffee station sees spills, steam, and constant handling. A few habits keep the tray looking good.
- Wipe up coffee drips the same day; sugar plus moisture is rough on finishes.
- Don’t overload the edge of the top tier with heavy mugs or jars.
- If it’s wood, use a slightly damp cloth, then dry right away.
- Check screws or center posts every couple of months to make sure nothing’s working loose.
If you ever build or refinish your own stand, choosing solid and stable wood types (instead of soft or crumbly boards) makes a huge difference in how long it lasts.
Final thoughts on dialing in your coffee bar tray
A 2 tiered tray for a coffee bar isn’t just decor; it’s a tool. When it’s chosen with the right size and material, and set up with a clear job for each tier, it makes mornings smoother. The tray holds the things that matter, shows a bit of personality, and keeps the counter from turning into a random mug parking lot.
Start with what you actually use every day, layer decor on top of that, then edit. Once you get that balance between function and style, you’ll notice the coffee bar becomes a spot people naturally gravitate to.
To sum it up, a good 2 tier coffee tray comes down to a few straightforward decisions:
- Pick a tray that fits your space and matches your kitchen style.
- Give the bottom tier the heavy, high-use items and the top tier the lighter, decorative pieces.
- Keep about 70% of the space practical and 30% decorative.
- Make small seasonal tweaks instead of full resets.
Handle those basics and the tray will pull its weight every single day, both as storage and as a centerpiece for your coffee bar.