Christmas 2 tier tray ideas don’t have to be complicated or overdone. With one small stand, you can bring Christmas into your kitchen, entry, or living room without crowding every surface.
The goal here is simple: pick a clear theme, use a few solid pieces, and style it with intention. You’ll see how to choose colors, balance height, and combine decor with practical items like mugs or snacks. Follow the steps, copy the example setups, and you’ll end up with a tray that looks pulled together, not cluttered, and actually fits real life.
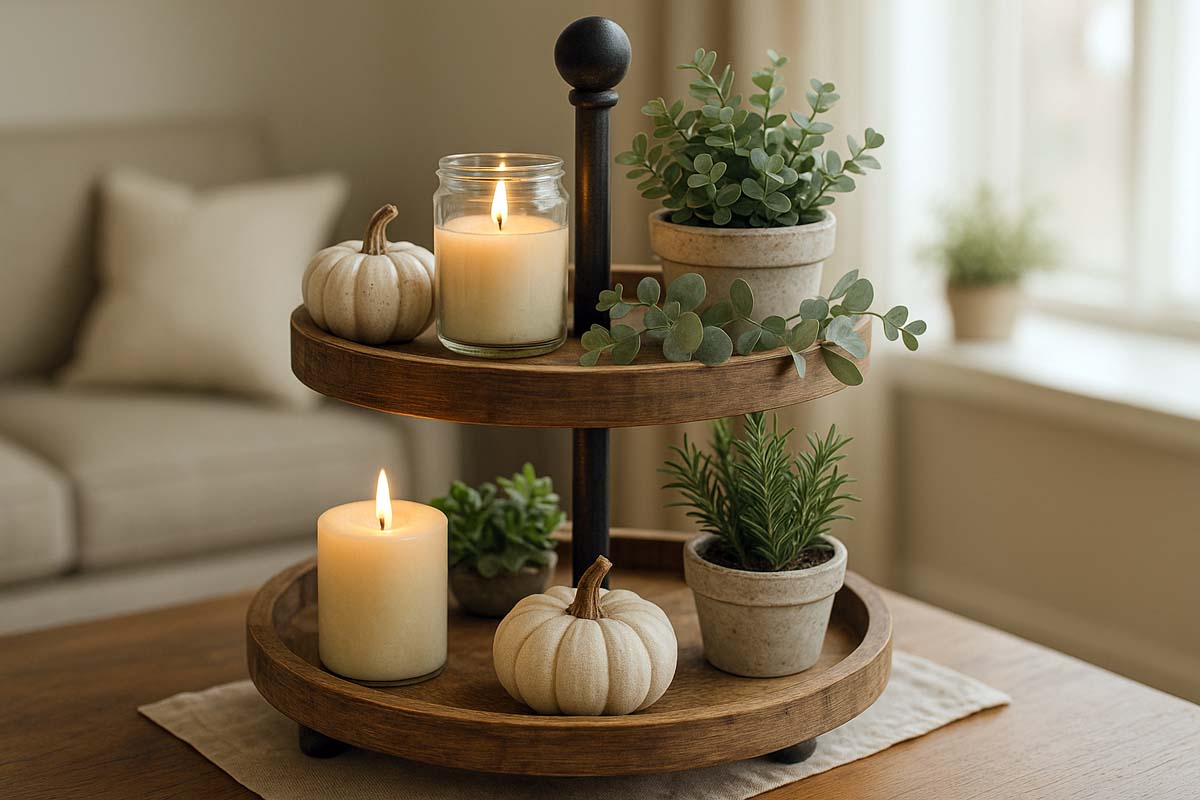
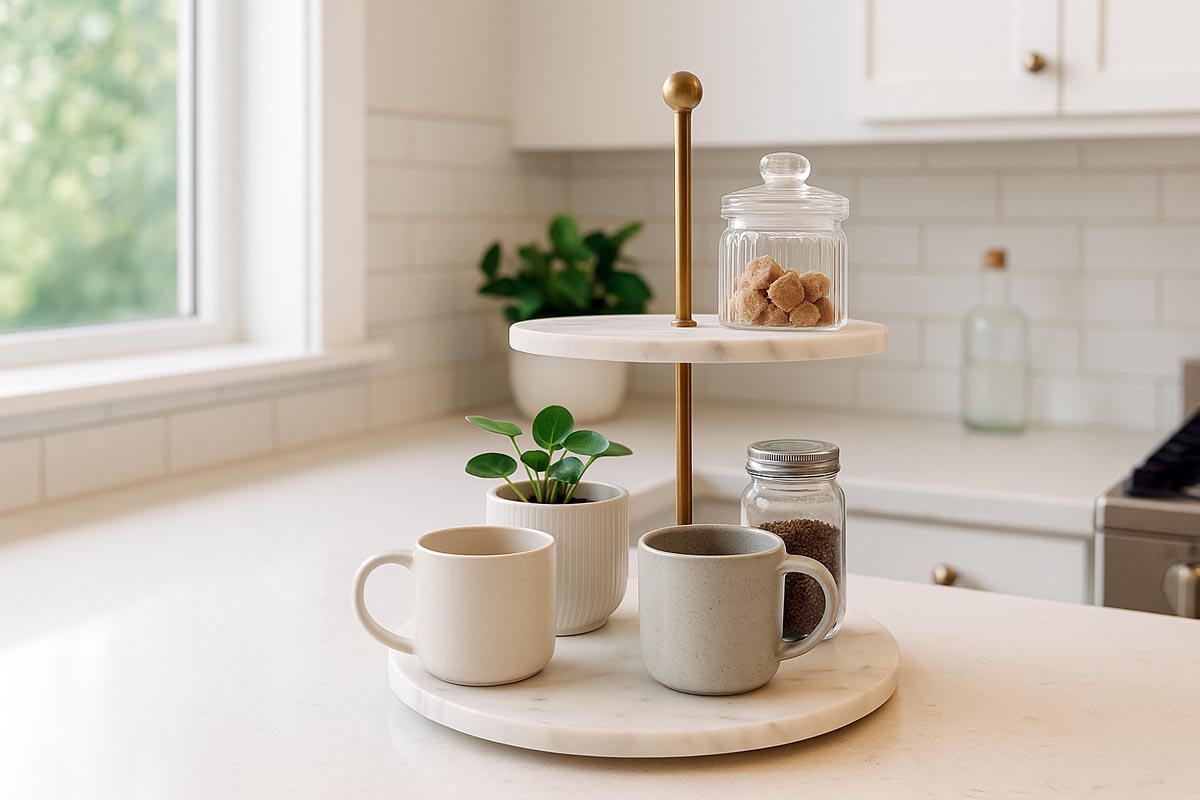
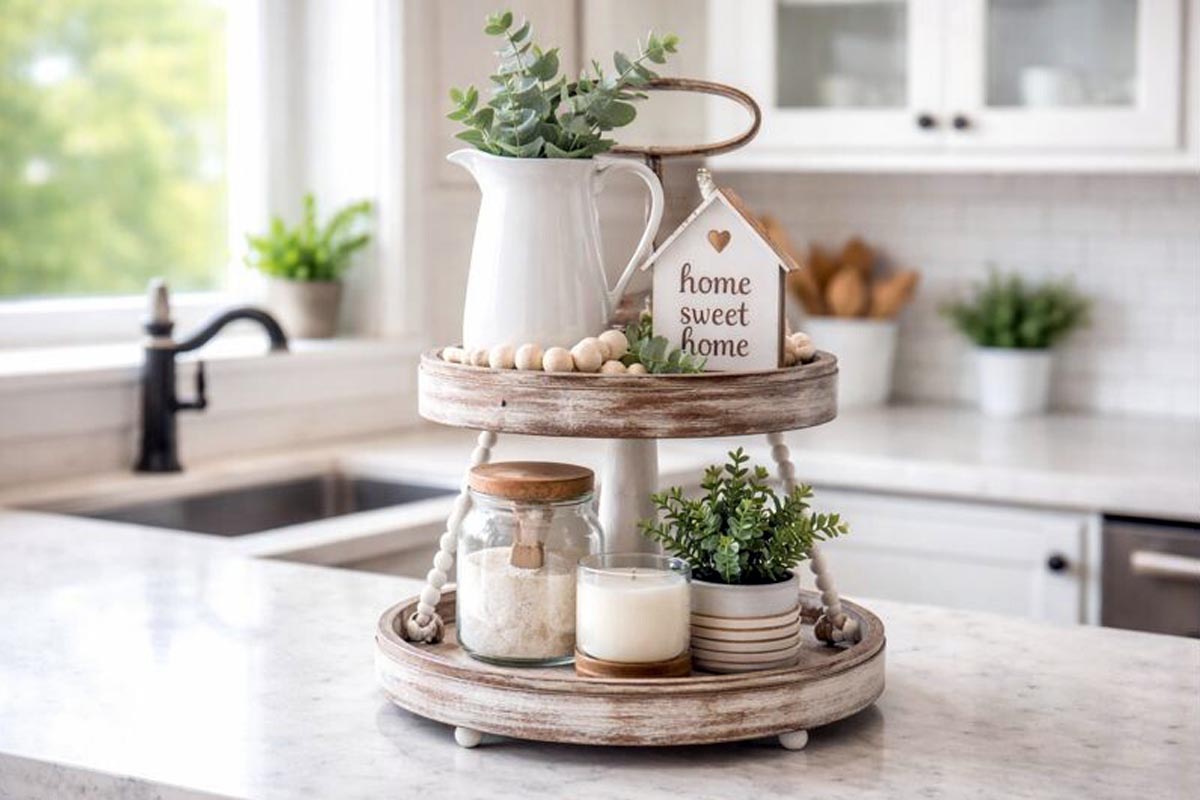
What Is a Christmas 2-Tier Tray and Why Use One?
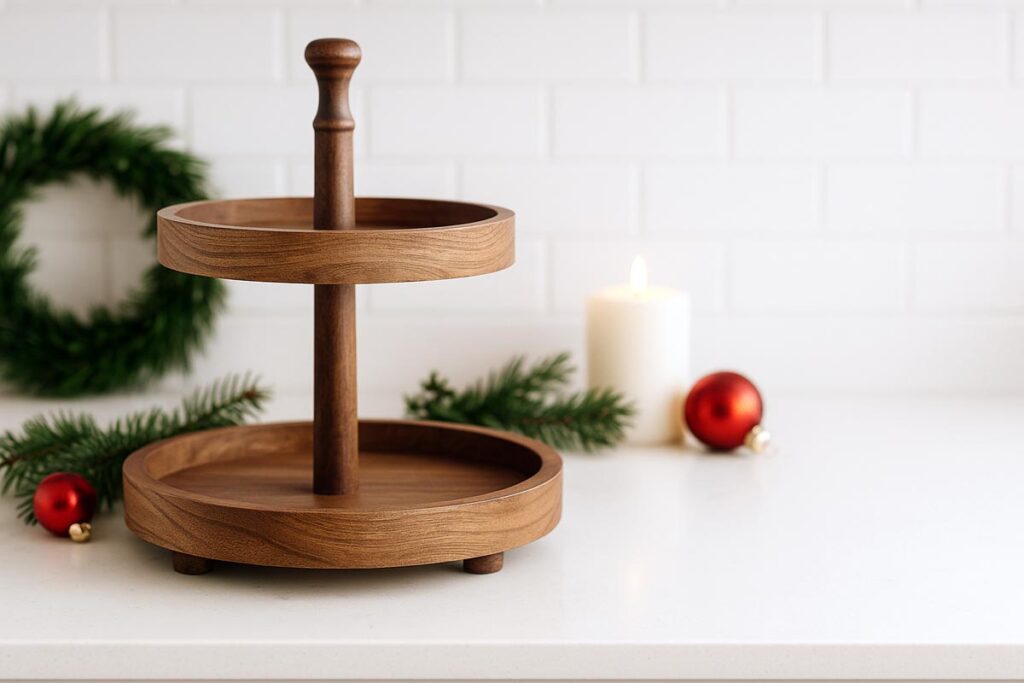
A 2-tier tray is simply a stand with two levels you can fill with decor or practical items. For Christmas, it turns into a compact display that can hold:
- Mugs and cocoa fixings
- Mini trees and ornaments
- Candles and greenery
- Snacks or cookies (if food-safe)
Why it works so well at Christmas:
- Small footprint, big impact. Great for small kitchens, apartments, or crowded counters.
- Easy to move. Pick up the whole scene and shift it when you need more space.
- Fast to change. Swap a few pieces and the whole look shifts from “candy cane” to “winter woods.”
- Reusable every year. Keep the tray and rotate themes with minimal new buying.
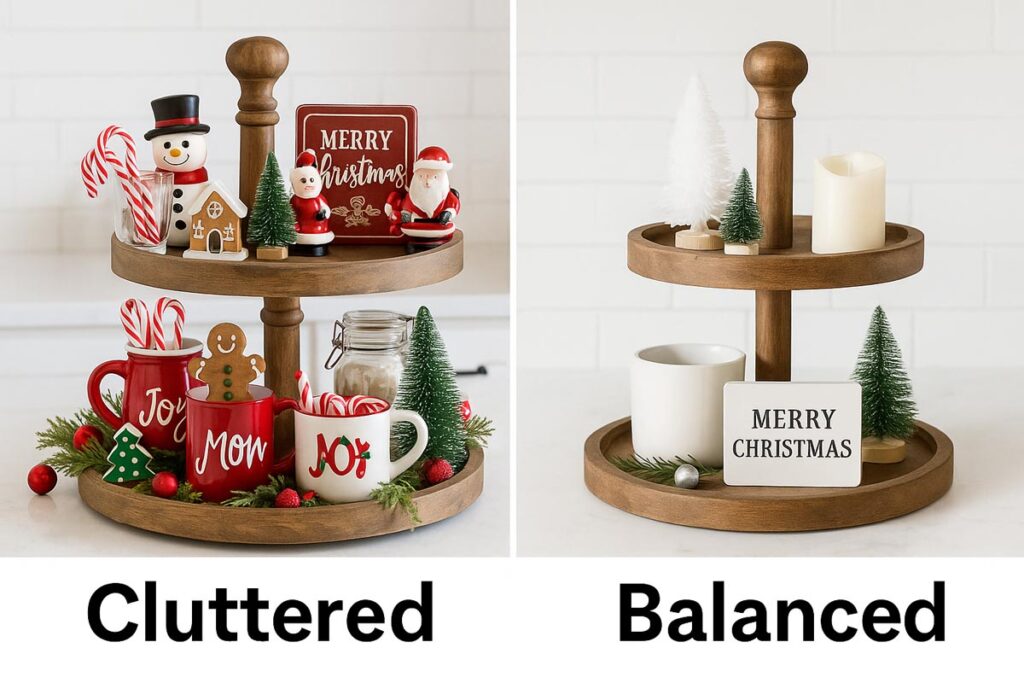
Drawback to keep in mind: a 2-tier tray can look cluttered fast. The fix is planning the theme and sticking to a simple structure instead of randomly piling items on.
Also see: 3 Tier Tray Christmas Decor Ideas
Key Principles Before You Start Styling
Think through these basics before you grab decor.
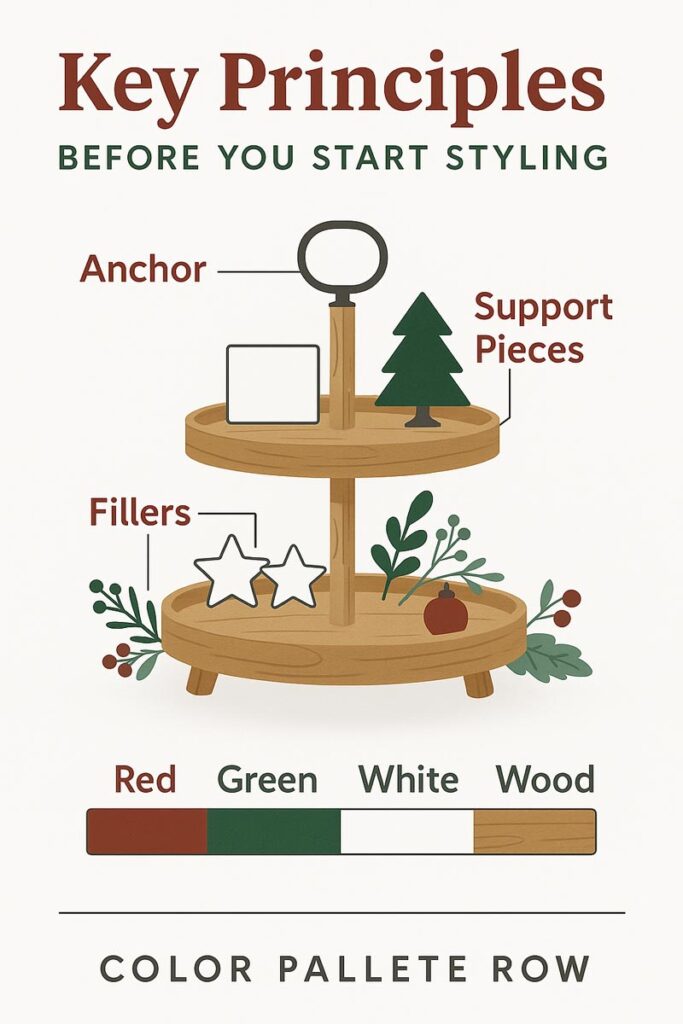
1. Pick one clear theme
A vague “Christmas” mix usually looks messy. A focused theme looks intentional:
- Hot cocoa bar
- Gingerbread and baking
- Winter woods / neutral
- Candy shop
- Nativity or faith-focused
- Rustic farmhouse
2. Choose a tight color palette
Stick to 2–3 main colors and 1 neutral. For example:
- Red + white + natural wood
- Green + gold + white
- Brown (gingerbread) + red + cream
This keeps the tray from looking like a random ornament box.
3. Think in “zones,” not items
Imagine each tier divided into mini zones:
- Anchor piece – one main item that sets the tone.
- Support pieces – 2–3 medium items.
- Fillers – greenery, beads, small ornaments, pinecones, candy.
If each tier has those three parts, the tray feels full but not chaotic.
4. Balance height and weight
- Put heavier, sturdier items on the bottom tier.
- Use taller but lighter pieces (bottle brush trees, small signs) up top.
- Avoid one super tall piece that blocks the view from one side.
5. Decide: decorative or functional?
Ask a simple question:
“Is this tray decor only, or will people grab things from it all day?”
If it’s functional (cocoa bar, snack station), leave open space for hands and keep breakables limited.
See more: 2 Tier Tray Decor
Step-by-Step: How to Style a Christmas 2-Tier Tray
Here’s a straightforward process that works for almost any theme.

Step 1: Choose the location first
Pick your spot before styling:
- Kitchen counter corner – great for cocoa or coffee themes.
- Kitchen island – centerpiece tray with decor and maybe snacks.
- Entry table – welcome tray with mini tree, candle, and small sign.
- Coffee table – low items only, nothing sharp or tippy if kids are around.
Knowing the spot helps decide how tall you can go and whether functional items are needed.
Step 2: Pick theme and colors (with a quick reference table)
Use this table to lock in the feel:
| Theme | Main Colors | Core Elements |
|---|---|---|
| Hot Cocoa Bar | Red, white, brown | Mugs, cocoa jars, marshmallows, candy canes |
| Winter Woods | Green, white, wood tones | Mini trees, pinecones, faux snow, deer |
| Gingerbread Baking | Brown, red, cream | Gingerbread figures, whisks, cookie cutters |
| Candy Shop | Red, pink, white | Candy jars, lollipops, striped straws |
| Scandinavian Minimal | White, black, natural wood | Simple trees, candles, stars, greenery |
Pick one theme and stick to it. That decision alone removes half the confusion later.
Step 3: Gather your pieces
Think in categories:
Anchors (1 per tier)
- Small sign
- Chunky mug
- Mini house or church
- Short, wide jar
Medium pieces (2–4 total)
- Bottle brush trees
- Mini Santa or snowman
- Stacking mugs
- Small ceramic houses
Fillers
- Faux greenery sprigs
- Bead garlands
- Loose ornaments
- Pinecones
- Wrapped candies
Practical items (if functional)
- Spoons in a small jar
- Sugar packets in a tiny bowl
- Snack bowls
Lay everything out on the table so you’re not digging through bins mid-build.
Step 4: Style the bottom tier
Start with the bottom. That’s the visual base.
- Place the anchor at the back or side: Example: a small framed “Hot Cocoa” sign against the handle post.
- Add 1–2 medium pieces: Maybe a large mug filled with candy canes and a small jar of cocoa mix.
- Tuck in fillers: Slide in greenery and a few ornaments around the bases, not blocking access if it’s functional.
Keep the front edge a bit cleaner so it’s easy to see the main items.
Step 5: Style the top tier
The top should echo the bottom, not copy it.
- Smaller anchor: A mini house, a little sign, or a stack of espresso mugs.
- One tall element: A taller bottle brush tree toward the back adds height without blocking views.
- Tiny fillers: One or two ornaments, a sprig of greenery, or a tiny deer figure.
Leave some breathing room on the top tier so it doesn’t feel top-heavy.
Step 6: Adjust from all sides
Turn the tray slowly. Check:
- Does each side have at least one “nice view”?
- Is any important piece hidden?
- Is anything wobbling or near the edge?
Shift items until the tray looks good from the main direction people will see it.
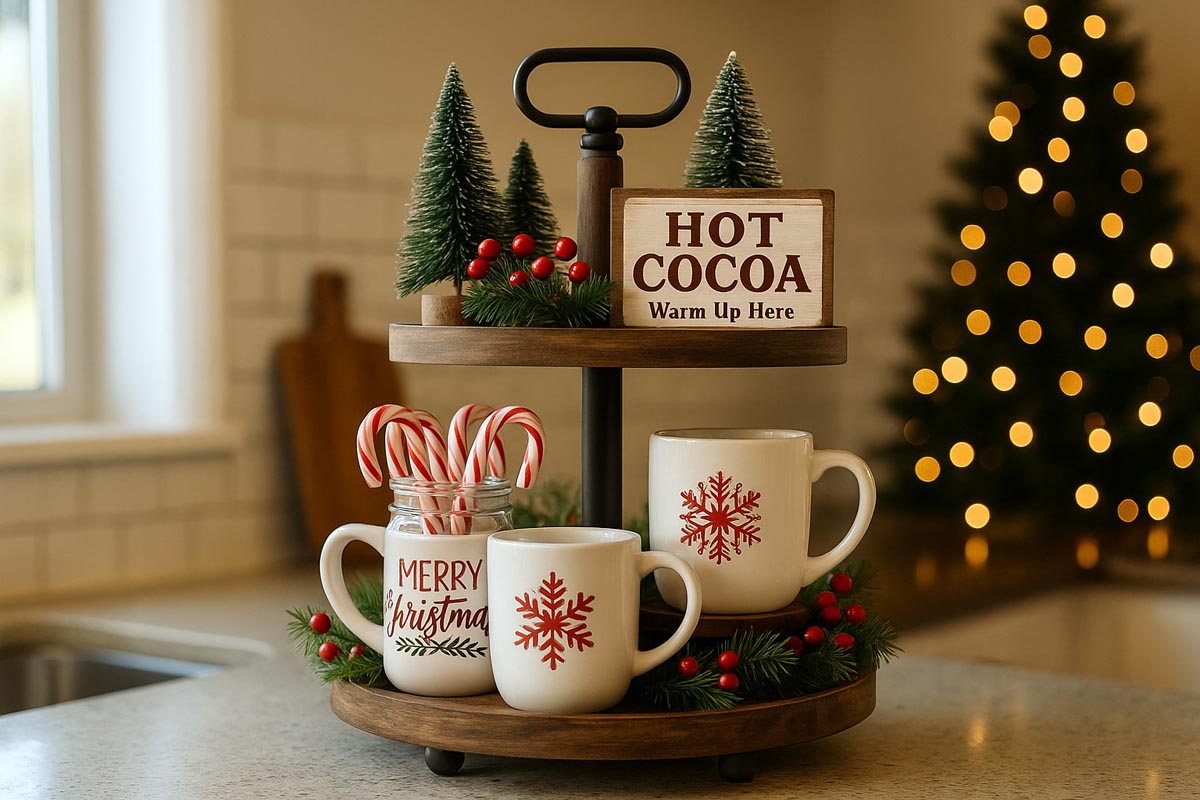
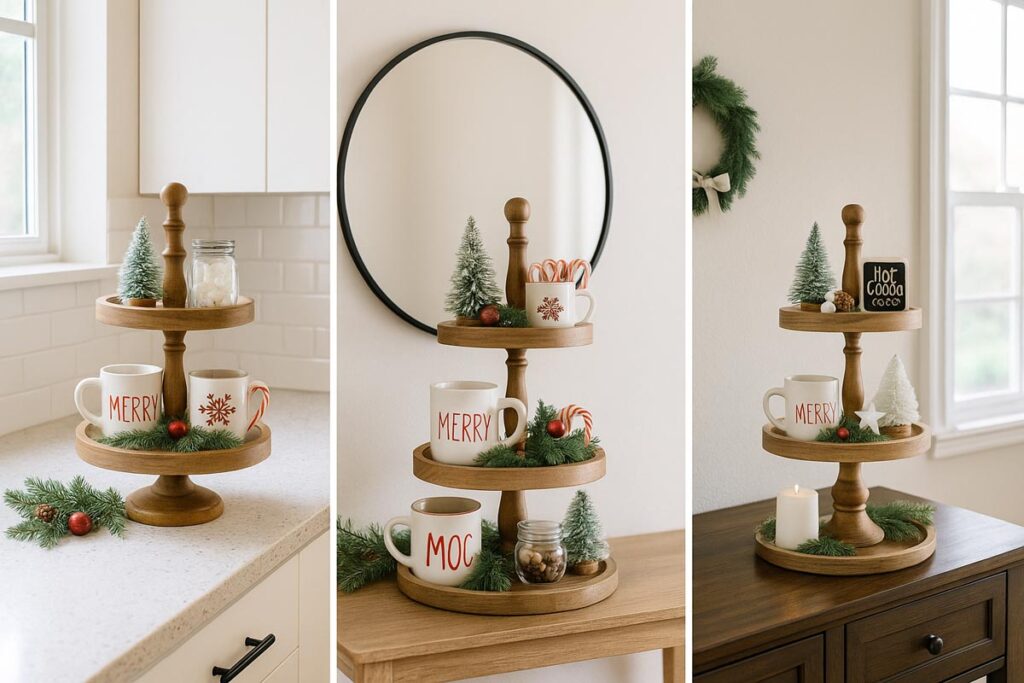
Practical Christmas 2-Tier Tray Ideas
Here are specific setups you can copy or tweak.
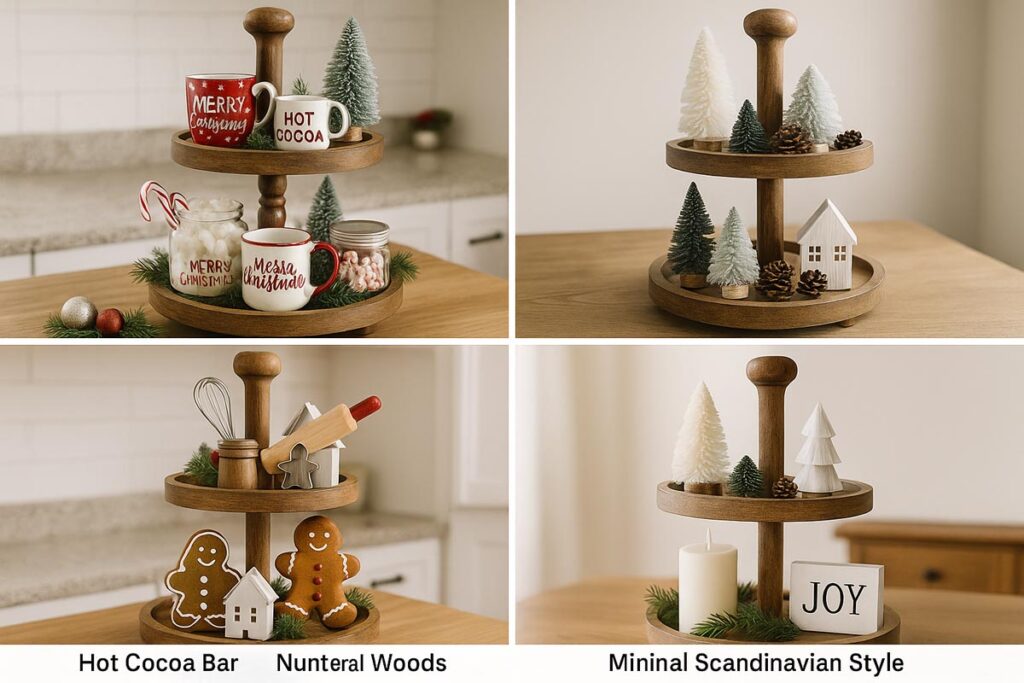
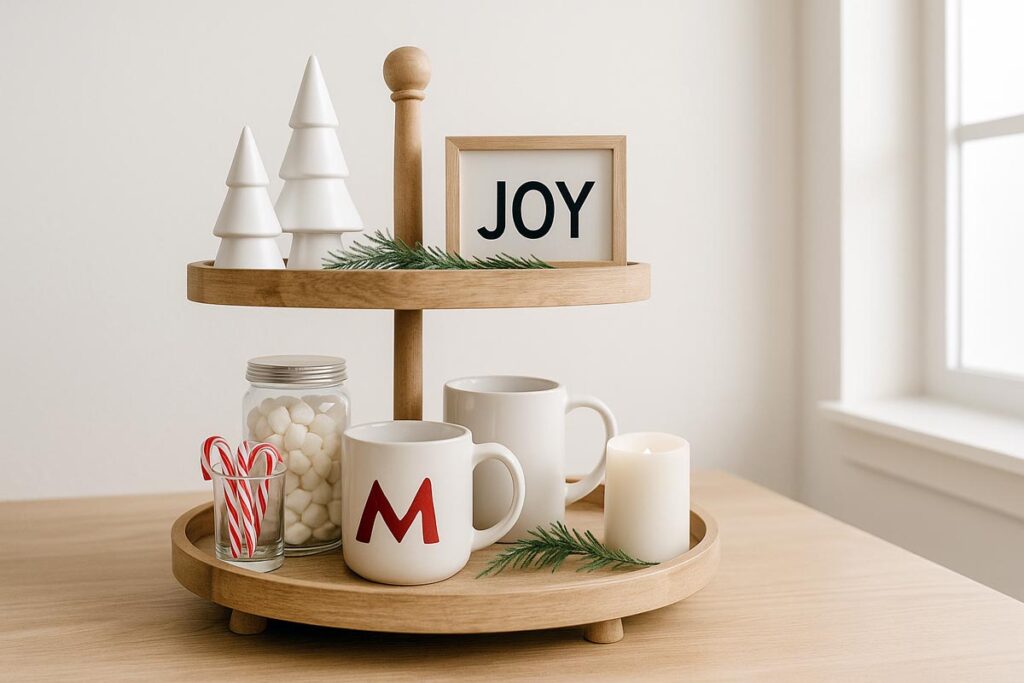
1. Classic Hot Cocoa Station Tray
Best for: kitchen counter or island.
What to use:
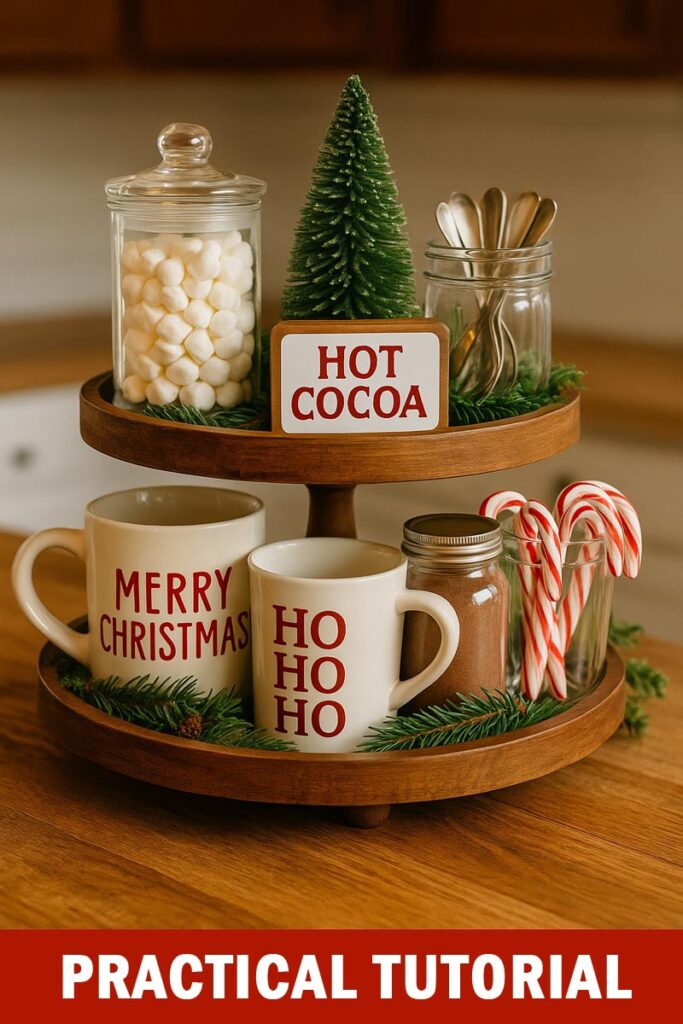
Bottom tier
- Anchor: small “Hot Cocoa Bar” sign at the back.
- Two chunky holiday mugs.
- Jar with cocoa mix or hot chocolate packets.
- Candy canes in a short glass or jar.
- Greenery tucked around the bases.
Top tier
- Small bowl of marshmallows (or mini sealed jar if kids around).
- One or two mini trees.
- Tiny spoon jar or napkin stack.
- A couple of red ornaments as fillers.
Benefits: super practical, guests know exactly where to go for a warm drink, and it looks festive without taking much room.
2. Neutral Winter Woods Tray
Best for: open shelves, entry tables, calm living rooms.
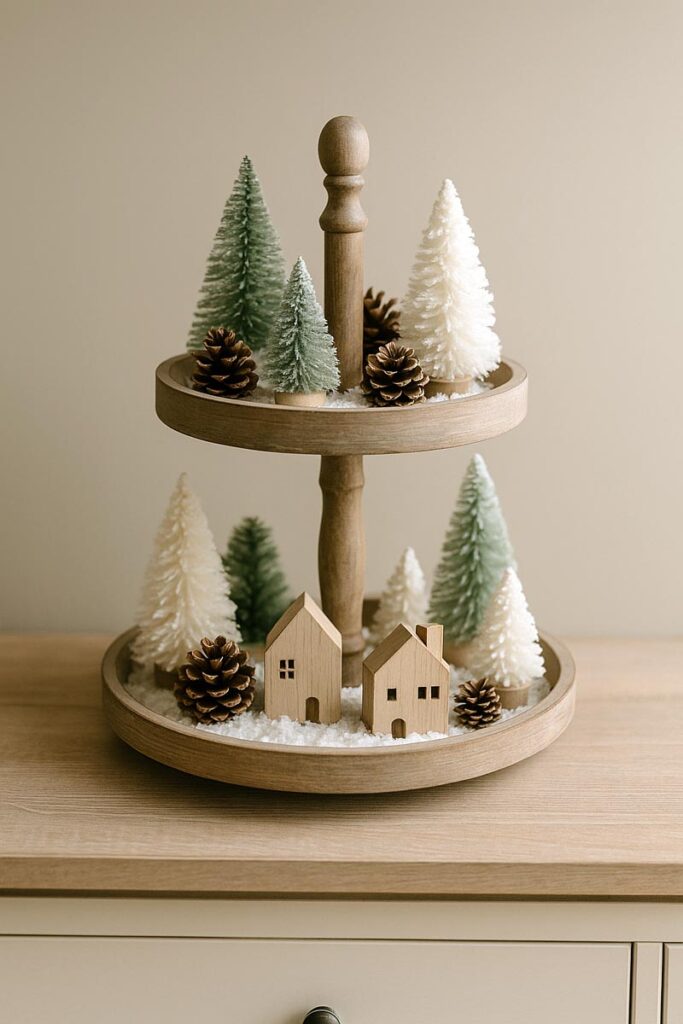
Color focus: greens, whites, wood tones.
What to use:
- Small wooden or ceramic houses.
- Different heights of bottle brush trees (greens and whites).
- Faux snow or white felt circles under pieces.
- Pinecones and wood beads as fillers.
Keep text and bright reds out or very limited. The look stays calm and wintery, so it can stay up past Christmas.
3. Farmhouse Gingerbread Baking Tray
Best for: countertop near the stove or mixer.

Color focus: brown, red, cream.
What to use:
- Gingerbread man and house figurines.
- Metal cookie cutters leaned against the central post.
- A mini rolling pin and whisk in a jar.
- Striped towels rolled or folded on the bottom tier.
- A few faux cookies or realistic-looking ornaments.
This tray feels like a tiny baking station and works well beside a mixing area without taking over.
See more: Farmhouse 2 Tier Tray Decor
4. Candy and Cookie Tray for Kids
Best for: supervised coffee table, sideboard, island for parties.
Key points: Use contained snacks, especially with kids or pets.

What to use:
- Clear lidded jars with wrapped candies.
- Mini plates with cookie tins or pre-wrapped treats.
- Fun character mugs (reindeer, snowman, Santa).
- Bright ornaments spread in between jars.
Keep the heaviest jars on the bottom tier and lighter decor on top. If very young kids are around, consider plastic jars instead of glass.
5. Minimal Scandinavian-Style Tray for Small Spaces
Best for: small apartments, narrow counters, clean modern rooms.
Color focus: white, black, natural wood, maybe a touch of green.
What to use:
- One simple white candle in a holder (flameless if safer).
- A couple of plain wooden or white trees.
- Small black-and-white sign with a simple word: “Joy” or “Peace.”
- A thin strand of greenery or a wooden bead garland.
Leave visible empty space. That emptiness is part of the design and keeps the tray from feeling busy.
Where to Place Your Christmas 2-Tier Tray
Placement often makes or breaks how useful the tray feels.
- Kitchen corner: Great for cocoa or coffee themes. Won’t hog prep space.
- Kitchen island center: Works as a centerpiece, but keep one side lower so sightlines stay open across the room.
- Entryway console: Use lighter items and maybe a key bowl. Mix decor with something practical so the tray earns its spot.
- Dining table: Works if the tray is low and not overloaded. People need to see each other across the table.
- Open shelves: A 2-tier tray can anchor a shelf section so the rest of the decor doesn’t feel scattered.
Common Mistakes and How to Avoid Them
- Overcrowding the tray: If every inch is covered, nothing stands out. Remove 2–3 pieces and see if the design actually looks better. It usually does.
- Too many color families: If more than three main colors are visible, the tray reads as clutter. Pull out items that don’t match the chosen palette.
- Wobbly or unsafe items: Tall breakables on the top tier, especially in a house with kids or pets, are just asking for trouble. Move heavy or fragile decor down or off the tray.
- Mixing food and non-food safely: If snacks are on the tray, use containers. Avoid setting food directly next to items that shed glitter or paint.
FAQs about Christmas 2 Tier Tray
Final Thoughts
A Christmas 2-tier tray doesn’t need expensive decor or perfect matching sets. The real trick is choosing a clear theme, limiting colors, and building from anchors to fillers instead of tossing everything on at once. With that structure, almost any mix of pieces can look intentional.
Once the first tray comes together, the process becomes repeatable. Next year, the same stand can handle a different theme just by swapping a few signs, mugs, and accent colors. That’s what makes a 2-tier tray such a practical base for Christmas decorating.
A well-styled Christmas 2-tier tray gives strong holiday vibes in a very small footprint. Start with location, pick a focused theme, gather anchors, medium pieces, and fillers, then build from the bottom tier up. Keep colors tight, leave breathing room, and check the view from all sides.
Whether the tray ends up as a hot cocoa bar, a calm winter woods scene, or a simple Scandinavian setup, the same basic steps apply. Follow the structure once, adjust it to your own decor, and the tray can stay in service year after year without turning into clutter.