2 Tier Decorative Tray Ideas: 11 Smart Ways to Style and Organize
Two tier decorative trays show up everywhere now, from kitchen counters to bathroom shelves, and there’s a good reason for that. They save space, look good, and keep small items under control. When someone understands a few basics about size, material, and layout, that simple stand turns into one of the hardest working pieces of decor in the whole house. This article walks through what a 2 tier decorative tray actually is, where it works best, how to pick the right style, and simple step by step ideas so anyone can set one up without wasting money or cluttering a room.
What is a 2 tier decorative tray, really?
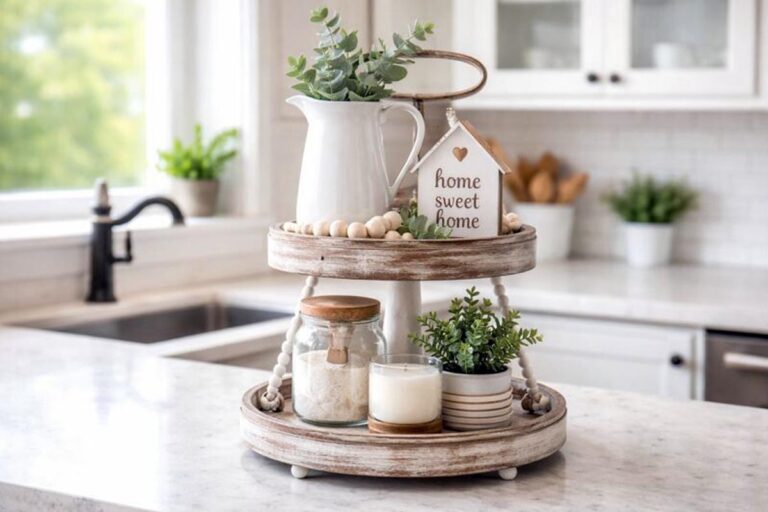
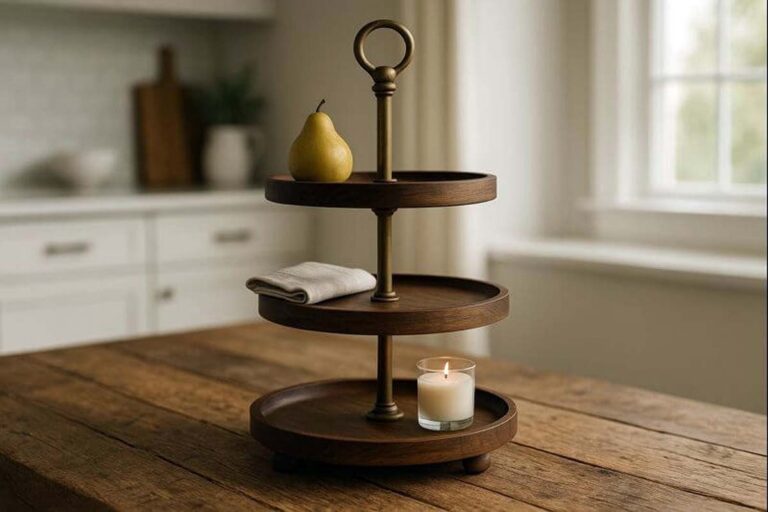
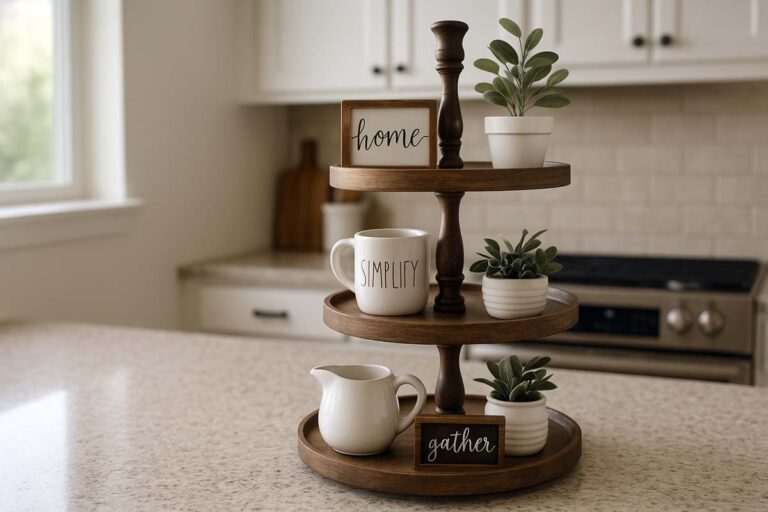
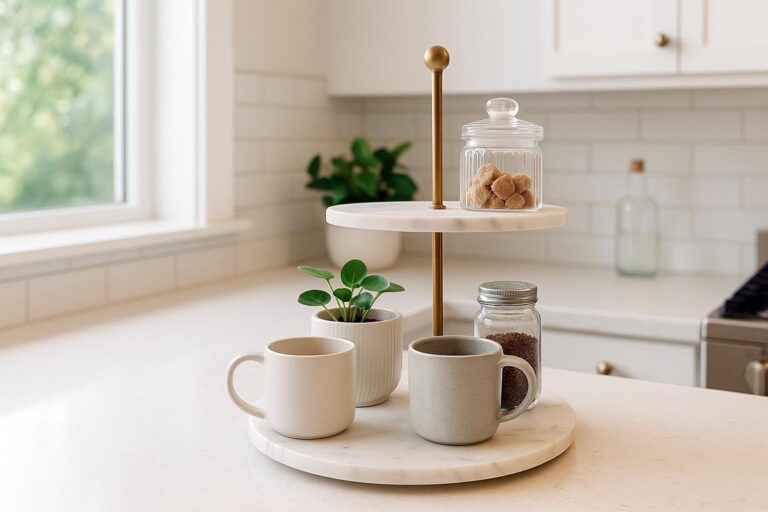
A 2 tier decorative tray is basically a small vertical shelf: two trays, one above the other, connected by a center post or frame. It’s meant to sit on a counter, table, or shelf and hold small items in a neat, visible way.
You’ll usually see:
- A bottom tray that’s wider and sometimes slightly taller
- A smaller top tray
- A center rod, column, or frame holding the two together
- A handle or finial on top so it’s easy to move
People use them for both function and decoration:
- Holding coffee bar items
- Organizing spices or condiments
- Displaying seasonal decor
- Keeping bathroom essentials together
- Showing off small collections
So the basic idea is simple: stack things vertically instead of spreading them all over the surface.
Also see: 2 Tiered Tray Stand for Coffee Bar
Why use a 2 tier decorative tray? (Benefits and drawbacks)
Before anyone buys one, it helps to be clear on what it actually does well and where it can get annoying.

Main benefits
- Saves counter space: Two levels mean more storage in the footprint of one tray. Small kitchens and bathrooms really benefit from this.
- Adds height and visual interest: A flat counter full of short items looks messy fast. A vertical piece breaks things up and makes the space look intentional.
- Keeps small items grouped: Sugar, spoons, napkins, seasoning jars, candles, keys – all of them end up in one “home” instead of drifting across the counter.
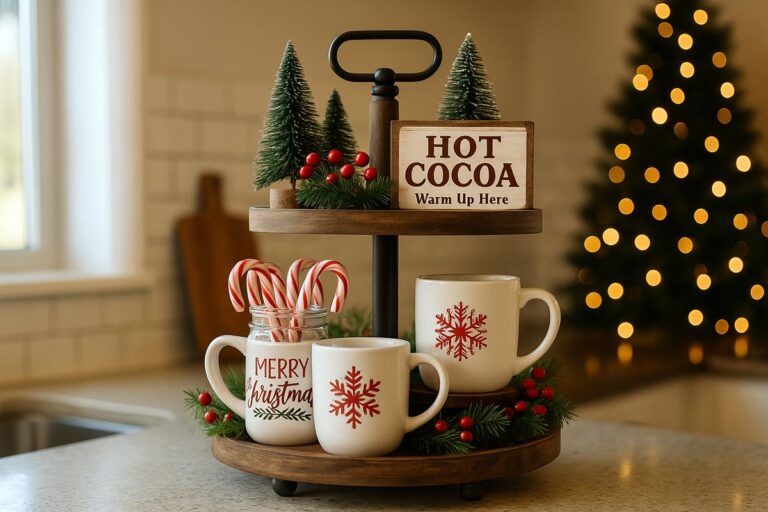
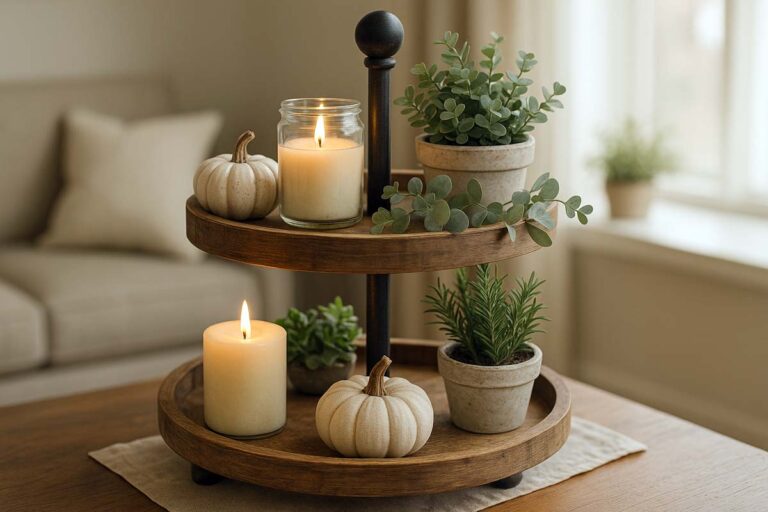
- Easy to redecorate for seasons: Swap a few pieces and the whole tray looks new again. That’s why tiered trays show up all over seasonal decor photos.
Possible drawbacks
- Can feel cluttered if overfilled: When every inch is covered, it stops looking styled and just feels busy.
- Takes up vertical space under cabinets: In a low cabinet area, the top tier might feel too tall.
- Needs a bit of dusting and rearranging: More surfaces and small items mean more cleaning than a single flat tray.
- Some cheaper models wobble: If the center post or base isn’t solid, the whole tray can feel shaky when someone grabs an item from the top.
Knowing these tradeoffs makes it easier to choose a piece that fits the way a home actually runs day to day.
Common materials and styles (and what each is best for)
Most two tier decorative trays fall into a few simple material categories. Each one has a “sweet spot” where it shines.
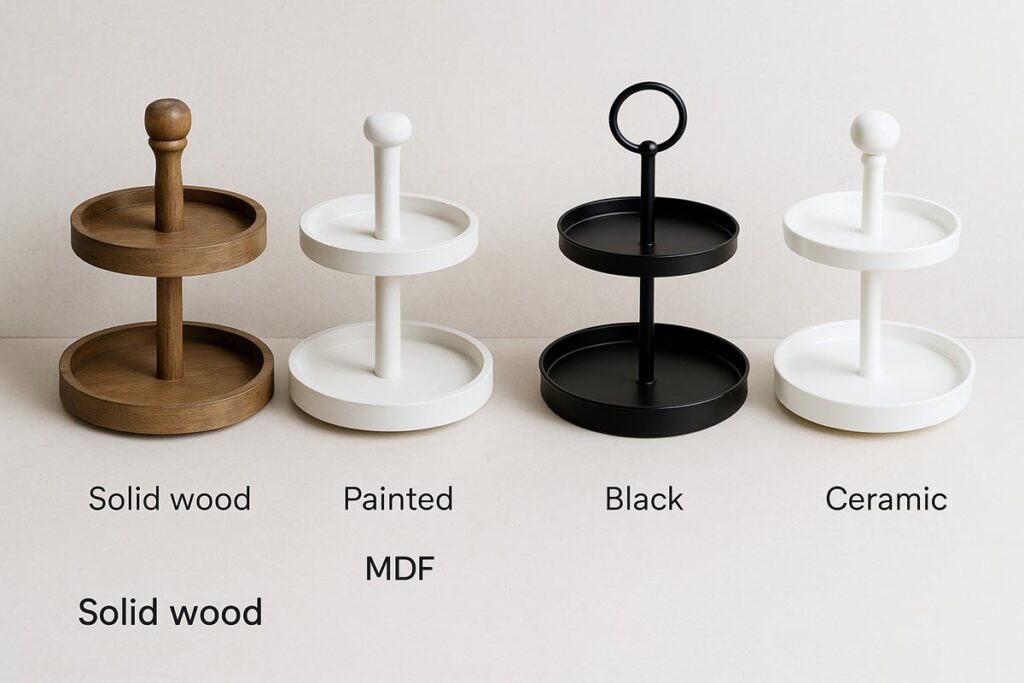
Main materials
| Material | Typical Look | Best For | Watch Out For |
|---|---|---|---|
| Solid wood | Warm, farmhouse, classic | Coffee bars, centerpieces, rustic decor | Needs protection from standing water |
| MDF + veneer | Budget-friendly, painted | Light decor, low-traffic areas | Softer edges, can chip |
| Metal | Modern, industrial, sleek | Bathrooms, kitchens, plants | Can show fingerprints or water spots |
| Ceramic/porcelain | Clean, bright, “serveware” look | Serving food, desserts, parties | Heavier, breakable |
| Mixed wood + metal | Balanced, casual | Everyday counters, entry tables | Check joints and screws |
If someone leans toward that farmhouse look, a weathered wood style works well, especially paired with enamel or ceramic pieces. There’s a nice overview of rustic options in this breakdown of a farmhouse style 2 tier tray stand.
Metal or mixed wood-and-metal trays fit better in modern kitchens or apartments, where everything else is a little cleaner and more streamlined.
How to choose the right 2 tier decorative tray for your space
Instead of starting with “What looks cute?”, it’s more useful to start with “Where will this live, and what will it hold?”
1. Decide the main location
Ask a simple question: Where will it sit 80% of the time?
Common spots:
- Next to the coffee maker
- On the kitchen island
- On a dining table or sideboard
- In a guest bathroom
- On an entry console
If the tray sits under low cabinets, measure the distance from the counter to the cabinet and aim at least an inch or two shorter than that.
2. Choose the main purpose
One tray usually works better when it does one main job:
- Coffee station
- Snack or breakfast station
- Bathroom storage
- Decor only (no daily-use items)
- Seasonal or holiday display
Daily-use trays need:
- Smooth surfaces that wipe clean
- Good stability (no wobble)
- Enough height between tiers so tall mugs or bottles fit
Decor-only trays can be more delicate or ornate because no one is grabbing things off of them all day.
3. Match the size to the items
A good rule: Lay the items out on a counter in the footprint of a dinner plate. That’s roughly the size of many bottom tiers. If things already look packed, a larger tray or a rectangular shape might be better.
Rectangular trays usually fit tight spaces (like against a wall or backsplash). If someone likes that look, there’s a helpful comparison of how a 2 tier rectangle tray behaves on a counter versus a round stand.
4. Think about material and maintenance
If kids will be grabbing snacks or someone will be moving the tray a lot, wood or metal handles are safer than tall ceramic ones.
For wood versions, it’s worth paying attention to species. Harder woods stand up better long term. There’s a deeper dive into that in the guide on best wood types for sturdy tiered tray stands.
5. Check stability before committing
If someone’s shopping in person, they should:
- Press gently on the top tier and see if it wobbles
- Wiggle the center post
- Make sure the base sits flat on a hard surface
Online, reviews that mention “wobbly” or “leaning” are a red flag.
Step-by-step: how to set up and decorate a 2 tier decorative tray
Here’s a simple process that works in pretty much any room. Once someone runs through it a couple of times, styling a tray takes minutes instead of an afternoon.
Step 1: Pick a theme (but keep it loose)
A theme doesn’t have to be complicated. It can be as simple as:
- “Everyday coffee station”
- “Neutral farmhouse decor”
- “Fall entryway pieces”
- “Guest bathroom essentials”
That theme helps decide what stays and what goes.
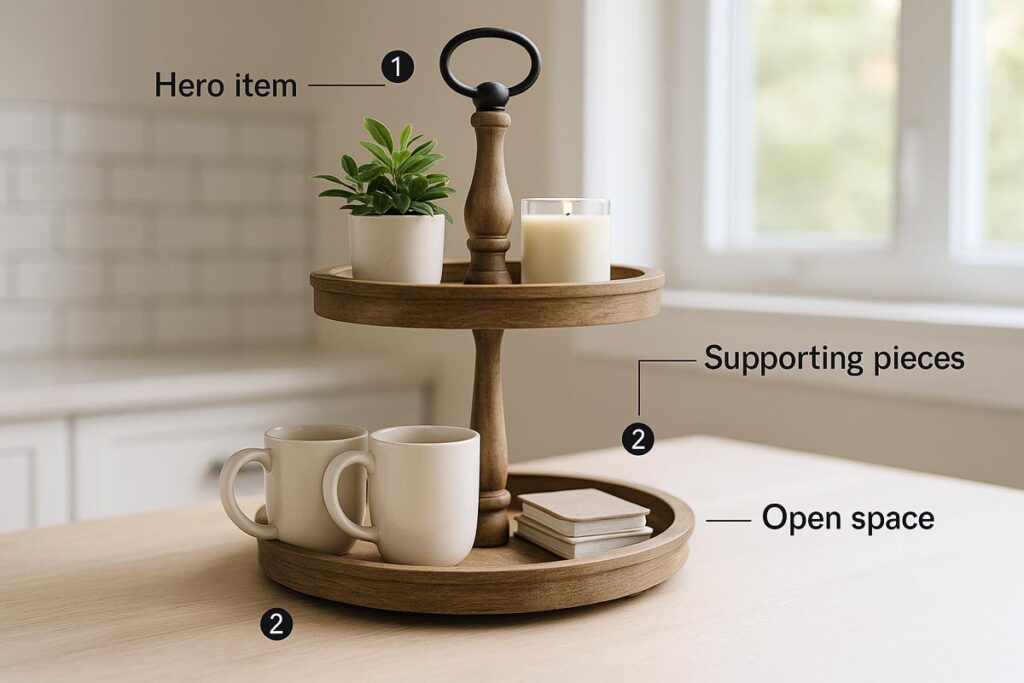
Step 2: Choose a main “hero” item
Each tier should have one slightly larger item that anchors it:
- A sugar jar or syrup bottle
- A small plant
- A candle in a glass jar
- A stack of folded napkins or towels
Place the hero item first, usually slightly off-center, not right in the middle. That keeps the tray from looking stiff.
Step 3: Add supporting pieces in different sizes
Next, fill around the hero item with smaller pieces:
- Mugs or small bowls
- Mini signs or a small frame
- Coasters, spoons, napkin rings
- Decorative beads, greenery, small ornaments
A good pattern is tall + medium + small on each tier. So, one taller piece, one medium object, and a few low items.
Step 4: Leave a little breathing room
If every open space is filled, the tray feels crowded. It’s okay to leave:
- A clear corner on the bottom tier
- A small open area on the top tier
This negative space actually makes the rest look more intentional.
Step 5: Check from a few angles
Stand back, crouch down, and look from the sides. Things that look balanced from the front might feel heavy on one side when viewed from the end of the counter.
If someone wants more structured seasonal ideas, there are plenty of themed layouts broken down in this guide on 2 tier tray decor.
Where a 2 tier decorative tray works best in the home
A good tray earns its keep by doing real work, not just sitting around.
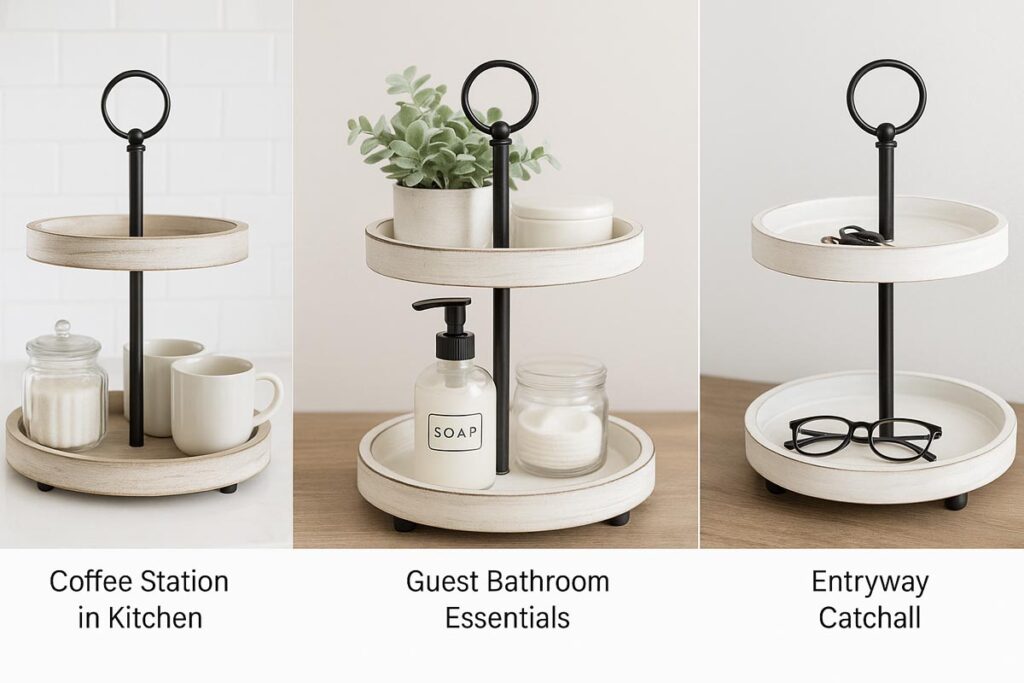
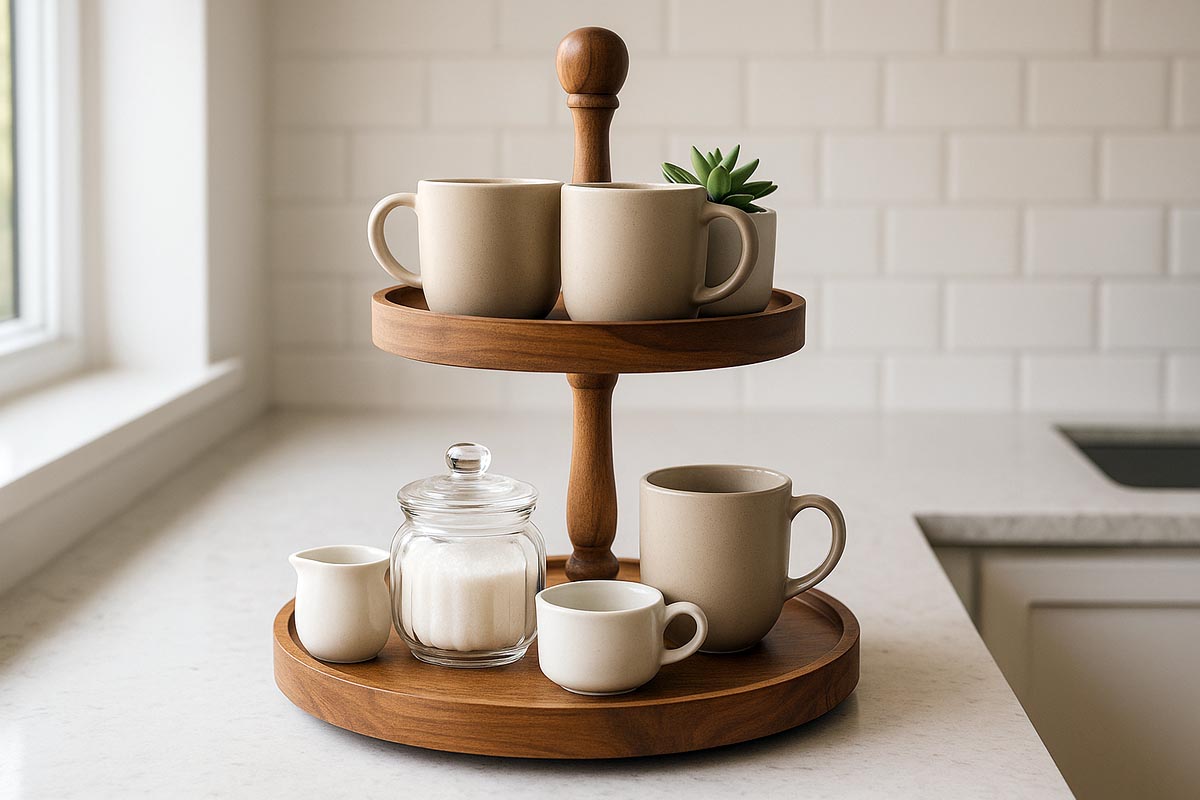
Kitchen and coffee bar
- Coffee pods, tea bags, sweeteners, spoons
- Small jars with sugar and instant coffee
- A couple of favorite mugs
The key here is easy reach. Keep things used every day on the bottom tier.
Dining table or sideboard
- Salt, pepper, and everyday condiments
- Napkins, small vase, candle
- Seasonal small decor (mini pumpkins, ornaments, etc.)
Using a tray keeps the table from feeling bare but still leaves room for plates and serving dishes.
Bathroom
- Hand soap, lotion, and small towels
- Cotton balls, cotton swabs, and face pads
- Small plant or candle
In bathrooms, materials that like moisture (ceramic, metal, sealed wood) beat raw unfinished wood.
Entryway or office
- Keys, sunglasses, wallet
- Small notepad, pens, and clips
- A tiny dish for coins
Here, the tray acts as a “landing pad” so small items don’t scatter.
Care and maintenance: keeping the tray looking good
A 2 tier decorative tray lasts a lot longer when it’s treated more like a piece of furniture and less like a disposable accessory.
- Wipe spills quickly: Especially on wood or MDF. Liquids that sit under a vase or soap pump will leave rings.
- Use coasters or small mats: Under soaps, syrups, or planters. Even a thin cork circle can save a surface.
- Tighten screws once in a while: The center post and base screws can loosen over time. A quick check keeps wobble under control.
- Dust before it builds up: When a tray holds a lot of decor pieces, dusting is easier if a few items are removed first, wiped, and then put back in place.
- Avoid dragging it full of heavy items: If someone needs to move it, lifting from the base instead of just the top handle saves stress on the center post.
Common mistakes people make with two tier trays
Even a nice tray can look off if it’s used the wrong way. A few issues pop up over and over:
- Overloading it with tiny pieces: Dozens of small items read as clutter. Larger, simple pieces look cleaner.
- Mixing too many colors at once: Sticking to one main color family (for example whites, wood tones, and greenery) keeps the tray coherent.
- Choosing the wrong height for the space: A tall tray under low cabinets or shelves feels cramped and awkward.
- Ignoring daily use: If someone hides the items he needs behind decor, he’ll end up moving things constantly. Practical items should be front and center.
Fixing most of these is as simple as removing a few pieces, repeating a couple of colors, and leaving one side a bit more open.
FAQs about 2 Tier Decorative Tray
How big should a 2 tier decorative tray be for a kitchen counter?
Most kitchen counters handle a tray with a bottom tier around the size of a dinner plate. That’s usually enough room for daily coffee or snack items without blocking prep space or feeling oversized under upper cabinets.
Can a 2 tier decorative tray be used for serving food?
Yes, as long as the surfaces are food-safe and easy to clean. Ceramic, porcelain, or sealed wood work best for serving. It’s still smart to use small plates, liners, or cupcake wrappers so cleanup stays simple.
What’s the best material for a bathroom 2 tier tray?
In a bathroom, ceramic, metal, or sealed wood handle moisture the best. These materials wipe clean quickly and resist water rings from soap bottles or lotion pumps, especially when paired with small coasters or mats under liquids.
Is a 2 tier decorative tray better than a flat tray?
It depends on the space. A 2 tier tray is better when counter space is limited and vertical storage is helpful. A flat tray works better on dining tables or coffee tables where low, wide arrangements are easier for everyone to see and reach.
Final thoughts
A 2 tier decorative tray looks simple, but it pulls a lot of weight if it’s chosen and set up with a bit of intention. When the size fits the space, the material suits the job, and the layout follows a clear theme, it becomes more than a trend piece. It turns into a small, reliable organizer that makes the rest of the room feel calmer and more deliberate.
For anyone who wants a mix of storage and style without covering every inch of counter, a 2 tier decorative tray is a straightforward solution. Start by matching the tray to the room and purpose, keep the layout clean and focused, and maintain it like any other small piece of furniture. Done that way, the stand will keep working quietly in the background while everything around it changes with seasons, guests, and everyday life.