Decorate a 2 tier tray for christmas in a way that actually fits your home and doesn’t look thrown together. A small tray can carry a lot of holiday mood if you treat it like a mini display, not just a spot to park random ornaments. With a clear theme, a simple color palette, and the right mix of useful pieces and decor, the tray turns into a little Christmas focal point on your counter or coffee bar. In this guide, every step walks through what to use, where to put it, and how to keep it practical.
1. Start with the tray and the spot
Before touching decor, look at two things: the tray itself and where it’ll sit.
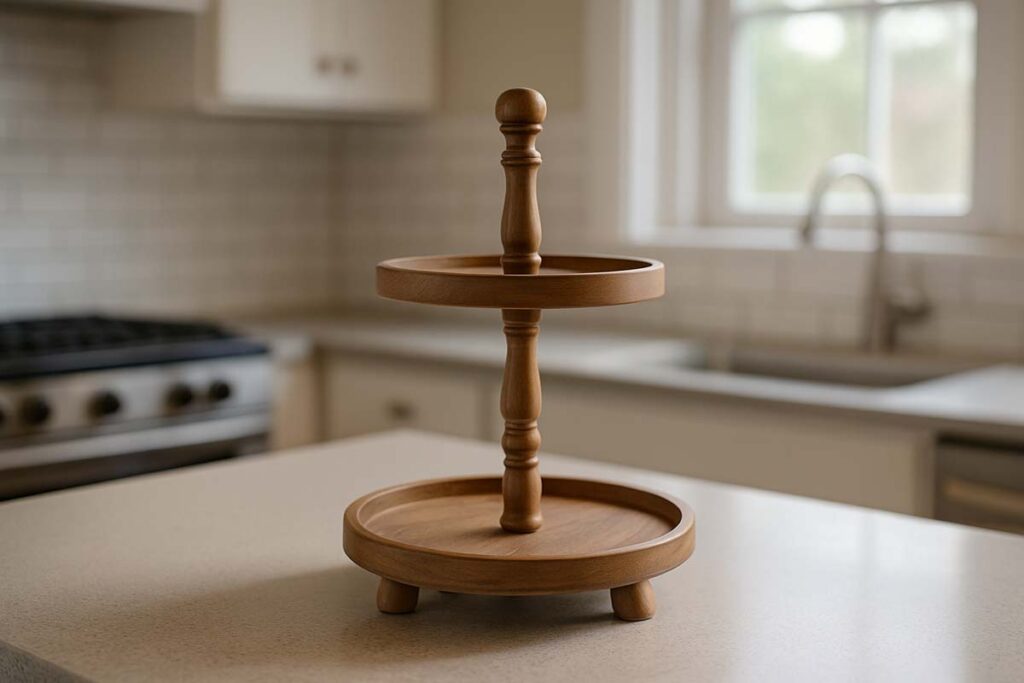
Check the style and material
Ask a few quick questions:
- Is the tray metal, wood, ceramic, or marble?
- Is it farmhouse, modern, rustic, or glam?
- Is it round, square, or rectangular?
- Is the center post chunky or slim?
A clean, simple 2 tier tray stand is easier to decorate, because it doesn’t fight with your decor. If the stand already has a strong look (heavy farmhouse or bold metal), plan decor that supports that style instead of competing with it.
Decide where the tray will live
Location changes the whole setup:
- Kitchen counter or island – mix decor with useful items (mugs, sugar, spoons).
- Coffee bar – focus on drink-related pieces and small canisters.
- Dining table – keep the tray a bit lower and balanced so people can see over it.
- Entry table – treat it more like a mini display, not a utility piece.
Knowing the spot keeps the tray from becoming pretty but useless.
See more at: 9 Cozy Styling Ideas to Decorate a 2 Tier Tray for Fall
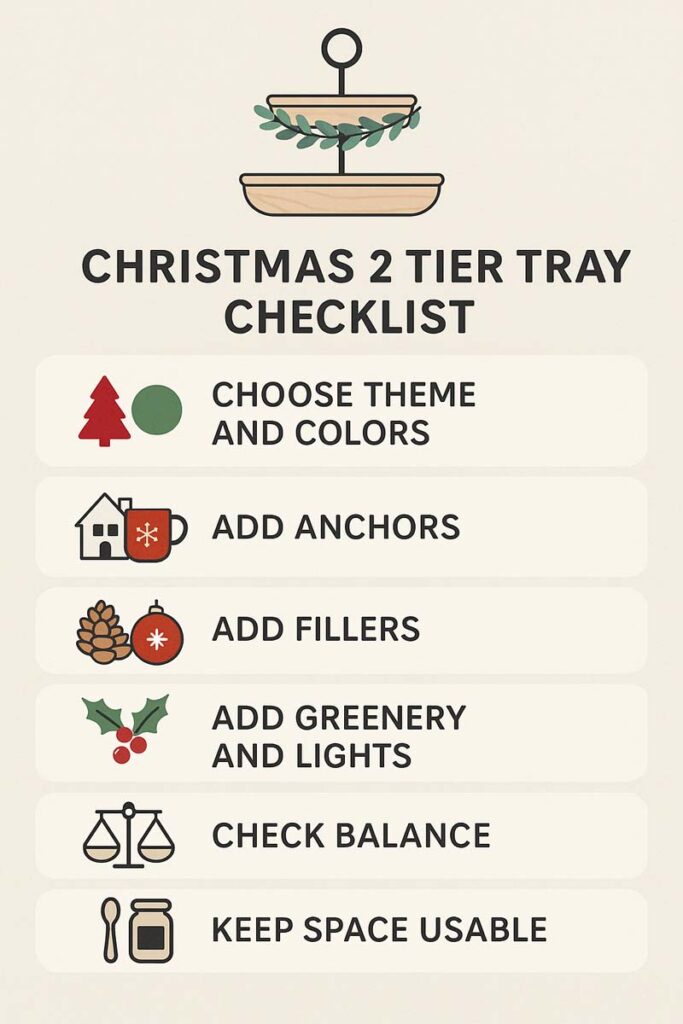
2. Pick a clear Christmas theme and color palette
This is where most trays go wrong. Too many colors. Too many ideas. Pick one lane.
Simple Christmas themes that work on a 2 tier tray
A quick way to decide is to choose a theme and a tight color palette:
| Theme | Main Colors | Key Items |
|---|---|---|
| Classic Cozy Christmas | Red, green, white | Mini signs, berries, bottle brush trees |
| Winter Woodland | Green, brown, white | Pinecones, wood slices, deer figures |
| Candy Cane / Peppermint | Red, white | Striped mugs, candy jars, ornaments |
| Neutral Farmhouse | White, cream, greenery | Wood beads, neutral trees, black text |
| Hot Cocoa Bar | Brown, red, white | Mugs, cocoa jars, marshmallow canister |
Pick one main theme and stick with 2–3 colors. That makes every decision easier.
If you want more inspiration before locking in a look, browsing some Christmas 2 tier tray ideas can help narrow down what actually fits your style.
3. Gather your core pieces before you start styling
Don’t decorate directly from a bin of random decor. Pull everything out where you can see it.
You’ll want four basic types of items:
Anchor pieces (biggest items)
- Example: a chunky mug, a small house, a mini sign, or a larger tree.
- You’ll use 2–4 of these, total, across both tiers.
Medium fillers
- Small jars, smaller trees, small figurines, candle tins.
- These bridge the gap between large items and tiny accents.
Small accents
- Ornaments, pinecones, bells, berries, mini presents.
- These tuck into gaps and help balance color.
Soft elements
- Greenery, faux snow, ribbon, bead garlands.
- These tie everything together and soften hard edges.
Lining everything up on the table makes it easier to see what’s missing. Maybe there’s plenty of red and green, but no white to break things up. Or the tray has tall pieces but no low items to fill space.
For general styling basics that work year-round, a few tiered tray decorating ideas also apply directly to Christmas setups.
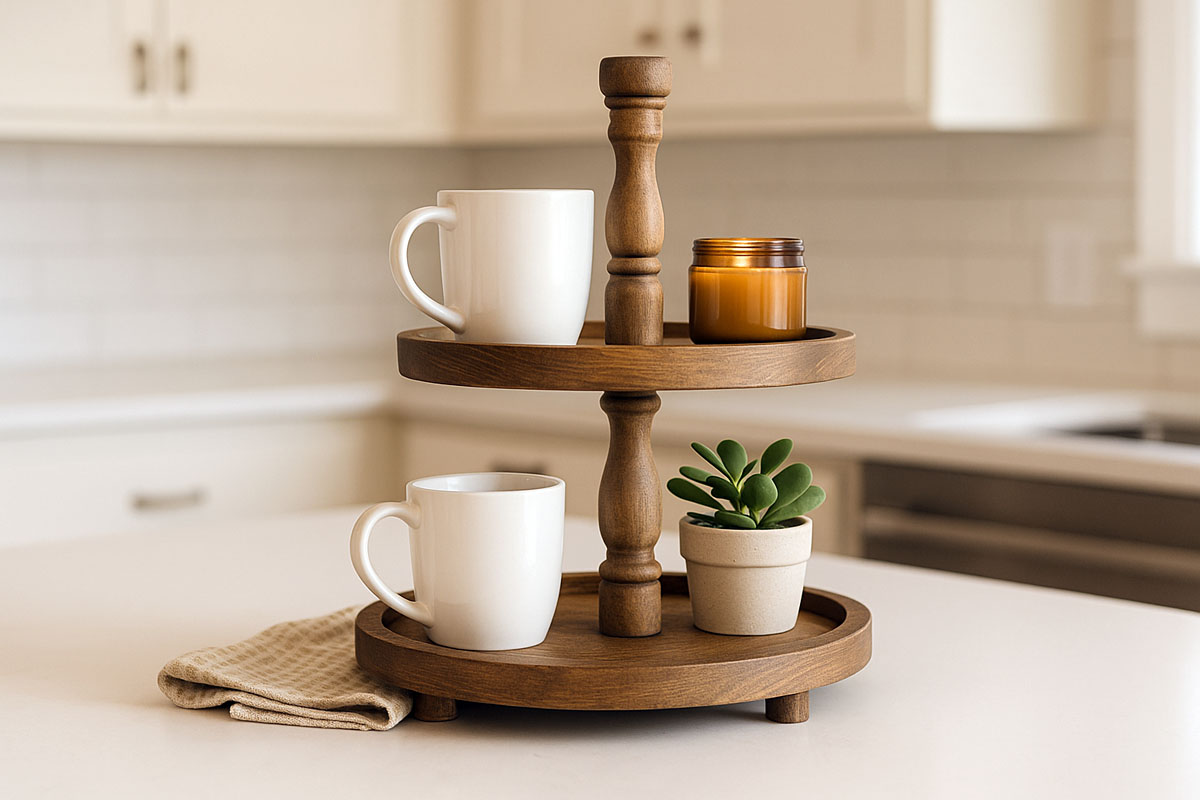
4. Start with the bottom tier: weight and function
Always style the bottom tier first. That’s where most of the visual weight and any functional items will go.

Step-by-step for the bottom tier
Place your main functional piece (if needed)
- Coffee bar: a pair of mugs, sugar jar, or cocoa canister.
- Kitchen: salt and pepper, a small utensil jar, or napkins.
- Entryway: a small bowl for keys or loose change.
Add a large anchor decor item
- Put a bigger tree, mini house, or bold sign opposite the functional piece.
- This keeps the tray from looking “heavy” on one side.
Slide in medium pieces to bridge the gaps
- Set a smaller tree or jar between the big items.
- Aim for different heights so the tray doesn’t look flat.
Tuck in greenery or ribbon as a base layer
- Snake a bit of faux evergreen around items.
- Let it peek out from under pieces instead of just sitting in the middle.
Drop in tiny accents last
- Add a couple ornaments, pinecones, or bells.
- Stop early. If you’re not sure if it’s too much, it’s probably too much.
From experience, the bottom tier works best when it feels about 70% full. You still want to be able to reach items without knocking over half the tray.
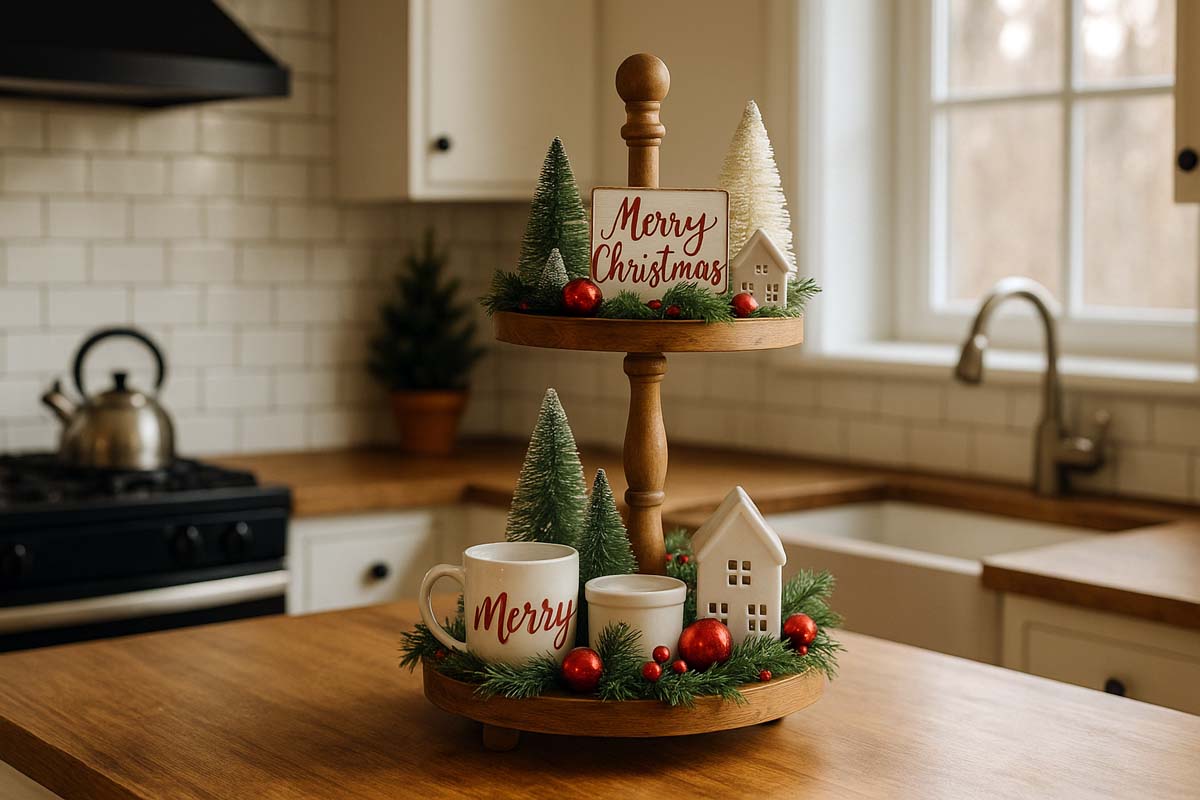
5. Style the top tier: height and focus
The top tier is where the eye lands first. Think of it as the “headline” of the tray.

Step-by-step for the top tier
1. Choose one clear focal point
- A sign (“Merry Christmas”), a tall tree, or a statement mug.
- Center it or slightly off-center, but let it own that tier.
2. Add 1–2 smaller supporting pieces
- A small figurine, mini house, or small jar.
- Keep them lower than the focal point so nothing competes.
3. Work greenery in around the base
- A small ring of greenery around a tree or sign looks finished.
- Don’t bury the items; you just want a hint.
4. Use tiny accents sparingly
- One or two mini ornaments, a tiny bow, or a small bell.
- The top tier should feel lighter and a bit more open than the bottom.
Overall, the top should be about 60% full. The tray looks better when air and space are part of the design.
6. Balance color, height, and texture
Once both tiers are roughly styled, step back and check balance.
Color balance
Ask yourself:
- Is red all on one side?
- Is greenery clumped in one corner?
- Does one tier look “busy” and the other “empty”?
Shift items so each tier has some of your main colors. For example:
- Bottom: red mug, green tree, white sign.
- Top: red accents, small green sprig, white house.
Height balance
You want a gentle up-and-down rhythm, not a forest of tall pieces.
- If everything is tall, remove something and add a low piece.
- If everything is low, add one taller item or raise something on a wood slice.
Texture mix
A good Christmas tray usually mixes:
- Smooth surfaces: ceramic, glass, metal.
- Natural pieces: wood, greenery, pinecones.
- Soft items: ribbon, twine, beads.
A more general 2 tier tray decor breakdown can help when you’re building your decor stash and want pieces that work beyond Christmas.
7. Make your Christmas tray actually usable
Pretty is nice. Useful is better, especially in December when counters fill up.
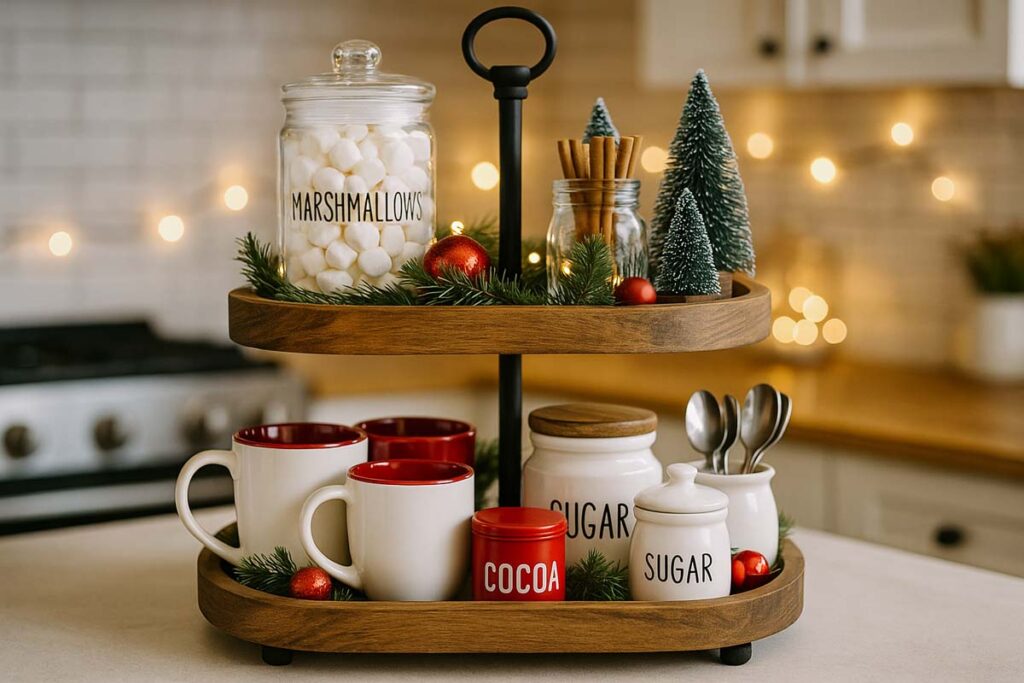
For a coffee bar or cocoa station
On the bottom tier, keep:
- Mugs
- Sugar or sweetener
- Cocoa, tea, or coffee canister
- Spoon or stirrer container
On the top tier, stack:
- Marshmallow jar
- Cinnamon sticks in a tiny jar
- Whipped cream or flavor syrups nearby (not on the tray if they’re large)
If you’re setting up a full coffee tray, it might help to look at a dedicated 2 tier tray for coffee bar layout and adapt it to your Christmas colors.
For a kitchen or island
- Keep one or two spots open for everyday items (keys, phone, small notepad).
- Avoid tall candles near overhead cabinets.
- Leave a bit of space around the tray so it doesn’t feel like clutter.
8. Add lights and small details
Lights and tiny touches are what make the tray feel like Christmas instead of just “winter decor.”
Lights
- Use battery-operated fairy lights with a thin wire.
- Wrap the wire under and behind items, not directly across them.
- Hide the battery pack behind the tray or under a napkin or greenery.
Small details that matter
- Add one bow to the handle or center post, not ten bows everywhere.
- Use a short strand of wooden beads to connect the two tiers visually.
- Sprinkle a tiny bit of fake snow in a controlled area, not the whole tray.
Less is more here. A couple of thoughtful details beat a dozen loud ones.
9. Keep it safe and easy to maintain
You don’t want a tray that looks great once and then drives you nuts all month.
- Avoid wobbly items near the edge. Test by lightly bumping the tray with your hand.
- Keep fragile glass pieces away from busy walkways or kids’ reach.
- Dust weekly. Lift items in small groups so you don’t forget where they go.
- Store by category after Christmas. Keep “tray-sized” decor in a separate box so next year’s setup is faster.
FAQs about Decorate a 2 Tier Tray for Christmas
Final thoughts
A solid Christmas tray comes down to a few simple rules: clear theme, tight color palette, smart use of height, and a mix of decor plus useful pieces. Once those are in place, everything else becomes easier. You’re not randomly decorating anymore. You’re solving small styling problems: “This corner needs green,” or “This side needs something taller.”
The nice part is that the same habits carry over into every season. Once Christmas comes down, the tray is already in the right spot, and your eye is already trained to balance it.
Decorating a 2 tier tray for Christmas doesn’t require a designer. It just needs a plan and a bit of intention. Start with the tray and the spot, pick a theme and colors, gather the right mix of pieces, then build from the bottom tier up. Balance color and height, add a few lights and soft details, and keep the tray practical enough to use every day.
If you ever expand to bigger setups, the same approach works on larger stands and even full 3 tier tray Christmas decor displays. Once you understand the basics, it’s just a matter of swapping colors and props for the next holiday.