3 Tier Tray Decor Ideas Inspired by Hobby Lobby
3 tier tray decor hobby lobby shoppers love is easier to pull together than it looks. The key is treating the tray like a tiny staged shelf, not a catch-all.
You only need a simple plan. Pick a style, repeat a few colors, and layer decor in the right order so it feels full but not cluttered.
What “Hobby Lobby Style” 3-Tier Tray Decor Really Means
Think about the displays you see near the aisles. They always feel cozy, full, and coordinated, not chaotic.
That same idea works on a 3-tier stand at home. Use repeated colors, simple shapes, and one or two “hero” pieces that grab attention.
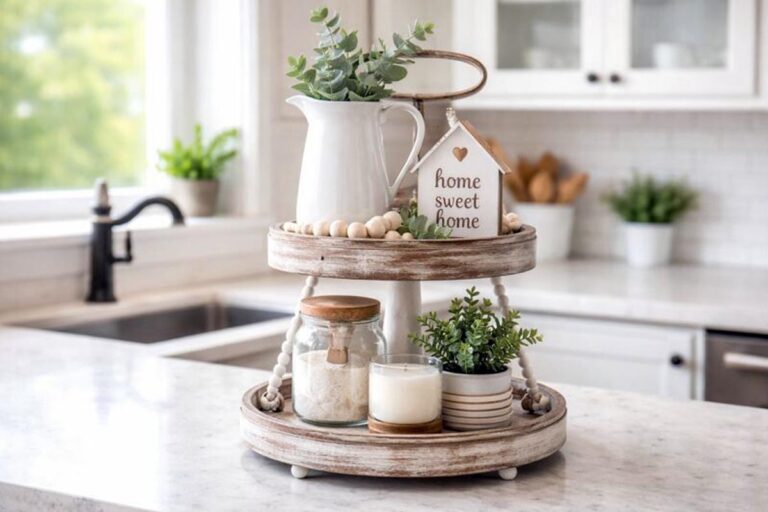
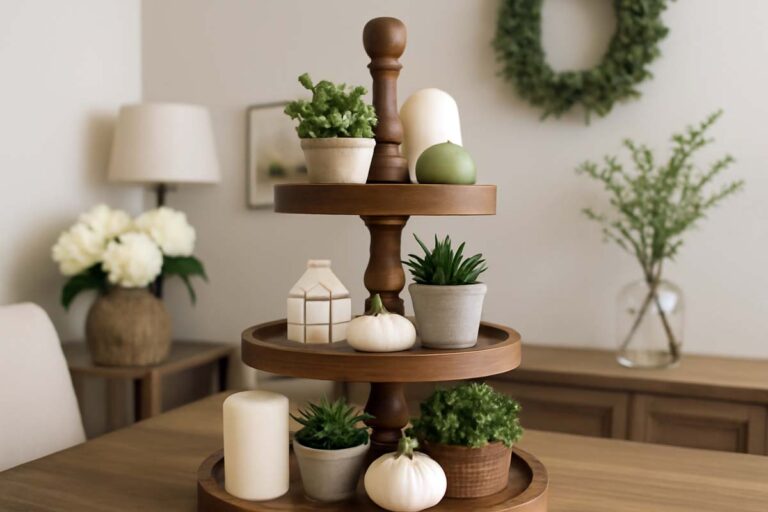
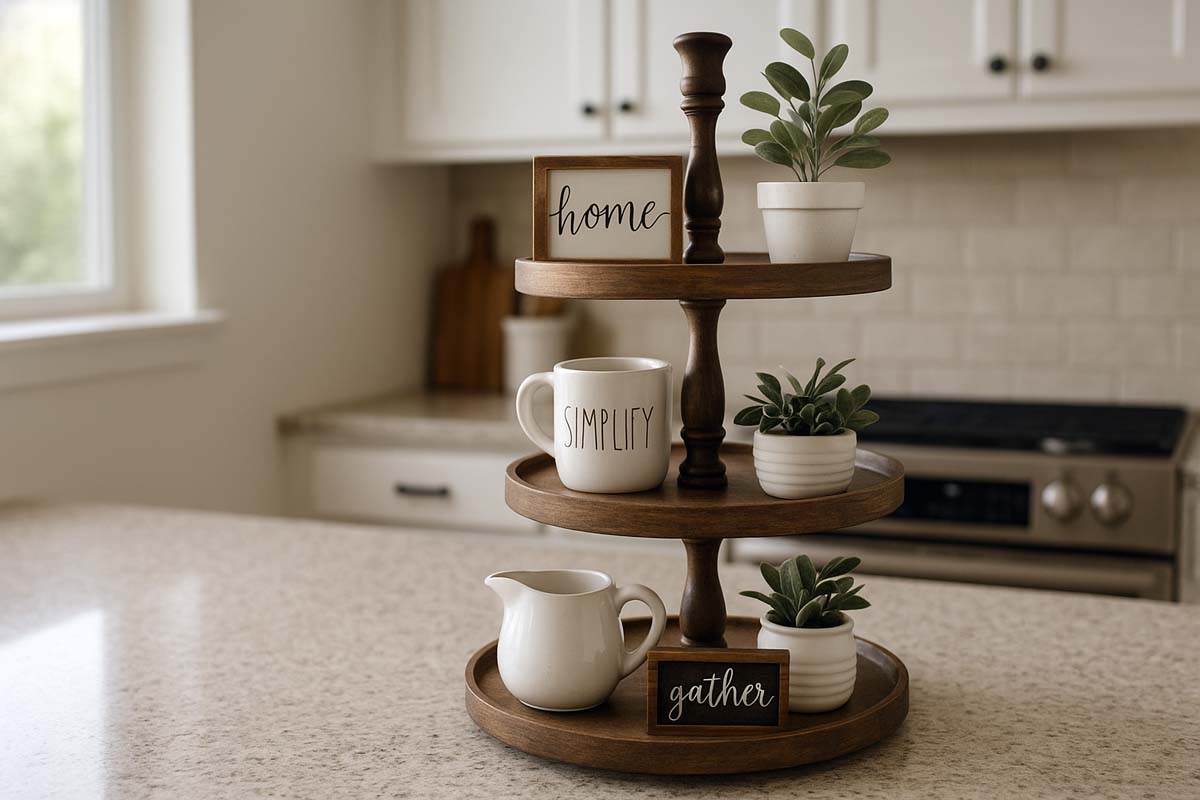
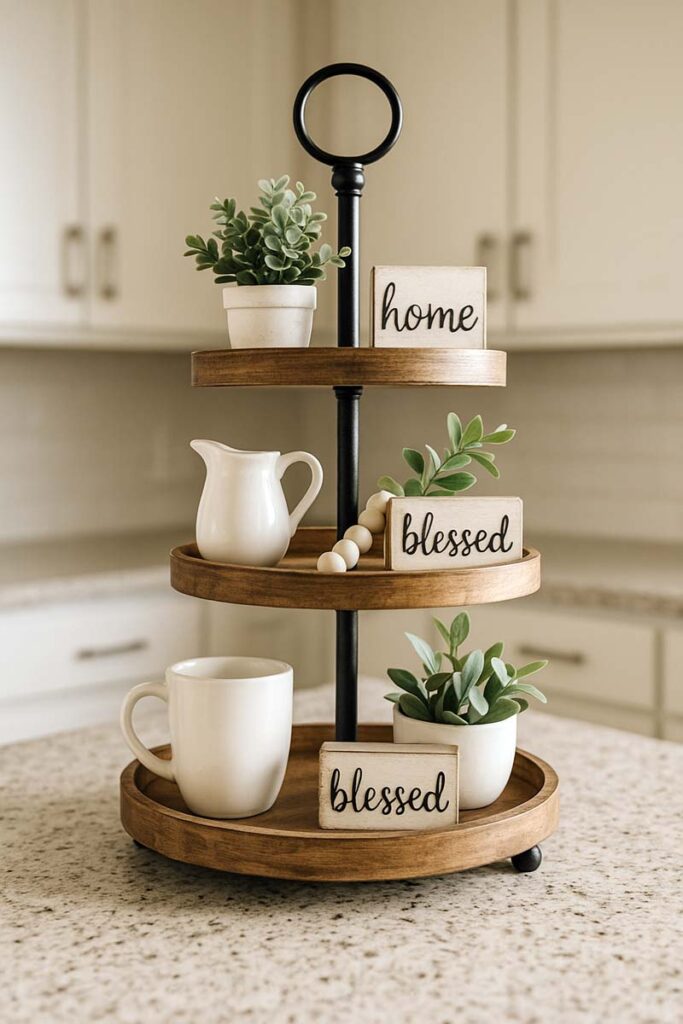
Most setups lean farmhouse or modern farmhouse. So you’ll see a lot of wood tones, white, black, and greenery with a small accent color.
You’re not trying to copy a specific shelf in the store. You’re just using the same tricks at a smaller scale on your own tray.
Also see: 3 Tier Serving Tray Ideas
Choosing the Right 3-Tier Tray
The best decor won’t help if the base tray doesn’t fit the space. So start by looking at size, material, and stability.
Material and Look
Wood trays give that classic farmhouse feel. They pair well with white mugs, black lettering, and soft greenery.
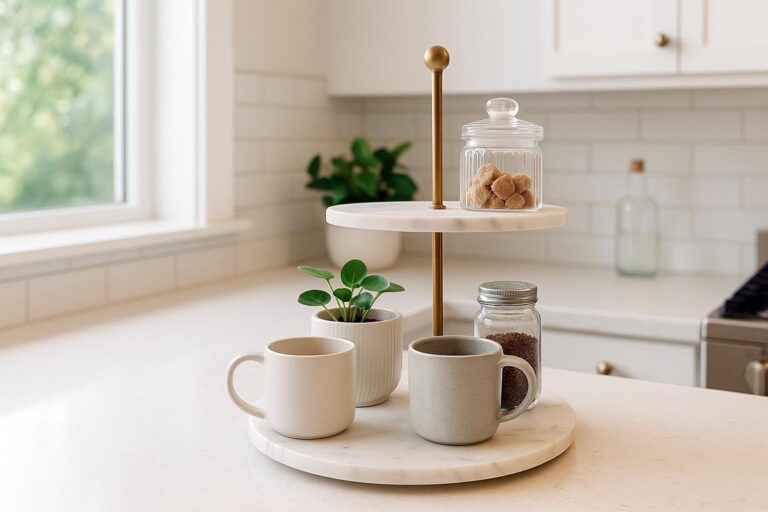
Metal trays feel a little more modern or industrial. They work well for coffee bar setups, enamel mugs, and black-and-white pieces.
Mixed wood-and-metal stands sit in the middle. They’re very forgiving if the rest of the kitchen is a mix of styles.
If you’re building or choosing a stand, think about how it will sit with your decor. A warm wood tray in a cool gray kitchen can still look great if the decor repeats both tones.
If you’re still deciding on a stand, a few builds on my site walk through shapes and proportions for three-level stands, including a turned-leg 3-tier stand project. That type of base gives plenty of room for decor while staying sturdy.
Size and Proportions
Measure the counter, table, or shelf before you commit. Leave a couple inches of clear space around the tray so it doesn’t feel crammed.
Most kitchens do well with a bottom tier around 12–16 inches wide. Bigger than that starts to dominate the counter unless you’ve got a big island.
Check the space between tiers too. You’ll want enough height for small signs and mugs without everything bumping the level above.
Stability and Safety
A three-level tray can get top-heavy fast. Heavier decor should live on the bottom tier, not the top.
Give the stand a gentle shake before loading it up. If it wobbles, tighten hardware or add small pads under the base to even it out.
Don’t stack fragile items on the very edge. One bump from kids or elbows can send those straight to the floor.
Plan Your Theme Before You Shop
Walking into Hobby Lobby with no plan usually leads to random pieces. Those are harder to turn into a clean tray display.
Pick one clear theme and a tight color palette first. Then everything you buy has to earn its place.
Here are a few helpful theme ideas:
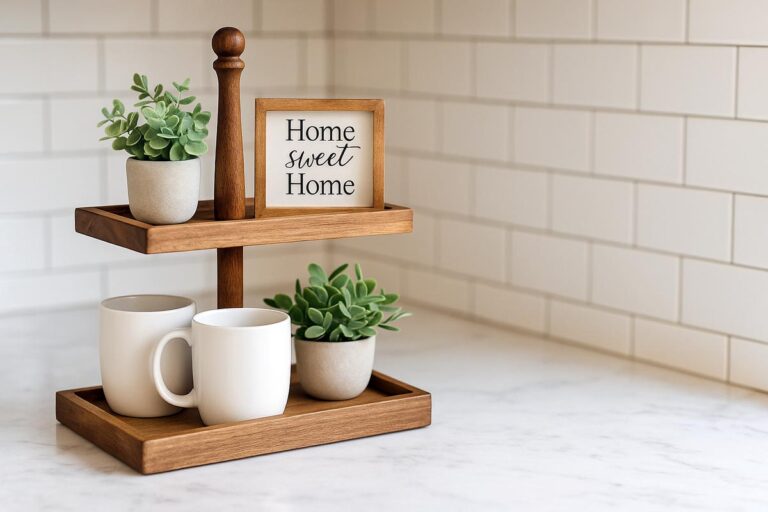
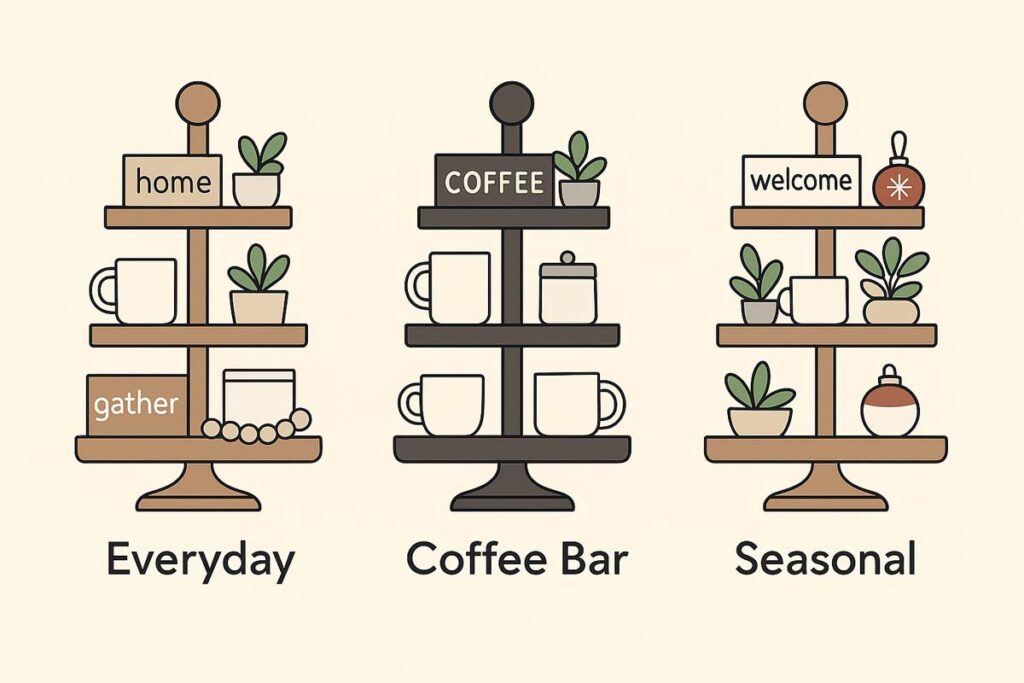
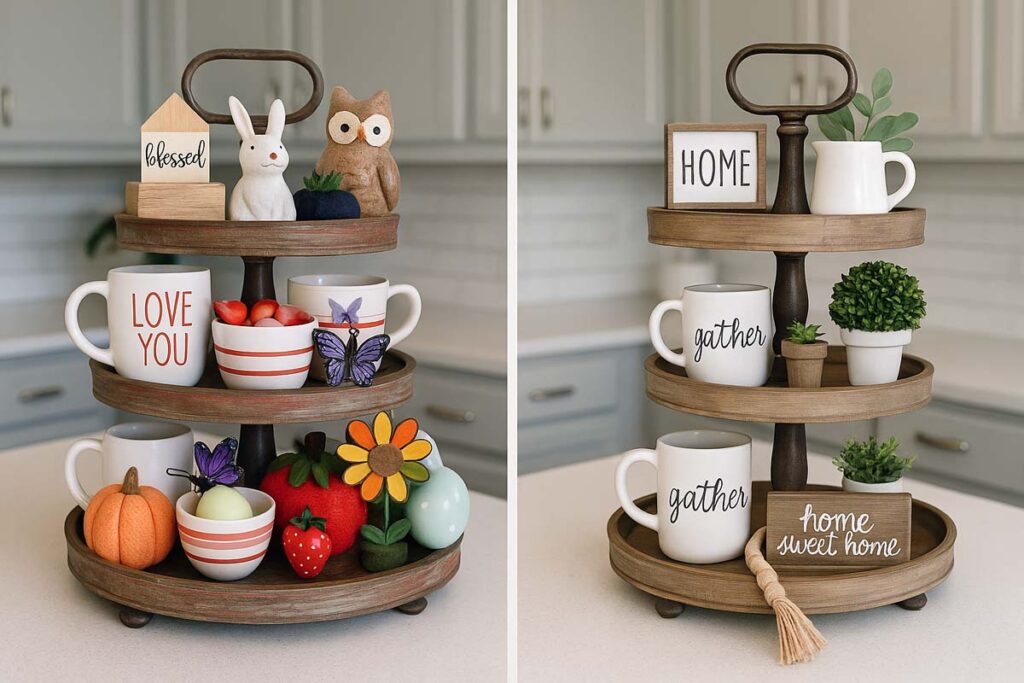
- Everyday farmhouse: Neutral signs, greenery, wood beads, mini houses, simple word art.
- Coffee bar: Mugs, scoops, canisters, “coffee” signs, black-and-white pieces.
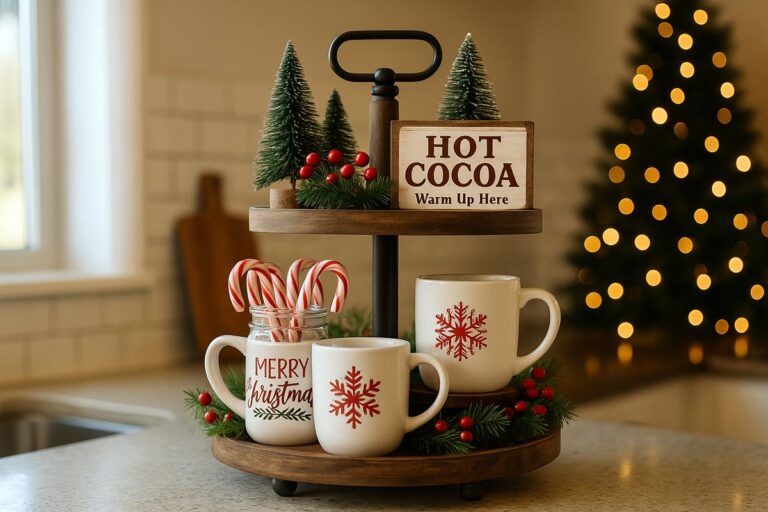
- Seasonal or holiday: Base neutrals plus one accent color, themed signs, mini ornaments, and figurines.
- Kitchen everyday: Faux herbs, simple jars, towels, and small “gather” or “kitchen” signs.
Stick to two main neutrals and one accent color. For example, white and wood with touches of sage green.
If a piece doesn’t fit the theme or colors, set it back. It’ll look better somewhere else than forced onto the tray.
Here are some common themes and how they usually look:
| Theme | Main Colors | Typical Pieces |
|---|---|---|
| Everyday farmhouse | White, black, wood tones | “Home” signs, beads, greenery, lanterns, mini houses |
| Neutral kitchen | Cream, gray, wood | Mugs, canisters, faux herbs, “coffee” or “gather” signs |
| Seasonal / holiday | Base neutrals + 1 accent | Little signs, figurines, themed beads, mini trucks, florals |
| Coffee bar | Black, white, metal | Mugs, scoops, canisters, coffee tags, sugar bowl |
| Bathroom tray | White, glass, greenery | Jars, rolled towels, soap pumps, small signs |
If you want more theme breakdowns, there’s a separate guide on 3-tier tray decor ideas that groups setups by style. That can help you pick a direction before touching any decor.
Know more: WILDMOS Wooden 3 Tier Cupcake Stand
Step-by-Step: How to Decorate a 3-Tier Tray
Use the same process every time and styling gets much easier. Here’s a simple order that works well for “Hobby Lobby style” trays.
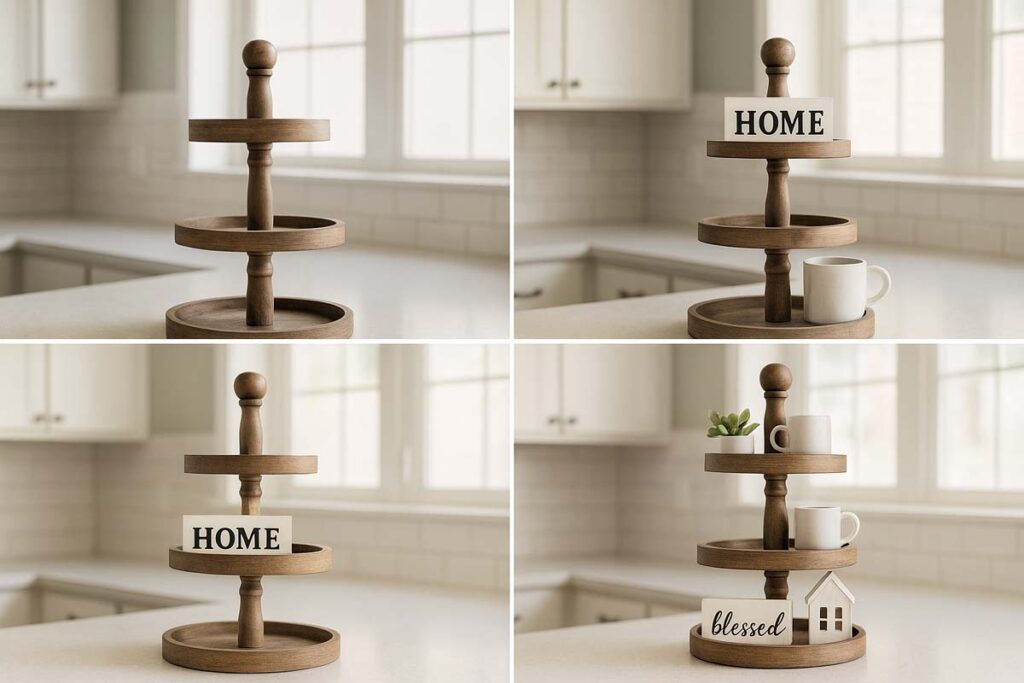
Step 1: Start With a Clean Tray
Take everything off the stand. Wipe it down so you’re not decorating on top of dust.
Set decor out on the table where you can see it. Group pieces by size and color so your choices are easier.
Step 2: Place Your Tall “Anchor” Pieces
Anchors are the taller items that set the tone. These might be signs, small plants, lanterns, or bigger mugs.
Put one strong piece on the top tier. Then add one or two anchors to the bottom tier.
Keep them close to the center of each tier, not hanging off the edge. That keeps the tray balanced and draws the eye inward.
Step 3: Add Medium-Size Pieces Around Them
Now fill in with medium-height decor. Think jars, shorter signs, small vases, or bowls.
Angle pieces slightly so they’re not all facing straight forward. The tray should look good from more than one direction.
Repeat similar shapes or finishes on different tiers. For example, a white jar on the middle tier and a white mug on the bottom.
Step 4: Tuck in Small Items and Greenery
Use tiny objects to fill gaps. Mini houses, little animals, small bowls, and tags all work well here.
Then add greenery last. Tuck small sprigs under signs, around mugs, and near the edges.
Let greenery trail just slightly over the tiers. That softens the whole display without hiding anything important.
Step 5: Step Back and Adjust
Look at the tray from the front and both sides. You’re checking for balance, not perfection.
Ask a few quick questions. Is there a nice mix of heights, are colors repeating, and does anything feel crowded?
Remove one or two pieces if it feels heavy. Most trays look better slightly under-filled than packed solid.
What to Put on Each Tier
Each level has its own job. Thinking that way keeps the layout organized.
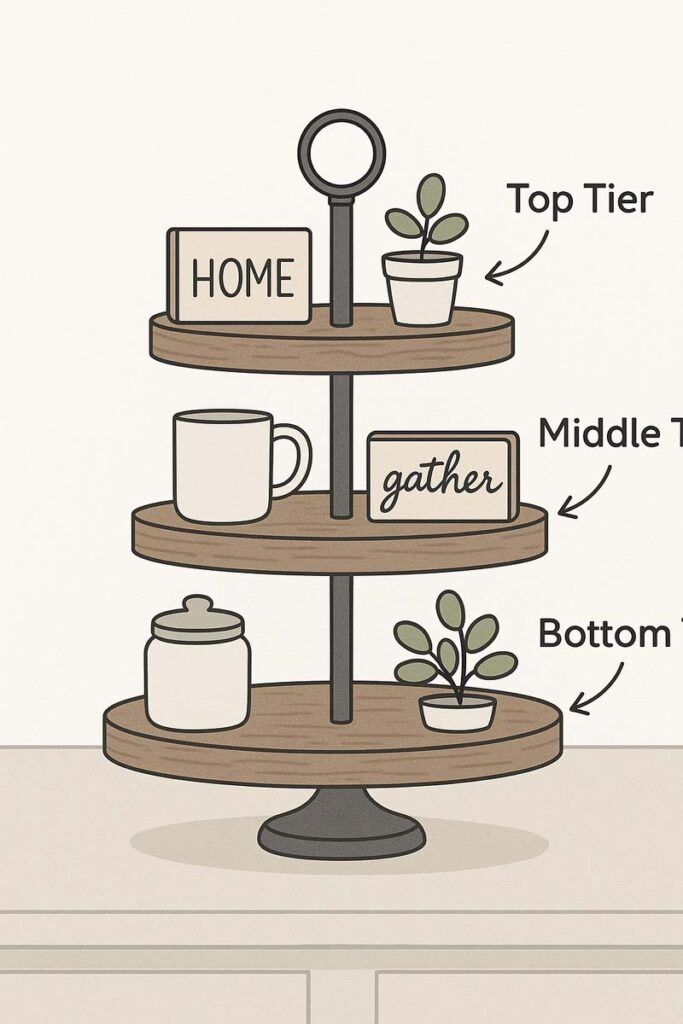
Top Tier
The top is the focal point. It doesn’t need a lot of stuff.
Use one strong item and maybe one tiny piece. A small sign and a little plant is often enough.
Anything up here should be easy to read from across the room. Avoid clutter that hides your main piece.
Middle Tier
The middle connects top and bottom. This is where you mix medium pieces and practical items.
Mugs, jars, and short signs work well. You can also use a sugar jar or napkins on a coffee bar tray.
Keep heights staggered but not too tall. You still want to see the anchor on the top tier.
Bottom Tier
The bottom holds weight and grounds the whole stand. Give it a bit more decor than the top tier.
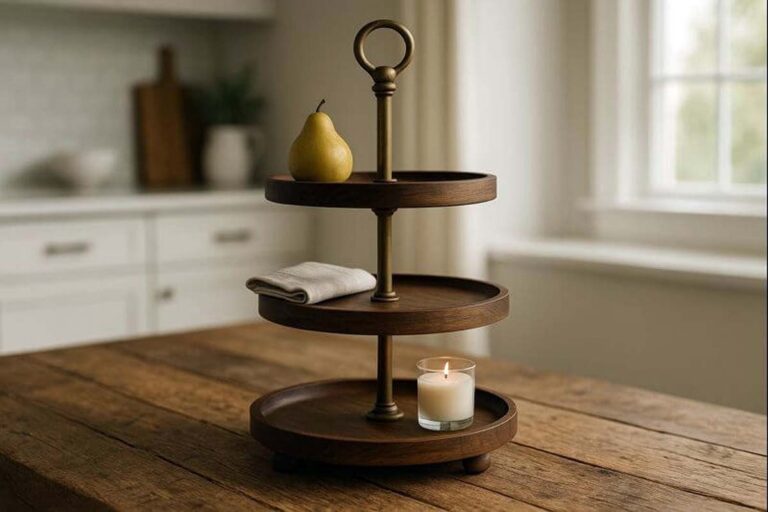
Use larger signs, stacked books or faux books, and heavier jars. This is a good place for functional pieces like bowls of wrapped candy.
Leave just a bit of empty space near the edge. That small gap keeps the tray from feeling like it’s spilling outward.
Common Mistakes With 3-Tier Tray Decor
A few easy traps show up over and over. They’re simple to fix once you spot them.
Too many colors
When five or six shades show up, the tray starts to look busy. Stick to two neutrals and one accent color for cleaner displays.
Everything the same height
If everything is short, the tray feels flat. Use small risers, stacked coasters, or mini books to lift a few pieces.
All decor, no function
In a kitchen or coffee area, leave room for something useful. One “working corner” on the bottom tier keeps the display practical.
Top-heavy layouts
Big heavy pieces up high make the stand easier to tip. Keep glass, ceramic, and weight down low whenever possible.
Maintenance and Storage
Good-looking trays don’t stay that way by accident. A little upkeep goes a long way.

Give the stand a light dusting once a week. Use a soft cloth or small brush for detailed signs and greenery.
If food ever touches the surface, follow the finish directions. Use liners or plates if the tray isn’t sealed for direct contact.
When seasons change, pack decor by theme. Label bins “Fall,” “Christmas,” “Everyday,” so the next refresh is simple.
Wrap fragile pieces in paper before storing. That keeps paint and finishes from rubbing off in the bin.
FAQs About 3-Tier Tray Decor and Hobby Lobby
How do you decorate a 3-tier tray on a small budget?
Start with neutral basics like plain mugs, simple signs, and greenery that work year-round. Then add just a few low-cost seasonal pieces, such as mini ornaments, wood tags, or small figurines, to change the look without rebuying everything.
How many items should go on each tier?
Most trays look good with three to five pieces per tier, depending on size.
If decor starts blocking other items or you can’t see the tray surface at all, remove one or two pieces until the layout breathes again.
What kind of greenery looks best on a 3-tier tray?
Small faux eucalyptus, boxwood, or olive stems are easy to work with and don’t overpower decor. Choose flexible stems you can bend and cut into smaller pieces, then tuck them around signs, mugs, and jars to soften hard edges.
Can you mix store-bought and handmade decor on the same tray?
Yes, and that usually looks more personal. Use store-bought basics for consistency, then mix in a few handmade tags, mini signs, or wood pieces that match your colors so the tray feels custom without clashing.
Conclusion
3 tier tray decor hobby lobby fans enjoy follows the same simple structure every time.
A sturdy stand, a clear theme, repeated colors, and a smart mix of heights.
Use that structure and you won’t rely on guesswork. You’ll know exactly why a display looks good and how to fix it when it doesn’t.
Over time, the tray becomes an easy part of your home’s rhythm. It changes with seasons and holidays, but the method stays the same.