Vintage 3 Tier Serving Tray: 11 Smart Ways to Choose, Fix & Style It
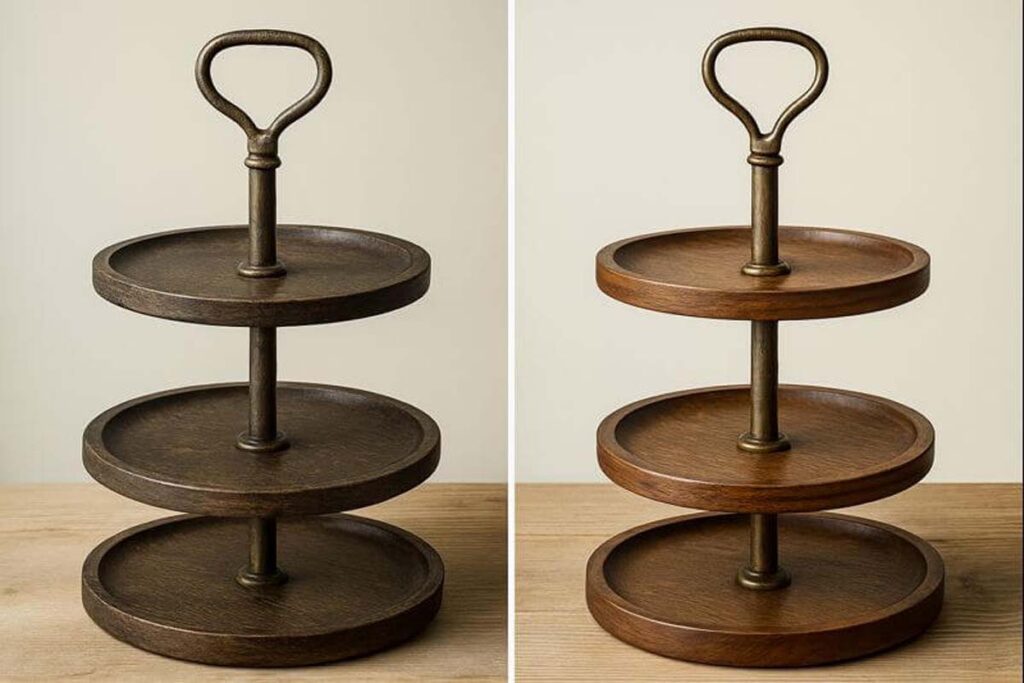
A vintage 3 tier serving tray isn’t just “old-looking.” It’s a tray with classic proportions, warmer finishes, and hardware that feels substantial in your hands. It can serve food, hold décor, or live on your counter every day. The trick is picking one that’s stable and then treating it right, so it stays that way.
What “vintage” really means on a 3 tier tray
When people say “vintage,” they usually mean one (or a mix) of these:
- Older construction (real wood, thicker plates, metal rod hardware, heavier base)
- Older styling (turned center post, scalloped edges, beadboard, warm stain, aged brass, dark iron)
- A patina that looks earned, not painted-on (small finish wear, softened corners, light hardware oxidation)
A true vintage piece often shows thoughtful build choices. The trays tend to be thicker. The center rod is usually steel, not a thin aluminum tube. And the balance is better, because it was built to be carried.
If you’re shopping modern-but-vintage-looking, focus less on “distressed” paint and more on structure.
Why people keep these trays around
A 3 tier tray earns its place because it solves small problems:
- Vertical storage on a crowded counter
- Easy resets (move one tray instead of ten items)
- Fast hosting (set up desserts, fruit, or cups without spreading out)
- Seasonal styling without redecorating the whole room
Plus, the three levels naturally create “layers,” which makes even simple items look intentional.
If he’s buying one for a small apartment, the vertical footprint matters even more. A tray that uses height well can replace a whole section of countertop clutter.
Benefits and drawbacks you should know before buying
Benefits
- Space efficiency: three surfaces in one footprint
- Visual order: items look grouped instead of scattered
- Versatility: works for food, décor, coffee bar supplies, or bathroom storage
- Portability: a sturdy handle makes it easy to move as one unit
Drawbacks
- Stability issues if the base is too light or the rod is thin
- Cleaning hassles if the finish is porous or the tiers aren’t removable
- Food safety concerns if an old finish is flaking or unknown
- Height limits on lower tiers (tall mugs may not fit)
None of those are dealbreakers. They just mean you should inspect before you commit.
How to pick a vintage 3 tier serving tray that won’t wobble
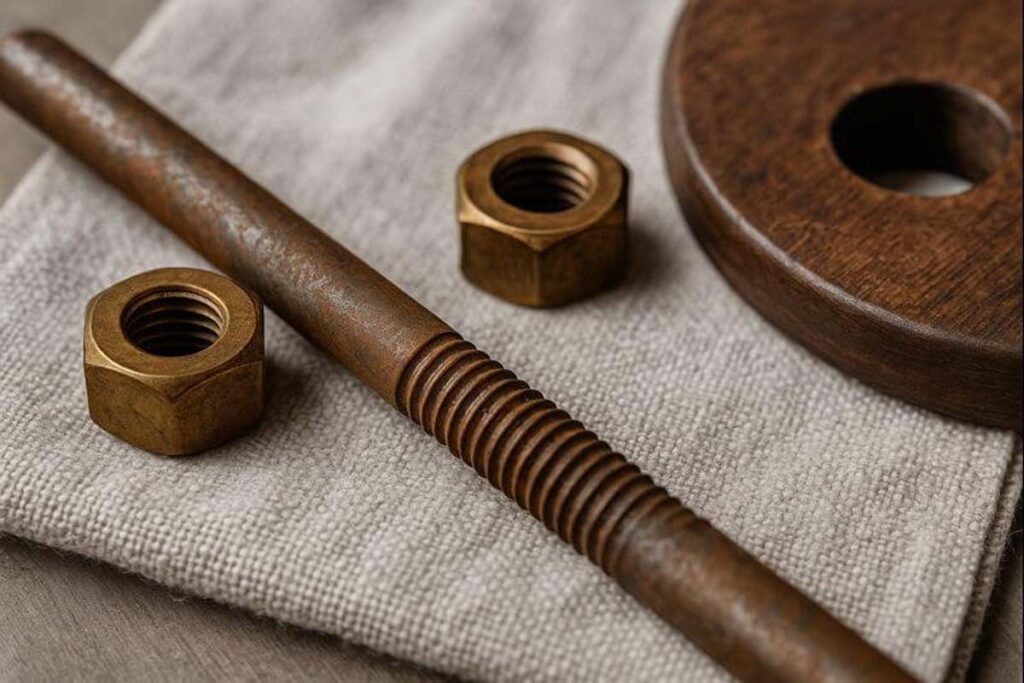
1) Start with the base and center rod
A stable tray starts at the bottom.
Check for:
- A wide bottom tier (it acts like an outrigging base)
- A thicker center rod that doesn’t flex when you gently shake the handle
- Metal washers between tiers (they help distribute pressure)
If the rod threads are stripped, the tray will never stay tight for long.
2) Check the tier material
For wood tiers, look at end grain or the underside. Solid wood is great, but well-made plywood can also last if edges are sealed and hardware is tight.
Want more detail on wood behavior (movement, strength, dents)? This guide helps when you’re comparing options: how different woods really behave.
3) Measure clearance between tiers
A tray can look big and still be useless if spacing is tight.
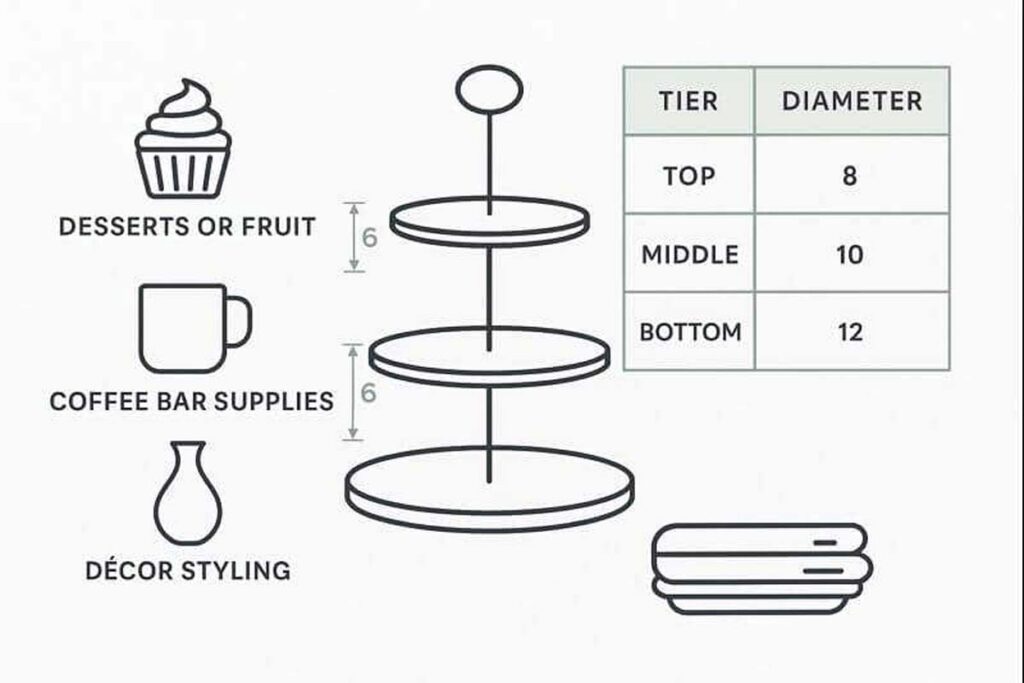
Here’s a practical sizing cheat sheet:
| Use case | Recommended tier diameter | Clearance between tiers |
|---|---|---|
| Desserts + fruit | 10–12″ | 7–9″ |
| Coffee bar (pods, sugar, stirrers) | 9–11″ | 6–8″ |
| Décor styling (mini vases, candles) | 10–13″ | 8–10″ |
4) Inspect joinery and tray rims
A rim that’s just brad-nailed on can loosen with carrying.
Better signs:
- A rim that’s glued and pinned
- A rim that’s part of the tray profile (routed edge)
- No gaps at corners or seam lines
5) Decide if it’s for food, décor, or both
If it’s for food, the finish matters more. If it’s décor-only, you have more freedom to keep the patina.
For serving-specific ideas and sizing, this page is a useful reference point: how a three-level server gets used.
Step-by-step: clean and restore a vintage 3 tier serving tray
Restoration doesn’t have to mean stripping to bare wood. Go from gentle to aggressive. Stop when the tray looks good and feels safe.
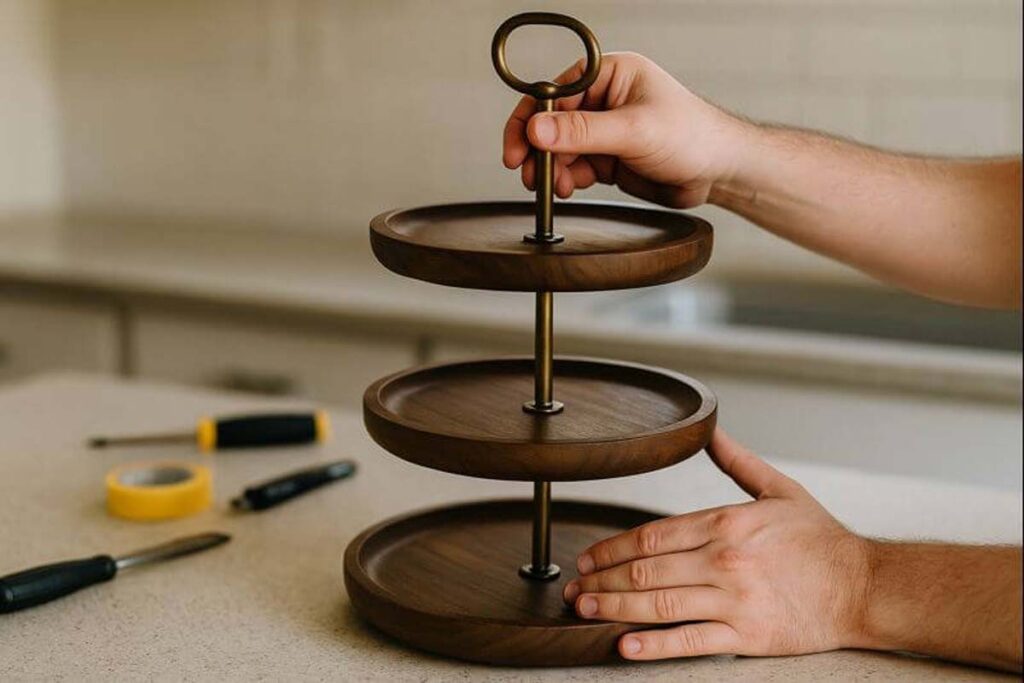
Step 1: Take it apart (if it’s designed to)
- Lay a towel down.
- Remove the top handle and slide tiers off the rod.
- Keep washers and spacers in order.
If it’s glued and fixed, don’t force it. Work assembled.
Step 2: Clean without soaking
- Use a soft cloth with warm water and a drop of mild soap.
- Wipe, don’t flood.
- Dry immediately.
Avoid soaking old wood or letting water sit around the rod holes. That’s how swelling starts.
Step 3: Deodorize (only if needed)
For thrifted trays that smell like storage:
- Light wipe with a 50/50 water-vinegar mix.
- Dry right away.
- Let it sit in moving air for a day.
Step 4: Tighten the hardware the right way
If the tray loosens constantly:
- Add a thin washer between metal-on-wood contact points.
- Check that the rod isn’t bottoming out in the handle.
- Tighten from the top while holding the bottom steady.
If the tray keeps loosening after this, the rod threads may be worn.
Step 5: Address rust and tarnish
- Use a gentle metal polish on the rod and handle (keep it off the wood).
- For light rust, a gray Scotch-Brite pad can help.
- Wipe residue fully so it doesn’t stain your tiers later.
Step 6: Fix the finish based on how you’ll use it
This is where people overcomplicate things. Keep it simple:
If it’s décor-only:
- Clean well.
- Light scuff with a fine sanding sponge only where it’s rough.
- Apply a thin protective topcoat that won’t look plasticky.
If it will touch food:
- Don’t keep a flaking or mystery finish.
- Strip or sand to a clean, stable surface.
- Apply a food-safe finish you trust, and let it cure fully.
In short, If you want a deeper walkthrough on durability-focused finishes and wood prep, these two help:
Step 7: Level the wobble
A wobble usually comes from one of three things:
- uneven feet
- warped bottom tray
- loose rod stack
Fix it like this:
- Set it on a known flat surface.
- Identify the “high corner.”
- Add a thin felt pad under the opposite side, or replace pads evenly.
Don’t sand the base aggressively unless you’re prepared to refinish it.
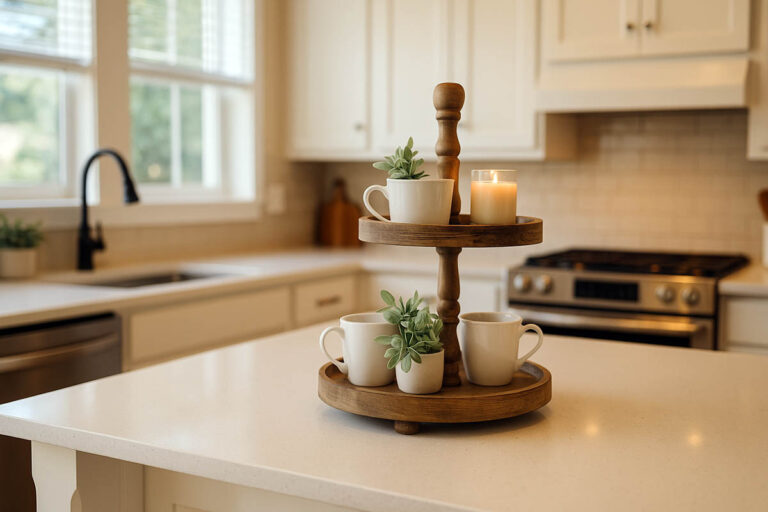
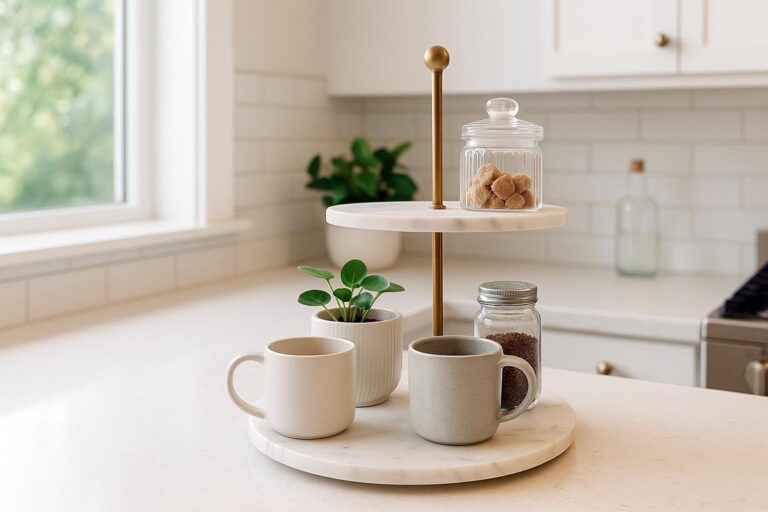
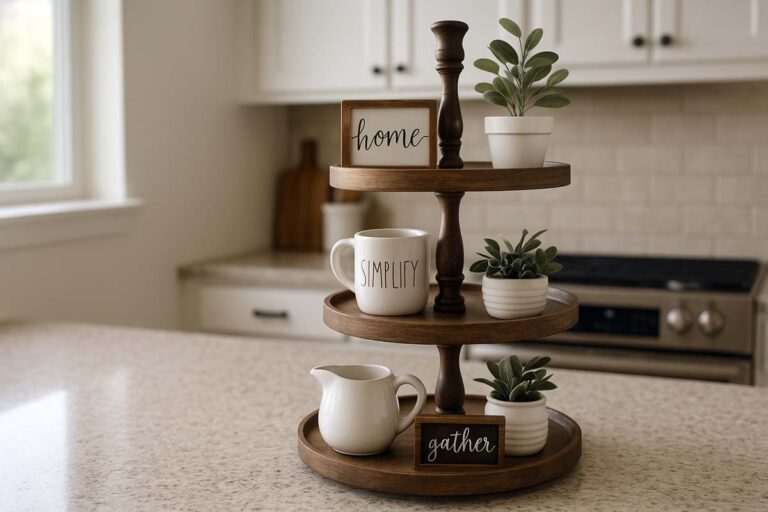
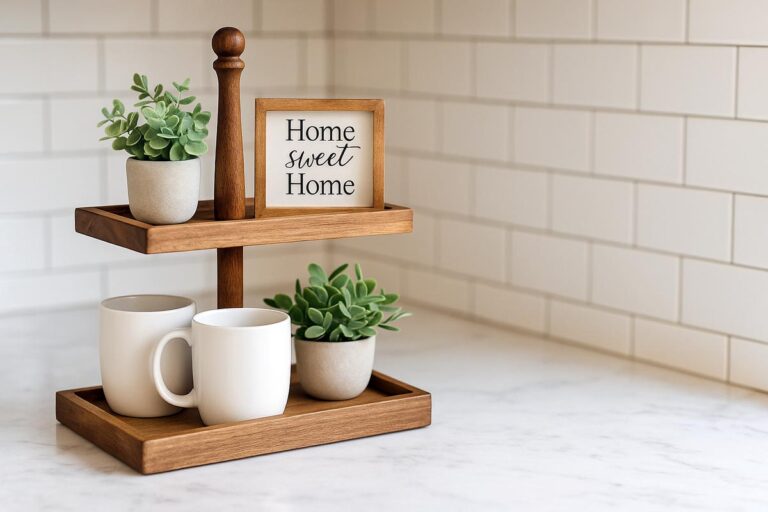
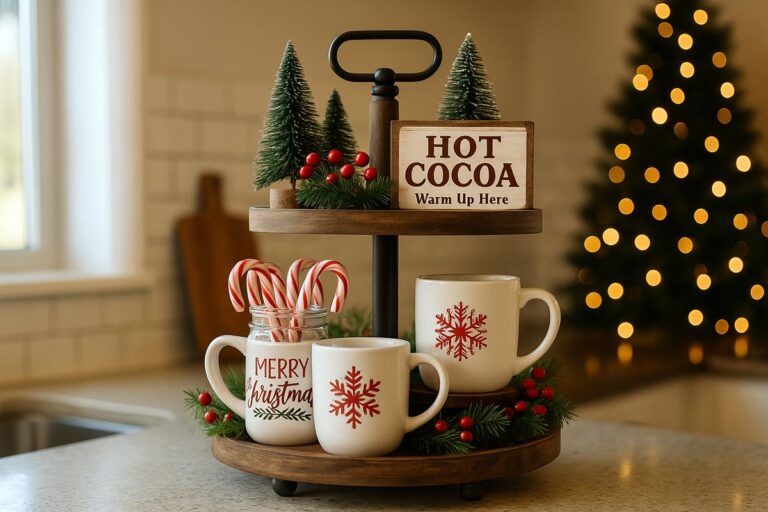
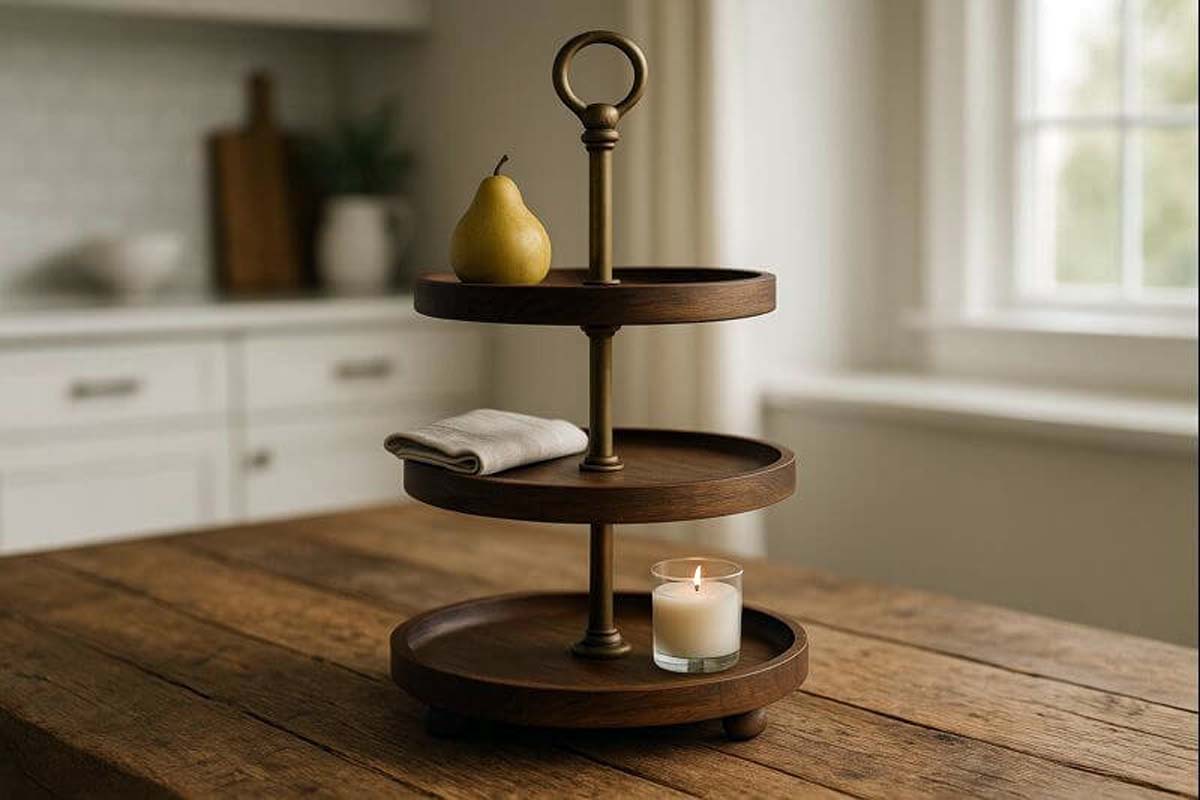
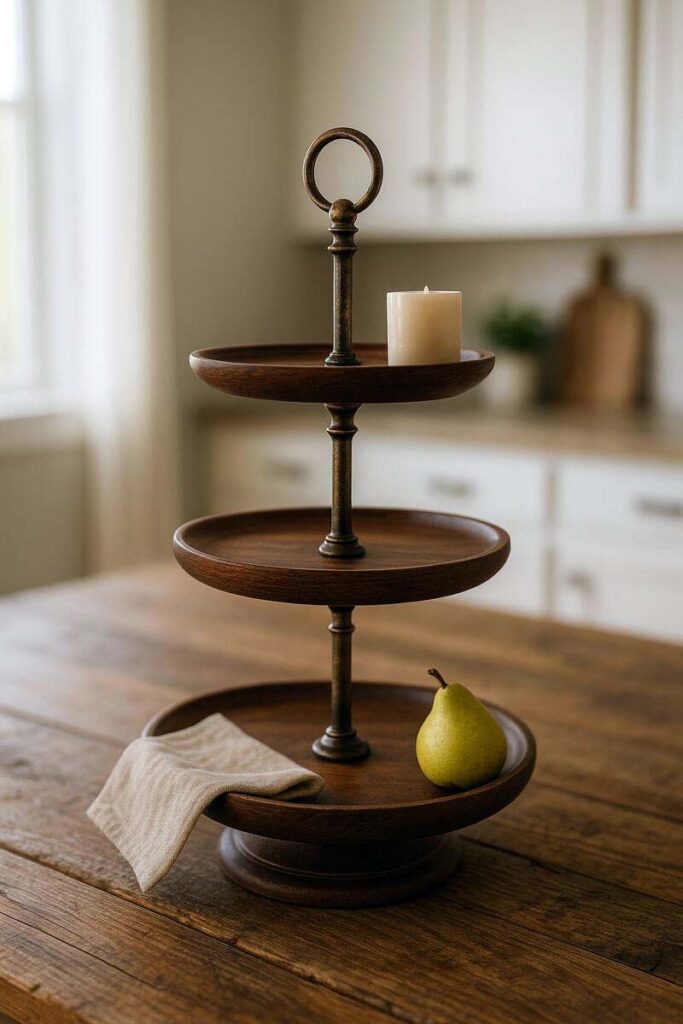
How to style a vintage 3 tier serving tray so it looks intentional
Styling should feel easy. The tray already gives you structure. Use that structure.
The simple styling rule: heavy bottom, lighter top
- Bottom tier: heavier items (small books, stacked plates, jar candles, wrapped napkins)
- Middle tier: medium height (mugs, small bowl, mini pitcher, small plant)
- Top tier: lighter visual weight (small sign, pinch bowl, tiny vase)
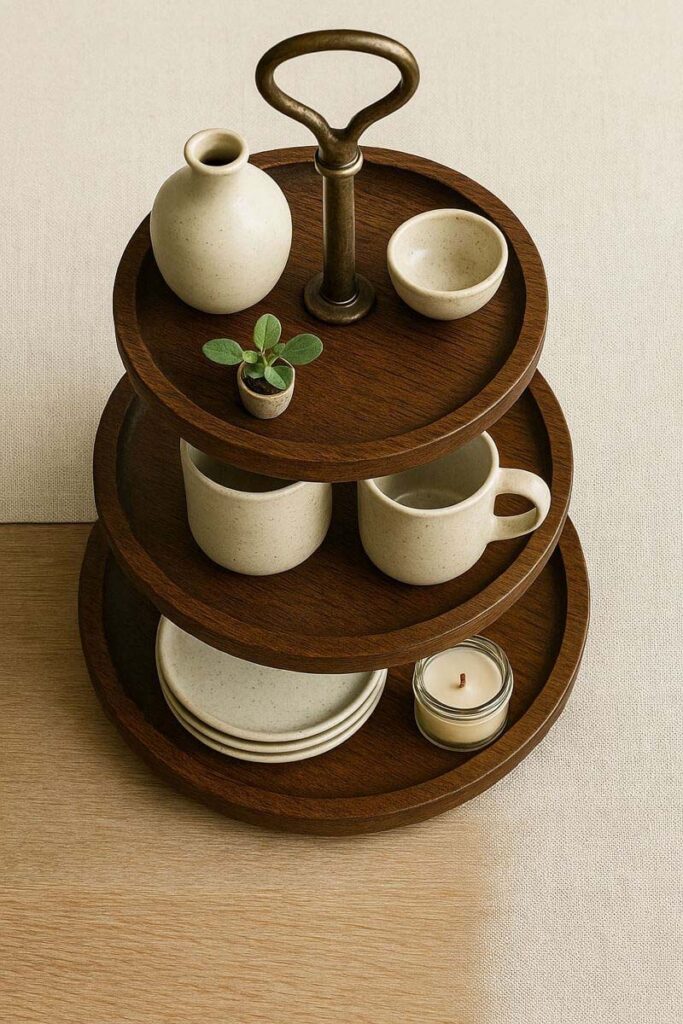
Use three item types, then stop
For most setups, three categories look clean:
- one practical item (napkins, sweetener, utensils)
- one texture item (wood beads, linen, greenery)
- one seasonal accent (ornament, mini pumpkin, small flag)
If you keep adding, it turns into clutter fast.
For styling examples and layout logic, these posts fit the same approach:
Vintage look without fake distressing
If the tray already has age, let it show. Then match it with:
- muted metals (brass, iron, pewter tones)
- warm whites, creams, and natural linen
- real wood tones (not high-gloss)
However, avoid mixing too many “themes.” A vintage tray paired with ultra-modern neon pieces fights itself.
Where a vintage 3 tier tray works best in a home
These are the spots where the tray earns daily use:
- Kitchen counter: coffee bar supplies, fruit, snacks
- Dining table: napkins, utensils, dessert station
- Entryway: keys, wallet tray, small plant, mail sorter
- Bathroom: hand towels, cotton rounds, soaps (keep wood sealed)
- Office: pens, sticky notes, chargers (top tier for small items)
Next, treat it like a “portable zone.” Set it up once, then move the whole thing when you clean.
Safety and upkeep that actually matters
A tray stand gets handled. Hardware loosens. Wood dents. Maintenance keeps it from becoming a shaky mess.
- Re-tighten the rod monthly if it’s used daily.
- Don’t lift it by the top handle if the load is heavy. Support the base too.
- Keep it away from direct stove heat and steam.
- Use felt pads to protect both the tray and your counter.
If you’re building or modifying stands, safety gear and tool care should be part of the plan:
FAQs
How can you tell if a vintage 3 tier serving tray is safe for food?
Check for flaking, sticky, or unknown finishes, especially on flat surfaces. If the finish is unstable or has a strong odor, refinish to a known food-safe surface and allow full curing before serving.
What’s the easiest way to stop a 3 tier tray from loosening over time?
Add washers at metal-to-wood contact points, tighten from the top while stabilizing the base, and confirm the rod threads are clean. Regular light re-tightening works better than over-tightening once.
Can a vintage tray be used in a bathroom without damaging the wood?
Yes, but only with a sealed surface and controlled moisture. Keep it away from direct splash zones, wipe condensation quickly, and use pads under containers to prevent trapped water rings.
What finish works for a vintage look without looking messy?
Use a base color (stain or dye), then add a glaze for depth, and protect it with a clear topcoat. Keep distressing limited to natural wear points like rims and handles so the aging looks intentional.
Final thoughts
A vintage 3 tier serving tray should feel steady, not delicate. Choose one with a solid base, a stiff center rod, and usable spacing. Clean it gently, tighten it correctly, and only refinish as far as needed for safety and durability. Then style it with weight at the bottom, lighter pieces up top, and a clear purpose for each tier.
If the tray wobbles, don’t ignore it. Fix the cause early, because wobble turns into cracks, stripped threads, and chipped finishes. Keep the setup simple, use it daily, and let the wear look natural. That’s the whole point of vintage—functional pieces that still look right after years of real use.