3 Tier Serving Tray – 9 Smart Ideas for Hosting, Decor and Storage
A 3 tier serving tray looks simple, but it can do a lot of work for you. It saves table space, makes food look better, and doubles as decor when you’re not hosting. If you’re trying to decide which tray to buy or how to actually use one without it turning into a wobbly clutter tower, you’re in the right place. In this guide you’ll see what a 3 tiered serving tray is, who it’s for, what to watch out for, and how to use it step by step.
What is a 3 tier serving tray, really?
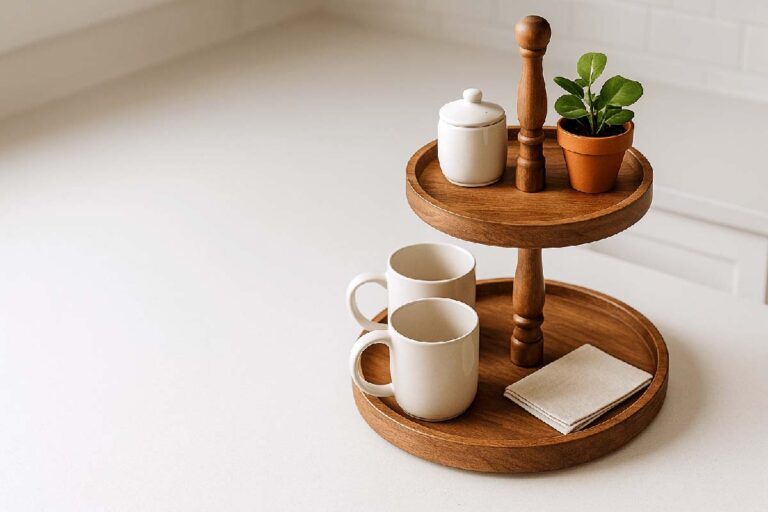
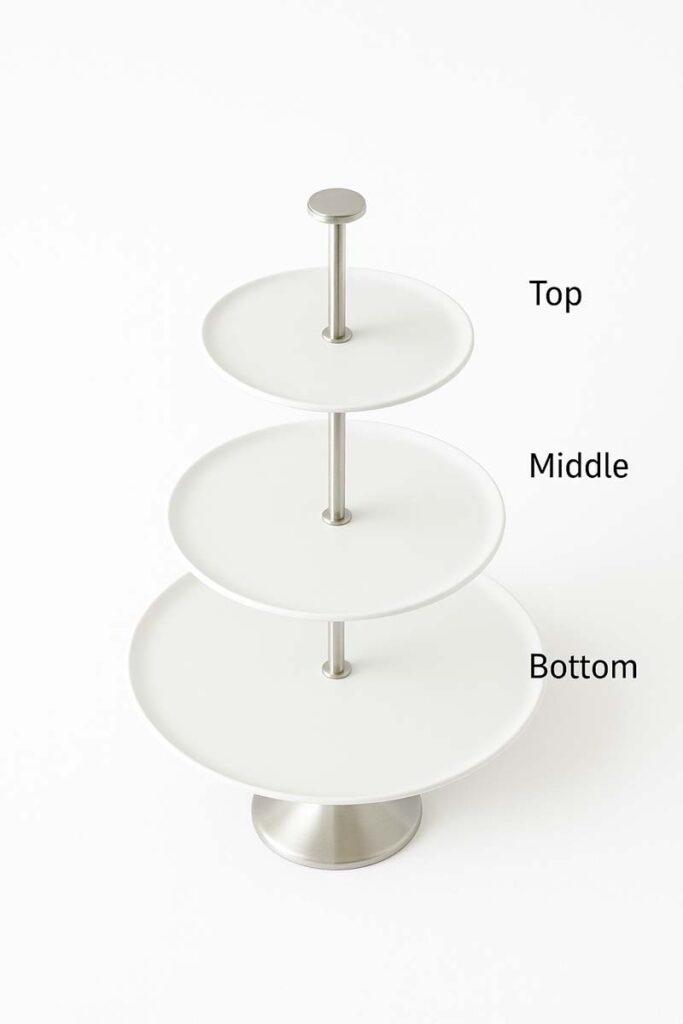
A 3 tier serving tray is a vertical stand with three levels (tiers) stacked on a center pole or frame. Each tier is basically a shallow tray or plate. The whole thing is meant to hold food or small items in a compact footprint.
In simple terms:
- Bottom tier: largest, usually for heavier or more used items.
- Middle tier: medium size, used for sides or snacks.
- Top tier: smallest, used for light or decorative items.
You’ll normally see these trays used for:
- Desserts and cupcakes
- Cookies and pastries
- Fruit or finger foods
- Tea sandwiches
- Appetizers and snacks
You also see them used as decor stands for candles, plants, seasonal pieces, or bathroom and coffee bar storage. So even though the name says “serving tray,” it’s really a flexible tiered stand.
Why even bother with a 3 tier serving tray?
If you’re tight on space or you like a clean table layout, a 3 tier tray solves a few problems at once.
Main benefits
1. Uses vertical space instead of table space: Most dining tables and counters get cluttered fast. A 3 tier tray stacks things up, not out. You can keep your main table surface open for plates and glasses while snacks or desserts live on one compact footprint.
2. Makes food look more intentional: Even simple store-bought cookies look better when they’re stacked at different heights. The tray creates a focal point, which makes the whole spread feel more put-together with almost no extra effort.
3. Keeps things organized by level: You can group items by:
- Type (savory vs sweet)
- Course (sandwiches, then dessert)
- Flavor (spicy vs mild)
That way people don’t have to dig around. They just look at each tier and grab what they want.
4. Works for food and decor: Between parties, you don’t need to hide it away. You can load it with:
- Small plants or greenery
- Candles or lanterns
- Mugs and coffee supplies
- Bathroom jars for cotton pads, soaps, etc.
So you’re not buying something that only comes out twice a year.
5. Easy to carry and move: Most 3 tiered serving trays have a handle or center knob. You can load it in the kitchen and carry the whole setup to the table or patio in one trip.
Drawbacks and when a 3 tier tray is a bad idea
It’s not perfect for every situation. There are a few things to watch.
1. Can be top-heavy if loaded wrong: If you stack heavy items on the top tier, or the base is narrow, the tray can tip. For homes with young kids or pets, this matters. You want heavier food low and lighter items high.
2. Taller trays don’t fit under low cabinets: On a counter with low upper cabinets, a tall tray may not fit. You don’t want to buy something you have to tilt to move.
3. Not ideal for saucy or messy foods: Anything that drips or needs a lot of serving utensils is better in regular dishes. Tiered trays work best with “grab-and-go” foods.
4. More pieces to clean: Instead of one flat tray, you’re cleaning three shelves plus the center pole. For some people that’s not an issue; for others it gets old fast.
If any of these are deal-breakers, you may want a single-level serving platter or a shorter 2 tier tray instead.
Materials: what your 3 tier serving tray should be made of
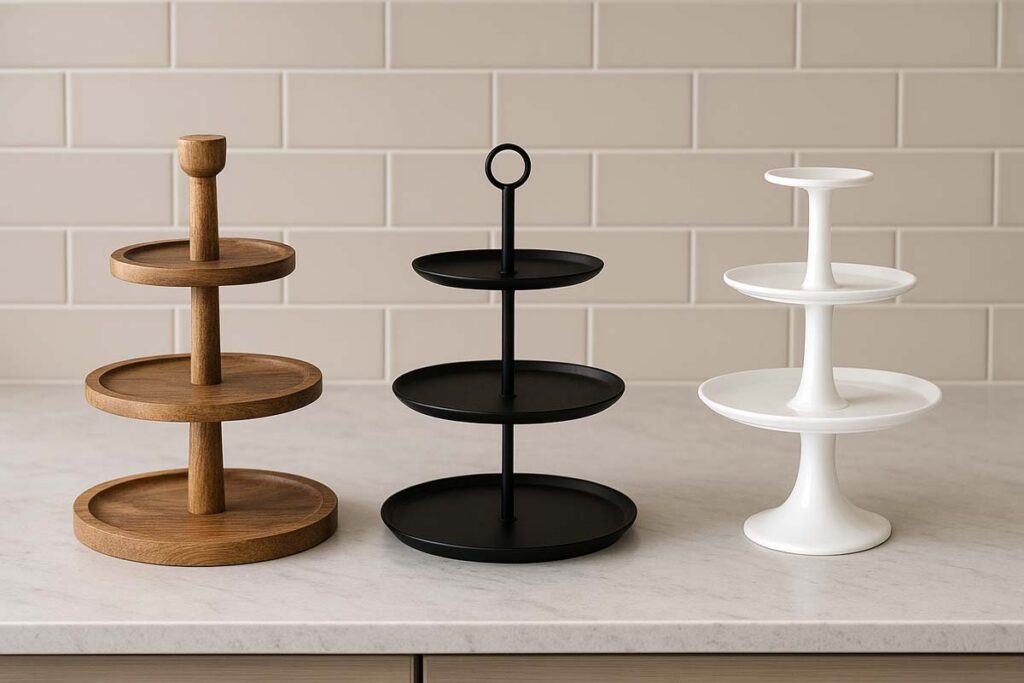
Material decides how the tray looks, feels, and holds up over time. Here’s a quick breakdown.
| Material | Look / Style | Best For | Watch Out For |
|---|---|---|---|
| Wood | Warm, farmhouse, rustic | Everyday decor + dry foods | Needs hand-washing, not soaking |
| Metal | Sleek or vintage, depending finish | Buffets, parties, outdoor use | Can dent or scratch, may feel cold |
| Ceramic | Clean, modern, classic | Desserts, tea parties, formal use | Heavier, can chip if dropped |
| Porcelain | Refined, bright white | Weddings, showers, special events | Fragile but elegant |
| Glass | Airy, lets food stand out | Light desserts, fruit | Shows fingerprints, more fragile |
| Plastic / Acrylic | Lightweight, casual | Kids’ parties, picnics | Can scratch or look cheap if very thin |
If you like traditional wood builds and want to go deeper into wood selection for tiered stands, you can dig into best wood types for tiered tray stands.
Where a 3 tier serving tray actually shines
You don’t buy this just for one holiday and then forget it. Here’s where it actually earns its keep.

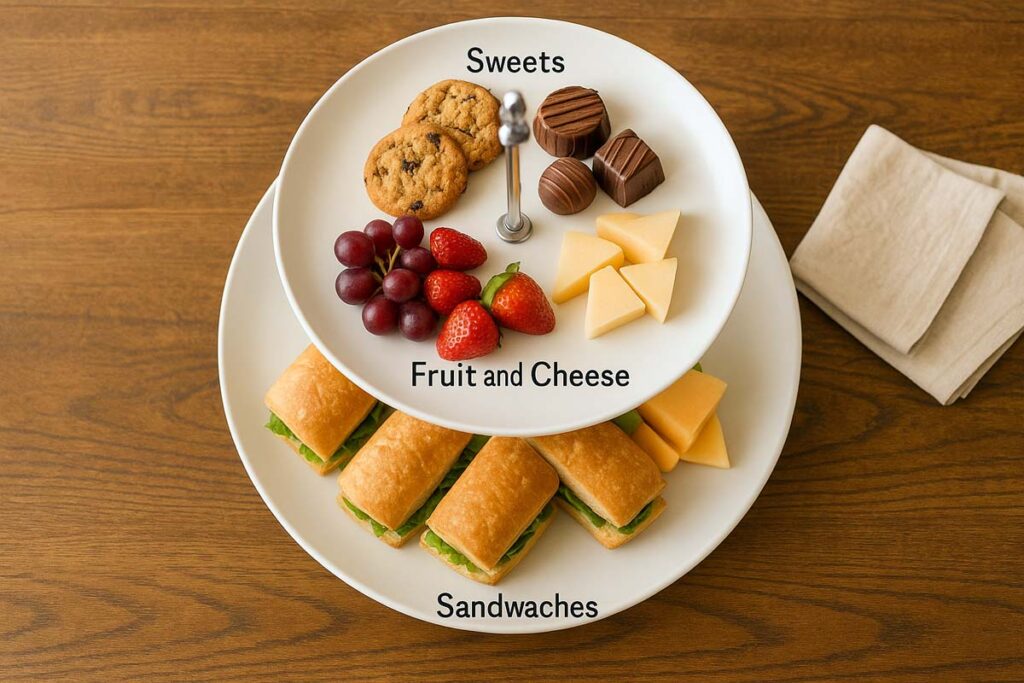
1. Brunch and family gatherings
You can load:
- Bottom tier: bagels, pastries, muffins
- Middle tier: sliced fruit, cheese, small bowls of jam
- Top tier: small sweets like macarons or chocolates
People can reach everything easily, and your table doesn’t feel crowded.
2. Dessert or cupcake station
For dessert-only setups:
- Bottom: cupcakes or brownies
- Middle: cookies or bars
- Top: candies, truffles, or decorative pieces
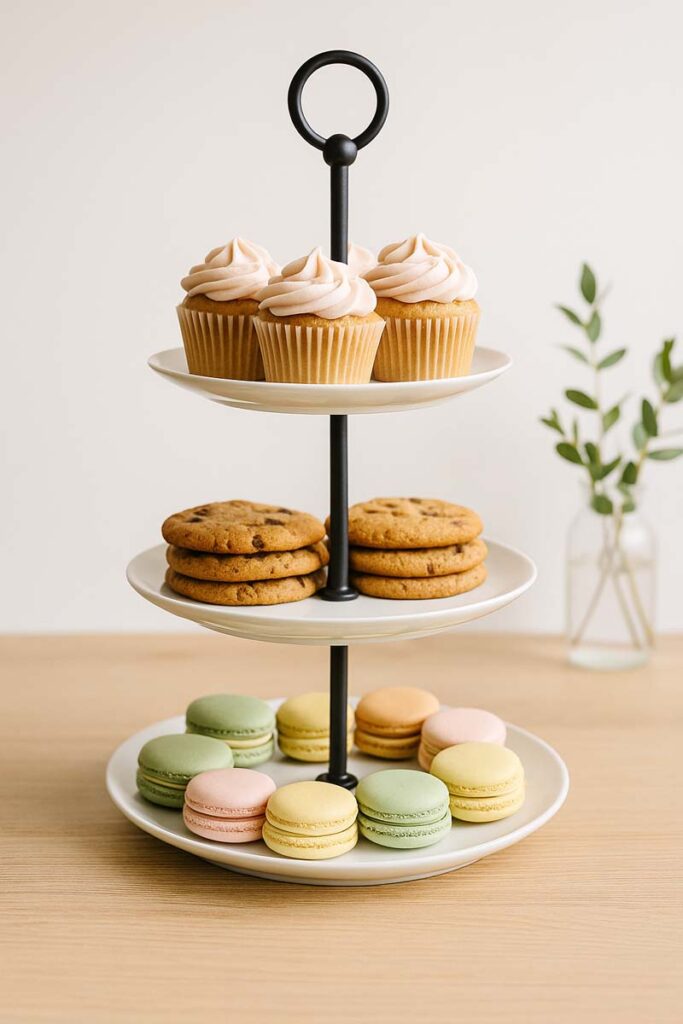
This works well on a separate dessert table, especially when you want it to look “special” without a ton of extra work.
3. Tea, coffee, or hot cocoa bar
Even though many coffee bar guides focus on 2 tier setups, the same layout logic works with three levels. You can put:
- Bottom: mugs or teacups
- Middle: sugar, cream, cocoa mix, tea bags
- Top: stir sticks, toppings, and decor
For more ideas on how to style a tiered tray as a drink station, you can borrow concepts from a coffee-focused setup like a tiered coffee bar and adapt them to your 3 tier stand.
4. Everyday decor and storage
You don’t have to pack the tray away between parties. A 3 tier tray can hold:
- Entryway: keys, mail, sunglasses
- Bathroom: rolled washcloths, soaps, jars
- Living room: remotes, coasters, small plants
If you want pure styling inspiration, you’ll pick up a lot of layout ideas from 3 tier tray decor, then tweak them to match your space.
5. Seasonal and holiday decor
A 3 tier tray is an easy base for seasonal decorating because you only decorate a tiny footprint, not a whole room. For Christmas, for example:
- Bottom: small houses, bottle brush trees, mini signs
- Middle: ornaments in bowls, greenery, ribbons
- Top: star, bigger ornament, or mini tree
If you like more Christmas-specific layouts, 3 tier tray Christmas decor ideas walks through detailed seasonal setups you can copy or modify.
How to choose the right 3 tier serving tray (step-by-step)
Here’s a straight, practical way to pick a tray without guessing.
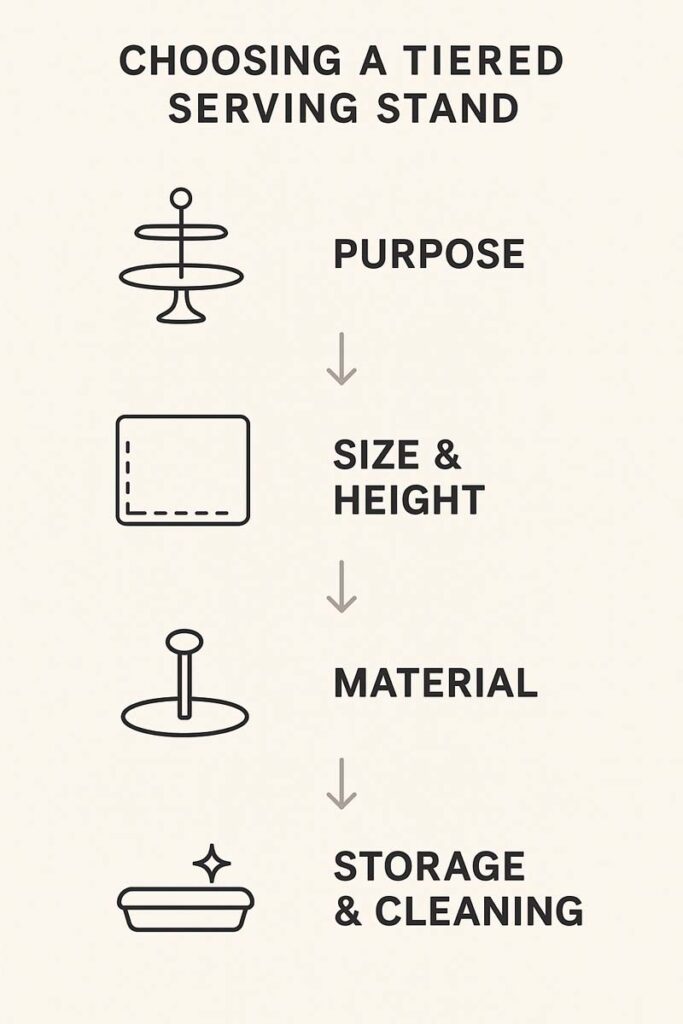
Step 1: Decide the main job
Ask one simple question: “Is this mainly for serving food, or mainly for decor?”
- Mostly food: focus on food-safe finishes, stability, and easy cleaning.
- Mostly decor: you can lean harder into style, height, and materials that look good even if they need gentle care.
You can of course mix both, but it helps to prioritize.
Step 2: Measure your space
Grab a tape measure and check:
- Height: distance from counter or table to the bottom of any upper cabinets or shelves.
- Depth and width: how much surface space you’re willing to give up.
Then compare those numbers to the tray’s listed dimensions. Don’t skip this. A lot of people end up with trays that are just a half-inch too tall.
Step 3: Pick the shape
Most common shapes:
- Round: feels softer and is easier to walk around. Great for center-of-table.
- Rectangle / square: good for buffets along a wall or narrow tables.
If your table is long and narrow, a rectangular tray often fits better and doesn’t feel like it’s “blocking” the view.
Step 4: Check the base and pole
Stability matters more than anything else.
Look for:
- A wide, flat base that doesn’t rock.
- A solid center pole that screws together snugly.
- Hardware that can be tightened with simple tools or by hand.
If the product photos show a skinny base and tall tiers, assume you’ll have to be extra careful how you load it.
Step 5: Think about assembly and storage
Some 3 tier trays come apart easily. Others are almost permanent.
Ask:
- Does it break down into flat pieces for storage?
- Are there a lot of tiny screws that can get lost?
- Will it fit in a standard cabinet if you want it out of sight?
If you live in a small place, a tray that can be disassembled into flat parts is worth it.
Step 6: Check cleaning instructions
Quick rule of thumb:
- Wood: hand wash only, no soaking.
- Metal: usually hand wash; some are safe for gentle dishwashers.
- Ceramic / porcelain / glass: often top-rack dishwasher safe if the manufacturer says so.
If you hate hand-washing, ceramic or porcelain trays with removable plates might suit you better than a one-piece wooden stand.
How to arrange food on a 3 tier serving tray
Here’s a simple layout that works for most parties and gatherings.
Step 1: Line the surfaces (optional but smart)
Use one of these:
- Parchment paper cut to fit
- Small doilies
- Food-safe liner or small plates
This protects the tray and makes cleanup easier, especially with crumbs or frosting.
Step 2: Load the bottom tier
Bottom = biggest and heaviest.
Good options:
- Sandwiches
- Sliders or savory bites
- Heavier desserts like brownies, full-size cupcakes, or scones
Spread them evenly so the weight is balanced front-to-back and left-to-right.
Step 3: Fill the middle tier
Middle = lighter food but still important items.
Ideas:
- Cheese cubes, crackers
- Fruit (grapes, berries, sliced apples with lemon)
- Smaller cookies or bars
Leave small gaps so people can grab things without knocking into other items.
Step 4: Finish the top tier
Top = lightest and smallest items.
Good picks:
- Mini cupcakes, macarons, truffles
- Wrapped candies in a small bowl
- A small decorative piece plus a few treats
Avoid any heavy ceramic bowls or large glass items on top. That’s how trays get top-heavy.
Step 5: Add finishing touches
- Tuck in a bit of greenery or a small seasonal decoration.
- Place tongs, small spoons, or napkins next to the tray, not on the tiers.
You want the tray to stay open and easy to reach, not crowded with tools.
Styling a 3 tier tray for decor (not just food)
When you’re not hosting, you can style the tray as a decor stand. A simple approach is “function on the bottom, fun on the top.”
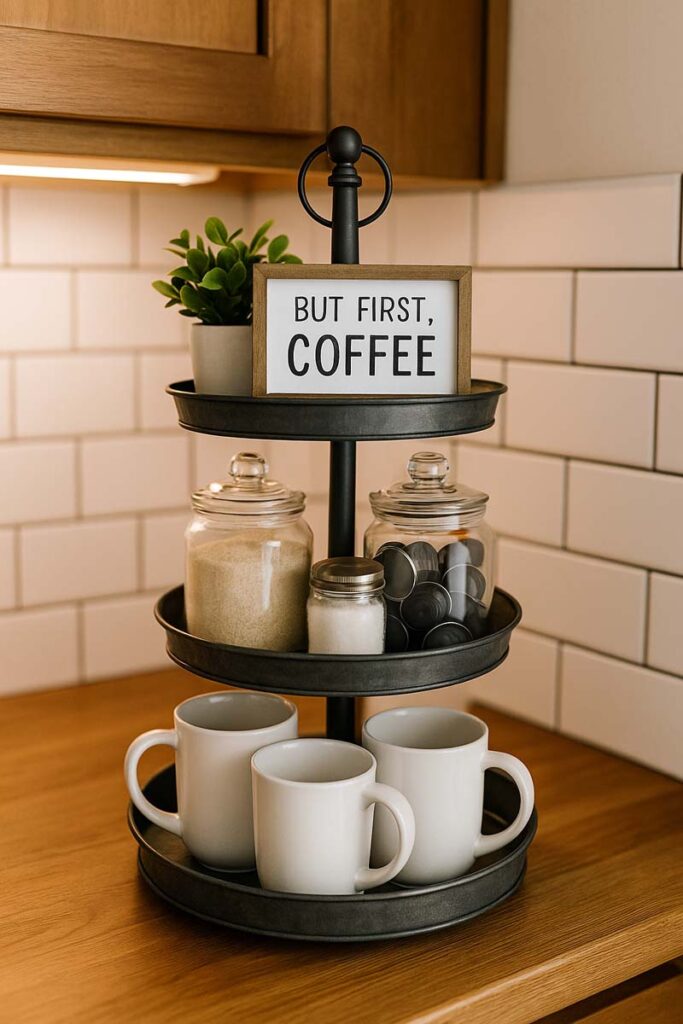
For a coffee corner:
- Bottom: everyday mugs
- Middle: small jars of sugar, coffee pods, tea bags
- Top: a small plant and a mini sign
For a bathroom:
- Bottom: rolled hand towels or washcloths
- Middle: jars for cotton pads, Q-tips, bath salts
- Top: candle, small plant, or diffuser
And for general living room decor:
- Bottom: stack of coasters, small basket for remotes
- Middle: a framed photo, a small book, or small bowl
- Top: decorative object, plant, or seasonal item
You can pull more styling layouts, especially seasonal ones, from 3 tier tray decor and adjust them for your exact tray and room.
Cleaning and caring for your 3 tier serving tray
How you clean it depends on the material, but the logic is simple: gentle, quick, and dry.
Basic routine after each use
- Clear off all food or decor.
- Wipe crumbs with a dry cloth or paper towel.
- Use a damp cloth with mild dish soap for any sticky spots.
- Dry immediately with a soft towel.
Wooden trays
For wooden 3 tier trays:
- Don’t soak or leave in standing water.
- Don’t put them in the dishwasher.
- If the surface looks dry over time, use a food-safe oil or conditioner (if the manufacturer allows it).
Ceramic, porcelain, or glass trays
- Check the manufacturer’s instructions.
- Many removable plates are dishwasher safe.
- Inspect any glued or metal joints before placing in a dishwasher; if something looks delicate, hand wash.
Metal trays
- Use a soft cloth to avoid scratches.
- Avoid harsh cleaners that can damage finishes.
- Dry thoroughly to prevent rust or water spots.
When you’re storing the tray long-term, keep it somewhere dry and don’t stack heavy items on top of it.
Buying vs building a 3 tier serving tray
You’ve got two main paths: buy a ready-made stand, or build one yourself.
When it makes sense to buy
- You need it soon for an event.
- You don’t have woodworking tools or a place to work.
- You care more about function than a custom look.
Buying is also the better option if you want ceramic or porcelain tiers, since those are hard to DIY without special tools and materials.
When building your own is worth it
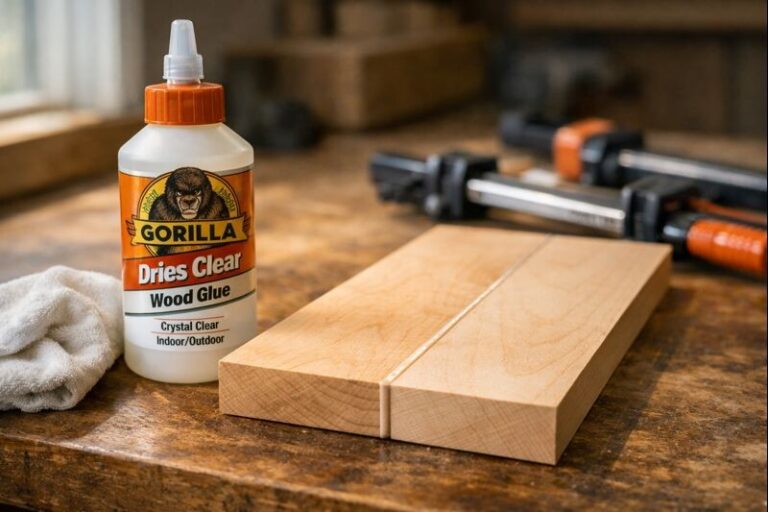
Building a 3 tier tray stand makes sense if you:
- Enjoy woodworking or want to learn.
- Want custom dimensions, height, or style.
- Prefer real, solid wood over cheaper materials.
If you want a straightforward build, you can follow a full walkthrough like how to make a tiered tray stand. For a more detailed turned-leg style, there’s also a project focused on a turned leg 3 tier stand, which shows how to get that classic farmhouse look.
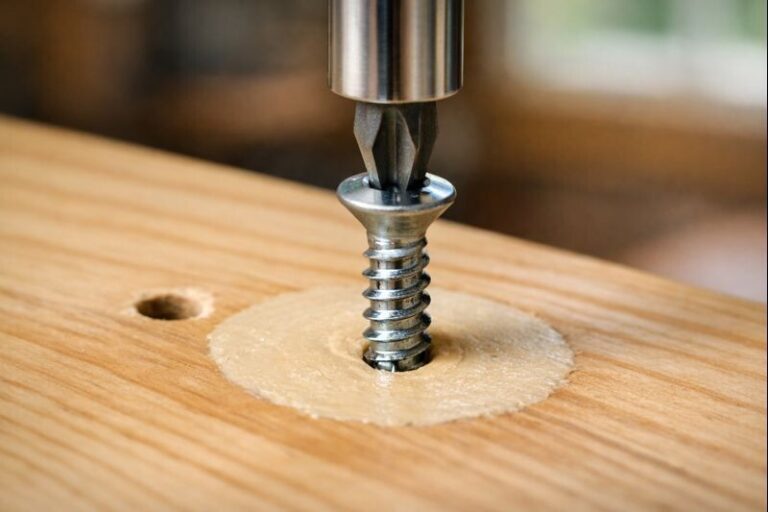
Before you fire up any tools, it’s smart to look over essential safety gear for tray stand builds, especially if you’re newer to saws, drills, and finishes.
FAQs about 3 Tier Serving Tray
How to make a 3 tier serving tray?
To make a 3 tier serving tray, cut or choose three plates or wooden circles in different sizes, drill centered holes, sand and finish them, then stack using a threaded rod or tiered hardware kit. Tighten everything securely and check stability before using.
Where to buy 3 tier serving tray?
You can buy a 3 tier serving tray at home goods stores, kitchenware shops, big-box retailers, craft stores, and online marketplaces. Compare materials, size, reviews, and return policies. Check that it’s food-safe, stable, and sized to fit your counter or table space.
What size 3 tier serving tray should I choose?
Pick a tray that fits your counter or table with some breathing room around it. For most homes, a base around 10–14 inches wide and a height under your lowest cabinet works well. Always compare the listed dimensions to where you plan to keep it.
How do I clean a wooden 3 tier serving tray safely?
For wooden trays, wipe off crumbs, then use a damp cloth with mild dish soap. Don’t soak the wood or put it in the dishwasher. Dry it right away with a towel. If the surface looks dull, refresh it with a food-safe oil or conditioner recommended by the manufacturer.
How do I keep a 3 tier serving tray from tipping?
Put heavier items on the bottom tier, lighter items on the top, and spread weight evenly. Make sure the base is fully on a flat surface and avoid pushing the tray from high up. If it still feels unstable, move it away from table edges and high-traffic areas.
Final thoughts on the Three Layer Serving Tray
A 3 tier serving tray is one of those pieces that seems like “just decor” until you actually use it. Then you realize how much table space you’ve been wasting with random plates and bowls. When it’s chosen carefully and set up the right way, it pulls your food and decor into one clean, vertical layout that’s easy to live with every day.
You don’t need anything fancy. You just need a tray that fits your space, doesn’t wobble, and matches how you like to host. Once those pieces are in place, the styling, food choices, and seasonal tweaks become the fun part instead of a chore.
To sum it up, a good three tiered wood tray does three jobs at once. It saves space by going vertical, it makes your food or decor look intentional, and it keeps everyday items within easy reach. The key decisions are simple: pick the right material, check the height and base, and load the tray with the heaviest items at the bottom and the lightest on top.
Whether you buy a ready-made stand or build your own, treat it as a working piece of your kitchen and home, not just a holiday prop. If you do that, the tray will pay you back every day with less clutter, faster setups, and a more pulled-together look whenever guests walk in.