How to Decorate a 2 Tier Tray for Fall: 9 Cozy Styling Ideas
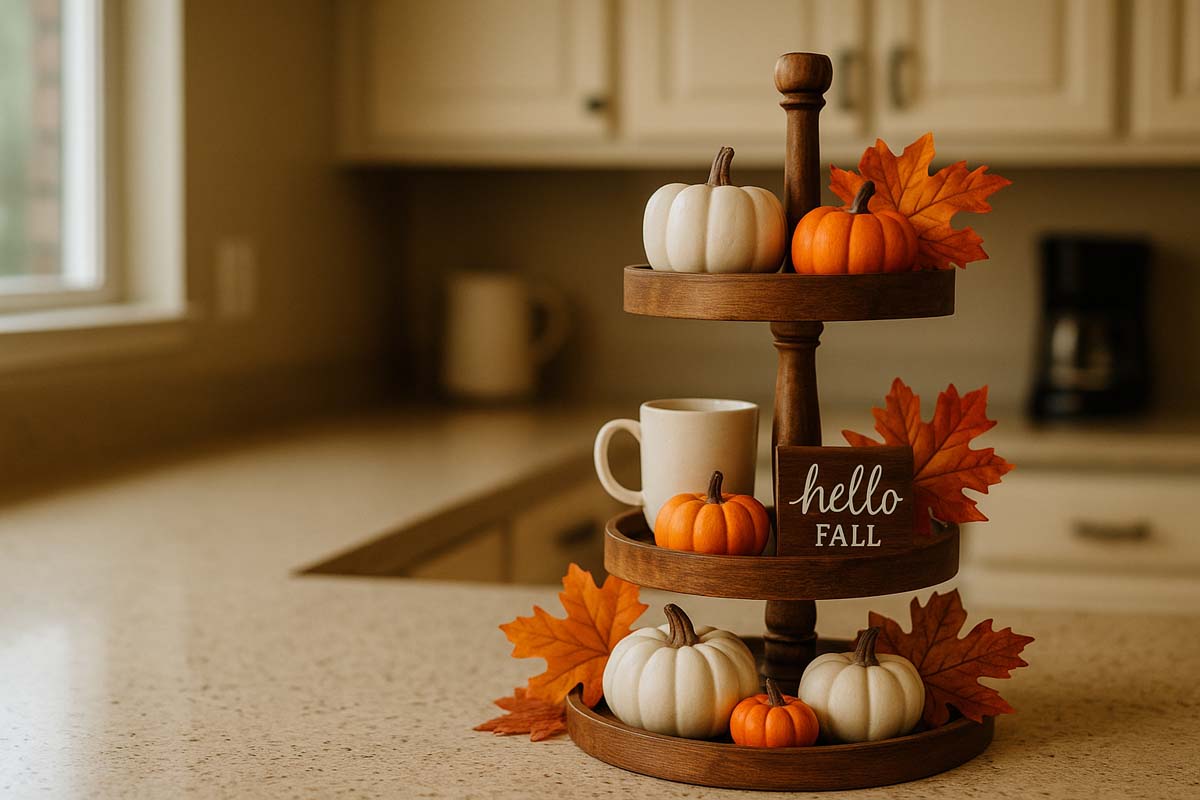
To decorate a 2 tier tray for fall the right way, start by treating it like a small, vertical shelf that needs a plan, not random clutter. Think about where the tray will sit, how much space you have, and whether it should be mostly decorative or actually useful. Then choose a simple color palette, decide on a theme (pumpkin patch, neutral farmhouse, or moody autumn), and build each tier in layers—tall anchors, medium pieces, and small fillers. That’s how you get a balanced, cozy fall tray that looks intentional and works with everyday life.
Start With the Tray and the Spot
Before grabbing pumpkins and foliage, decide where the tray will live and what it needs to do.
Ask a few basic questions:
- Will it sit on a kitchen counter or island?
- Is it part of a coffee bar or hot drink station?
- Will it be a dining table centerpiece?
- Is it going on an entryway console?
This choice affects everything: height, colors, and how busy it can be.
- On a coffee bar, the tray should hold mugs, spoons, and maybe sugar jars.
- On a dining table, keep it low enough that people can see each other.
- In an entryway, you can go a little taller and more decorative.
If you’re just getting started with styling tiered trays in general, it can help to skim a broader guide on how to decorate a tiered tray to understand spacing and balance first.
Also see: 2 Tier Marble Tray Ideas
Pick a Clear Fall Theme and Color Palette
Next, choose one simple theme. Don’t mix everything (Halloween, Thanksgiving, generic fall) at once or it’ll look messy.
Common fall themes that work well on a 2 tier tray
- Pumpkin patch – pumpkins, gourds, tiny crates, burlap.
- Warm farmhouse – wood, white ceramics, gingham, simple signs.
- Moody fall – dark greens, rust, amber glass.
- Soft neutral fall – creams, beige, white pumpkins, light wood.
Choose a tight color palette
Stick to 2–3 main colors plus a neutral. For example:
- Orange + white + black + wood
- Mustard + dark green + cream
- Burnt orange + brown + beige
Here’s a quick reference:
| Theme | Main Colors | Good Accent Pieces |
|---|---|---|
| Pumpkin Patch | Orange, green, brown | Mini pumpkins, crate, straw, small chalkboard |
| Warm Farmhouse | White, wood, black | Enamel mugs, wood beads, simple “hello fall” sign |
| Moody Fall | Dark green, rust, black | Amber bottles, dark candles, metal accents |
| Neutral Fall | Cream, beige, light wood | White pumpkins, linen, small books |
If you like a more rustic farmhouse look, using a farmhouse-style tiered tray decor approach with wood, white, and black works great for fall too.
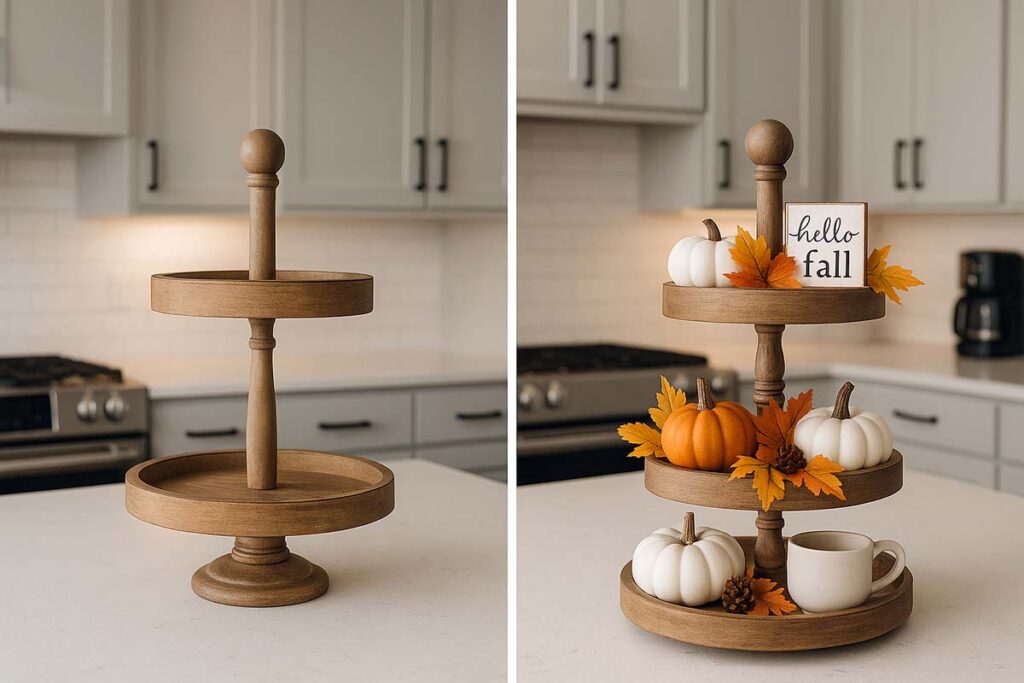
Gather the Right Mix of Decor Pieces
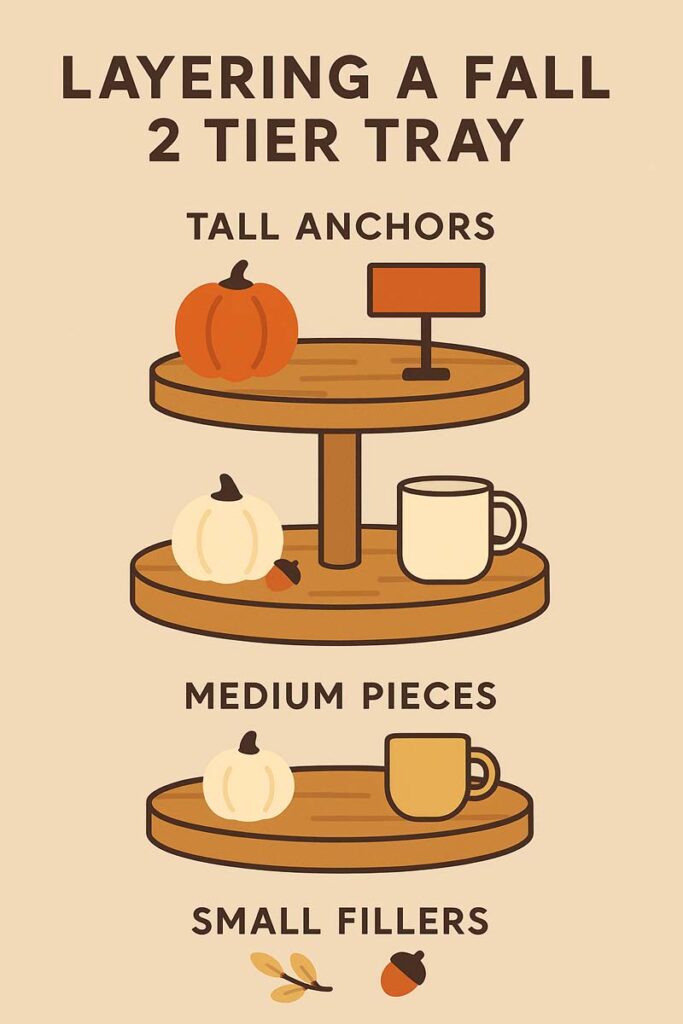
A good 2 tier tray is all about mix and match. You want a blend of heights, shapes, and textures.
Think in categories:
1. Tall anchors
- Bottle vases
- Candle sticks (battery candles are safer)
- Small sign standing upright
- A stacking of small books or riser
2. Medium pieces
- Mugs or cups
- Small jars with lids
- Larger pumpkins
- Sugar bowl, creamer, syrup bottle (for coffee setups)
3. Small fillers
- Mini pumpkins or acorns
- Pinecones
- Tiny faux leaves
- Wood beads
- Tiny houses or animals
4. Soft/texture elements
- Small fabric pumpkins
- Faux leaf garlands
- Twine, burlap ribbon, or linen napkins
If your tray is very decorative itself (marble, metal, or carved wood), let it show. Keep that in mind when you choose how full to make it. A more decorative piece, like a 2 tier decorative tray, doesn’t need as many items on top to look finished.
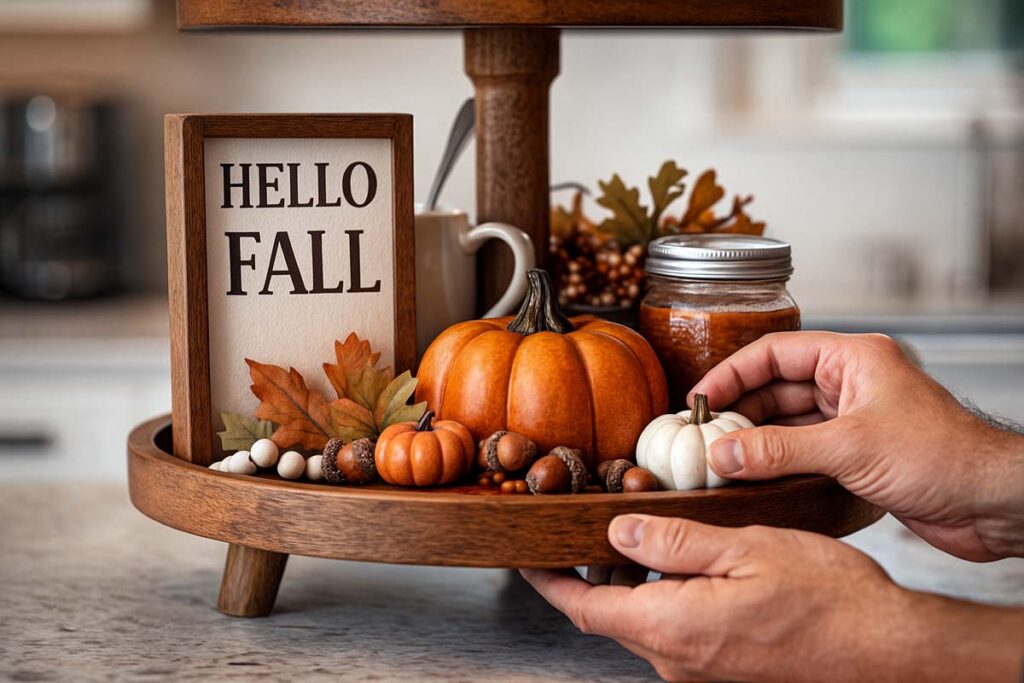
Step-by-Step: Style the Bottom Tier
The bottom tier usually holds the heavier, more practical pieces. It’s also where you build most of the visual weight.
1. Lay down your base
- If you like a softer look, tuck a thin strip of garland or a few faux leaves along the back edge.
- Don’t cover the whole surface. Leave gaps so items sit flat.
2. Place 1–2 tall anchor pieces
Put a taller item toward the back or side so it doesn’t block the view:
- A chunky mug filled with utensils.
- A tall pumpkin or vase.
- A stacked mini book bundle with twine.
These anchors set the height and give your eye something to land on.
3. Add the useful pieces
If the tray is functional (like a coffee bar):
- Add mugs, a sugar jar, or a little bowl of tea bags.
- Keep them toward the front so they’re easy to reach.
- Group similar items together for a clean look.
If it’s purely decorative:
- Use larger pumpkins, a sign leaning against your tall piece, or a small basket filled with mini pumpkins.
4. Fill in with medium-sized decor
Now add 2–3 medium items to balance the tier:
- A second pumpkin in a different texture or color.
- A ceramic house.
- A small framed quote or “hello fall” sign.
Keep space between items. You want that “styled” look, not a junk pile.
5. Tuck in small fillers
Last, sprinkle in the small pieces:
- A few acorns or pinecones near the base of items.
- A wood bead garland snaking between things.
- A tiny pumpkin on top of a stack of books.
Stop before it feels crowded. If every gap is filled, remove one or two pieces.
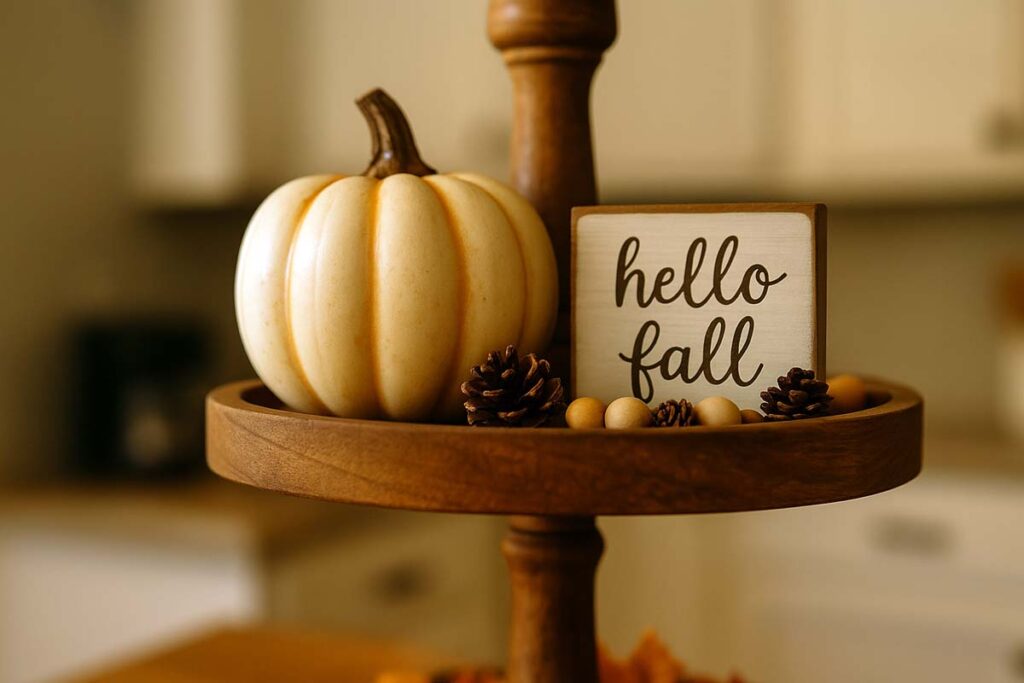
Step-by-Step: Style the Top Tier
The top tier is usually smaller, so it should look lighter but still connected to the bottom.
1. Set a single tall-ish focal point
Use one taller item here:
- A smaller sign or tag.
- A medium pumpkin.
- A mini vase or bottle.
Place it slightly off-center. That keeps the tray from looking too stiff.
2. Add one functional or personal piece
This keeps it from looking like a store display:
- A single favorite mug.
- A small jar with cinnamon sticks.
- A tiny bowl of wrapped candies.
If you’re doing a 2 tier tray stand in the kitchen, this could be the “special” mug that only comes out in fall.
3. Repeat colors and textures from the bottom
To tie everything together:
- If there’s a big orange pumpkin below, add a small orange pumpkin up top.
- If there’s burlap on the bottom, use a little burlap bow or ribbon on the top.
This repetition makes the tray feel intentional.
4. Finish with tiny fillers
Same idea as the bottom, but lighter:
- One or two mini pumpkins.
- A couple of pinecones.
- A tiny strand of wood beads.
Again, stop before it goes overboard.
Balance, Editing, and Safety
Once both tiers are styled, take a step back and check a few things.
Balance check
Ask yourself:
- Do the colors appear on both tiers?
- Is there a good mix of tall, medium, and small pieces?
- Does one side look much heavier than the other?
If something looks off, move a piece from one side to the other rather than adding more.
Editing
It’s easy to over-decorate. Try this:
- Remove 1–2 items.
- See if it looks cleaner and more intentional.
- Only put something back if you really miss it.
Safety
Especially important if you have kids, pets, or the tray sits near a stove:
- Don’t use real candles on a crowded tray. Stick to battery candles.
- Make sure tall items are stable and can’t tip easily.
- Don’t stack heavy ceramic pieces too high.
If your tray is round, tall, or a bit top-heavy, something like a 2 tier round tray often feels more stable when heavier pieces sit toward the center rather than the edges.
Simple Fall Styling Formulas You Can Copy
If you don’t want to overthink everything, use simple formulas.
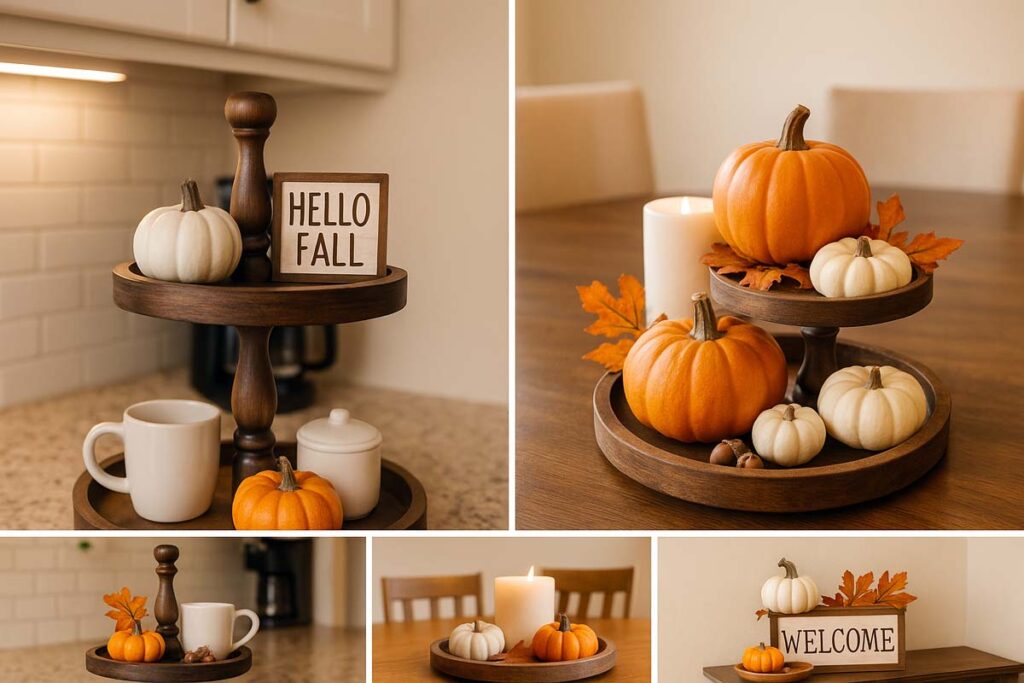
1. Coffee bar fall tray
Bottom tier:
- Tall sign or pumpkin at the back.
- Two favorite mugs at the front.
- Small jar with sugar packets.
- Mini pumpkins and a few faux leaves to fill gaps.
Top tier:
- Medium pumpkin or mug with cinnamon sticks.
- Tiny sign (“sweater weather,” “pumpkin spice,” etc.).
- A couple of pinecones.
If you’re turning this into a full coffee setup, a guide focused on a 2 tiered tray for a coffee bar can help you organize all the drink-related pieces around it.
2. Dining table centerpiece
Bottom tier:
- One taller pumpkin at the back.
- A low candle (battery) near the front.
- A small bowl with acorns or nuts.
Top tier:
- One medium pumpkin.
- A small cluster of leaves.
Keep the overall height under eye level so people can talk across the table.
3. Entryway welcome tray
Bottom tier:
- A “welcome” or “hello fall” sign.
- A small bowl or dish for keys.
- A pumpkin and a tiny house or lantern.
Top tier:
- One decorative pumpkin.
- Pinecones or acorns as filler.
Here, you’re mixing real function (keys, sunglasses) with seasonal decor.
Final Thoughts
A 2 tier tray for fall doesn’t need expensive pieces or complicated tricks. It comes down to a few basics: a clear theme, a tight color palette, and a simple structure of tall anchors, medium pieces, and small fillers. When you repeat colors, swap clutter for intention, and think about how the tray will actually be used, the whole setup feels calm instead of chaotic.
Once fall is over, the same structure works for other seasons. You only swap pumpkins and leaves for winter greens, spring florals, or summer blues. If you like planning ahead, it’s worth checking out more seasonal inspiration like Christmas 2 tier tray ideas so the tray can roll right into the next holiday without starting from scratch.
To decorate a 2 tier tray for fall, start by choosing the spot and purpose, pick a simple theme and color palette, then build each tier from base layer to tall anchor to small fillers. Keep the layout balanced, edit out extra pieces, and repeat colors across both tiers so everything feels cohesive and easy on the eyes.