Stain Birch Plywood: 5 Ways to Go Dark Without Muddy Patches
Stain birch plywood takes a clean, even process because birch face veneer absorbs pigment unevenly and shows lap marks fast. The fix comes from surface prep, a controlled “washcoat” or conditioner, and the right stain type for the color you want. This guide covers staining birch plywood for light tones, medium browns, and staining birch dark without muddy patches. I’ll also show a simple test-board routine so your plywood stain matches your project before you commit to the real panel.
Contents Here
- 1 Why does birch plywood blotch when you stain it?
- 2 What birch plywood type stains the most predictably?
- 3 Tools and supplies that make staining plywood easier
- 4 How to prep birch plywood before staining
- 5 How to stain birch plywood evenly
- 6 Staining birch plywood dark without turning it muddy
- 7 Best stain types for staining birch plywood
- 8 How to apply plywood stain without lap marks
- 9 Topcoats that look good over stained birch plywood
- 10 Common problems when staining birch plywood and how to fix them
- 11 Safety notes that matter in a small shop
- 12 FAQs about Stain Birch Plywood
- 12.1 Do I need wood conditioner for staining birch plywood?
- 12.2 What grit should I sand birch plywood to before staining?
- 12.3 What is the best way to get a dark stain on birch plywood?
- 12.4 Can I stain birch plywood and skip the topcoat?
- 12.5 Why does my plywood stain look different after the clear coat?
Why does birch plywood blotch when you stain it?
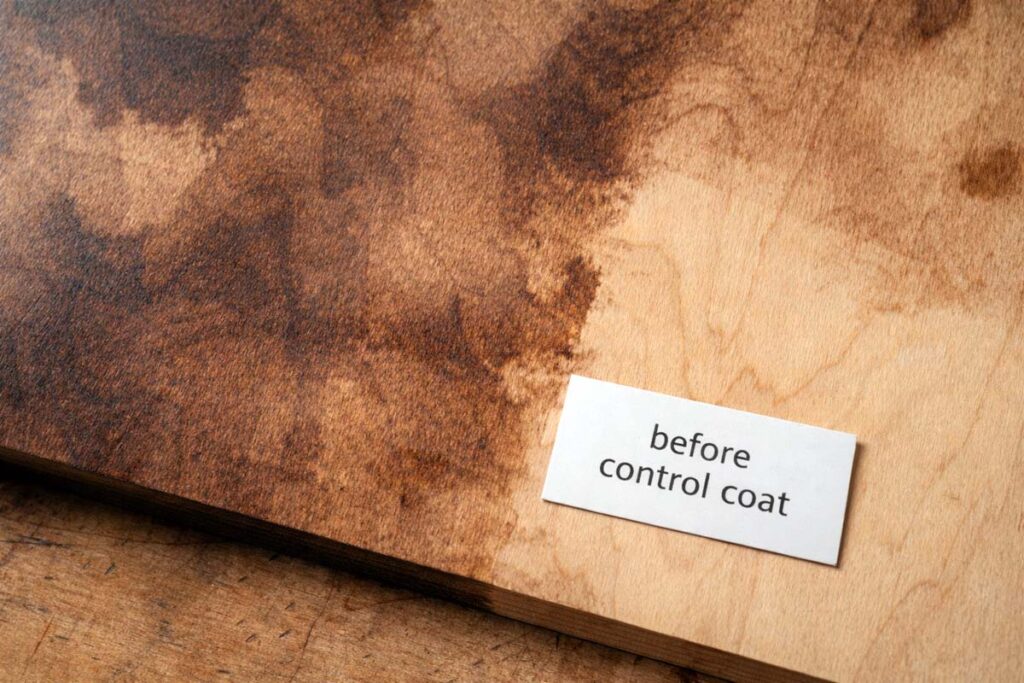
Birch plywood blotches because the thin birch veneer has uneven density and mixed grain that drinks pigment at different rates. Soft earlywood sections darken fast, while tighter grain stays lighter. Factory sanding, glue squeeze-out, and face-veneer patches also block stain and create pale spots.
A stain plan that controls absorption prevents most blotching. Woodworkers control absorption with sanding discipline, a pre-stain conditioner or washcoat, and stain choices that rely less on heavy pigment.
What birch plywood type stains the most predictably?
Cabinet-grade birch plywood stains more predictably than shop-grade sheets because the face veneer is cleaner and more consistent. Look for flatter panels, fewer football patches, and minimal face repairs. A smoother, thicker face veneer also gives you more sanding room before you risk sanding through.
If your project depends on a perfect look, buy extra material for test panels and reject any sheet with heavy patching on the show face. If you’re still picking material, my notes on panel selection and grades help in what exactly is cabinet-grade plywood.
Tools and supplies that make staining plywood easier
You don’t need fancy gear, but a few items prevent common mistakes.
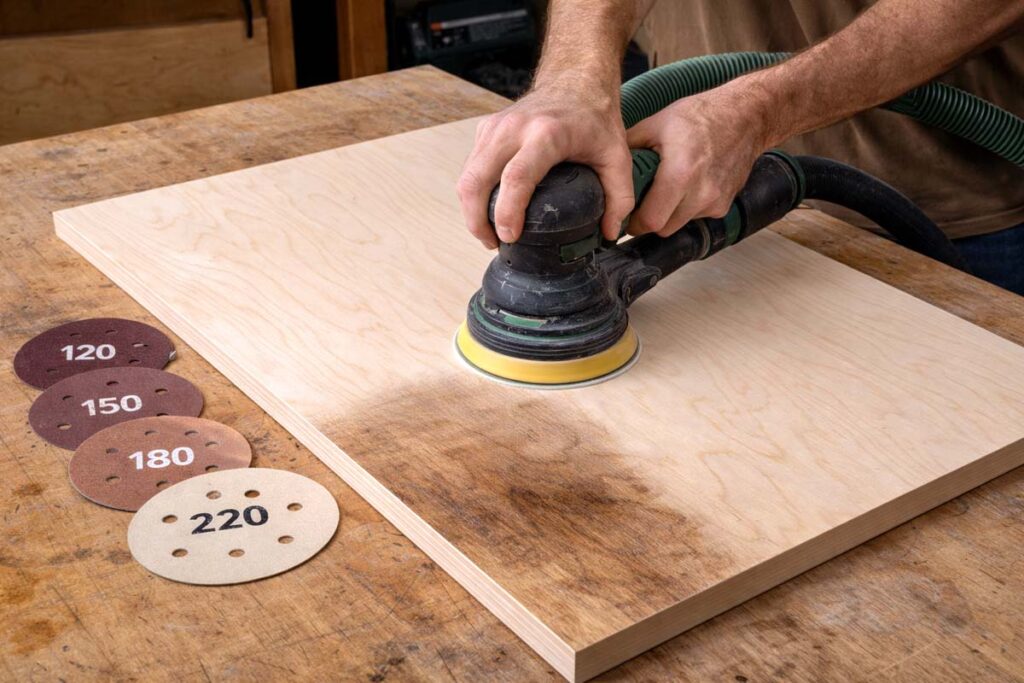
- Random orbit sander and sanding block
- Sandpaper: 120, 150, 180, 220 grits
- Vacuum and tack cloth or clean microfiber
- Clean rags or foam brushes
- Pre-stain wood conditioner or dewaxed shellac for a washcoat
- Stain (oil wiping stain, gel stain, or dye stain)
- Clear topcoat (water-based poly, oil-based poly, or wiping varnish)
- Nitrile gloves, eye protection, and a respirator rated for organic vapors (for solvent products)
How to prep birch plywood before staining
Good prep is where most “nice stain jobs” come from, especially on plywood.
Flatten and clean first. Vacuum the surface and check for glue squeeze-out. Dried glue acts like a stain resist and leaves bright spots. Scrape glue with a sharp chisel or card scraper, then sand.
Sand in a controlled range. For most birch plywood, sand the face to 150 or 180 grit. Sanding to 220 grit can reduce blotching for some stains, but it can also limit how dark the color gets. The key is consistency across the whole sheet.
Use a block on edges. Plywood edges can round over quickly with a power sander. Keep edges crisp with a sanding block so your stain line looks sharp.
If your project includes exposed end grain or solid-wood trim, this sanding method helps the stain read more evenly: guide to sand end grain smooth.
How to stain birch plywood evenly
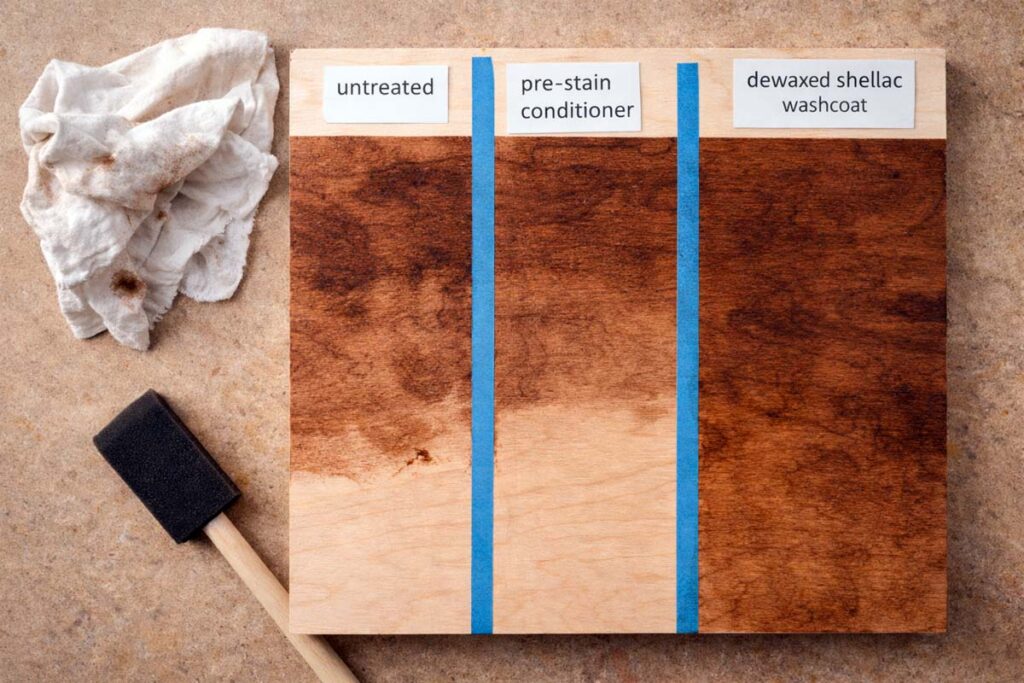
The most reliable approach is a test panel, then a conditioner or washcoat, then stain, then topcoat. Order matters because each layer changes absorption.
- Make a test board from the same sheet. Cut a scrap from your project panel. Sand it exactly like the real piece.
- Choose your control layer: conditioner or washcoat.
- Pre-stain conditioner helps reduce blotching with oil-based wiping stains.
- A thin washcoat of dewaxed shellac gives tighter control and works under most stains and topcoats.
- Apply stain with a wet edge. Work in manageable sections. Keep the surface uniformly wet, then wipe off consistently.
- Let the stain dry fully. Dry time depends on product and shop conditions. Follow the can, not the clock.
- Topcoat to lock in color and protect the surface. A clear finish deepens the look and prevents the stain from lifting during use.
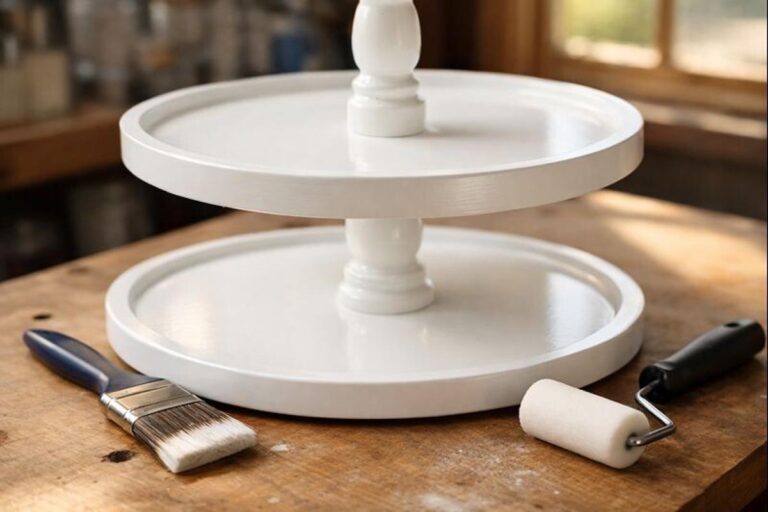
For trays and serving pieces, sealing matters as much as color. This is the same workflow I use for protective coats: way to seal a wooden serving tray.
Staining birch plywood dark without turning it muddy
Staining birch dark is where most people get frustrated, because heavy pigment exaggerates blotches. These options give better control.
Option 1: Dye first, then a light pigment stain. A dye stain colors the wood fibers more evenly than a heavy wiping stain. After dye, a light pigment stain or glaze can add depth without harsh patches.
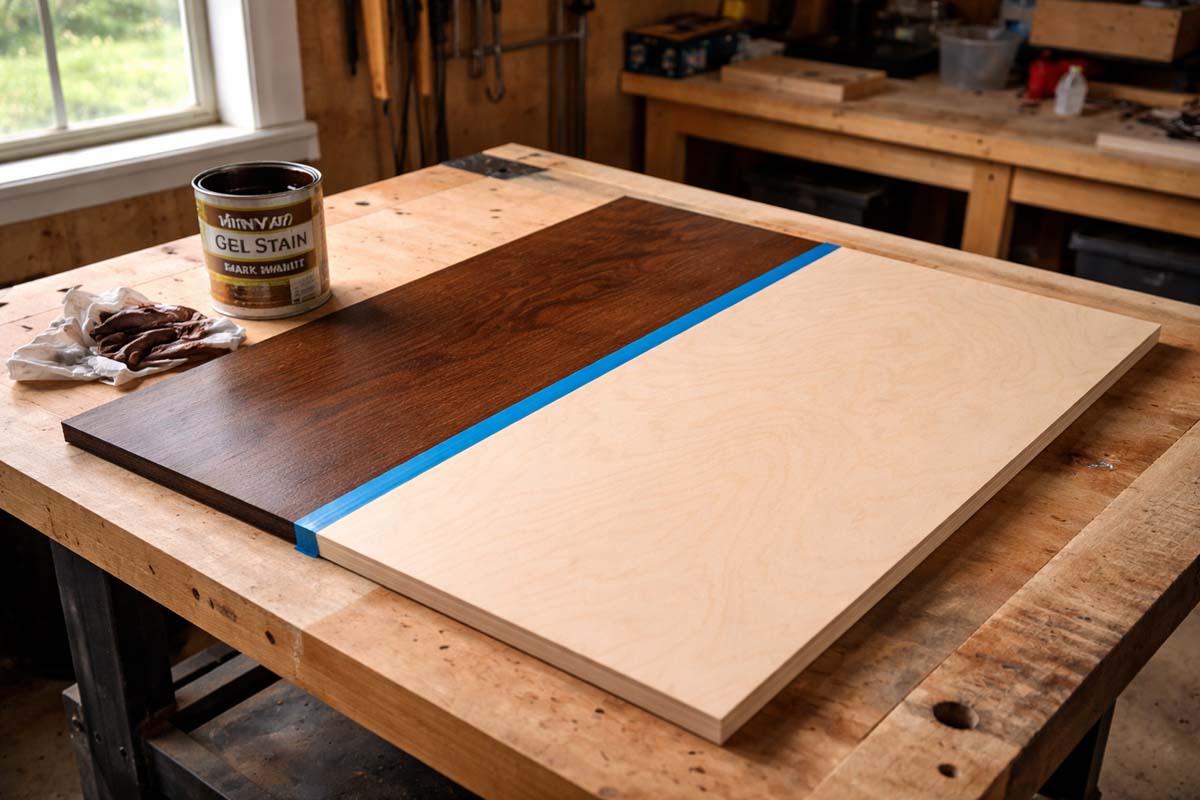
Option 2: Use gel stain for more uniform color. Gel stain sits closer to the surface and acts more like a thin paint layer. It often looks more even on birch veneer than a penetrating oil stain.
Option 3: Use toner between coats. A toner is tinted finish sprayed between clear coats. It adjusts color gradually and evens out panel differences. This route works well when you need a near-furniture match, but it asks for spray equipment and good ventilation.
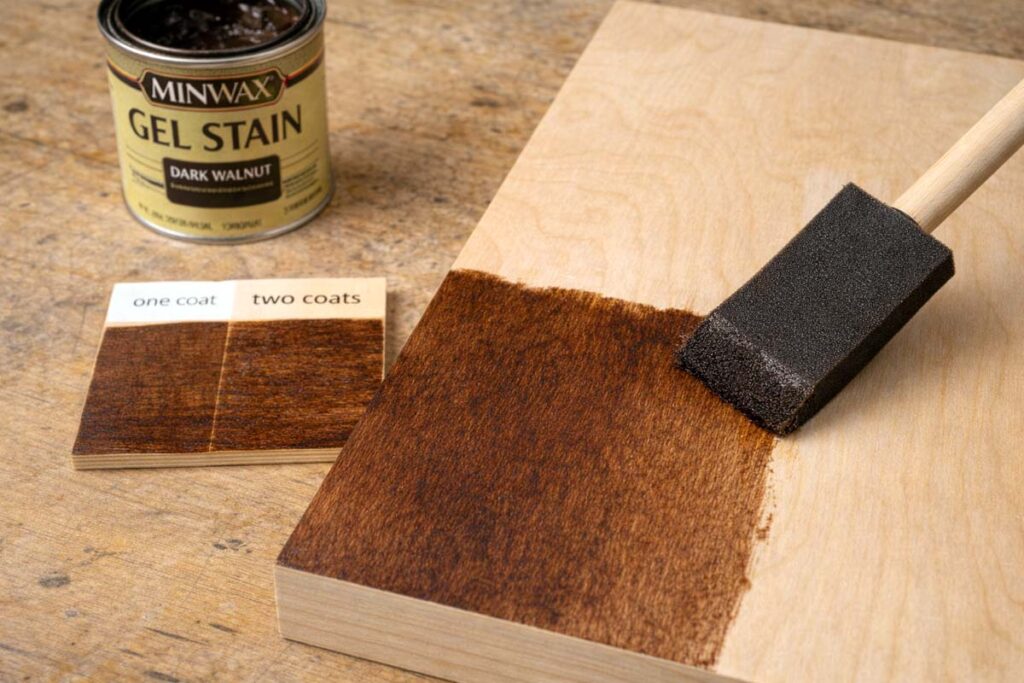
If you need “espresso” or “dark walnut” on birch plywood, I steer most shop builds toward gel stain or dye + light glaze because those methods reduce the blotching that comes with heavy penetration.
Best stain types for staining birch plywood
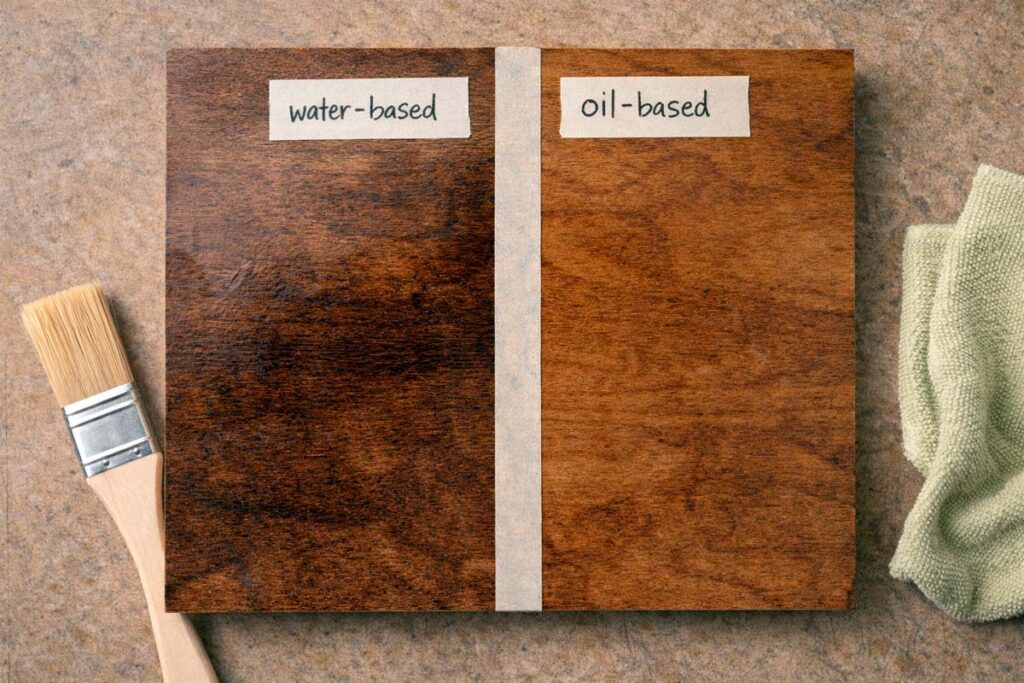
Oil-based wiping stain: Easy to find and easy to use, but it can blotch on birch unless you control absorption. Best for medium tones when you use conditioner or a washcoat.
Water-based stain: Faster dry and easier cleanup, but it can raise grain and show lap marks. Best when you work quickly, keep a wet edge, and sand lightly after grain raise.
Gel stain: More uniform on birch plywood because it penetrates less. Best for darker colors and high consistency.
Dye stain: Strong color and good clarity. Best when you want darker tones without muddy pigment buildup.
How to apply plywood stain without lap marks
Lap marks come from stain drying in patches while you work.
Work from one end to the other and keep the whole area wet until you wipe. On large panels, stain in strips that you can maintain as one wet field. Wipe in the same direction, with the same pressure, and swap rags before they load up.
If you’re staining both sides, stain the “show face” first so you can refine your technique before you touch the back.

Topcoats that look good over stained birch plywood
A clear coat protects the surface and changes the color tone. Plan for that change.
- Water-based polyurethane: Keeps birch closer to its natural tone and stays clearer over time.
- Oil-based polyurethane or wiping varnish: Warms the color and deepens browns.
- Hardwax oil: Leaves a softer sheen and pleasant feel, but it needs careful maintenance in wet or high-wear use.
If the project touches food or you plan to use it as a serving piece, check the finish rules you follow in your shop. Here’s how I frame that decision: understanding polyurethane food safe when cured.
Know more: Stained Birch Plywood: 7 Fast Fixes for Blotch-Free Results
Common problems when staining birch plywood and how to fix them
Problem: Light spots that refuse stain.
Glue contamination blocks stain. Sand back to clean wood. If you already topcoated, you often need to strip that area and rework it.
Problem: Blotchy dark islands.
Your stain penetrated unevenly. Next time, increase absorption control with a washcoat or switch to gel stain. On the current piece, a glaze can reduce contrast before the final topcoat.
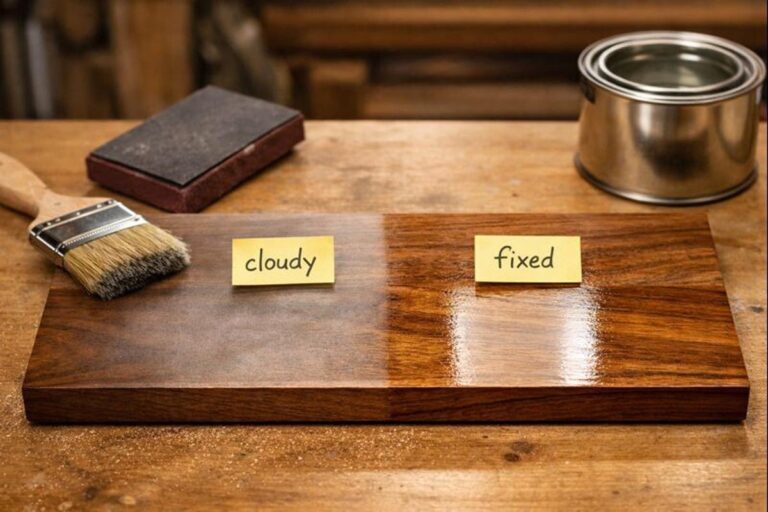
Problem: Cloudy clear coat.
Moisture, cold conditions, or heavy coats cause haze. Use thinner coats and follow dry times. If you’re already stuck with haze, this troubleshooting path helps: understanding why clear coats get cloudy.
Problem: Raised grain after staining.
Water-based products lift fibers. Raise grain on purpose first: wipe with water, let dry, sand lightly, then stain.
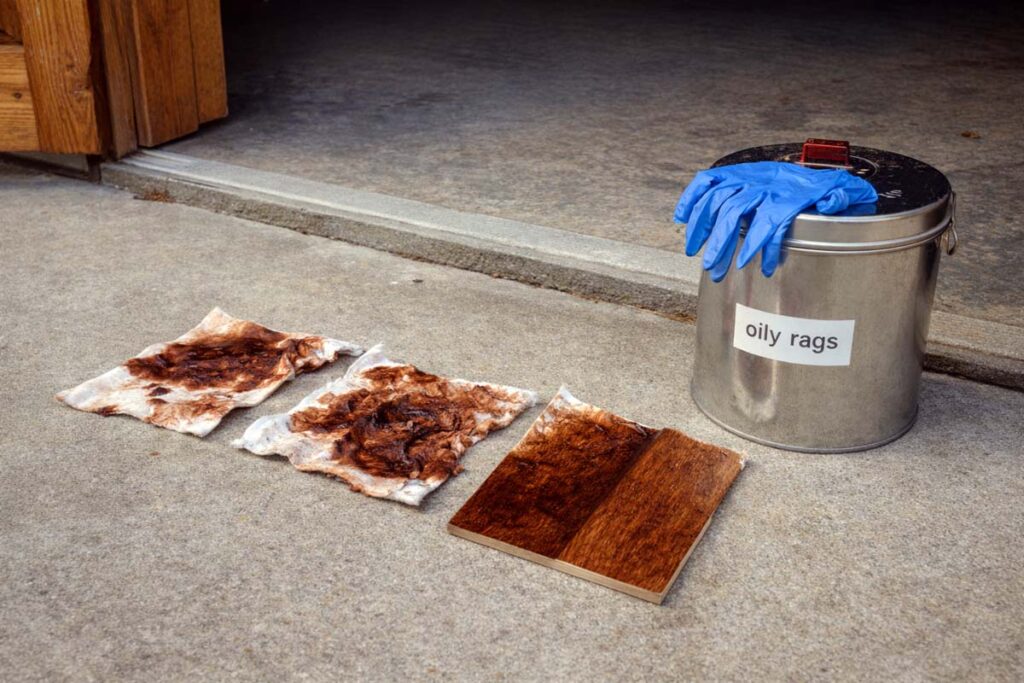
Safety notes that matter in a small shop
Solvent stains and finishes put vapors in the air and fire risk in your trash can. Use active ventilation, wear a proper respirator for solvent fumes when needed, and store stain rags in a sealed metal container or lay them flat to dry outside. Keep sparks and open flames away from finishing work.
FAQs about Stain Birch Plywood
Do I need wood conditioner for staining birch plywood?
You don’t always need it, but it helps a lot with blotching on birch veneer. If you’re using a penetrating wiping stain, conditioner (or a light shellac washcoat) keeps the color more even.
What grit should I sand birch plywood to before staining?
Sand most birch plywood to 150 or 180 grit for a good balance of smoothness and stain absorption. If you sand to 220, it can look cleaner, but the stain may not get as dark.
What is the best way to get a dark stain on birch plywood?
For a dark, even look, gel stain is usually the easiest win because it sits closer to the surface and hides blotches. Dye stain under a light glaze also works great for deeper color.
Can I stain birch plywood and skip the topcoat?
You can, but it won’t hold up well. Stain adds color, not protection, so the surface will scuff, spot, and fade faster. A clear topcoat is what locks in durability for real use.
Why does my plywood stain look different after the clear coat?
Clear coat changes the color and contrast, sometimes a lot. Oil-based finishes warm and deepen tones, while water-based finishes stay clearer. That’s why a scrap test with your exact topcoat saves surprises.