Is Wood Glue Food Safe? 9 Quick Fixes for Cleaner Glue Lines
In short, most wood glues are considered food-safe after they fully cure, as long as the glue stays inside tight joints and you remove any squeeze-out from the food-facing surface.
The short answer is that many common woodworking glues are considered safe after they fully cure, as long as the glue stays inside the joint and not on the food-facing surface. Let’s sort out what that really means.
Quick verdict: when wood glue is “safe enough” for kitchen projects
Most wood glues aren’t meant to be eaten, and none of them should be treated like a condiment. What matters is this: once a typical woodworking glue fully cures, it becomes an inert plastic-like solid in the joint. If your glue line is tight, clean, and buried between boards, it’s generally treated as low-risk for normal kitchen use.
Where people get into trouble is when glue ends up on the surface where food sits, or when the joint has gaps that can trap moisture and crumbs. If you keep the glue where it belongs and let it cure completely, you’re doing what careful woodworkers do every day.
If you’re also fixing a wobbly chair or a loose table joint, this rundown on strong glue choices for furniture fixes will help you pick the right bottle: strong glue choices for furniture fixes.
Food safe vs food grade vs non-toxic: three terms people mix up
These labels sound similar, but they don’t mean the same thing.
Food grade usually implies a product is intended for direct contact in food processing, sometimes even around ingredients. Most woodworking glues are not sold that way.
Food safe in the woodworking world usually means the cured product won’t reasonably transfer harmful compounds during normal use. Think of a cutting board glue line buried inside the board.
Non-toxic is the loosest term of the bunch. It often means “not acutely poisonous in normal handling,” not “approved for food contact.” It’s helpful, but it’s not the finish line.
If you remember one thing, remember this: wet glue safety and cured glue safety are different conversations.
What actually makes a wood glue acceptable around food
When folks say “food safe wood glue,” they’re usually pointing at two practical requirements:
It must fully cure
Dry-to-the-touch isn’t the same as cured. Cure is when the chemical reaction is complete and the glue reaches its final stable state. If you want a deep explanation of timing and what changes as it cures, bookmark this: how long for wood glue to fully cure.
It should be used for indirect contact, not as a surface coating
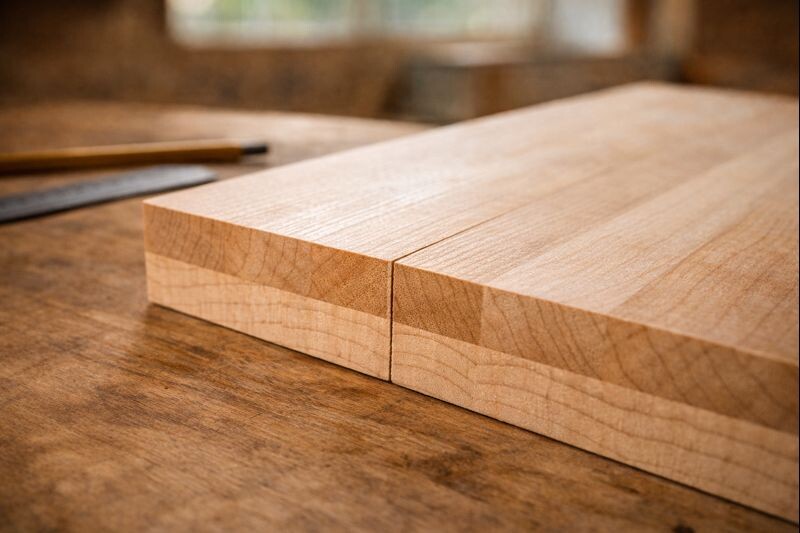
Many common woodworking adhesives are discussed in terms of indirect food contact, meaning the glue is sandwiched inside a joint, not smeared where you slice lemons. That’s exactly how edge-glued panels, butcher blocks, and laminated tray parts are built.
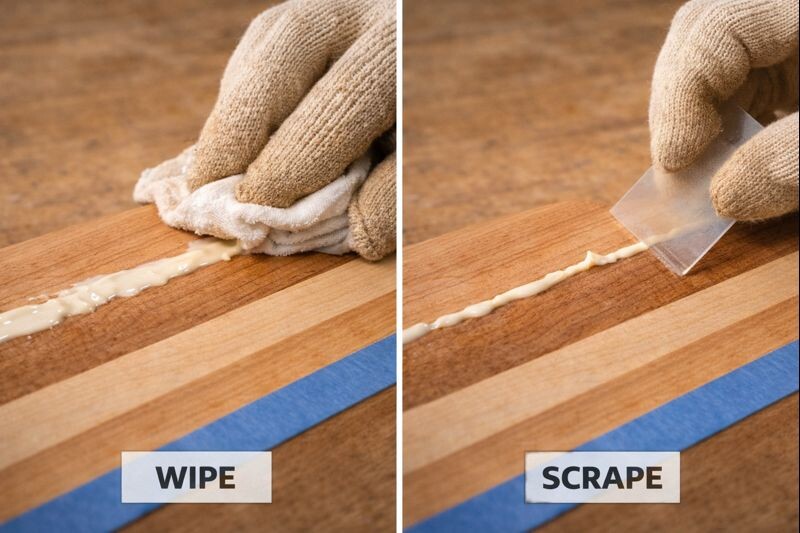
Practical shop rule: If you can scrape the glue off the surface, scrape it off. Don’t “seal it in” and hope.
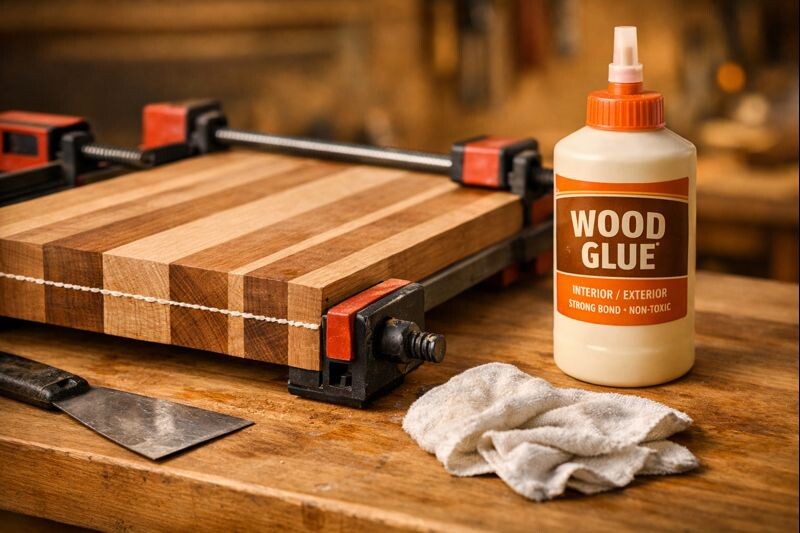
Wood glue types: what works for kitchen pieces, and what I avoid
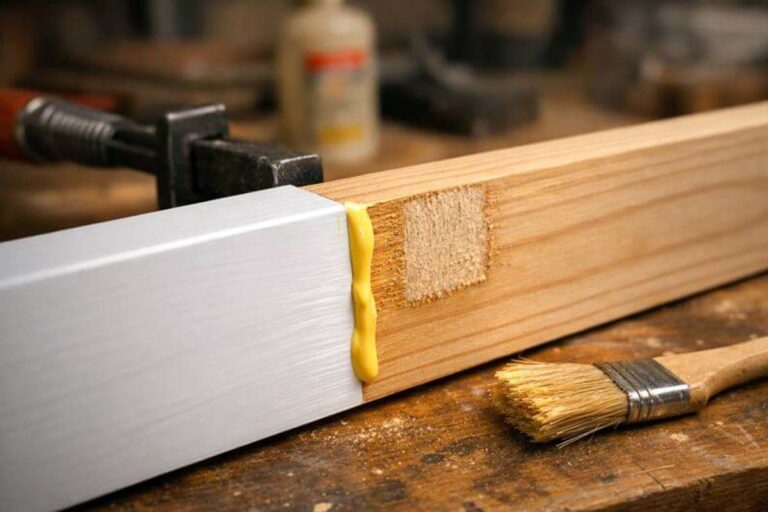
PVA and aliphatic resin (yellow/white carpenter’s glue)
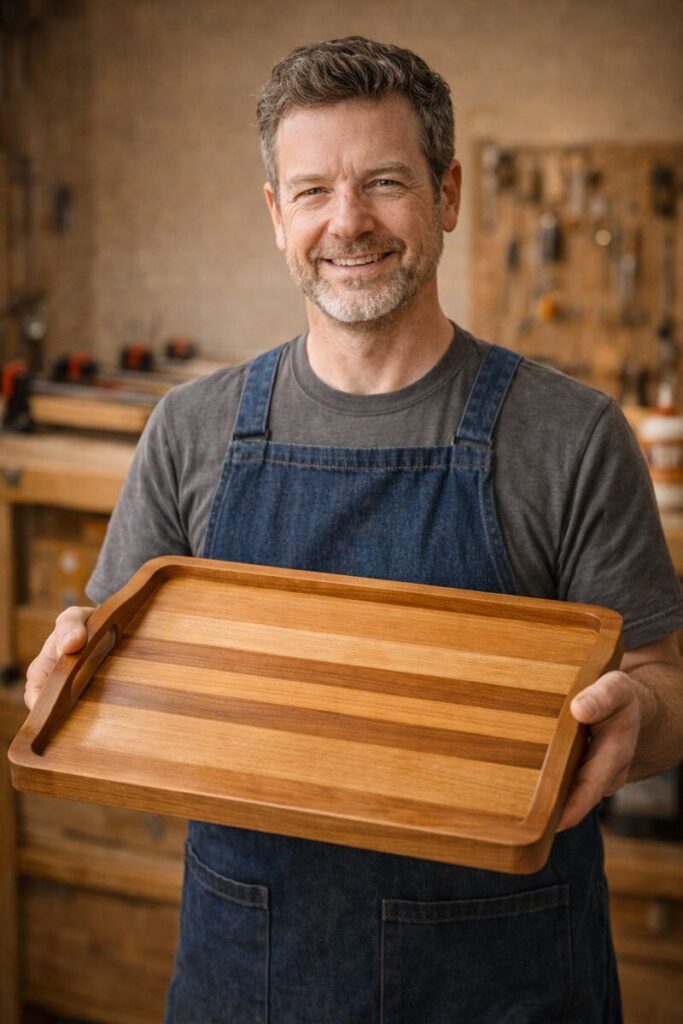
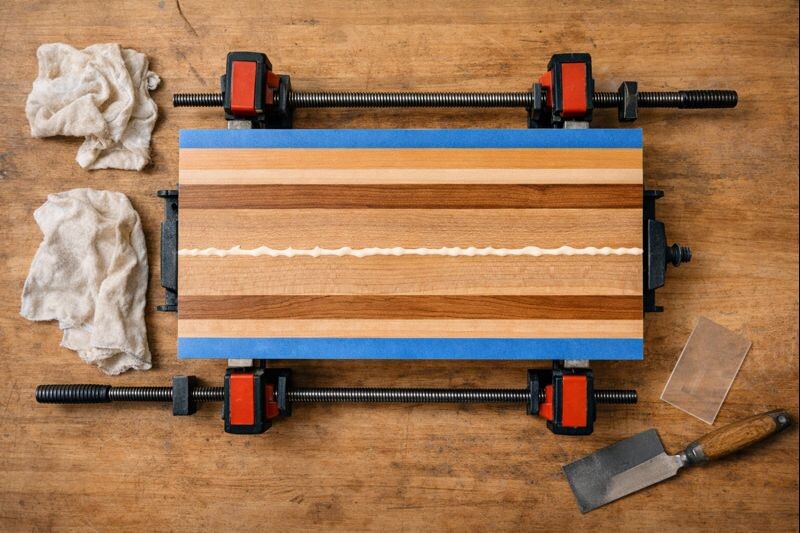
For most tray parts and laminated panels, this is the workhorse category. These glues bond strong, clean up with water, and sand well. They’re also the kind most commonly used in cutting boards and butcher blocks, where the glue line is internal and minimal.
A few pointers from the bench:
- Aim for tight joints. Glue isn’t a gap filler in this category.
- Clamp enough to close the seam, not enough to squeeze it dry.
- Remove squeeze-out while it’s wet or rubbery.
If you’re using PVA for something like a handled serving tray, the bigger safety question often becomes your topcoat, not the glue. This walkthrough on how to seal a wooden serving tray pairs well with this topic because it keeps food and moisture from soaking into the wood.
Hide glue and traditional protein glues
Hide glue has a long history, and it’s naturally derived. The catch is performance. Many hide glue setups don’t love repeated soaking, high heat, or harsh washing routines. For a decorative tray that’s wiped clean, it can be fine. For something that gets rinsed often, I don’t reach for it.
If you’re building anything that might see standing water, pick a glue that matches that reality.
Epoxy: only when it’s specifically intended for food-contact use
Epoxy is handy for repairs, fills, and certain inlays, but it’s also easy to misuse. The “food safe” part depends on the exact product, the mixing ratio, and the cure schedule.
If you’re using epoxy in a kitchen piece:
- Use an epoxy that clearly states food-contact suitability in its documentation.
- Mix accurately, scrape the cup sides, and avoid “eyeballing.”
- Let it cure the full stated time before use.
Epoxy can be a solid option for fixing cracks in a tray lip or stabilizing a knot, but I treat it like a system, not a shortcut.
Polyurethane glue: strong bonds, more fuss, and more questions
Polyurethane glue can be tough and water resistant, but it foams, it’s messy, and it’s less forgiving on cleanup. It also tends to bring more safety questions during application, since the uncured product can be more irritating.
If you’re deciding whether it’s appropriate in your situation, this article is worth reading alongside everything here: is polyurethane food safe when cured. It’ll help you think clearly about cure, use-case, and what “safe” means once it’s hardened.
Glues I don’t use on food-facing surfaces
A few categories make me cautious for kitchen pieces, especially where food sits or gets cut:
- Hot glue (softens with heat and can release under stress)
- Craft glues with no clear technical info
- Super glue (CA) for anything that sees heat, water, or flexing
- Anything with no label guidance or technical sheet, especially bargain bottles
Could you “get away with it”? Maybe. But kitchen work is where I stop gambling.
Best practices for cutting boards, butcher blocks, trays, and bowls
Kitchen projects live in a rough environment. They see water, warmth, mild acids, and repeated cleaning. The safest builds share a few habits:
Keep glue lines tight and buried
A good joint is wood-to-wood contact with a thin glue film between. The less exposed glue you have, the better.
Design for wipe-clean reality
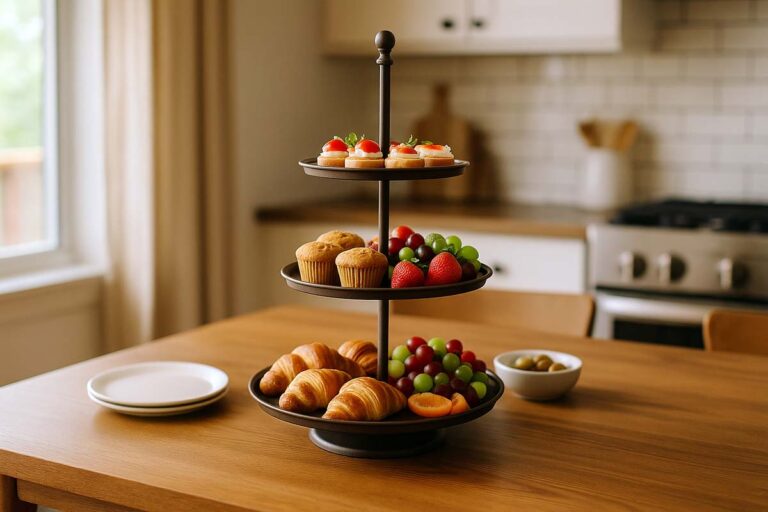
A tray with deep cracks, gaps, or open seams will hold grime no matter what glue you used. If you’re building tray stands or tiered setups, good joinery matters just as much as finish. This is also where having the right PPE helps when sanding and finishing; I keep a simple checklist like this on hand: essential safety gear for tray stand builds.
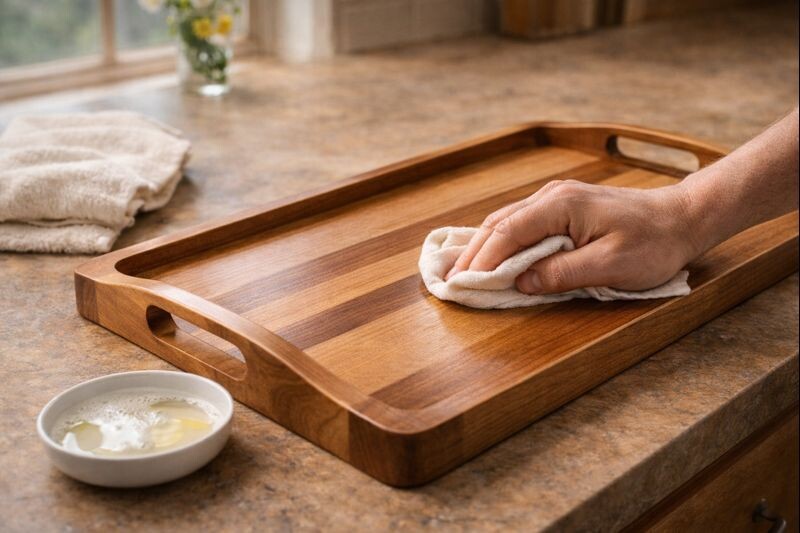
Finish matters as much as glue
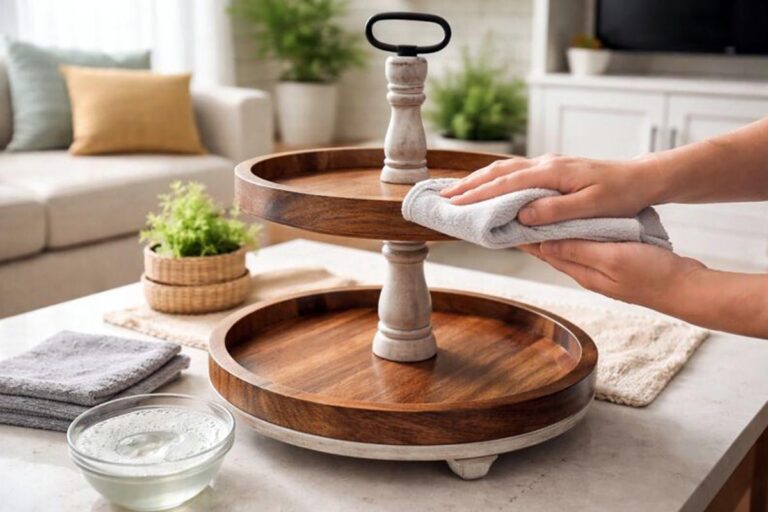
Even if the glue is buried, the finish is what your food and hands actually touch. Choose finishes that are commonly used on kitchenware, and apply them correctly. If you want a clean, durable approach for serving pieces, start with how to seal a wooden serving tray, then maintain it properly with how to clean a sealed wood tray without dulling it.
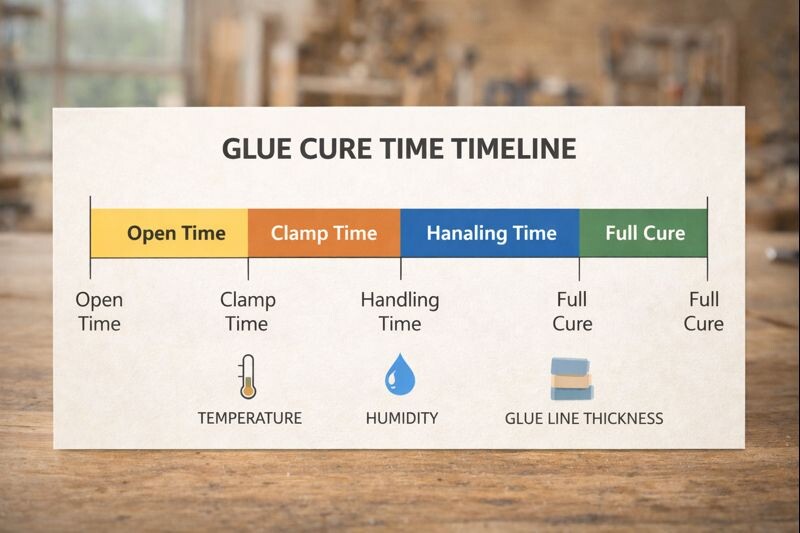
Curing time: when it’s actually safe to use your project
This is where most advice online gets sloppy. “Dry” is not the same as “ready for food.”
- Dry time is when it stops feeling wet.
- Set time is when it holds without slipping.
- Full cure is when it reaches its stable, final state.
If you’re unsure, don’t guess. These two references will keep you honest:
Temperature and humidity matter a lot. A chilly garage can turn “overnight” into “give it two days.” Thick glue lines also cure slower than thin ones.
If you need speed, do it the right way instead of cranking heat blindly. This helps: how to make wood glue dry faster.
Safe application steps that keep glue out of your food
You don’t need fancy moves here. You need clean, repeatable habits.
Tools that help
- Bar clamps or parallel clamps
- Small brush or roller (optional)
- Damp rag and a dry rag
- Plastic scraper or chisel
- Painter’s tape (great for keeping squeeze-out off faces)
My simple glue-up routine
- Dry fit first. If there’s a gap dry, glue won’t fix it.
- Apply a thin, even coat. More glue usually means more mess.
- Clamp until the joint closes. Look for a small, consistent bead.
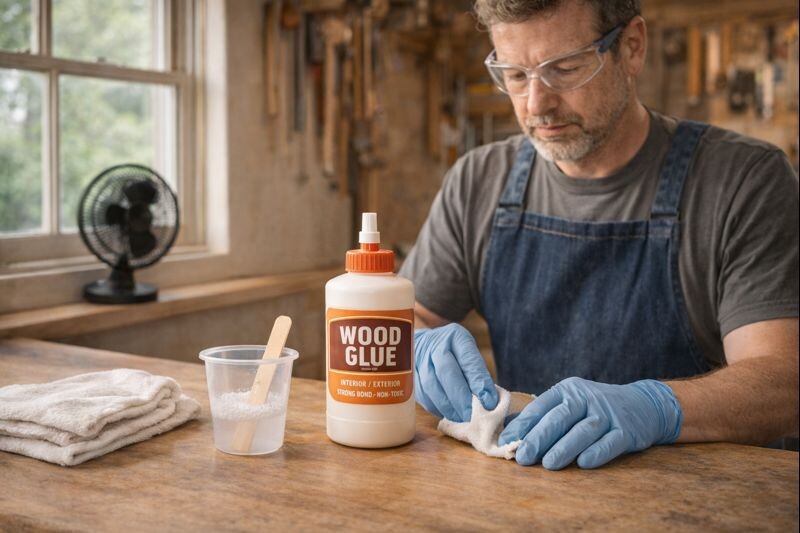
- Deal with squeeze-out on your schedule.
- Wipe when wet if it won’t smear into the grain.
- Or wait until rubbery, then scrape clean.
- After full cure, remove any residue. Scrape, then sand lightly.
- Finish the food-facing surfaces appropriately. Don’t rely on “sealed glue” as your safety plan.
If you’re working on end grain boards or anything where sanding can get tricky, a clean sanding routine keeps glue residue from showing later. This is a good reference: how to sand end grain smooth.
Shop safety: the wet stage is where you treat glue with respect
Once cured, most woodworking glues are pretty tame. While they’re wet, they can irritate skin and lungs, and some categories are more aggressive than others.
Good habits that cost nothing:
- Work with fresh air moving through the shop.
- Avoid rubbing wet glue into your skin.
- Wear gloves when using epoxy or polyurethane, especially for long sessions.
- Don’t sand half-cured glue. It gums up paper and makes dust you don’t want.
If you finish your tray and notice haze or cloudiness in the clear coat, don’t panic and add more product. Fix the cause first. This troubleshooting guide can save a project: why clear coats get cloudy.
FAQs on “is wood glue food safe”
What’s the safest way to clean a finished wood tray?
Use mild soap, a damp cloth, and don’t soak it. For detailed care steps that keep finishes looking good, see how to clean a sealed wood tray without dulling it.
Can I speed up glue curing with heat?
You can help it along with warmer temps and airflow, but don’t cook the project or rush into sanding. If you need practical, safe speed-ups, use this: how to make wood glue dry faster.
Does finish make a difference if the glue is inside the joint?
Yes. The finish is what food and hands touch, and it controls moisture movement. For serving pieces, a reliable approach starts with how to seal a wooden serving tray.
Is polyurethane glue safe for kitchen items?
It can be used in certain builds, but it’s fussier and can be more irritating while wet. If you’re considering it, read this first: is polyurethane food safe when cured.
Is wood glue food safe once it’s fully cured?
For many common woodworking glues used in tight joints, cured glue is generally treated as low-risk in normal kitchen use. Don’t leave glue on food-facing surfaces, and don’t use the project until it’s fully cured.
Is there any truly “food grade” wood glue for direct food contact?
Most woodworking glues aren’t sold as food grade for direct contact. The practical standard in woodworking is using glue for internal joints, then using a suitable finish and good cleaning habits.
How long should I wait before using a cutting board after gluing?
Follow the label, and when you’re unsure, wait longer. Dry time is not full cure. If you want to be precise, start with how long for wood glue to fully cure.
Conclusion
The safest way to think about this is simple: wood glue belongs inside tight joints, not on food-facing surfaces. Let the glue fully cure, remove squeeze-out cleanly, and choose a finish that matches kitchen use. If you do those things, your trays and laminated panels will hold up well and clean easily.