How Long for Wood Glue to Fully Cure: 7 Crucial Dry vs Cure Facts
How long for wood glue to fully cure depends on the glue type, shop conditions, and joint stress. If you’re wondering when you can unclamp, sand, finish, or actually use the project, you’re asking the right question. “Dry” and “cured” are not the same thing, and mixing them up is how good joinery turns into callbacks.
Contents Here
- 1 The quick answer most woodworkers use
- 2 Drying vs setting vs curing (the three clocks you’re really dealing with)
- 3 Full cure time by glue type
- 4 Clamping time rules (and why clamp time isn’t cure time)
- 5 What changes how long wood glue takes to fully cure
- 6 When it’s safe to move to the next step
- 7 Ways to help wood glue cure faster (without weakening the joint)
- 8 Common mistakes that make glue-ups fail early
- 9 How to read the glue bottle like a pro
- 10 FAQs on Wood Glue Cure Time
- 11 Final thoughts
The quick answer most woodworkers use
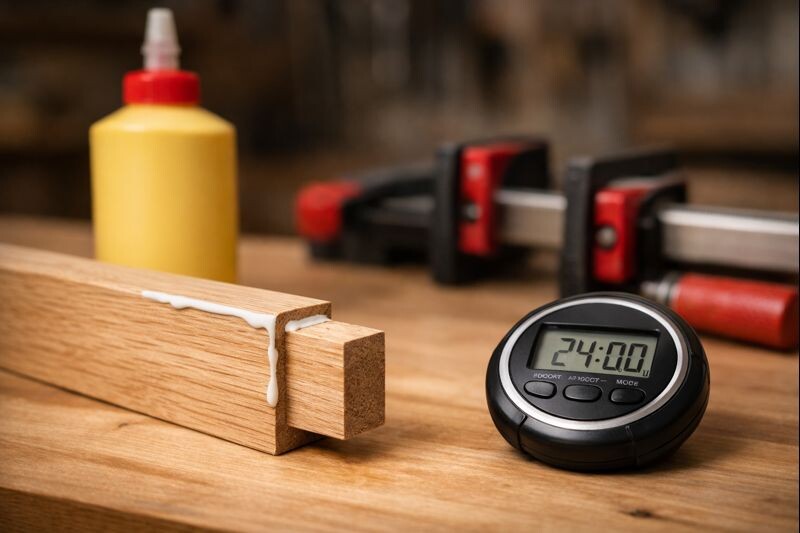
For typical yellow or white carpenter’s glue (PVA), full cure is usually about 24 hours in a normal shop. In cooler, damper conditions, or with a thicker glue line, it can stretch to 48 hours before the joint reaches its best strength.
That doesn’t mean you’re stuck staring at clamps all day. It just means you should match your next step to the glue’s stage:
- After clamp time: you can usually remove clamps and handle gently.
- After full cure: you can load the joint, machine aggressively, or finish confidently.
If you’re building something that gets handled a lot—like trays, tiered stands, or small furniture—give the glue the full cure window. You’ll feel the difference in long-term durability.
Know more: How Long Does It Take for Wood Glue to Dry
Drying vs setting vs curing (the three clocks you’re really dealing with)
Most glue-ups run on three overlapping timers. When folks say “it’s dry,” they might mean any of these:
- Setting is when parts stop sliding around. The glue grabs, and alignment holds.
- Drying is when water or solvent leaves the glue line enough to feel firm.
- Curing is when the adhesive finishes its chemical process and hits full strength.
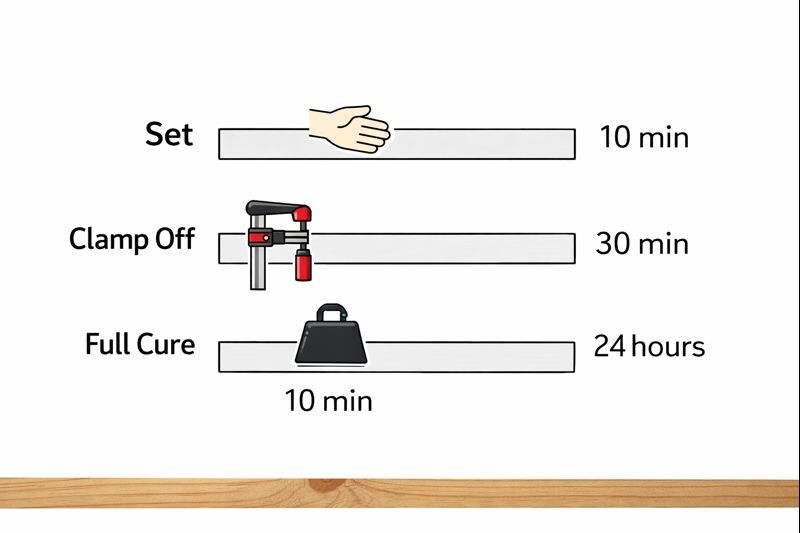
Here’s the practical takeaway: clamp time is about holding alignment, while cure time is about strength. You can often unclamp before full cure, but you shouldn’t stress the joint until it’s cured.
Full cure time by glue type
Different adhesives reach full strength in different ways. If you keep a couple glue types in the shop, this section saves headaches.
PVA glue (yellow or white carpenter’s glue)
This is the everyday workhorse for tight-fitting wood joints. It’s water-based, which means it’s heavily influenced by temperature, humidity, and wood moisture.
In most home shops, PVA hits practical full strength in about 24 hours. If the shop is cool or the wood is damp, plan on longer. A thick glue line also slows things down because the outside skins over first.
Where it shines: edge gluing, face frames, trays, and clean joinery that fits well.
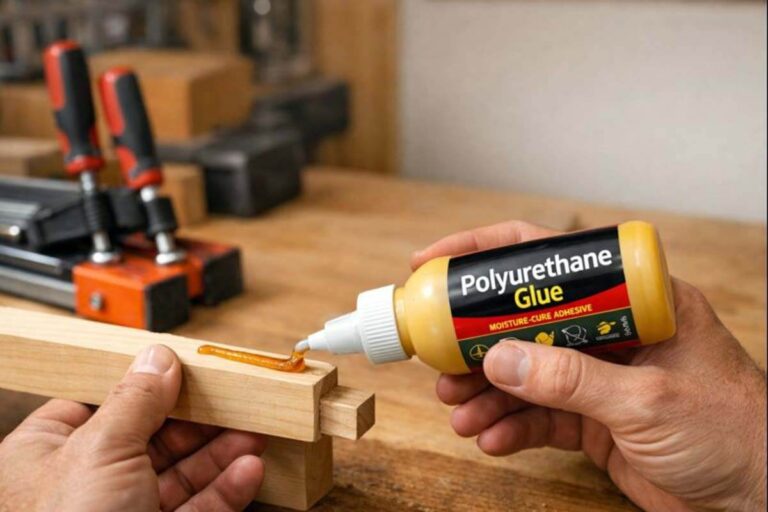
Polyurethane glue (the foaming kind)
Polyurethane glue behaves differently than PVA. It reacts with moisture, expands as it cures, and can fill small gaps. The expansion is not a “strength bonus,” though. You still want decent joint contact.
Full cure is commonly around 24 hours, but the working feel varies more than PVA. Clamp pressure matters because expansion can push joints out of alignment if you’re light on clamping.
Where it shines: mixed materials, slightly imperfect fits, and some outdoor applications.
If you’re finishing a serving piece later, it’s worth understanding finish safety after curing, especially for topcoats. My quick reference on polyurethane safety once it’s fully cured helps you time that part without guessing.
Epoxy (two-part resin + hardener)
Epoxy is its own world. Cure time depends on the specific formula and temperature. Some epoxies set fast but still need a full day to reach real strength. Others are slow-cure by design for maximum working time.
The safe habit is simple: treat epoxy as “hands-off” until the label’s full cure time passes. If you plane or clamp-move an epoxy repair early, you can weaken the bond.
Where it shines: repairs, gap-filling, oily woods with proper prep, and water-resistant joints.
CA glue (cyanoacrylate / “super glue”)
CA grabs quickly, which makes it great for quick fixes and tiny parts. But that instant grab can be misleading. Thicker glue lines can take much longer to truly cure through.
Use CA for small repairs, not primary structural joinery. If the joint matters, lean on PVA, epoxy, or a properly rated glue for the job.
Where it shines: chip repairs, small trim, quick tacking, and jigs.
Learn more: How Long Does Wood Glue Take to Set
Clamping time rules (and why clamp time isn’t cure time)
Clamps keep parts still while the glue sets. That’s their job. They don’t magically “finish” the glue. If you remember one thing, remember this: unclamping is not the same as curing.
Open time vs closed clamping time
- Open time is how long you have to spread glue and assemble parts before it starts grabbing.
- Closed clamping time is how long the joint needs pressure once it’s assembled.
If you’re doing a big glue-up, practice the dry fit first. Dry fitting is what keeps you from panicking halfway through assembly.
Stressed joints vs unstressed joints
A picture frame or decorative trim joint is usually low stress. A chair rung, tray handle, or tiered stand base is high stress.
- Low-stress joint: you can often handle carefully after the clamp window.
- High-stress joint: don’t load it until full cure, even if it feels solid.
If you’re building a stand where wobble or leverage is an issue, pair good glue habits with smart construction. This walkthrough on making a tiered tray stand step by step is a good reminder of where the stress really lands.
How tight should clamps be?
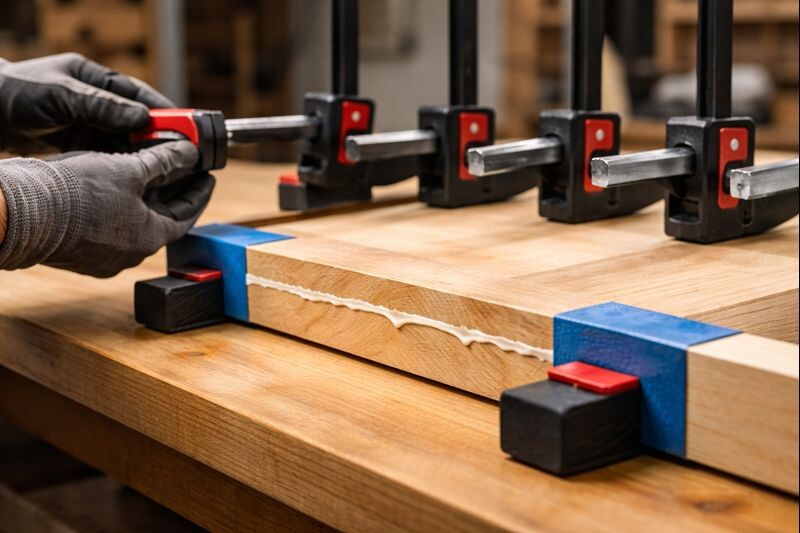
You want firm contact, not crushed fibers.
Too little pressure leaves gaps and weak spots. Too much pressure can squeeze out too much glue and starve the joint. A small, consistent squeeze-out bead is usually a good sign you’ve got coverage.
If clamps are bowing parts or leaving dent marks, back off and add cauls. Good glue-ups look calm, not tortured.
What changes how long wood glue takes to fully cure
When someone says, “My glue didn’t cure,” it’s usually one of these variables.
Temperature (cold shops slow everything down)
Most wood glues cure slower in the cold. Some won’t behave properly below their recommended minimum temperature. If your shop lives in the 40s–50s°F range, expect delays and weaker early strength.
A simple fix is moving the project inside after clamping, as long as it’s supported flat. Don’t bake it with aggressive heat. Gentle warmth is your friend.
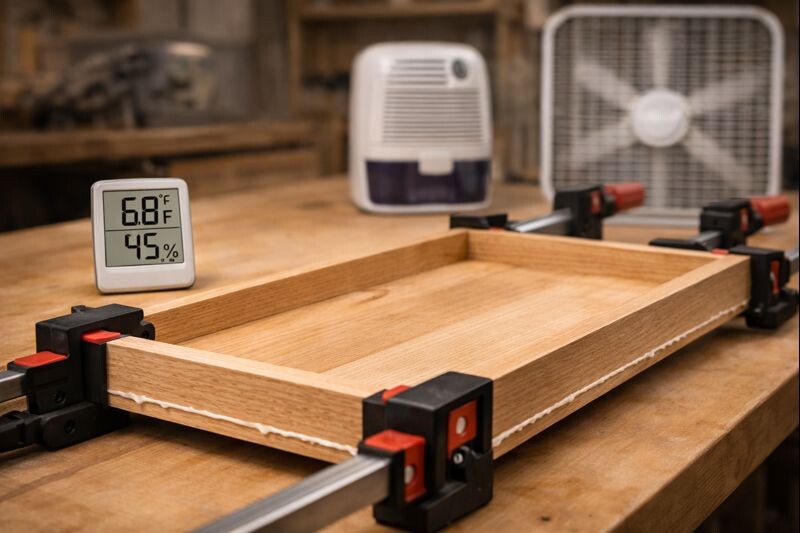
Humidity and airflow
High humidity slows water evaporation in PVA glues. Poor airflow does the same thing. You don’t need a wind tunnel, but you do want reasonable air movement and stable conditions.
If you’re in a muggy season, assume cure time stretches. Plan your schedule around it instead of fighting it.
Wood moisture content (the sneaky culprit)
Gluing damp wood can slow curing dramatically. Worse, it can set you up for movement later as the wood dries and shrinks.
If boards feel cool and clammy, or if they’ve been stored outside, let them acclimate. A day of patience beats a joint that creeps later.
Glue line thickness (too much glue slows curing)
More glue doesn’t mean more strength. It often means a thicker glue line that skins over and stays soft underneath.
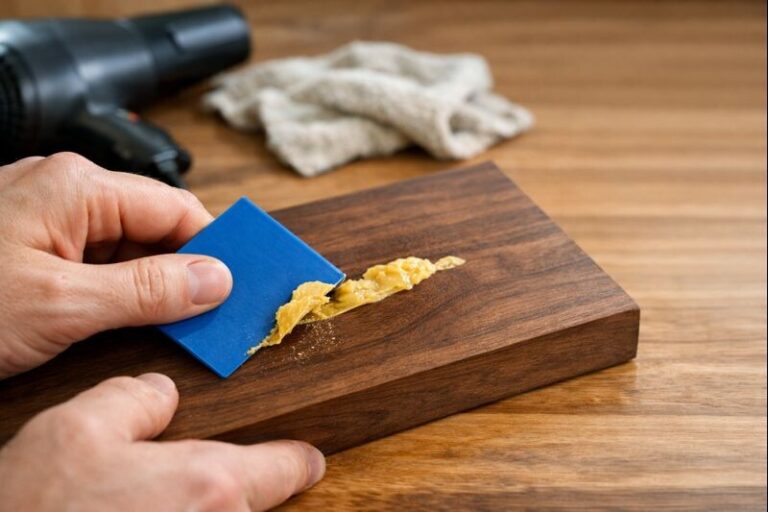
Aim for a thin, even coat with full coverage. If you’re drowning the joint, you’re adding mess and slowing cure time. This matters even more if you plan to stain, because glue smears can show up as ugly light patches.
If you’ve ever had blotchy stain around joints, you’ll appreciate this guide on preventing stain blotches on pine. Glue control is a big part of that.
When it’s safe to move to the next step
This is the section most people actually need. You’re not just asking about glue. You’re asking about workflow.
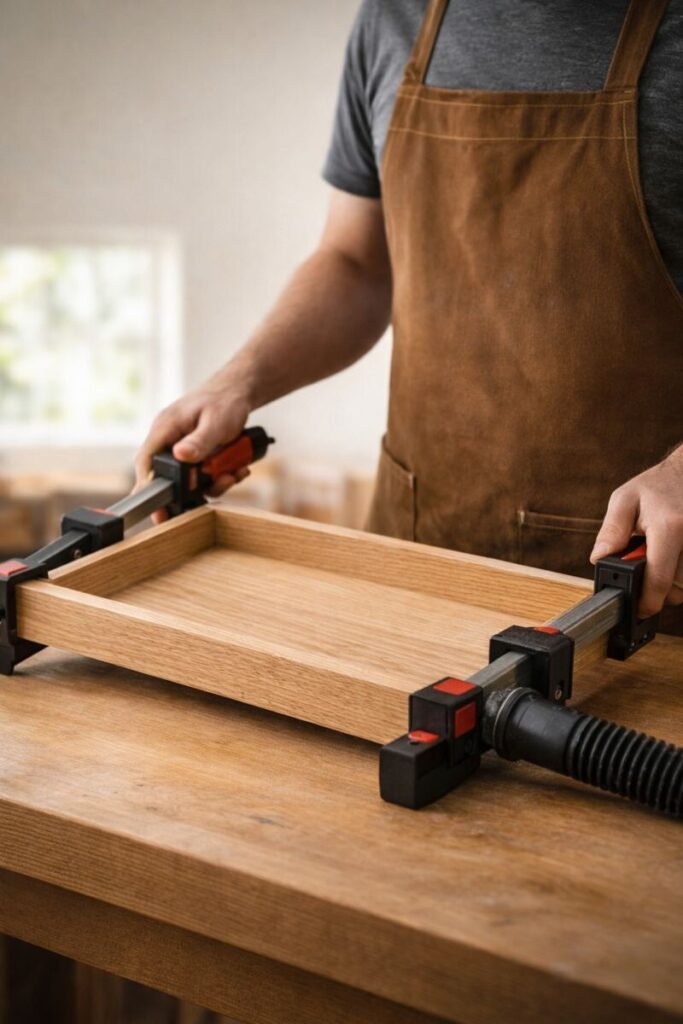
When can you remove clamps?
Remove clamps after the glue’s recommended clamp time if the joint is stable and supported. If the parts spring or shift, re-clamp and give it more time.
For load-bearing joints, I leave clamps on longer when I can. Clamps are cheap insurance, and re-doing a joint is not.
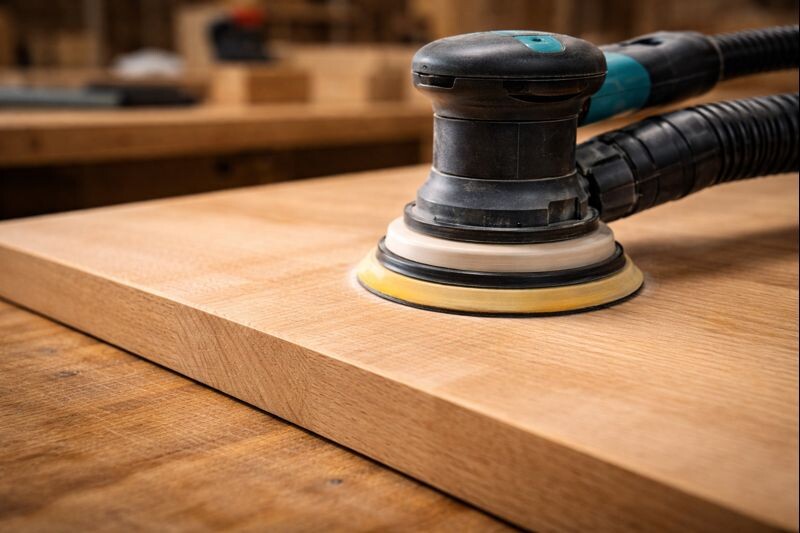
When can you sand, plane, or machine the joint?
If you sand too early, you can smear semi-cured glue into the grain. That can show up later under stain or clear coat.
If you plane or route too early, you can introduce “creep,” where the joint subtly shifts under pressure. That’s how panels end up with a faint ridge at the glue line after a week.
A safe habit: do light cleanup after the glue firms up, then do final surfacing after full cure.
If you’re chasing a clean surface for finishing, you’ll like this walkthrough on sanding end grain smooth without tearing it up. It pairs well with good glue timing.
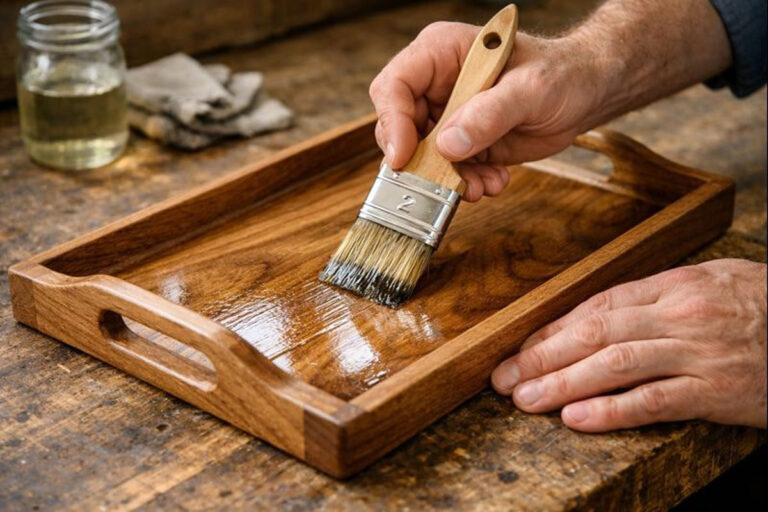
When can you apply finish or put the project into service?
Finishing too early can trap moisture near the glue line or highlight glue contamination. It can also lead to cloudy clear coats or tacky paint if conditions are already borderline.
If you’re finishing something like a serving tray, timing matters for durability. Here’s my process for sealing a wooden serving tray properly so the finish cures hard and cleans easily.
And if your clear coat ever turns hazy, this troubleshooting guide on why clear coats get cloudy and how to fix it is worth keeping bookmarked.
Ways to help wood glue cure faster (without weakening the joint)
You can speed curing, but you can’t cheat physics. The goal is better conditions, not reckless heat.
Try these safe improvements:
- Warm the space gently. A stable, warmer room helps most glues.
- Lower humidity if you can. A dehumidifier makes PVA more predictable.
- Use dry, acclimated wood. This is the biggest cure-time upgrade.
- Apply glue correctly. Thin, even coverage beats puddles every time.
- Clamp smart, not brutal. Firm contact is better than crushed fibers.
Avoid blasting a fresh glue-up with a high-heat gun. You can skin the glue line and slow the inside from curing properly. Gentle warmth wins.
Common mistakes that make glue-ups fail early
Most glue problems aren’t the glue’s fault. They’re process problems.
Mistake: removing clamps because it “feels solid”
A joint can feel solid and still be weak inside. If you put stress on it early, you can create microscopic bond failures that show up later as squeaks or cracks.
Fix: support the assembly and wait for full cure before loading.
Mistake: using too much glue
This slows curing and creates finishing problems. It can also make parts skate around during clamping.
Fix: spread a thin coat, get full coverage, and clean squeeze-out promptly.
Mistake: starving the joint with too much clamp pressure
If you crank clamps like you’re bending steel, you can squeeze out too much adhesive. Wood-to-wood contact is great, but you still need glue in the interface.
Fix: tighten until the joint closes, then stop.
Mistake: gluing dirty or burnished surfaces
Planed or sanded surfaces are usually fine. But oily contamination, dust, or a polished surface can reduce adhesion.
Fix: brush or vacuum dust, wipe oily woods properly, and glue soon after prep.
How to read the glue bottle like a pro
Manufacturers often list multiple times, and it’s easy to grab the wrong one.
Look for:
- Open time: how long you can assemble before it grabs.
- Clamp time / working strength: when you can remove clamps.
- Full cure: when the bond reaches max strength.
- Minimum temperature: below this, results get unreliable.
If the label says “do not stress for 24 hours,” take it seriously. That’s the line that keeps chairs from wobbling and tray handles from popping loose.
FAQs on Wood Glue Cure Time
Is “dry to the touch” the same as fully cured?
No. Dry to the touch just means the surface firmed up. Full cure means maximum strength through the whole glue line.
Is 12 hours enough for wood glue to cure?
Sometimes for light handling, yes. For load-bearing use, I still wait the full cure window whenever possible.
Can I apply paint if the glue joint isn’t fully cured?
It’s better to wait. If you’re sealing painted wood and fighting tackiness, this article on sealing acrylic craft paint so it doesn’t stay tacky can help you avoid finish frustration.
Does wood glue expand as it dries?
Most PVA doesn’t “expand” like foam, but it can creep under pressure before full cure. Polyurethane glue can foam and push joints if not clamped well.
Final thoughts
How long for wood glue to fully cure isn’t one fixed number—your glue type, temperature, humidity, wood moisture, and glue thickness all affect it.
In a normal shop, many PVA glue-ups reach full strength in about 24 hours, but colder or damp conditions can push that longer. If the joint will carry weight, wait for full cure before stressing it.