Screw Wood Plugs: 9 Pro Tricks for Seamless, High-End Screw Hides
Screw wood plugs make screw holes disappear on tray stands, shelves, and furniture without reaching for putty.
They’re small pieces of real wood, so the surface finishes like the rest of the board.
With the right counterbore depth, grain match, and a clean flush cut, the plug blends in—or becomes a deliberate accent—while the joint stays serviceable and strong.
Contents Here
- 1 Screw wood plugs
- 2 Why bother with plugs instead of filler
- 3 Drawbacks and when not to use screw wood plugs
- 4 Wood plugs vs other ways to cover screw holes
- 5 Tools and supplies that make plugs painless
- 6 Recommended tools & plug options (budget + pro, no hard sell)
- 7 Choosing the right plug size and screw setup
- 8 Step-by-step: installing screw wood plugs (clean, flush, and low-stress)
- 8.1 Step 1: Mark the locations and plan the grain direction
- 8.2 Step 2: Drill the counterbore to a controlled depth
- 8.3 Step 3: Drill the pilot hole in the center
- 8.4 Step 4: Drive the screw properly
- 8.5 Step 5: Cut or select your plugs
- 8.6 Step 6: Dry-fit first
- 8.7 Step 7: Glue smart, not heavy
- 8.8 Step 8: Align the grain, then tap the plug home
- 8.9 Step 9: Trim flush without tearing fibers
- 8.10 Step 10: Sand and finish
- 9 Common plug problems and quick fixes
- 10 Using screw wood plugs on tray stands without wobble issues
- 11 FAQs about Screw Wood Plugs
- 12 Final thoughts
Screw wood plugs
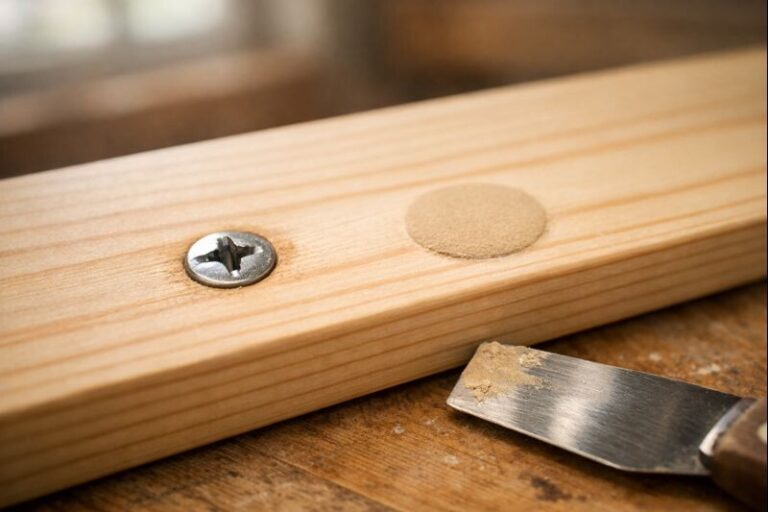
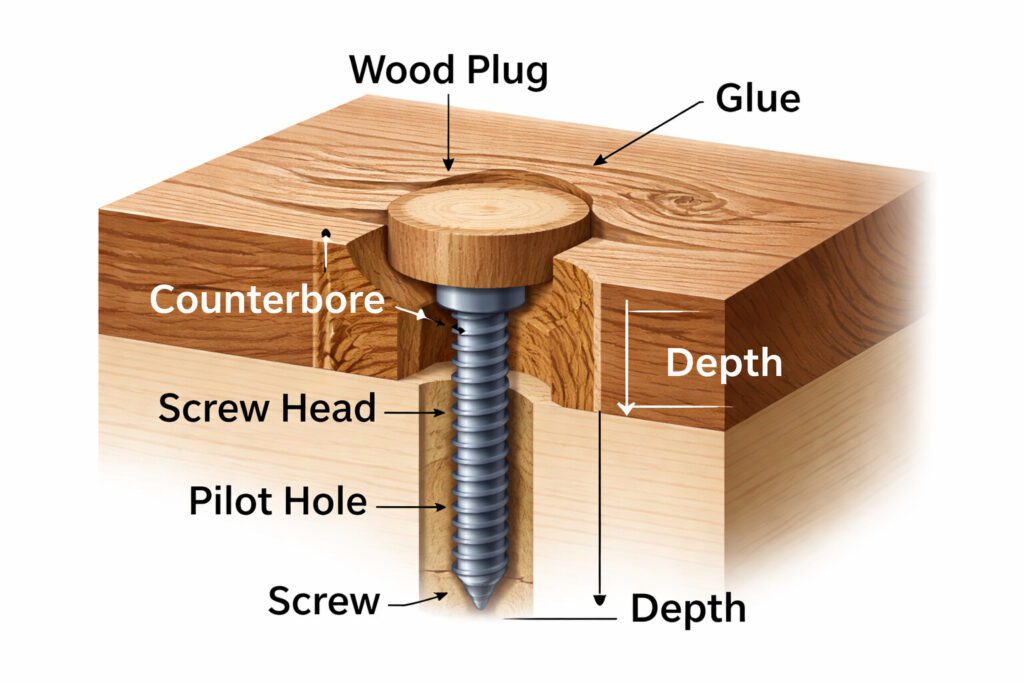
A screw wood plug is a small “cookie” of wood that gets glued into a counterbored hole after the screw is driven.
The screw sits down inside that counterbore, then the plug covers it.
That’s different from:
- Countersinking: a cone-shaped recess that lets the screw head sit flush, but still visible.
- Wood filler: fast, but it can shrink, crack, or show under finish.
- Pocket-hole plugs: similar idea, but made for pocket holes (angled holes), not straight counterbores.
For most tray stand builds, plugs shine on the underside of trays, around center posts, and anywhere you want a clean face with no shiny screw heads. If you’re already planning hidden fasteners, this pairs nicely with the approach covered in hiding fasteners without filler.
Why bother with plugs instead of filler
Plugs take a little longer, but they look and hold up better in a lot of real-world projects.
Main benefits:
- They finish like wood: stain, oil, poly, paint—no weird dull spot.
- They age better: filler can telegraph later; plugs usually don’t.
- They protect the screw head: less moisture, less grime, fewer rust freckles.
- They can be decorative: contrasting plugs (walnut in maple, maple in walnut) look intentional.
- They’re strong for tray stands: a deep counterbore plus a plug keeps the face clean while the screw does the clamping.
However, plugs aren’t always the best move.
Drawbacks and when not to use screw wood plugs
Skip plugs when:
- The joint may need frequent disassembly (plugs can be removed, but it’s extra work).
- The stock is very thin (not enough depth for screw + counterbore).
- The surface is highly contoured (flush trimming gets tricky).
- The wood is brittle or splintery and you can’t control tear-out (some softwoods can be fussy).
If the hole is already messy from a stripped fastener, fix the bite first, then worry about hiding it. This guide on repairing a stripped screw hole helps when screws won’t hold anymore.
Wood plugs vs other ways to cover screw holes
Here’s the quick comparison most builders actually need.
| Method | Best for | Upsides | Downsides |
|---|---|---|---|
| Screw wood plugs | Finished furniture faces, tray stands, visible surfaces | Looks like real wood, durable, clean under clear coat | Takes time, needs tools |
| Wood filler | Painted work, quick repairs | Fast, cheap, easy | Can shrink, stain poorly, shows under clear finish |
| Screw caps (plastic/metal) | Utility builds, shop fixtures | Fast, removable | Visible, not “woodworking clean” |
| Dowels cut flush | Thick stock, rustic projects | Easy to make | Often shows end grain “dot” |
For a deeper rundown of hole-covering options beyond plugs, check covering screw holes cleanly.
Tools and supplies that make plugs painless
You don’t need a fancy shop, but the right bits and cutters prevent most headaches.
Core tools:
- Drill/driver
- Forstner bit (clean counterbore walls) or a brad-point bit for smaller counterbores
- Drill bit for the pilot hole
- Countersink bit (optional, helps seat screw heads cleanly)
- Plug cutter (straight or tapered)
- Mallet or small hammer
- Wood glue (PVA)
- Flush-cut saw or a sharp chisel
- Sandpaper (120 → 180 → 220 is typical)
Nice-to-have tools:
- Drill press (makes plug cutting safer and more accurate)
- Depth stop collar or painter’s tape depth flag
- Blue tape (prevents glue smears and finish halos)
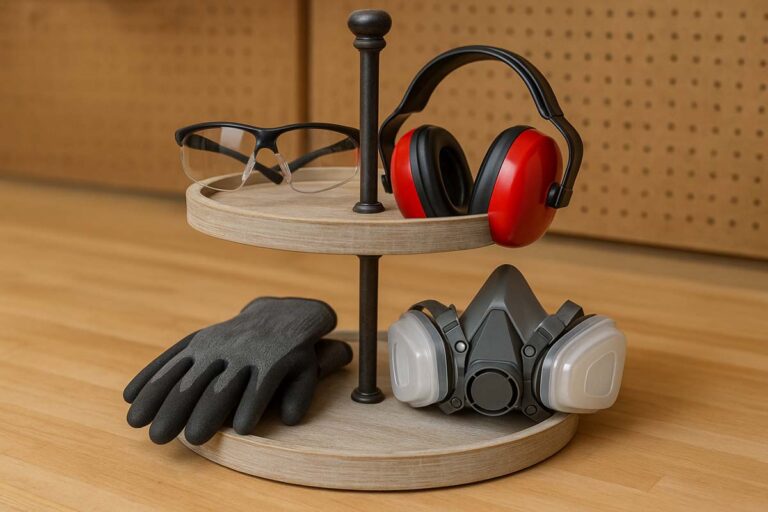
And don’t skip safety. Plug cutting throws chips. Eye protection matters, especially with small cutters. This checklist on basic shop safety gear for tray builds maps out what’s worth keeping at arm’s reach.
Recommended tools & plug options (budget + pro, no hard sell)
Here’s a short kit that covers 95% of screw wood plug jobs.
| What to buy | Budget-friendly pick | Step-up pick | Why it’s worth it |
|---|---|---|---|
| Plug cutter | IRWIN plug cutters (common sizes like 3/8″ are a workhorse) | Snappy tapered plug cutter + countersink combo | Tapered plugs seat tight and hide small drilling “oops” better. The combo bits save time. |
| Countersink/counterbore set | Basic countersink set (match your screw sizes) | W.L. Fuller countersink sets that include plug cutter + stop collar | Cleaner, repeatable holes. Plus, the stop collar keeps depth consistent. |
| Forstner bits (for flat-bottom counterbores) | A mid-range Forstner set | FISCH Forstner bits / sets | Flat-bottom holes make plugs look tighter and trim cleaner. |
| Flush-cut saw (for trimming plugs) | Any flexible flush-cut saw | SUIZAN flush-cut pull saw | A good flush-cut saw reduces scratches and lowers the risk of tearing fibers. |
| Depth control | Tape on the bit (works fine) | Milescraft DrillStop collar set | When you’re doing multiples (tray stand parts), stop collars keep every counterbore identical. |
| Glue | Standard PVA wood glue | Titebond II or III (pick based on moisture needs) | II is water-resistant (Type II). III is waterproof (Type I) with longer open time. |
| Pre-made plugs (fast option) | Hillman oak plugs/buttons | Cross-grain/tapered plug packs (better blend) | Pre-made plugs are quick for painted builds or utility work. Cross-grain styles usually blend better. |
| Tape for glue control | ScotchBlue painter’s tape (2090) | Same tape, just buy wider rolls | Tape around the hole prevents glue halos that show up under stain or clear coat. |
Quick buying tip that saves frustration: prioritize a sharp plug cutter and consistent depth control before buying a dozen plug species. That’s what makes plugs look “built-in,” not patched.
Choosing the right plug size and screw setup
Plugs are usually sized by diameter: 1/4″, 3/8″, 1/2″, and up.
A practical way to choose:
- Pick a plug size that fully covers the screw head with a little margin.
- Keep enough wood under the counterbore so you don’t weaken the part.
General starting points (always test on scrap):
- 1/4″ plugs: small screws, light trim
- 3/8″ plugs: many #6–#10 wood screw jobs
- 1/2″ plugs: larger screws, thicker stock, “feature plug” look
If the screw choice itself is still fuzzy, it helps to understand head styles and sizing first. The basics are covered in a plain-English wood screw overview and getting screw size right.
Step-by-step: installing screw wood plugs (clean, flush, and low-stress)
This is the workflow that stays reliable on tray stands and small furniture parts.
Step 1: Mark the locations and plan the grain direction
Before drilling, decide if the plug should “disappear” or pop.
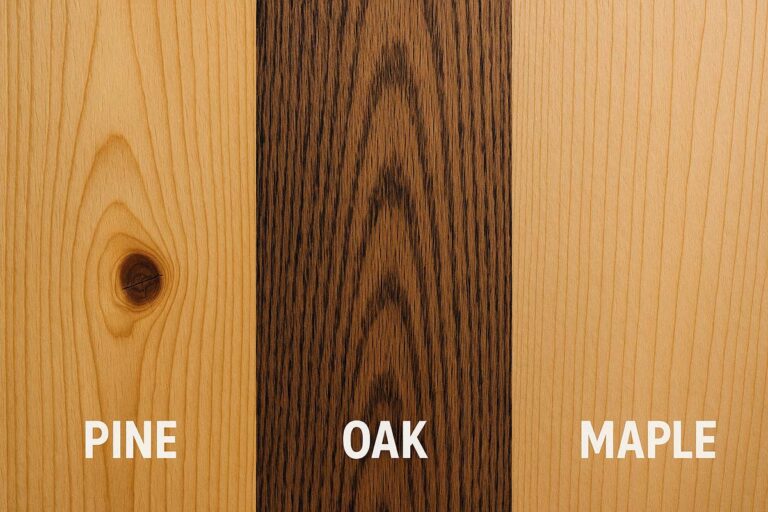
- For invisible plugs, cut plugs from the same board species (and similar color).
- For accent plugs, choose a contrasting wood, but keep the finish consistent.
Next, think about grain direction. A face-grain plug blends best when its grain runs the same way as the surface.
Step 2: Drill the counterbore to a controlled depth
Use a Forstner bit for a flat-bottomed hole.
Typical depth:
- Deep enough so the screw head sits below the surface by at least 1/8″
- Shallow enough to leave solid wood beneath the screw tip
A clean trick: wrap painter’s tape around the bit as a depth flag, or use a stop collar.
Step 3: Drill the pilot hole in the center
Keep the pilot centered in the counterbore.
Pilot holes reduce splitting and make the screw drive straight. If splitting is a recurring problem on your builds, the steps in preventing wood from splitting while driving screws are worth using every time.
Step 4: Drive the screw properly
Drive the screw until the head is seated down in the counterbore.
Don’t over-torque. Overdriving can strip the hole, crush fibers, and make the plug area look sunken later.
If you want a refresher on technique, driving screws into wood the right way lays out the basics without the fluff.
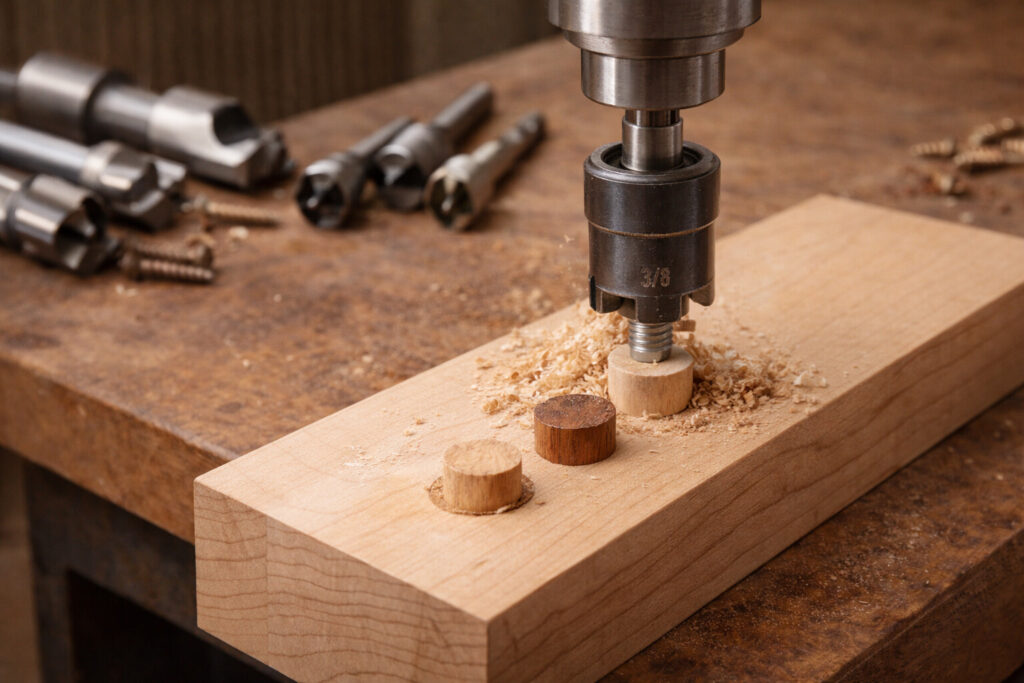
Step 5: Cut or select your plugs
You’ve got two main options.
Option A: Cut custom plugs (best match):
Use a plug cutter and cut plugs from scrap of the same species.
Tips that matter:
- Use straight-grained scrap. Wild grain looks cool, but it’s harder to “vanish.”
- Cut a few extra. Some will split during installation.
Option B: Buy pre-made plugs (fast and consistent):
Pre-made plugs are great for painted projects or when color match isn’t critical.
Commercial buying tips:
- Look for tapered plugs if you want easier, tighter installs.
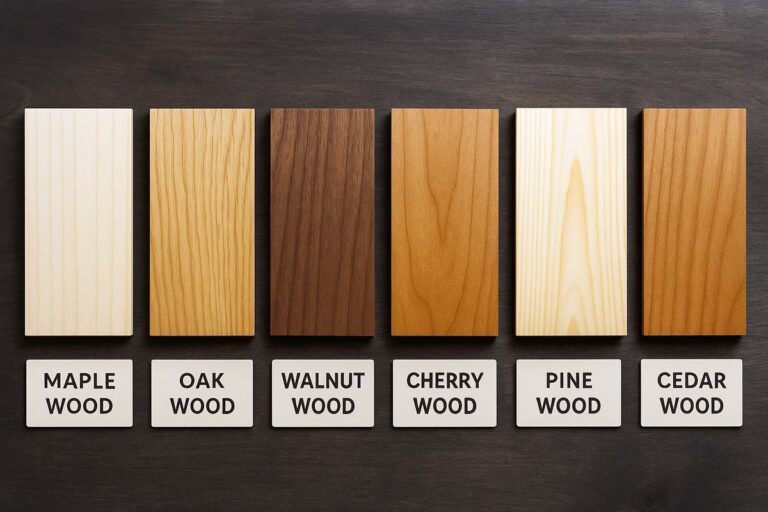
- Pick the right species (oak, maple, walnut, etc.) so stain behaves predictably.
- Avoid super fuzzy plugs; they soak glue and can swell unevenly.
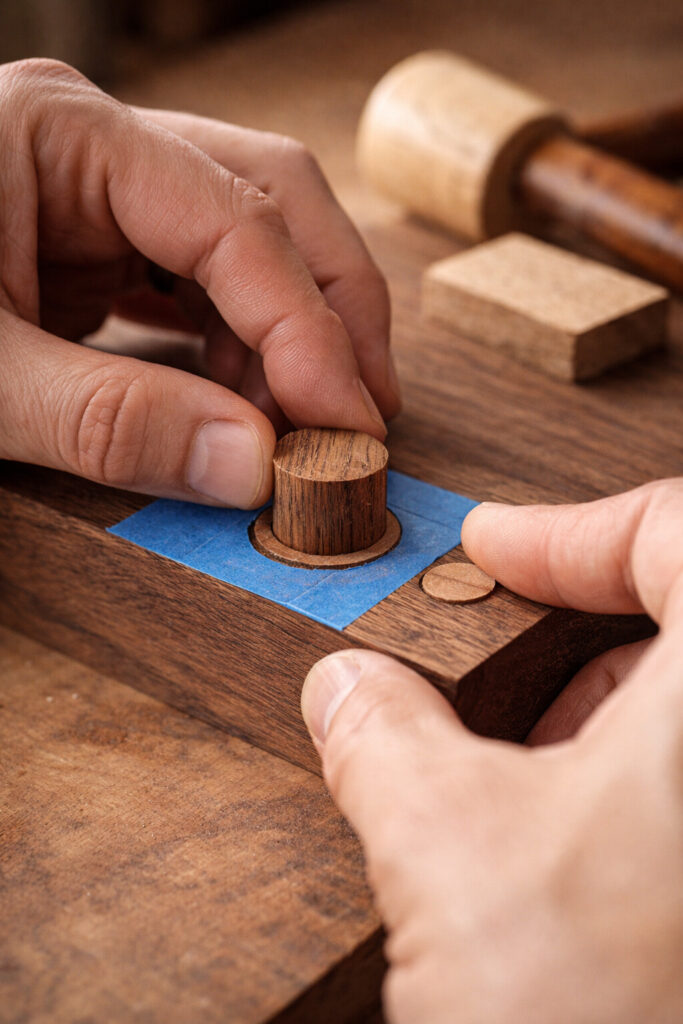
Step 6: Dry-fit first
This step saves you from panic later.
- The plug should start by hand, then need light taps to seat.
- If it drops in loosely, it may show a glue line. Consider a fresh plug or tapered style.
- If it refuses to start, lightly sand the sides of the plug—don’t force it and split the surrounding rim.
Step 7: Glue smart, not heavy
Use just a thin coat of glue on the plug’s sides or on the counterbore wall.
Avoid puddling glue on the bottom. That’s where squeeze-out causes finish blotches.
A clean method:
- Put blue tape around the counterbore opening.
- Tap the plug in.
- Peel tape immediately, then wipe any tiny squeeze-out.
Step 8: Align the grain, then tap the plug home
Rotate the plug so the grain lines up with the surface board.
Next, tap it flush with a mallet and a scrap block.
If the plug is tapered, it will tighten quickly, so alignment must happen before the last taps.
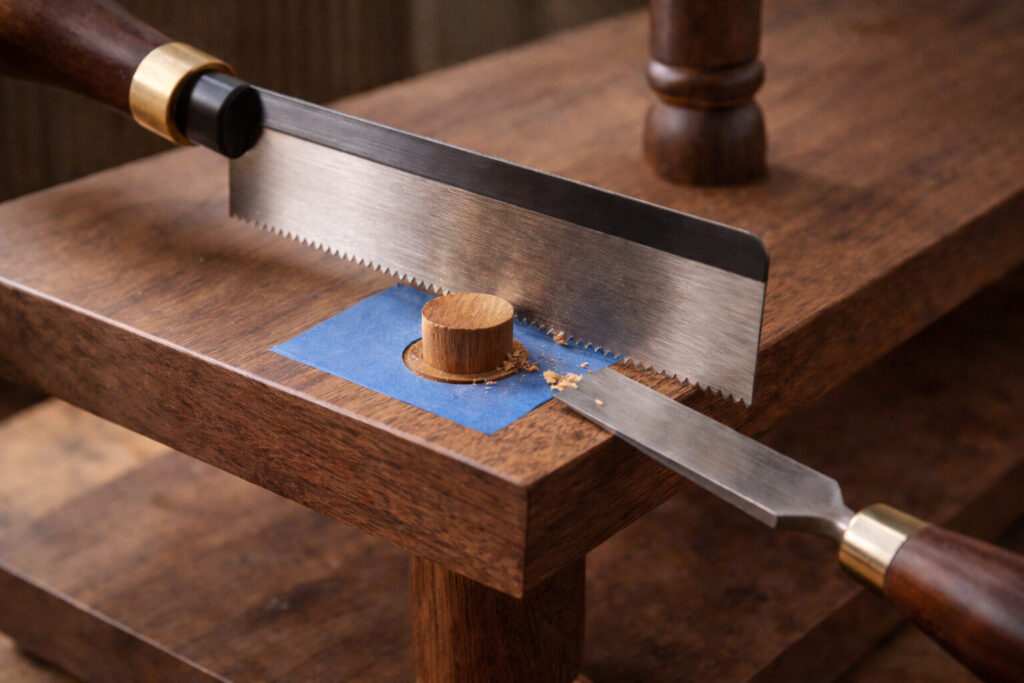
Step 9: Trim flush without tearing fibers
Two reliable approaches:
- Flush-cut saw: safest for most people, especially on tray parts.
- Sharp chisel: fast, but only if the edge is truly sharp and you’re cutting with the grain.
A pro move: leave the plug slightly proud, trim nearly flush, then sand the last little bit. That prevents a low spot.
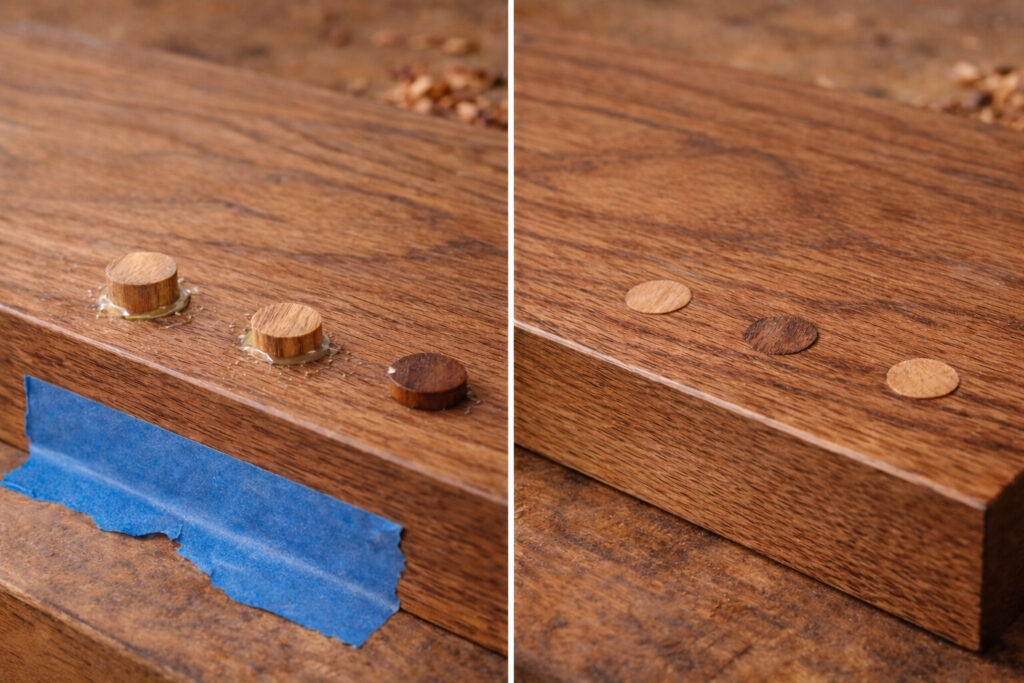
Step 10: Sand and finish
Sand the area evenly so the plug blends into the surface.
Then finish as normal.
If the project is a tiered tray stand that may get wiped down often, choose a finish that can handle light moisture and cleaning. For tray-related finishing, sealing a wooden serving tray is a good reference point for durable topcoats.
Common plug problems and quick fixes
Most plug issues come from glue, depth, or trimming.
- Plug looks like a dark ring after finishing: Usually glue smear. Next time, tape the area and use less glue.
- Plug sits low (a “divot”): Counterbore too deep or plug trimmed too aggressively. Fix by drilling it out and plugging again, or lightly skim with a matching plug and sand.
- Plug cracks during tapping: Plug too dry/brittle or too tight. Use a tapered plug, or ease the sides slightly.
- Plug won’t match color: Different wood batch or grain. If stain is planned, cut plugs from offcuts of the same board whenever possible.
Using screw wood plugs on tray stands without wobble issues
Plugs hide screws, but they don’t fix bad structure.
For tiered tray stands, strength comes from solid joinery and a stable center post, then plugs make it look finished.
A good order of operations:
- Build the frame and trays.
- Get everything square and tight.
- Fix wobble before cosmetics.
- Plug the visible counterbores last.
If your stand rocks even slightly, tighten the build process first using stopping a tiered tray stand from wobbling. Then circle back and hide the fasteners with plugs.
And if you’re still planning the full build, this walkthrough on building a tiered tray stand that holds up pairs well with plug-based screw hiding.
FAQs about Screw Wood Plugs
Can screw wood plugs be stained to match the board?
Yes, but the match depends on wood species and grain. Use plugs cut from the same board whenever possible, keep glue off the surface, and test stain on scrap first to confirm color and absorption.
Are tapered plugs better than straight plugs?
Tapered plugs are often easier to install and can seat tighter with less fuss. Straight plugs work fine, but they require cleaner hole sizing and more careful fitting to avoid splits or loose glue lines.
Can a plugged screw be removed later?
Yes, but it takes a few steps. Drill a small hole into the plug, pick it out with an awl, then back the screw out. Using minimal glue on the plug sides makes future removal easier.
What glue works best for installing wood plugs?
Standard PVA wood glue works well for most interior projects. Apply a thin coat to avoid squeeze-out and finish problems. For quick installs, a small amount of medium CA glue can work, but it reduces reversibility.
Final thoughts
Screw wood plugs are one of those small details that make a project look “finished,” especially on tray stands where the eye lands on broad, flat surfaces.
Keep the process simple: clean counterbores, correct pilot holes, light glue, grain alignment, and careful flush trimming.
Do that, and the screws stay strong while the surface stays clean.