How Strong Is PVA Wood Glue? 7 Hard Facts Every Woodworker Needs
In short, PVA wood glue is extremely strong—on tight, well-clamped long-grain joints it often bonds so well that the wood fibers fail before the glue line does. This article breaks down real strength numbers, what changes them, and how to get dependable results.
Contents Here
- 1 What “strength” really means for PVA glue
- 2 Typical PSI strength: what you can expect from PVA
- 3 PVA types and how they influence strength
- 4 Joint design matters more than the glue
- 5 What affects PVA strength in the shop
- 6 How to apply PVA for maximum strength
- 7 When PVA is a great choice, and when it isn’t
- 8 PVA vs epoxy vs polyurethane vs hide glue: practical differences
- 9 Major Insights
What “strength” really means for PVA glue
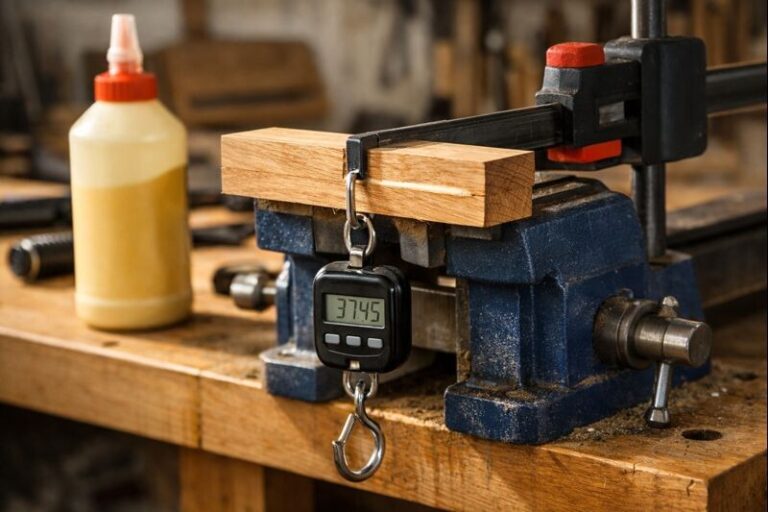
When woodworkers talk about “strong glue,” they’re usually talking about shear strength. Shear is the sideways sliding force that tries to make two glued boards slip apart. Lab tests often report strength in PSI (pounds per square inch), but those numbers assume clean surfaces, tight joints, proper clamping, and full cure.
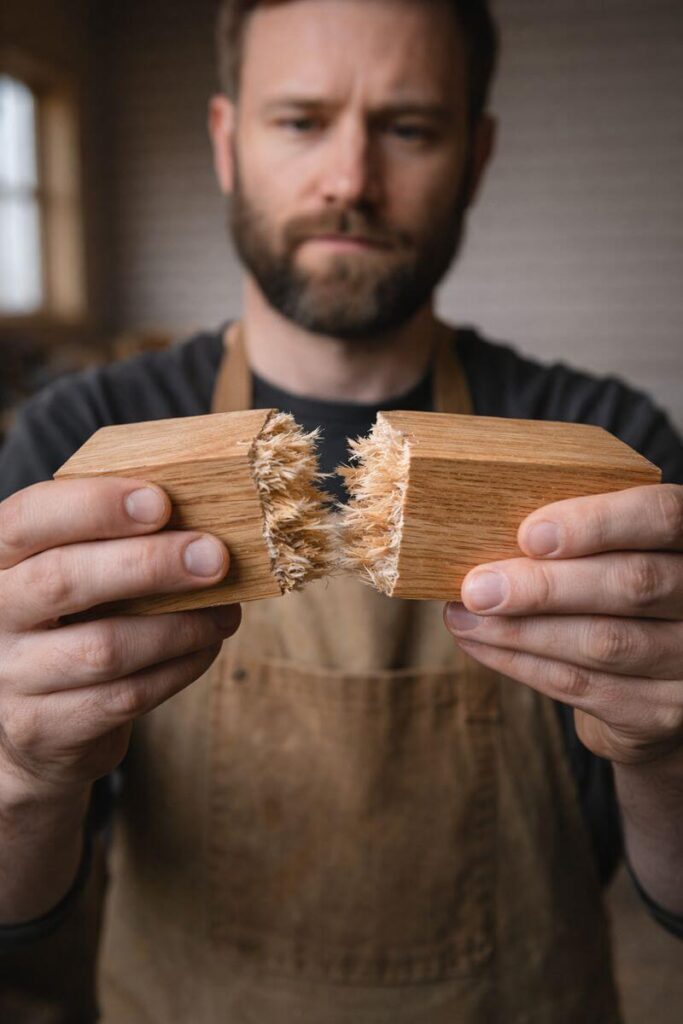
Here’s the part that matters in real projects: a “strong” glue joint is one where the wood fails before the glue line. That’s why you’ll hear the phrase “stronger than wood,” especially for long-grain joints made with good PVA.
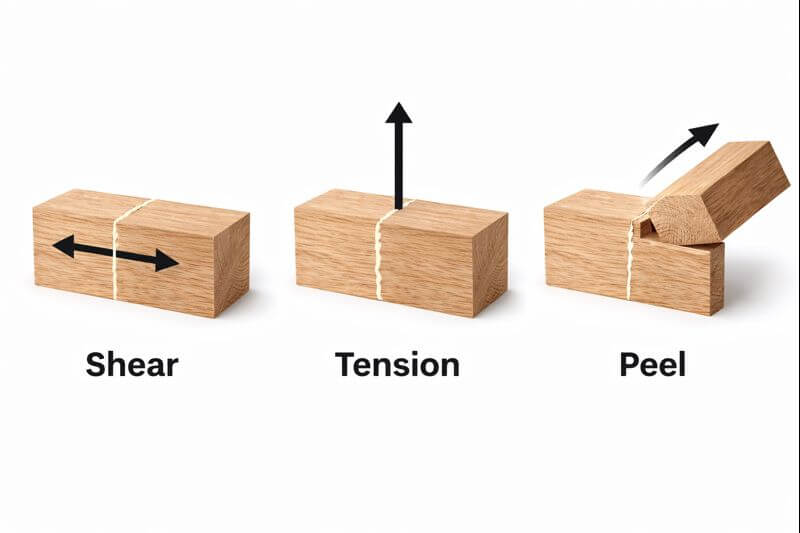
Shear vs tensile vs real-life stress
Most furniture joints don’t fail in one clean direction. Chair rails rack, shelves bend, and frames twist. That means your joint sees a mix of:
- Shear (sliding)
- Tension (pulling apart)
- Peel (lifting at an edge, which is brutal on glue)
- Creep stress (slow movement under constant load)
So don’t treat PSI as a “weight rating.” Treat it as a comparison tool, then build joints that resist racking and peel.
Typical PSI strength: what you can expect from PVA
Many common PVA wood glues test in the neighborhood of 3,000–4,000 PSI in shear under ideal conditions. Some products test higher or lower depending on formula and testing method. The important point is this: in a well-fit long-grain joint, those numbers are often high enough that the wood gives up first.
If you want the bigger picture on adhesives beyond just PVA, read my guide on overall wood glue strength in real shop conditions. It helps you keep the lab talk in perspective.
Why your results won’t match the “perfect test”
If someone says, “My glue is 4,000 PSI,” that doesn’t mean your project will always hit that. Your results shift with:
- Wood species and density
- Surface prep (planed vs sanded, dusty vs clean)
- Glue-line thickness (too thick can weaken, too thin can starve)
- Clamp pressure and alignment
- Temperature and humidity
- Time before stressing the joint
PVA is forgiving, but it’s not magic. It rewards tight joinery and patience.
PVA types and how they influence strength
“PVA” is a family of glues, not a single product. Most woodworkers run into these variations:
- White PVA (school/craft glue): longer dry time, often weaker for structural joints.
- Yellow carpenter’s glue (aliphatic resin/PVA blend): faster grab, common for furniture.
- Type II: more water-resistant for occasional moisture.
- Type III: more water-resistant, often marketed for outdoor exposure (still not a perfect forever-outdoor solution).
If you’re unsure what’s in your bottle, start with understanding what PVA wood glue actually is. It clears up labeling and why “Type” ratings matter.
Is white “Elmer’s-style” glue strong enough for wood?
White PVA can work for light-duty repairs, crafts, and non-structural indoor projects. For furniture, cabinets, shelves, and anything that gets bumped, yellow carpenter’s glue is usually the better pick. It typically sets faster, sands better, and tends to perform more consistently in wood-to-wood joints.
Joint design matters more than the glue
You can’t glue a bad joint into a good one. PVA shines when it has wood-to-wood contact and enough surface area to bite into.
Strong with PVA:
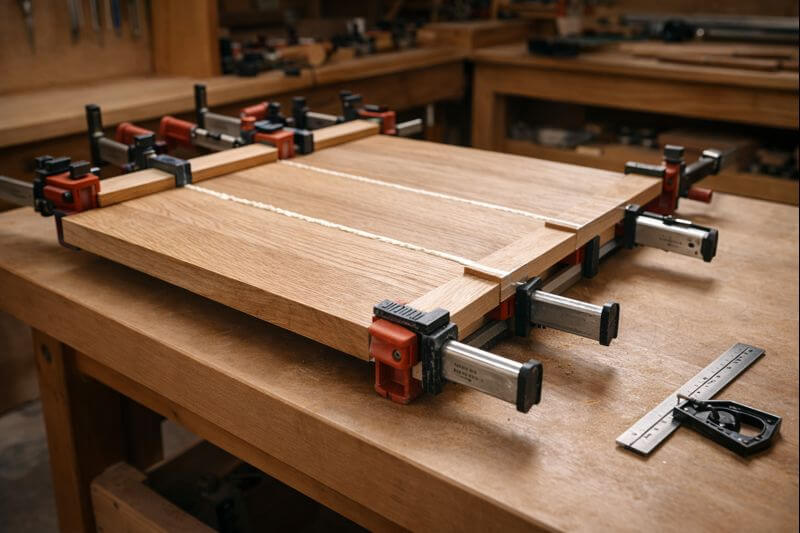
- Long-grain edge joints (panel glue-ups)
- Mortise-and-tenon joints
- Dados and rabbets with good fit
- Dowels, loose tenons, and biscuits (when used correctly)
Weak with PVA (unless reinforced):
- End-grain butt joints
- Big gaps you’re trying to “fill with glue”
- Peel-prone joints with thin edges and leverage

Quick strength reality check by joint type
If you’re building a shelf, a simple butt joint can hold for a while, then loosen under racking. A dado or rabbet gives you more glue area and mechanical resistance. For chairs, frames, and anything that flexes, choose joinery that fights twist and peel from the start.
If you’re planning for load, it helps to understand how much weight a glued joint can realistically carry. The answers usually come down to joint geometry, not just glue.
What affects PVA strength in the shop
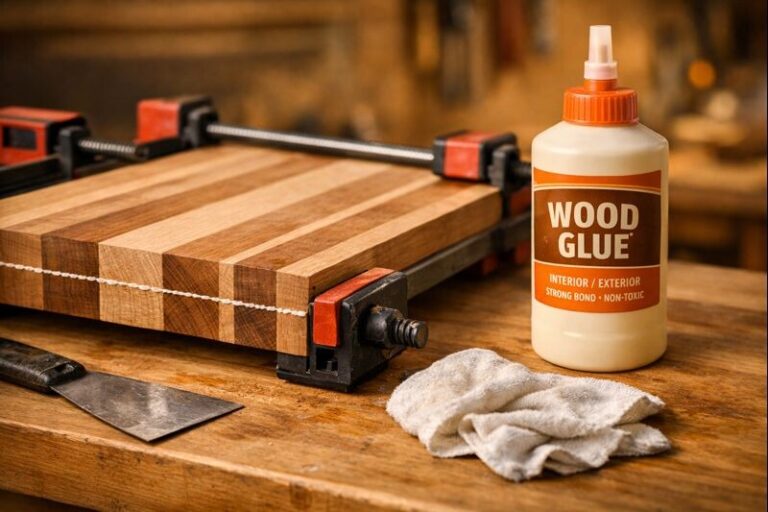
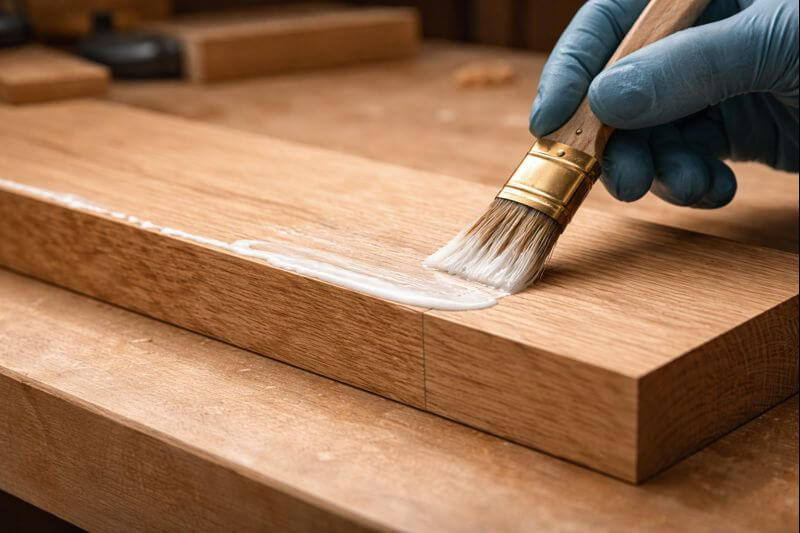
PVA is at its best when the glue line is thin, continuous, and fully cured. These are the big levers you can control.
Surface prep and fit
Aim for clean, fresh wood. A good planed or jointed surface is ideal. If you sand, stop at a reasonable grit and remove dust. Most failures I see come from gaps, dirty surfaces, or rushed assembly.
Glue coverage and glue-line thickness
You want full coverage, not puddles. Too little glue can starve the joint, especially if the wood is thirsty. Too much glue can leave a thick, rubbery line that doesn’t perform as well as a tight bond.
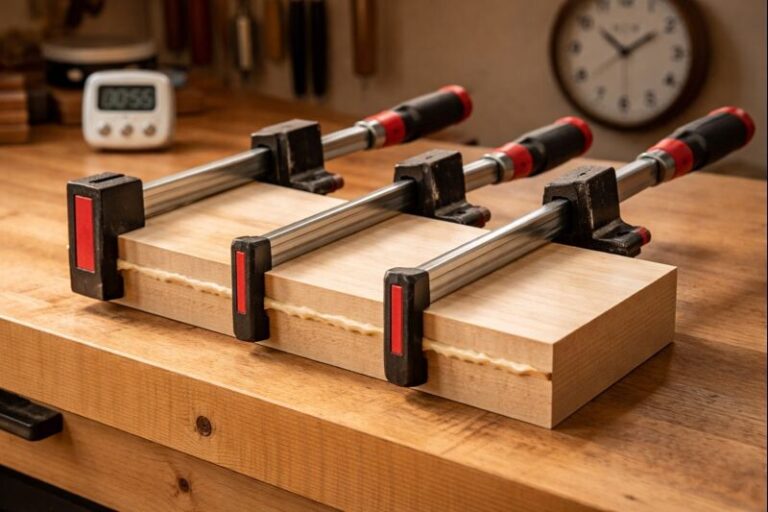
Clamping pressure and alignment
Clamp enough to bring the joint together evenly and keep it from creeping out of alignment. Over-clamping can squeeze out too much glue and leave dry spots. Under-clamping can leave gaps that never develop full strength.
If you want a simple, no-drama reference, use my guide on proper clamping time for common wood joints.
Dry time vs full cure
PVA often feels “dry” long before it’s at full strength. In many shops, you can remove clamps after the initial set, but you shouldn’t load or stress the joint heavily until it has cured.
For a practical timeline, see wood glue drying and curing timelines that match real projects.
How to apply PVA for maximum strength
This is the shop routine I teach when someone wants repeatable joints.
- Dry-fit first. Your parts should pull together without force or gaps.
- Apply an even coat. A thin, consistent layer beats blobs every time.
- Assemble and seat the joint. A slight rub can help spread glue evenly.
- Clamp square and flat. Use cauls if needed to keep things aligned.
- Leave it alone. Don’t “test” the joint while it’s still green.
- Clean squeeze-out at the right time. Wipe wet squeeze-out with a damp rag, or wait for it to gel and pare it off.
Common mistakes that weaken PVA joints
- Gaps in the joint: Fix the fit, don’t hope the glue fills it.
- Dusty or oily surfaces: Clean and re-cut if needed.
- Clamp panic: Too many clamps can starve the joint.
- Cold shop curing: Warm the space or give it more time.
- Rushing the cure: If it’s still “green,” it’s still weak.
If you’re not sure whether you’re waiting long enough, the clamp guide I linked earlier keeps it simple and safe.
When PVA is a great choice, and when it isn’t
PVA is a great everyday glue for:
- Indoor furniture and cabinetry
- Edge-glued panels
- Well-fit joinery that closes tight
PVA is a poor choice when:
- You need true gap-filling
- The joint will see constant water exposure
- The piece will sit in high heat
- You’re bonding tricky oily woods without proper prep
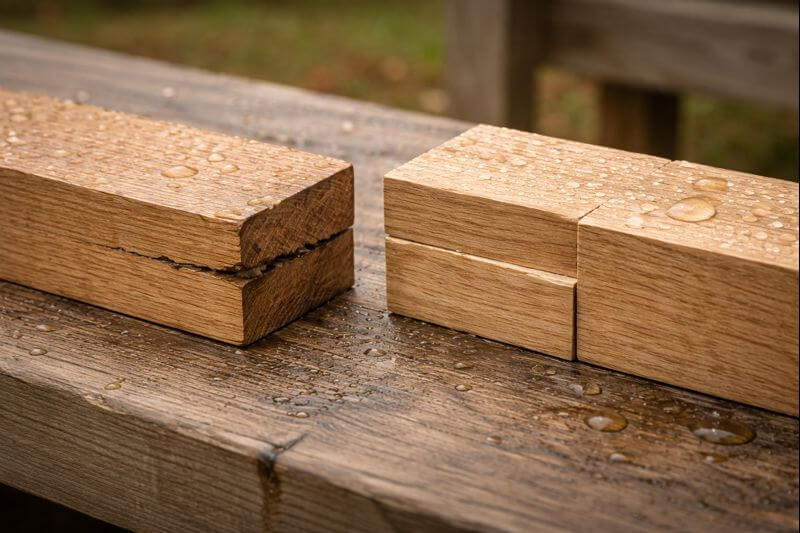
For outdoor work, “water-resistant” doesn’t mean “weatherproof forever.” Sun, heat cycles, and water infiltration still punish the joint design.
PVA vs epoxy vs polyurethane vs hide glue: practical differences
No glue wins every job. Here’s how I think about it in the shop:
PVA (wood glue): Best for tight, clean wood-to-wood joints. Fast, strong, easy cleanup. Some formulas resist moisture better than others.
Epoxy: Best when you need gap-filling, repairs, rot stabilization, or bonding mixed materials. It’s messy but incredibly useful.
Polyurethane glue: Can bond dissimilar materials and handles moisture, but it foams and needs tight control. It’s not a “gap filler” the way people assume.
Hide glue: Great for restorations and work you may want to reverse later. It’s strong, but it’s a different workflow and needs heat control.
Pick the glue that matches the problem, then build the joint to match the load.
Major Insights
PVA wood glue can be extremely strong, especially in tight long-grain joints with good clamping and full cure. If you remember only three things, make it these: fit the joint well, spread an even coat, and don’t stress it early. Do that, and the wood will usually be the weak link.