Can You Screw Into Wood Filler? 7 Proven Rules for a Rock Solid Hold
Can you screw into wood filler without issues depends on what “wood filler” means on your bench. Some fillers are basically sawdust-and-glue cosmetics. They look fine, but they don’t grip threads well.
Other fillers (especially epoxy-based) can hold a screw surprisingly well when they’re used the right way, with the right prep, and in the right location.
Contents Here
- 1 The straight answer: screws and wood filler don’t “bite” the same way
- 2 Why people try it anyway
- 3 Benefits and drawbacks of screwing into wood filler
- 4 Not all “wood filler” is the same
- 5 The rule for tray stands: don’t place hardware in filler if you can avoid it
- 6 Best practice options (from strongest to quickest)
- 7 If you still want to screw into filler, do it the “least bad” way
- 8 Pilot holes matter more than people think
- 9 Where screwing into filler is acceptable on a tray stand
- 10 Finishing and paint considerations (so your patch doesn’t telegraph)
- 11 Final thoughts
The straight answer: screws and wood filler don’t “bite” the same way
A wood screw holds because its threads compress and grab real wood fibers.
Most common wood filler has very few long fibers. It’s more like a crumbly plug once it cures.
So when you drive a screw into standard filler, one of two things usually happens:
- The screw “cuts” a weak hole and strips out easily.
- The filler cracks and breaks free from the surrounding wood.
That’s why, on tray stands and tiered trays, filler should be treated as a surface repair, not a structural anchor point.
If you’re building a tiered tray stand, and you’re deciding where the center post, handle, or base hardware goes, it helps to also read about picking strong wood that won’t let fasteners loosen in this guide on sturdy wood choices for tiered tray stands.
Why people try it anyway
On real projects, screws land in ugly spots.
A knot blows out. A pilot hole drifts. A screw strips. Now there’s a crater where hardware needs to sit.
This comes up a lot on tiered tray stands, especially:
- Base plates that need to stay tight
- Center post mounts (where wobble starts)
- Handle brackets or top finial blocks
- Quick repairs on store-bought tiered stands
If you’ve ever had a stand rock side-to-side after assembly, that’s often a screw holding poorly or loosening over time. This walkthrough on stopping a tiered tray stand from wobbling pairs well with what you’re learning here.
Benefits and drawbacks of screwing into wood filler
Benefits
- Works for very light-duty attachments (labels, thin trim, non-load pieces)
- Can be a temporary hold while glue sets (with the right filler)
- Helps when you need a fast cosmetic patch and the screw is just “along for the ride”
Drawbacks (the important part)
- Low pull-out strength with most store-bought fillers
- Threads strip easily, especially with repeated tightening
- Can crack under vibration (common on tiered trays that get carried)
- Filler can release from the wood if the surface wasn’t prepped right
If the joint matters, don’t rely on typical filler alone.
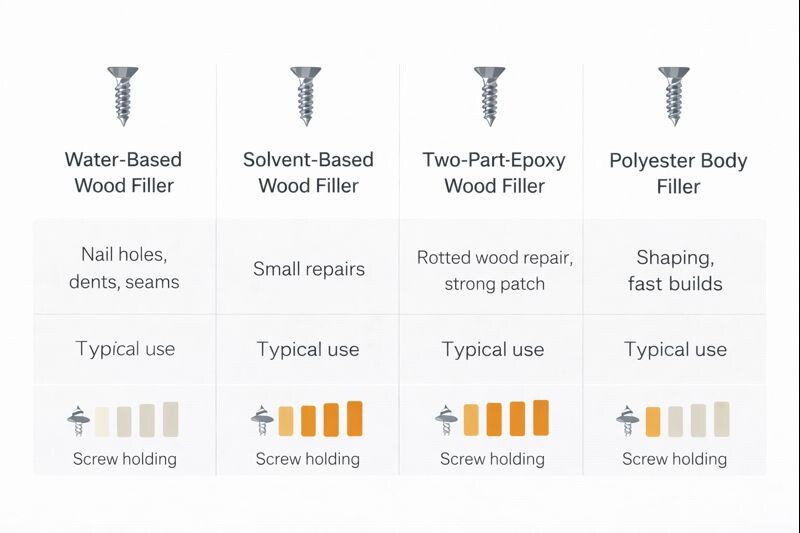
Not all “wood filler” is the same
Here’s the big mistake: treating all fillers like they cure into “wood.” They don’t.
A simple comparison table makes decisions quicker.
| Filler type | Typical use | Can it hold a screw? | Notes |
|---|---|---|---|
| Water-based wood filler (tub) | Nail holes, dents, seams | Usually no | Soft, sandy, strips easily |
| Solvent-based wood filler | Small repairs | Maybe, light duty | Harder, but can still crumble |
| Two-part epoxy wood filler | Rotted wood repair, strong patch | Yes, if done right | Best “filler” option for threads |
| Polyester body filler (Bondo-type) | Shaping, fast builds | Sometimes | Hard but brittle; can crack |
| Sawdust + wood glue mix | Small gaps | No | Glue isn’t a structural plug |
To know more: How to Join Two Pieces of Wood With Screws
The rule for tray stands: don’t place hardware in filler if you can avoid it
On a tray stand, the high-stress spots are predictable:
- The base where weight and torque happen
- The center column mount (especially for 2-tier and 3-tier stands)
- The handle/top where you lift and carry it
If those areas are compromised, the stand loosens and starts to sway.
For build context, this step-by-step guide on making a tiered tray stand helps you plan hardware locations so you’re not “saving” a bad hole later.
Best practice options (from strongest to quickest)
If a screw must go where filler is, there are smarter ways to rebuild the area. Here are the methods that actually hold up.
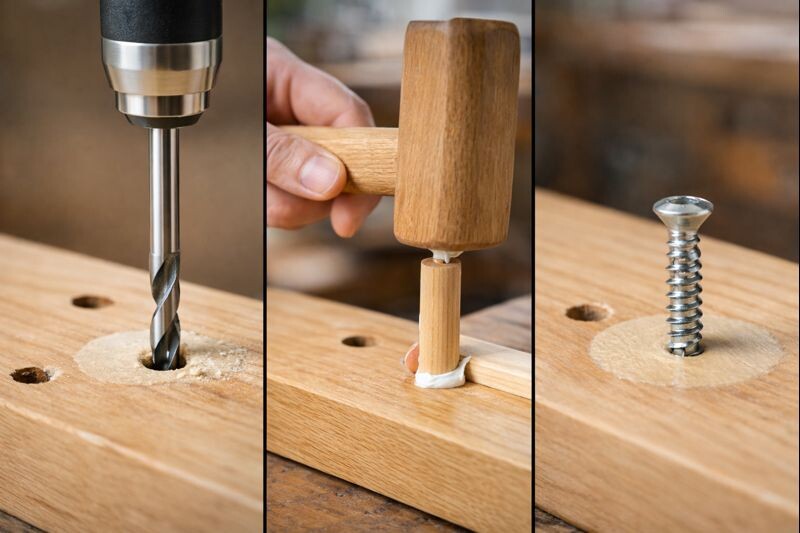
Option 1: Drill it out and glue in a hardwood plug (best overall)
This is the most dependable fix for tray stand bases and center mounts.
Step by step:
- Drill out the damaged area with a bit sized for a clean hole (often 3/8″ to 1/2″).
- Cut a hardwood dowel or plug to length.
- Coat the plug with wood glue and tap it in snug.
- Let it cure fully.
- Re-drill a pilot hole and drive the screw into real wood again.
This approach matches the same logic used in repairing fasteners. If you’re dealing with a hole that already failed, this guide on fixing a stripped screw hole in wood is a solid companion read.
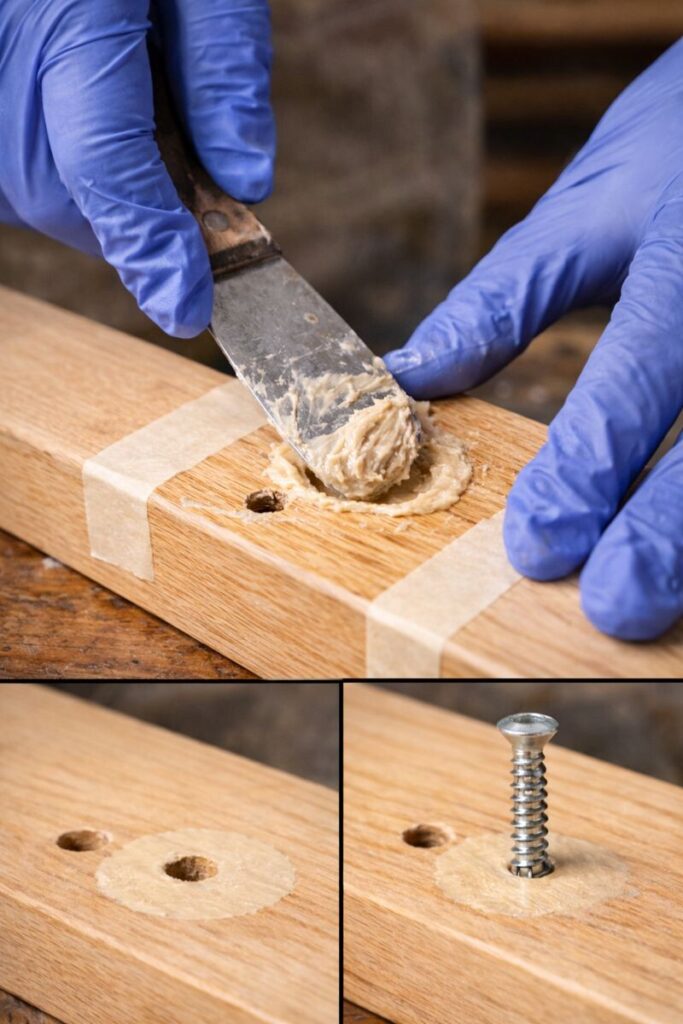
Option 2: Use epoxy filler as a structural rebuild (best when you can’t plug)
Two-part epoxy wood fillers can act more like a machinable patch.
Step by step:
- Remove all loose filler and weak fibers. Don’t leave dusty edges.
- Rough up the hole walls so epoxy has tooth.
- Mix the epoxy filler thoroughly. Incomplete mixing stays rubbery.
- Pack it in firmly and slightly overfill.
- Let it cure all the way through (not just surface hard).
- Drill a pilot hole after cure.
- Drive the screw by hand for the last turns to avoid cracking.
This works best for moderate loads, like a small bracket or a light tray stop. However, for a carry handle or center post, a plug is still safer.
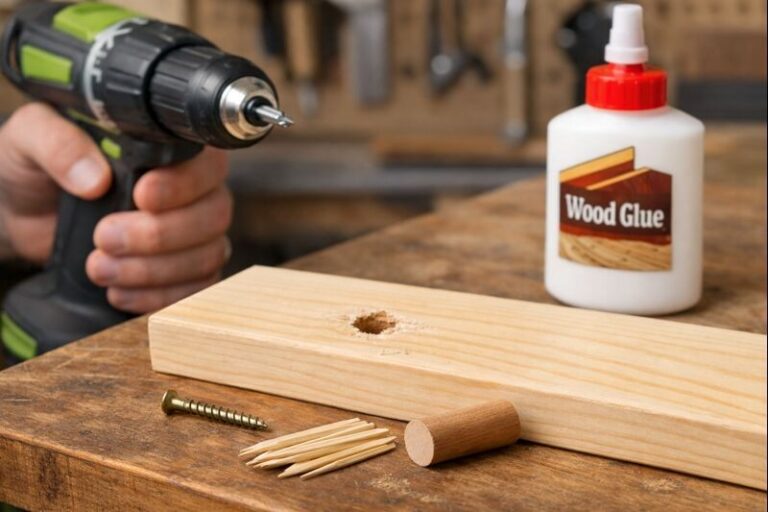
Option 3: “Filler plus toothpick” tricks (okay for light-duty repairs)
This is common advice, and it has a place, but keep expectations realistic.
Step by step:
- Put a few hardwood toothpicks or a thin bamboo skewer in the hole with glue.
- Break flush.
- Add a small amount of filler only to level the surface if needed.
- Re-drive the screw once the glue cures.
This method relies on the wood slivers, not the filler. It’s closer to a mini plug than “screwing into filler.”
If screws keep backing out over time, this article on fixing loose screws in wood gives a few practical approaches that work well on tray stands.
If you still want to screw into filler, do it the “least bad” way
Sometimes a project is already painted, already assembled, or you’re repairing a purchased stand and can’t drill cleanly for a plug.
If that’s your situation, follow this checklist.
Checklist for getting the best hold in filler
- Use two-part epoxy filler, not soft tub filler
- Let it cure fully (deep cure matters)
- Drill a proper pilot hole
- Use a screw with good thread depth (coarse threads often grip better)
- Avoid overtightening (that’s when filler fractures)
- Don’t rely on filler where the joint takes torque or lifting force
If you’re unsure which screw type you’re working with, these guides help you match hardware to the job:
- Wood screw basics explained plainly
- Understanding screw sizes and sizing systems
- Reading screw number markings correctly
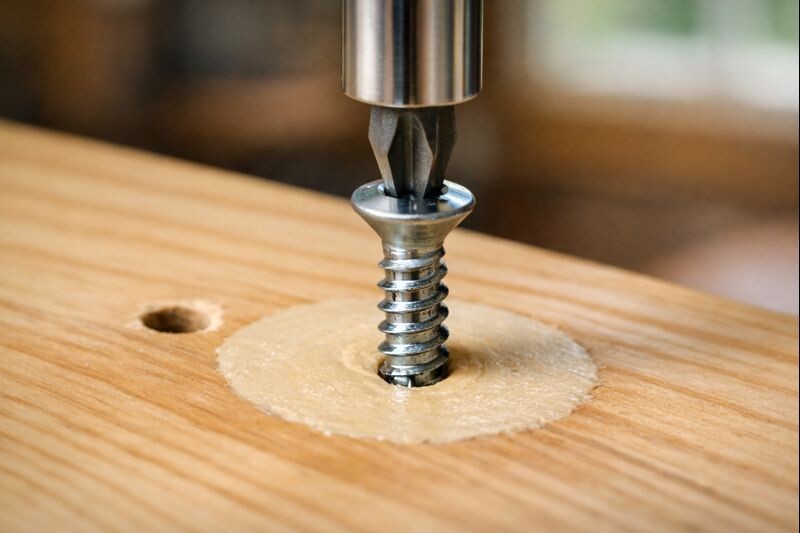
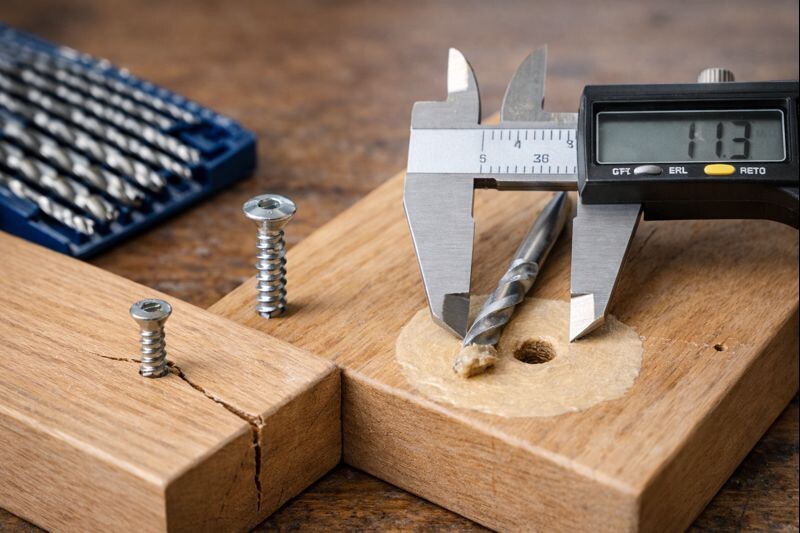
Pilot holes matter more than people think
When a screw goes into wood, the pilot hole prevents splitting and helps threads form cleanly.
When a screw goes into filler, the pilot hole prevents cracking and blowout.
A practical approach:
- Drill the pilot hole slightly smaller than normal.
- Test with a scrap patch of the same filler.
- Drive the screw slowly and stop as soon as it seats.
On tray stands, that last part matters, because compressing a bracket too hard can crush the filler and loosen later.
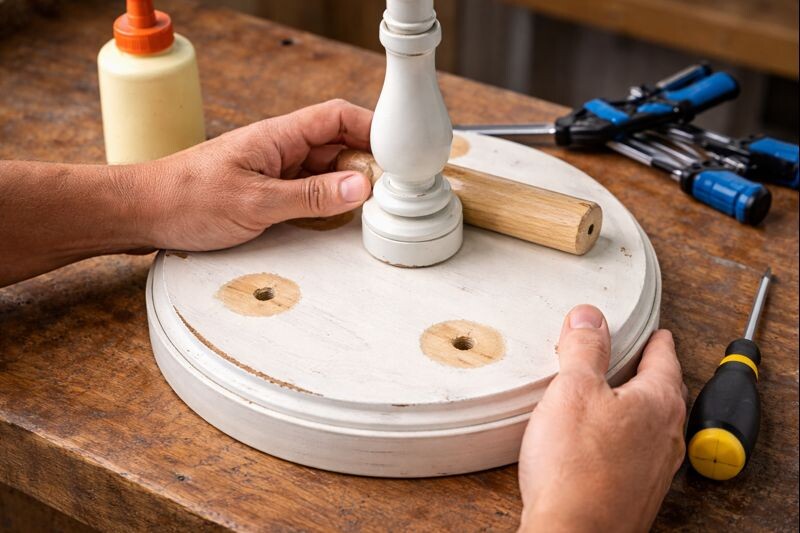
Where screwing into filler is acceptable on a tray stand
Here are spots where it’s usually fine:
- A small decorative sign holder that doesn’t carry weight
- A thin trim strip that’s also glued
- A magnet mount where the screw is just a “backup”
- A light-duty stop block that doesn’t see torque
And here are spots where it’s a bad bet:
- Base-to-post connection
- Any carry handle mount
- Any joint that gets tightened during seasonal decor swaps
- Anything that prevents wobble
If you’re doing a build and want the stand to feel solid from day one, it’s also worth keeping tools in good shape. A dull bit wanders and causes blown-out holes. This guide on basic tool maintenance for woodworking newbies keeps that from happening as often.
Finishing and paint considerations (so your patch doesn’t telegraph)
Even if the screw holds, filler can show under paint or stain.
A quick, reliable sequence:
- Sand the patch flush with 120–180 grit.
- Prime if painting (especially over filler).
- Spot-fill pinholes if needed.
- Sand again lightly.
- Paint or topcoat.
If the tray stand is getting a painted finish, the smoothness and brush marks matter more than most people expect. This guide on getting a smooth painted finish without brush marks is useful once the repair is done.
Final thoughts
Can you screw into wood filler safely only when the filler is strong enough and the joint is low-stress.
For tray stands, most important screws are structural, so filler alone shouldn’t be the plan.
When strength matters, rebuild the area with a hardwood plug or use epoxy filler correctly, then drill a pilot hole and drive the screw gently. Your stand stays tight, and you won’t be chasing wobble later.