2 Tier Wooden Tray: 7 Practical Ways to Save Space Instantly
A 2 tier wooden tray sounds simple, but it can solve a lot of little problems around the house. It saves counter space, makes serving easier, and gives you a clean way to show off decor. The trick is choosing (or building) one that actually fits your life instead of just looking good in photos. Below, you’ll see what matters with size, wood type, finish, stability, and real-world use, plus a straightforward build plan if you want to make your own.
Contents Here
- 1 What is a 2 tier wooden tray, really?
- 2 Why choose wood for a 2 tier tray?
- 3 Key decisions before you buy or build
- 4 Choosing the right wood species
- 5 Buying guide: what to look for in a 2 tier wooden tray
- 6 DIY: simple build plan for a 2 tier wooden tray
- 7 Safety, care, and maintenance
- 8 Where a 2 tier wooden tray actually earns its keep
- 9 Final thoughts on 2 tier wooden trays
What is a 2 tier wooden tray, really?
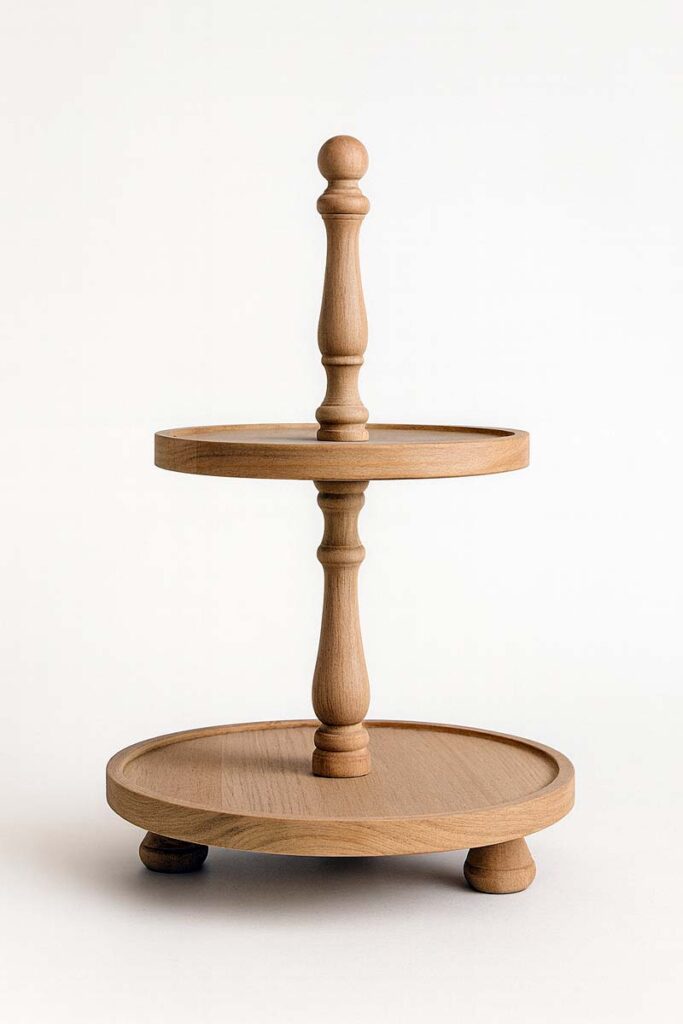
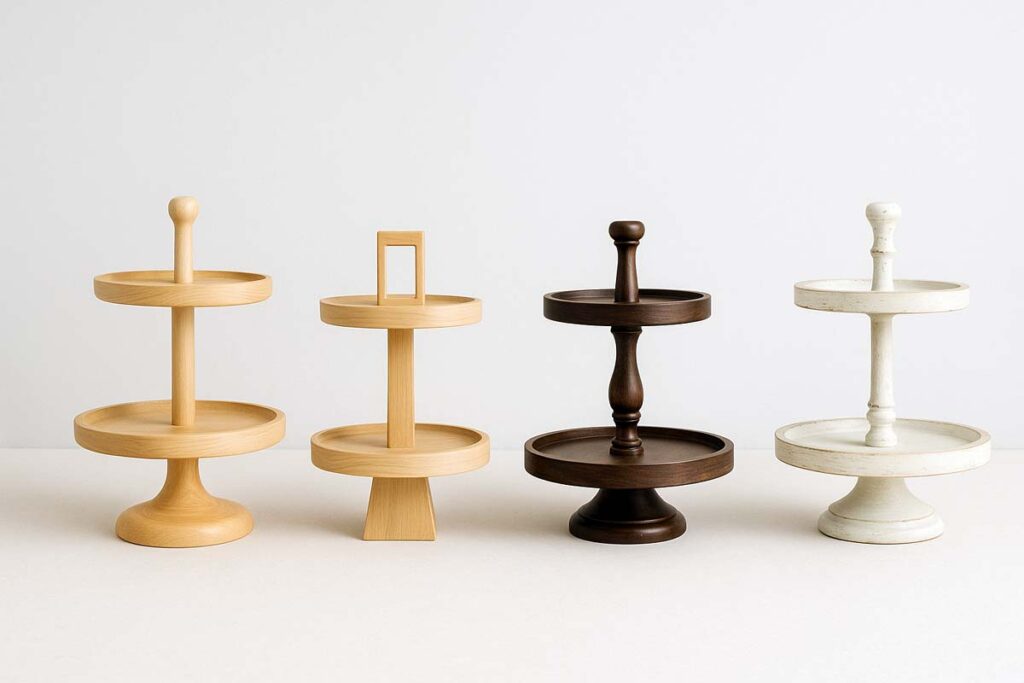
A 2 tier wooden tray is just two wooden trays stacked vertically with a center post or rod. The bottom tier is larger, the top tier is smaller, and the whole thing usually has a handle or finial on top so it’s easy to move.
You’ll see them used for:
- Serving cupcakes, snacks, or drinks
- Holding coffee bar essentials
- Organizing bathroom or vanity items
- Styling seasonal decor on a console or island
Compared to a flat tray, a two tier wood tray gives you more vertical storage in the same footprint. Compared to a 3-tier stand, it’s easier to carry and fits under most upper cabinets.
Also see at: Two Tiered Marble Tray
Why choose wood for a 2 tier tray?
Benefits
- Warm look. Wood works with farmhouse, rustic, and modern decor without looking cold or sterile.
- Customizable. You can stain, paint, or distress it to match a room.
- Repairable. Light scratches can be sanded and refinished instead of tossing the whole piece.
- Grippy surface. Items are less likely to slide compared to glass or metal.
Drawbacks
- Moisture sensitivity. Standing water and soaking in a sink will damage it.
- Finish care. Food-safe oil or topcoat needs refreshing over time.
- Weight. A solid hardwood 2 tier wooden tray can feel heavier than bamboo or metal.
If the tray will live in a humid bathroom or see heavy kitchen use, those trade-offs matter. That’s why wood species and finish are important choices, not afterthoughts.
Key decisions before you buy or build
Before money or sawdust gets involved, decide what the tray will actually do. That one step keeps you from buying something pretty that’s annoying in daily use.
1. What’s the primary job?
Ask one clear question: Is this mostly for food, decor, or storage?
- Food serving. You’ll want a food-safe finish and easy-to-wipe surfaces. Edges that are slightly raised help keep crackers or desserts from sliding off.
- Decor styling. Height, shape, and overall look matter more than a heavy-duty finish. This is where a farmhouse 2 tier tray stand style really shines for seasonal decor.
- Everyday storage. For keys, mail, or bathroom items, focus on stability and a footprint that fits the exact spot it’ll live.
2. Size and proportions
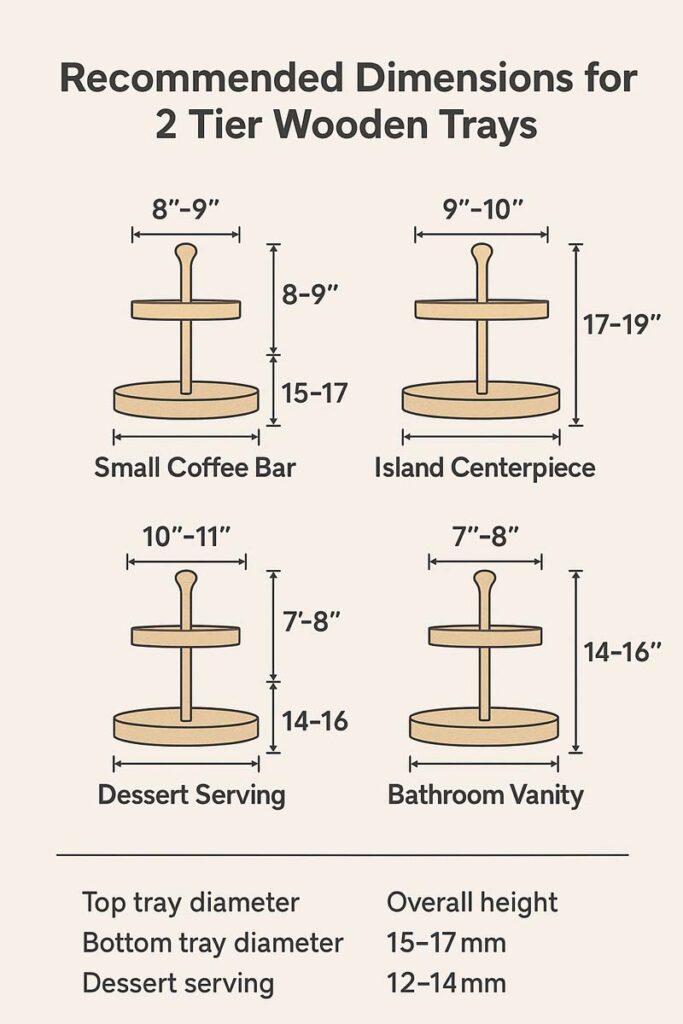
A 2 tier wooden tray that’s too big just becomes clutter on stilts. These ranges work well for most homes:
| Use case | Top tray size | Bottom tray size | Space between tiers | Overall height |
|---|---|---|---|---|
| Small coffee bar | 8″–9″ diameter | 10″–12″ diameter | 8″–9″ | 15″–17″ |
| Kitchen island centerpiece | 9″–10″ diameter | 12″–14″ diameter | 9″–10″ | 17″–19″ |
| Dessert / party serving | 10″–11″ diameter | 12″–14″ diameter | 7″–8″ | 14″–16″ |
| Bathroom / vanity | 7″–8″ diameter | 9″–10″ diameter | 7″–8″ | 14″–16″ |
Use those numbers as a starting point, then measure your exact space. Check:
- Distance to upper cabinets
- Depth of the countertop or shelf
- How far you’re comfortable reaching to the back
3. Shape and style
Shape changes how the tray feels in the room:
- A 2-tier round tray works great on islands, round tables, and coffee bars. It flows with the space.
- A 2-tier rectangle tray fits narrow counters, buffets, and against the backsplash without wasting depth.
Style decisions:
- Farmhouse / rustic. Turned post, distressed paint, visible grain.
- Modern. Straight lines, simple hardware, matte finishes.
- Traditional. Soft curves, slightly thicker profiles, warm stains.
Pick a style that matches your existing hardware and decor. A nice tray looks out of place if every other detail in the room is going in a different direction.
See more: Two Tiered Decorative Tray Ideas
Choosing the right wood species
You don’t have to overcomplicate this, but wood choice does affect how long the tray lasts and how it wears.
Good options for 2 tier wooden trays
- Maple, oak, beech. Durable, fairly hard, and stable. Good for trays that get daily use.
- Walnut, cherry. More premium look with rich color and grain. Better as showpieces or decor trays.
- Pine, spruce. Softer and more prone to dents, but easy to work and budget-friendly for painted pieces.
For a deeper breakdown on hardness and durability, it’s worth reading about the best wood types for sturdy tiered tray stands. That’ll help you match the species to how rough the tray’s life will be.
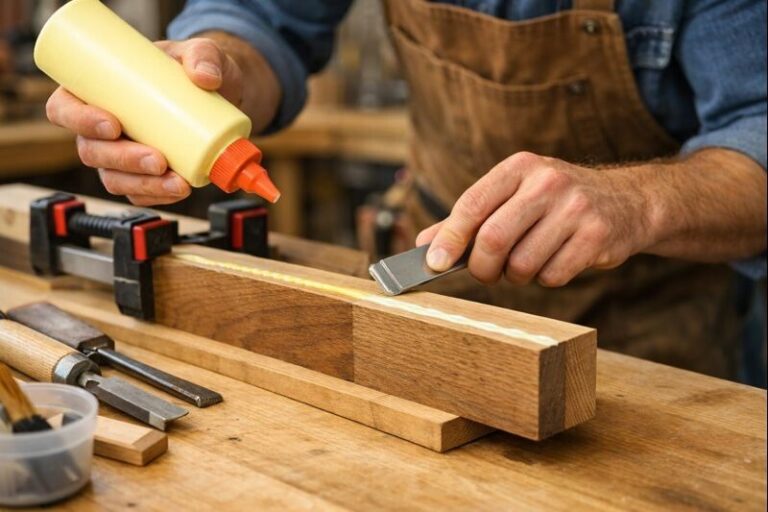
Finish and food safety
For serving food directly on the wood, go with:
- Mineral oil
- Beeswax/mineral oil blends
- Certified food-safe hardwax oils
For decor or non-food storage, a clear polyurethane, lacquer, or durable water-based topcoat holds up better to spills and cleaning.
Buying guide: what to look for in a 2 tier wooden tray
When you’re standing in a store or scrolling online, run through these quick checks.
Construction and stability
- Grab the center post and gently twist. It shouldn’t wobble or squeak.
- Press down on the edge of the top tray; the whole stand should feel solid.
- Look underneath: a continuous center post or sturdy hardware is better than thin screws into end grain.
Hardware and assembly
- If it ships flat, check reviews for “wobbly” or “leaning” comments.
- Well-made stands often use a threaded rod with metal connectors between tiers.
- If you plan to store it away seasonally, a design that breaks down is easier to live with.
Finish quality
- Run a hand lightly across the surfaces. Rough spots and splinters are a bad sign.
- Check edges and underside; they should be finished too, not bare wood.
- For food use, confirm the finish is listed as food-safe or suitable for direct contact with snacks and desserts.
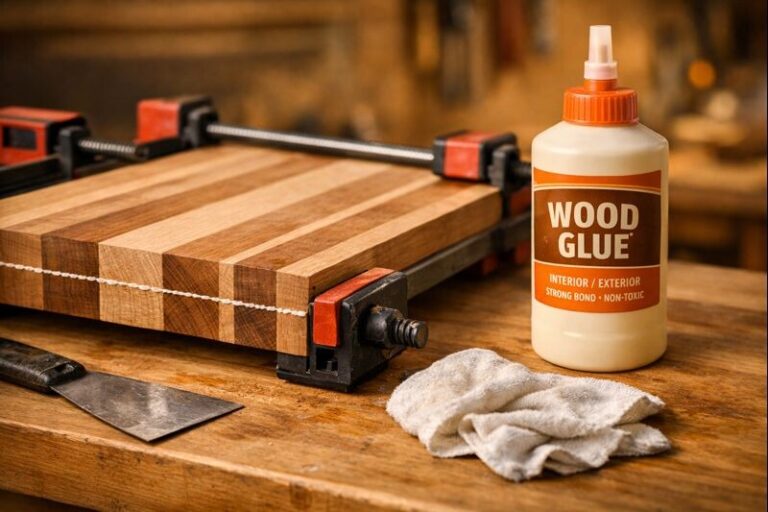
Price vs value
A solid hardwood 2 tier wooden tray with good hardware costs more than a thin, softwood version. That price difference often buys:
- Less wobble and flex
- Longer life
- Safer carry when it’s loaded with glass or ceramics
If the budget is tight but you still want a decorative piece, a more affordable wood with good design still works. For styling ideas, a quick browse through a 2-tier decorative tray setup can give you a clear picture of what looks good without overspending on the tray itself.
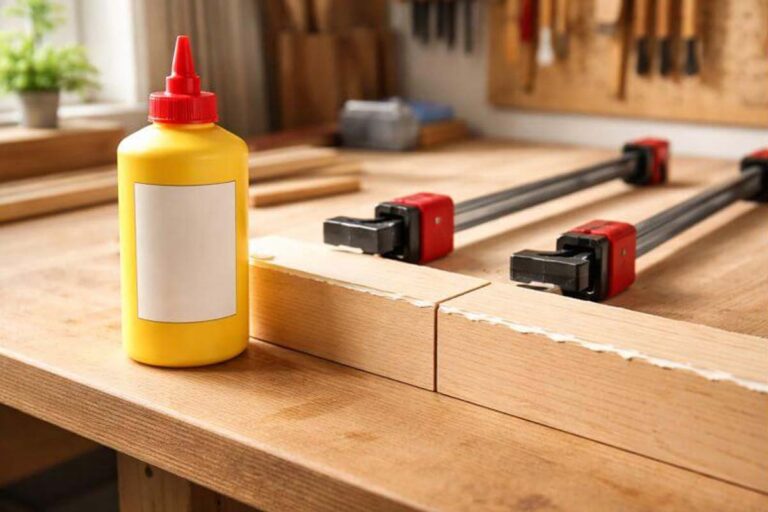
DIY: simple build plan for a 2 tier wooden tray
If there’s basic shop access and a few tools, a clean and sturdy 2 tier wooden tray is totally doable. Here’s a straightforward build that doesn’t depend on fancy joinery.
Tools and materials
- Two wooden rounds or rectangles (pre-cut or cut from a board)
- 1 center post (turned spindle or a straight dowel plus spacers)
- Threaded rod, washers, and nuts or wood screws
- Drill and bits
- Sander and sandpaper (120, 180, 220 grits)
- Finish (oil, wax, or clear coat)
- Felt pads or small feet (optional)
Step 1: Plan your dimensions
Pick sizes based on where the tray will live. For example:
- Bottom tray: 12″
- Top tray: 9″
- Spacing between tiers: 9″
- Overall height including finial: around 17″
Mark those numbers on paper and sketch a quick side view. This keeps proportions balanced and prevents mistakes later.
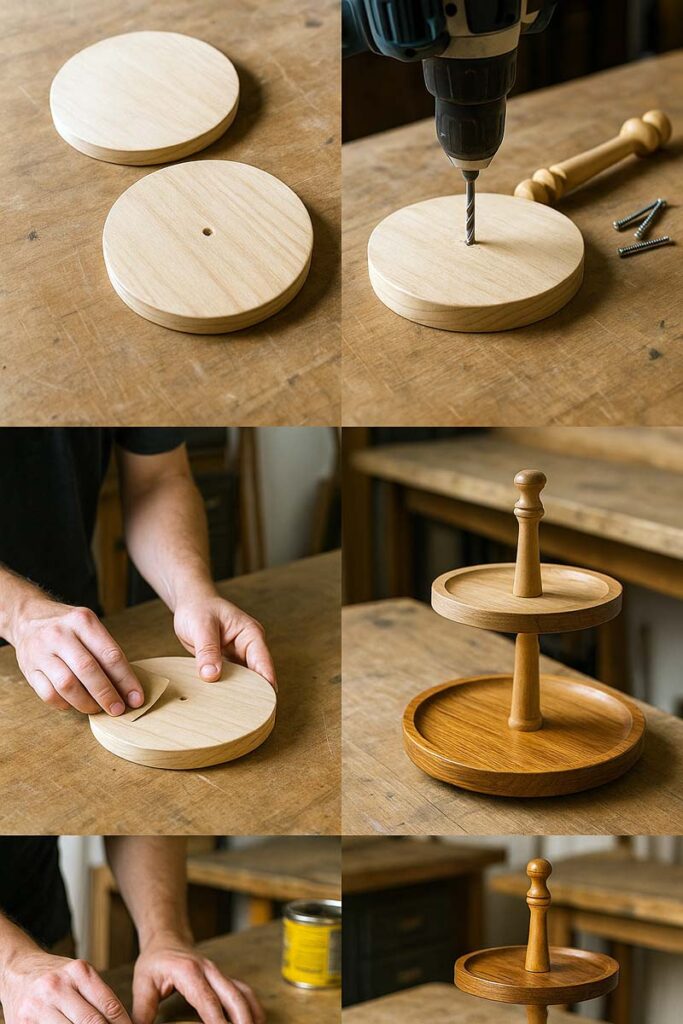
Step 2: Prepare the trays
- Cut or buy the two tray shapes.
- Lightly break the sharp edges with 120-grit sandpaper.
- Sand both faces through 120 → 180 → 220 grits until everything feels smooth.
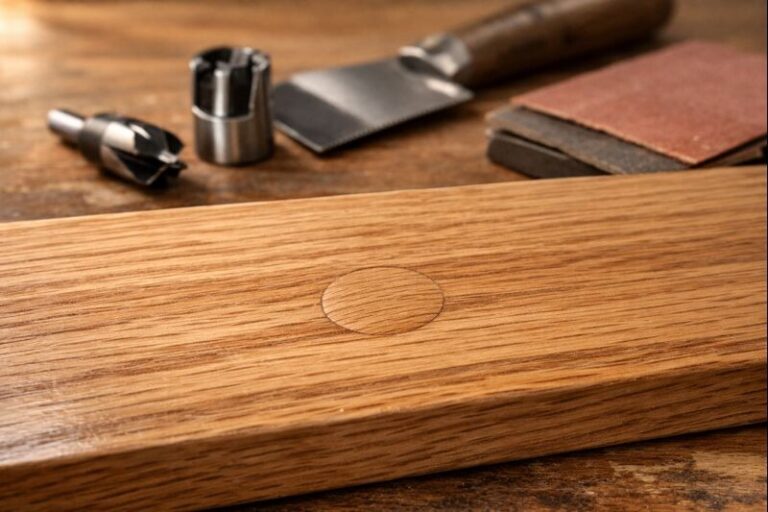
Step 3: Mark and drill center holes
- Find the center of each tray (diagonals on squares, or use a compass/crosshair on rounds).
- Mark the exact center with a sharp pencil.
- Drill a straight hole at the center of each tray sized for the threaded rod or screw you’ll use.
Take your time here. A crooked hole makes the whole stand lean.
Step 4: Prep the center post
- If using a turned spindle, drill straight through the length to accept the threaded rod.
- If using a dowel, cut it to length and pre-drill pilot holes for screws at top and bottom.
Dry-fit the post between the trays to confirm height and fit.
For a more advanced build, or if there’s interest in different styles of posts and trim details, check the step-by-step tips in how to make a tiered tray stand.
Step 5: Test assembly (dry fit)
Before any glue or finish:
- Stack bottom tray → spacer or nut → center post → spacer → top tray.
- Tighten nuts or screws just enough to pull everything together.
- Check for level and wobble. Adjust holes or hardware as needed.
This dry run saves a lot of regret.
Step 6: Apply the finish
Disassemble again and finish each wooden part separately:
- Wipe off sanding dust with a clean cloth.
- Apply your chosen finish according to the can’s directions.
- Let it dry fully between coats and lightly sand with very fine grit if the grain raises.
For food use, stick to food-safe oils or waxes. For decor only, a clear topcoat gives better protection.
Step 7: Final assembly
Once everything is dry:
- Stack the parts again in order with washers where wood meets metal.
- Tighten until snug but not crushing the wood.
- Add felt pads or small feet under the bottom tray to prevent scratching countertops.
Load the tray slowly the first time. If it feels solid and doesn’t rock, you’re good.
Safety, care, and maintenance
A two tier wooden tray doesn’t need fussy care, but a few habits keep it in good shape.
- Weight balance. Heavier items (mugs, jars) belong near the center and on the lower tier.
- Lifting. Always lift from the base with one hand under the bottom tray, even if there’s a top handle.
- Cleaning. Wipe with a damp cloth and mild soap. Avoid soaking or running it under the faucet.
- Protection. Use coasters or small plates under very hot or wet items.
- Refinishing. If the surface looks dry or scratched, a light sanding and new coat of finish brings it back.
Where a 2 tier wooden tray actually earns its keep
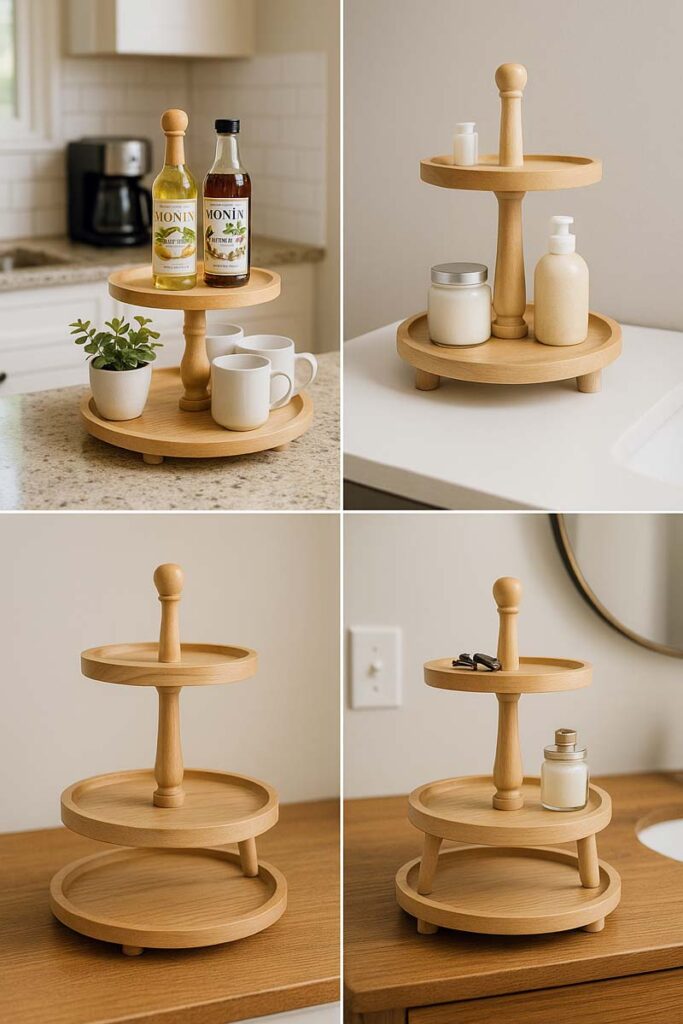
Here are spots where a two tier wood tray tends to stick around instead of becoming clutter:
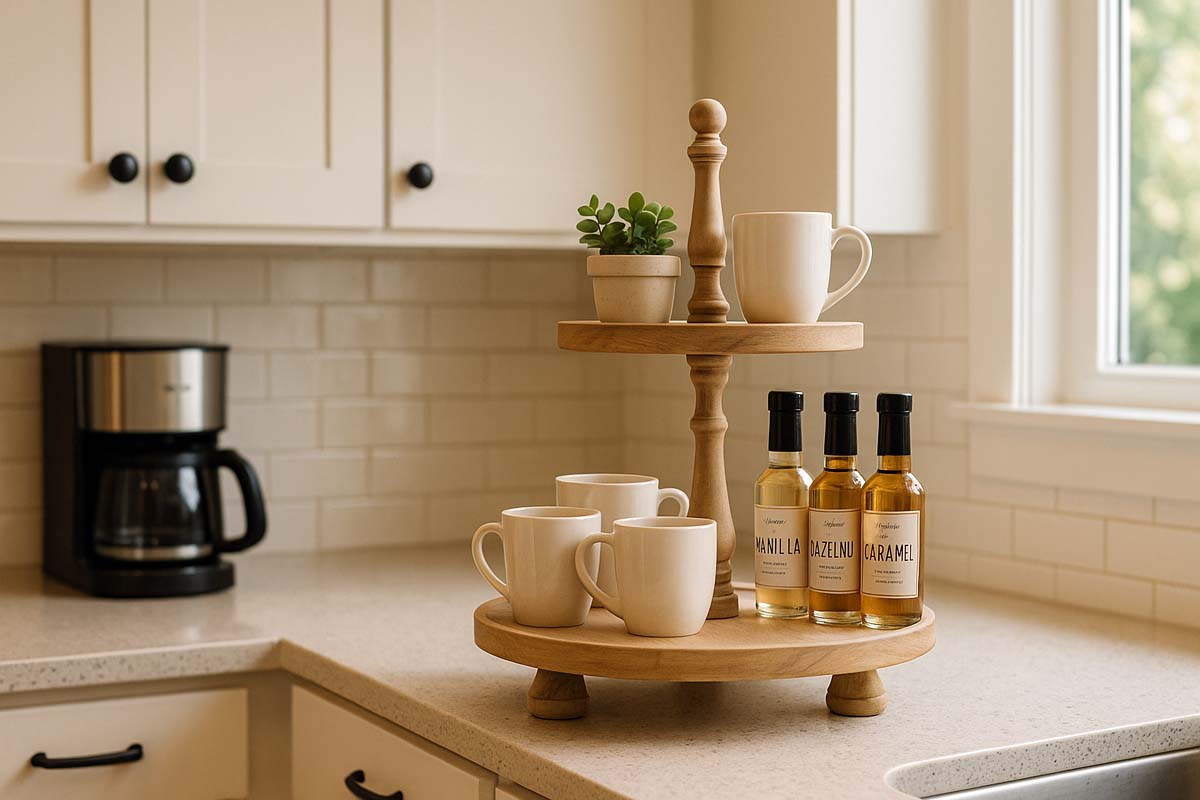
- Coffee bar. Top tier for mugs, bottom for syrups, sugar, and spoons.
- Kitchen corner. Oils, salts, and everyday spices on the bottom; small decor or plants on top.
- Bathroom vanity. Lotions and jars below, perfume or small decor above.
- Entry table. Keys and wallet up top, mail and sunglasses on the bottom.
- Desk or craft area. Pens and small tools on top, notebooks or supply bins on the bottom.
Once it has a specific job, it stops being just decor and actually earns the space it takes.
Final thoughts on 2 tier wooden trays
A good 2 tier wooden tray does three things well: it fits the space, it feels stable when loaded, and it matches the rest of the room without trying too hard. When those basics are right, the tray quietly makes life easier day after day instead of being something you constantly adjust or work around.
Think through where it’ll live, what will sit on it, and how often it’ll move. Then choose the shape, size, and wood that match that reality, not just a styled photo.
A 2 tiered wooden tray is a small project or purchase, but it touches your daily routine more than it seems. Decide on purpose first, size and wood second, and construction quality third. Whether you buy or build, that order of thinking leads to a tray that’s safe, durable, and genuinely useful in your home.