What Is a Wood Screw: What You Need To Know
Wood screw basics matter more than most people think when you’re working with real wood. Choose the wrong fastener and a tray stand wobbles, splits, or just feels cheap. A proper wood screw is designed to bite into fibers, pull joints tight, and stay put. This guide breaks down what it is, why it matters, and how to use it with confidence.
Contents Here
- 1 What is a wood screw, in plain language?
- 2 The main parts of a wood screw
- 3 Wood screws vs other common screws
- 4 Materials and finishes: why they matter
- 5 Head and drive styles you’ll see most
- 6 Why use a wood screw instead of glue alone?
- 7 How to choose the right wood screw step by step
- 8 How to drive a wood screw the right way
- 9 Common problems with wood screws and how to fix them
- 10 Where wood screws show up in tray stands and décor
- 11 FAQs
- 12 Final thoughts
What is a wood screw, in plain language?
A wood screw is a metal fastener made specifically to join pieces of wood. Check the given below two example of wood screws:
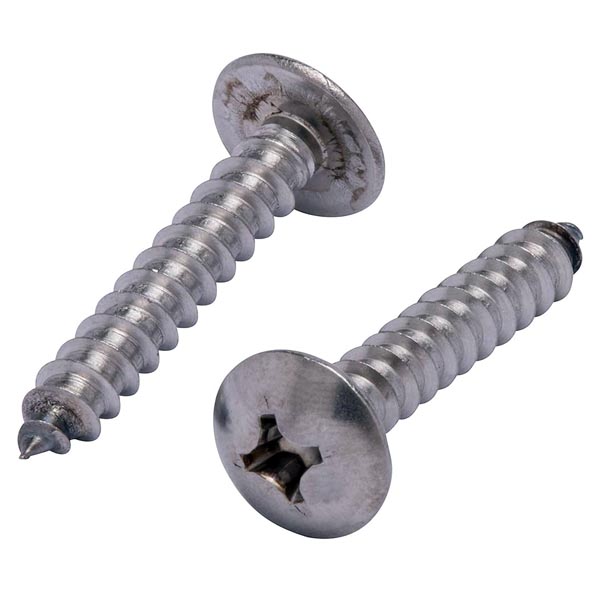
It has a sharp point, aggressive threads, and a thicker body near the head so it can grip fibers, draw boards together, and resist pulling out under load.
Think about the screws holding the posts of a tiered tray stand into the base. Those are usually wood screws. They don’t just “hang out” in a hole; they actively clamp two pieces of wood together.
Compared to generic screws, a wood screw is shaped to:
- Cut its own path into wood fibers
- Pull two pieces of wood tight as it turns
- Allow some flex as the wood expands and contracts with humidity
That combination is why wood screws are used in furniture, cabinets, tray stands, shelving, and almost every small woodworking project.
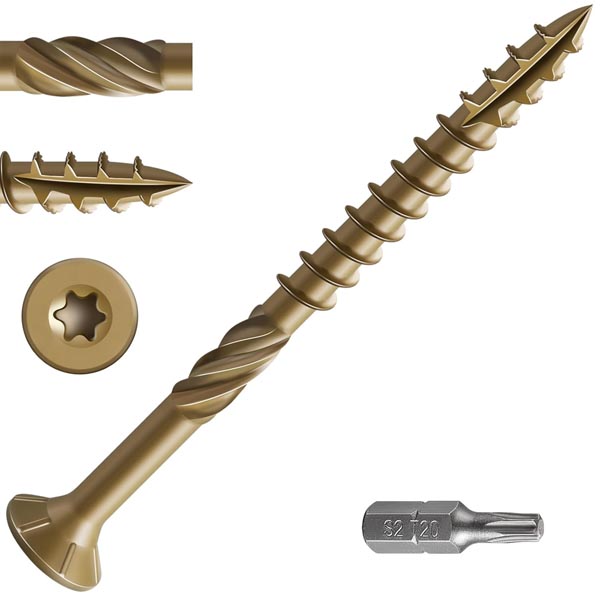
The main parts of a wood screw
It’s easier to pick the right screw when you know its anatomy.
Picture the screw in your hand and match it with the labeled illustration you’ll see in the image below.

Key parts:
- Head – The top of the screw. This is where the driver bit sits and where the screw bears against the wood or a hardware piece.
- Drive – The recess in the head (Phillips, Torx, square, etc.). This determines which bit you use.
- Shank – The smooth or partially smooth part just under the head. It lets the screw pull the top piece down tight without threading into that piece.
- Threads – The spiraled ridge that bites into the wood and provides holding power.
- Root – The core of the screw under the threads. Thicker cores resist snapping.
- Point – The sharp tip that starts the screw into wood and follows your pilot hole.
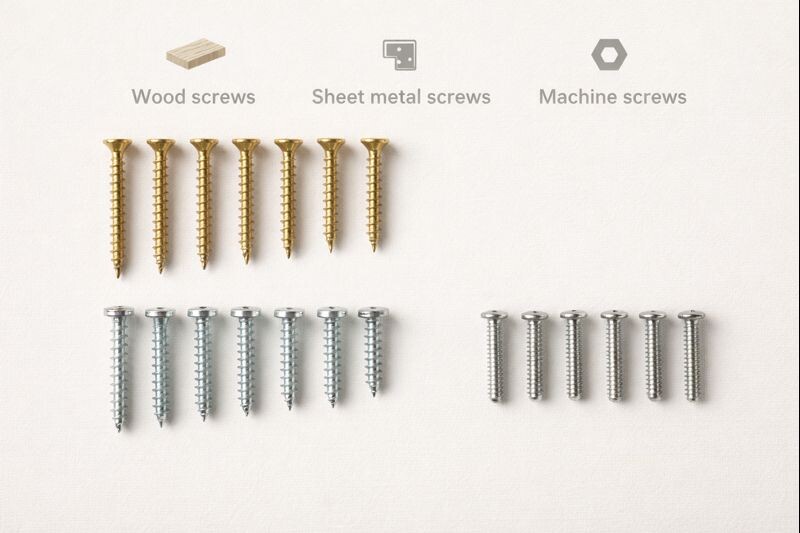
Wood screws vs other common screws
A lot of people grab whatever screw is in the drawer. That works…until it doesn’t.
Here’s a quick comparison to keep things straight:
| Screw type | Best used in | Thread style | Pilot hole needed? |
|---|---|---|---|
| Wood screw | Solid wood, plywood, MDF | Deeper, wider threads | Yes, for clean, strong joints |
| Sheet metal screw | Thin metal, brackets | Very sharp threads | Often self-drilling in metal |
| Machine screw | Metal parts with tapped holes or nuts | Fine, even threads | Always needs a nut or tapped hole |
If you’re building or repairing a tiered tray stand, the screws tying legs, posts, and bases together should almost always be wood screws, not machine screws.
Materials and finishes: why they matter
Wood screws come in different metals and coatings. That’s not just for looks. It affects strength, rust resistance, and even staining around the screw.
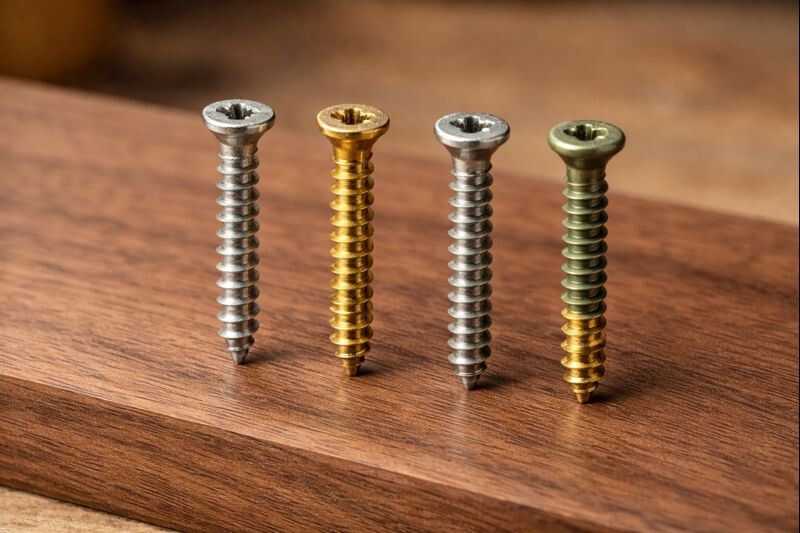
Common options:
Plain steel
- Strong and inexpensive
- Fine for indoor tray stands and décor that won’t see moisture
- Can rust if exposed to humidity or spills
Brass
- Softer metal with a warm color
- Great for decorative hardware and visible screw heads
- Easy to snap if over-tightened, especially in hardwood
Stainless steel
- Excellent corrosion resistance
- Good for bathrooms, kitchens, or near sinks where trays might see moisture
- Slightly more expensive but reliable over time
Coated or plated steel (zinc, ceramic, etc.)
- Steel strength with a protective coating
- Often marketed as “exterior” or “deck” screws
- Good choice if your décor pieces sometimes live outdoors or on a damp porch
If you’re screwing into a finished wooden tray base, coated screws help reduce rust stains bleeding through the finish over time.
Head and drive styles you’ll see most
Two decisions matter here: head shape and drive type. Both affect strength, appearance, and ease of use.
Common head shapes
Flat head (countersunk)
- Sits flush with the surface
- Ideal for tray stand bases, cabinet faces, and anywhere you’ll fill or hide the screw
Pan or round head
- Domed top that stays above the surface
- Good for hardware, brackets, and spots where you don’t want to countersink
Washer or flange head
- Wide bearing surface
- Helpful where wood is soft or the head might crush the fibers
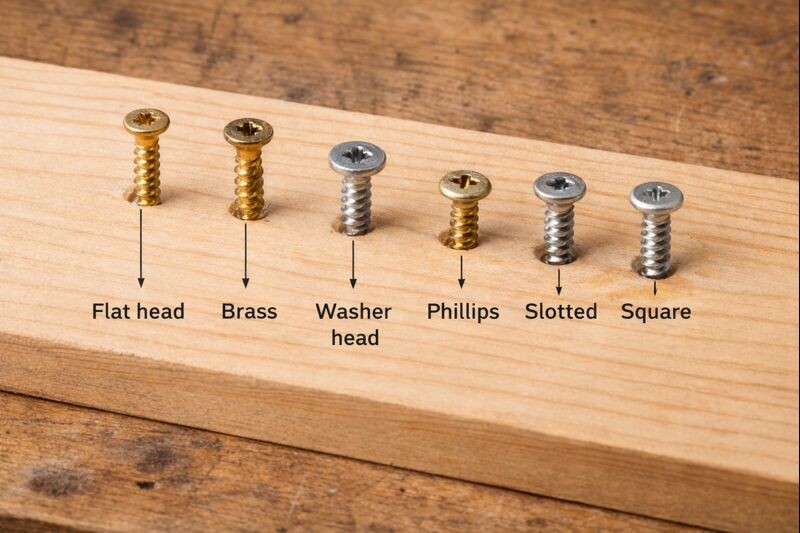
Drive types
- Phillips – Common, but easier to cam out if you push too hard.
- Slotted – Old-school, but the bit slips easily; avoid if you can.
- Square (Robertson) – Very secure, great for woodworking, resists cam-out.
- Torx (star) – Excellent grip and control, especially for longer screws.
For most tray stand builds and small wood projects, square or Torx drives make life easier and reduce stripped heads.
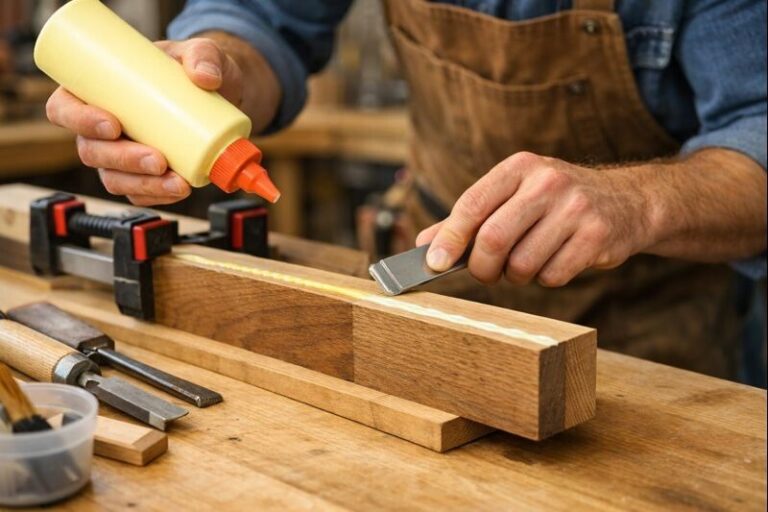
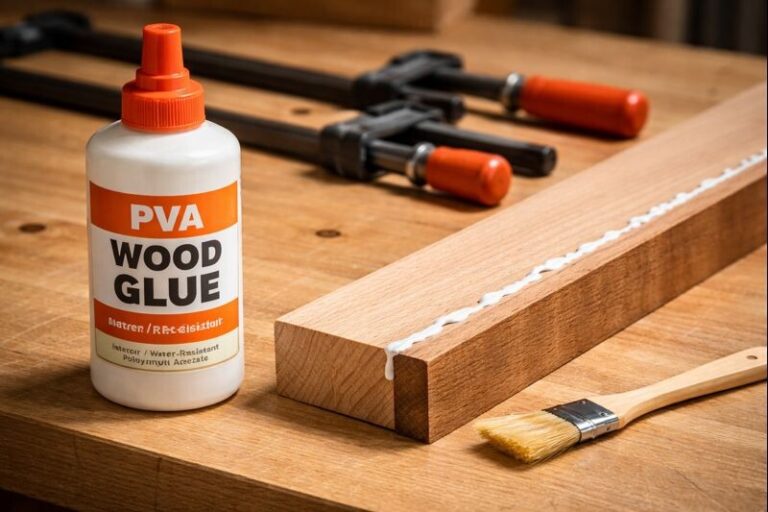
Why use a wood screw instead of glue alone?
Glue is strong, no question. But a wood screw adds several benefits.
Benefits:
- Pulls joints tight even if cuts aren’t perfect
- Acts as a clamp while glue dries
- Lets you disassemble or repair later
- Handles some shear force and racking, which matters for tall tiered stands
Drawbacks and limitations:
- Can split wood if sized wrong or driven without a pilot hole
- Screw heads might show unless they’re plugged or hidden
- Cheap screws snap or strip, causing more repair work
For load-bearing parts, such as a center post on a three-tier tray, screws plus glue usually give the best long-term stability.
How to choose the right wood screw step by step
When you’re standing in front of the screw aisle, follow a simple checklist:
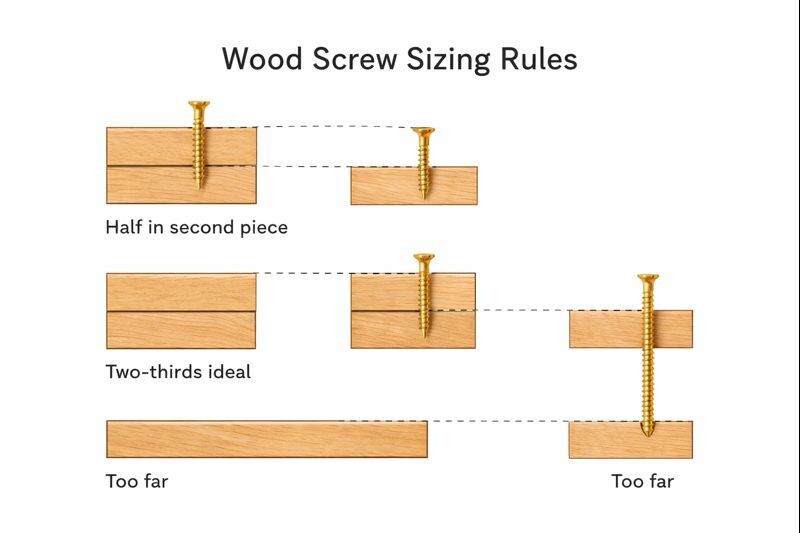
1. Match the screw length to the joint
- A good rule: at least half the screw length should be in the second piece.
- Example: For a 3/4″ tray base going into a thicker post, a 1 1/2″ screw often works well.
2. Pick a reasonable diameter
- Light decorative pieces: #6 or #8 screws.
- Tray stand legs and structural parts: #8 or #10.
- Thicker screws mean more holding power but a larger pilot hole.
3. Choose the right material and coating
- Indoors, low moisture: coated or plain steel is fine.
- High-moisture areas: stainless or quality exterior-coated screws.
4. Decide on head style
- Want a flush, clean surface? Use flat head wood screws and countersink them.
- Mounting brackets or metal to wood? Pan or washer heads often work better.
5. Choose a friendly drive type
- Torx or square for most woodworking.
- Phillips only if that’s what you already have bits for.
If a joint is especially visible, plan for plugs or decorative caps on top of the screw heads so the hardware doesn’t distract from the wood.
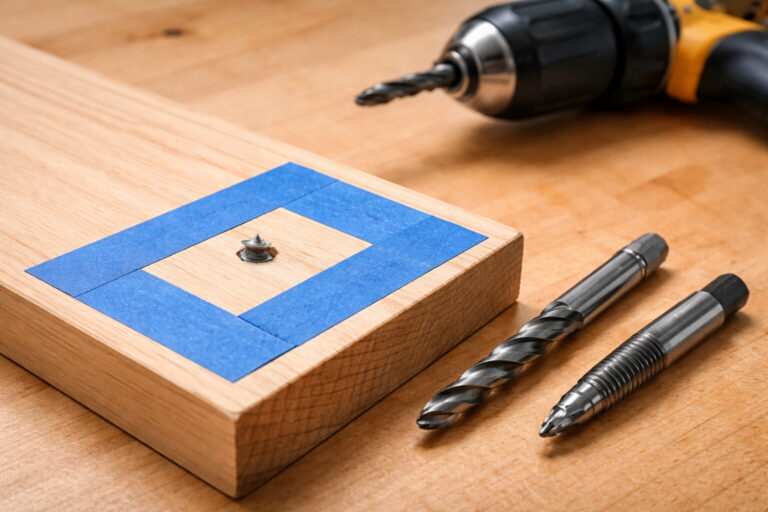
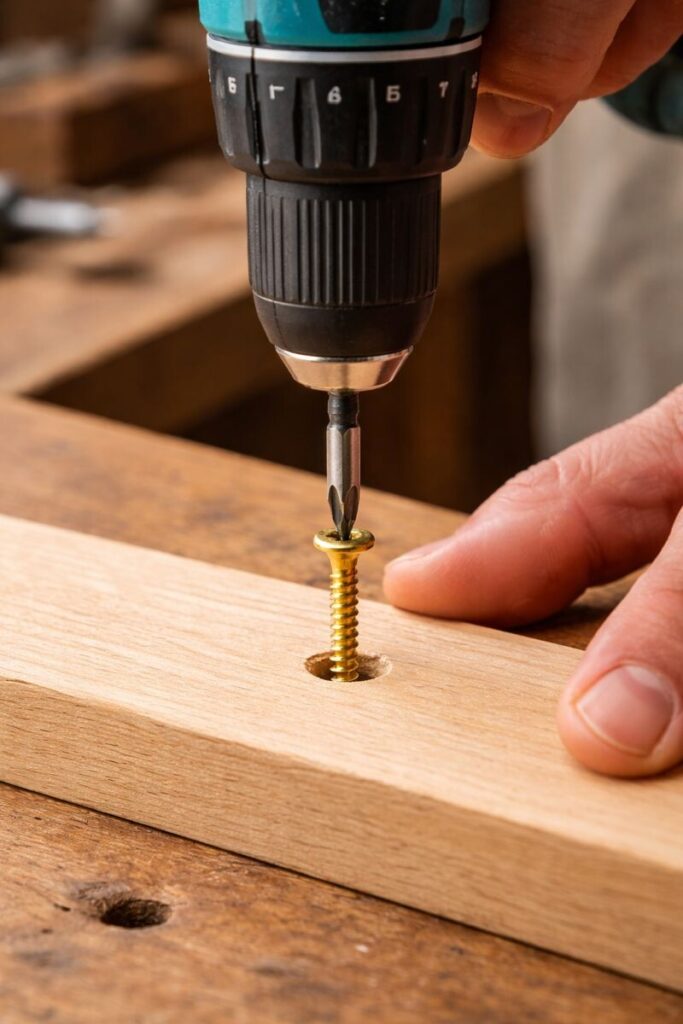
How to drive a wood screw the right way
This is where a lot of problems start. Stripped heads, split boards, crooked posts—those usually come from rushing the driving process.
Here’s a simple, repeatable method:
- Mark the screw location: Use a pencil and a square so the screw is centered on the thickness of the board.
- Drill a pilot hole: Use a bit slightly smaller than the screw’s root (core) diameter. In hardwoods, err on the larger side to avoid splitting.
- Add a countersink if needed: With a countersink bit, create a tapered recess for flat-head screws. This keeps the head flush and prevents the wood from mushrooming around it.
- Lubricate long screws: For longer screws going into hardwood, a little paste wax on the threads helps. That reduces friction and lowers the chance of snapping the screw.
- Drive the screw with steady pressure: Keep the drill or driver perfectly in line with the screw. Go medium speed and stop as soon as the head seats; don’t over-tighten.
- Finish the surface: For hidden screws, fill over the head or add a plug before sanding and finishing.
If you’re new to tools, pairing this process with the safety tips in the shop gear guide on essential safety gear for tray stand builds helps keep fingers, eyes, and lungs protected.
Common problems with wood screws and how to fix them
Even with good technique, things still go wrong. The good news is most screw issues are fixable.
Stripped screw hole in wood
- The threads no longer grip, so the screw spins.
- You can fix that with dowels, plugs, or filler methods like the ones covered in the guide on repairing stripped screw holes in wood projects.
Loose screws in high-use areas
- Movement, vibration, or soft wood causes the screw to wobble.
- The article on tightening up loose screws in wood assemblies walks through ways to restore a snug fit.
Stripped screw head
- The bit chews out the drive recess and won’t grab.
- There are several tricks for removing them without damage in the guide on taking out stripped screws from wood surfaces.
Broken screw buried below the surface
- Usually from over-torque or brittle screws.
- When that happens, the tutorial on getting a broken screw out of wood safely is worth having bookmarked.
Screw completely stuck
- Corrosion or glue has locked it in place.
- Strategies in the walkthrough on removing a stuck screw from wood without wrecking the board help avoid splitting the piece.
Those repair skills matter a lot when a tiered tray stand wobbles after a few months and you’d rather fix it than start over.
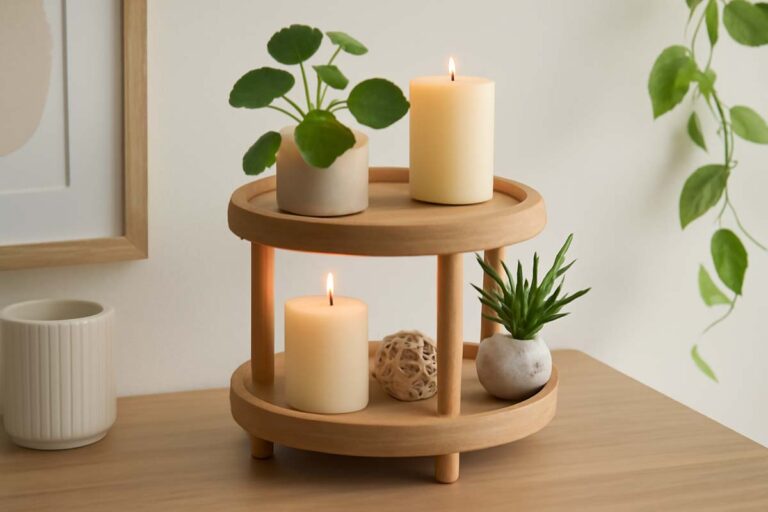
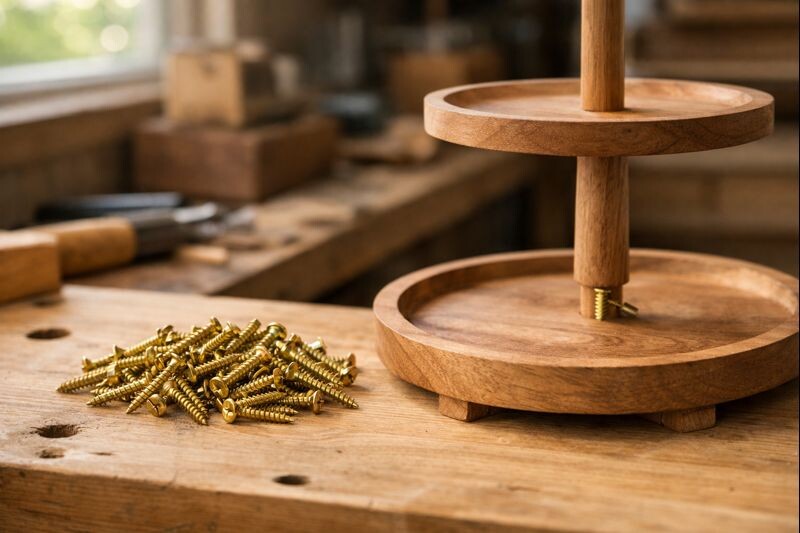
Where wood screws show up in tray stands and décor
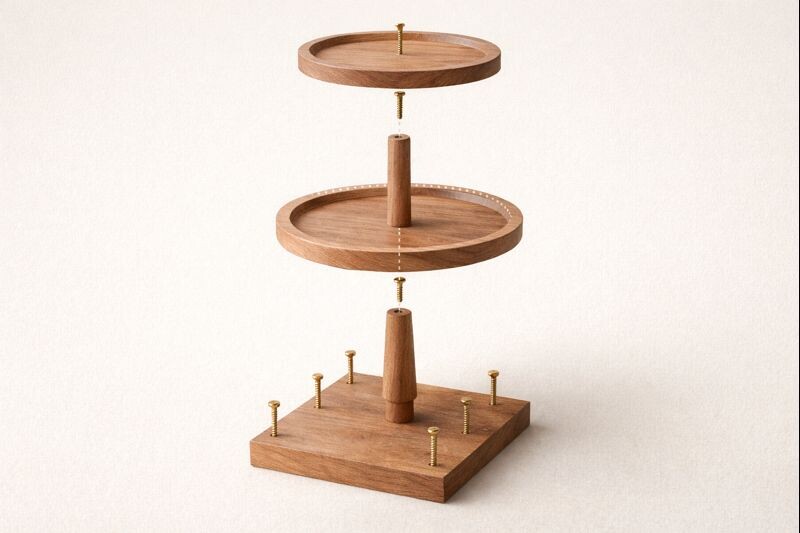
Look at a typical two-tier tray stand. There are screws:
- Holding the center post to the base and top tray
- Anchoring any metal hardware or feet
- Sometimes hidden under plugs in the tray surface itself
If you check the build guides for making a farmhouse-style tiered tray stand or the more general tutorial on building a tiered tray stand from scratch, you’ll see wood screws doing most of the structural work.
Choosing the proper screw length and type here is exactly what keeps that stand from rocking. Pairing that with the advice in the post on stopping a tiered tray stand from wobbling gives a very stable result.
An exploded-view sketch under this section—base, post, trays, and screws—all labeled, makes it obvious where each screw goes and how it supports weight.
FAQs
What’s the main difference between a wood screw and a drywall screw?
A wood screw is designed for solid wood and has a thicker core for strength. A drywall screw is made for fastening drywall to studs and often has a brittle shank that can snap in hardwood, so it’s not ideal for structural wood joints.
Do I always need a pilot hole for a wood screw?
For strong, clean joints, drilling a pilot hole is recommended almost every time. It helps prevent splitting, makes driving easier, and lets the screw follow a straight path. In soft woods you can sometimes get away without one, but it’s still a safer habit.
How long should a wood screw be for joining two boards?
A simple rule is to have at least half, and ideally two-thirds, of the screw length embedded in the second piece. For example, when driving through a 3/4″ board into a thicker post, a 1 1/2″ to 2″ screw often gives a strong connection.
Can I reuse wood screws in another project?
You can reuse wood screws if the threads are sharp, the shank isn’t bent, and the head isn’t stripped. However, avoid reusing screws that were heavily stressed or corroded. Fresh screws are inexpensive insurance for structural or weight-bearing joints.
Are stainless steel wood screws worth it for indoor projects?
Stainless steel screws are most valuable where moisture is common, like bathrooms, kitchens, or near sinks. For dry indoor spaces, quality coated steel screws work well. If your décor pieces see frequent cleaning or occasional splashes, stainless gives extra peace of mind.
Final thoughts
In short, a wood screw is a purpose-built fastener for wood joinery. It has a sharp point, aggressive threads, and a head designed to clamp pieces together without fighting the natural movement of the material.
Once you understand screw parts, materials, and basic sizing, choosing the right one becomes quick and almost automatic. That’s what leads to tray stands, shelves, and small décor that feel solid in the hand instead of wobbly or cheap.
Get in the habit of drilling proper pilot holes, using quality screws, and fixing small problems like stripped holes before they become big ones. Your projects will last longer, look cleaner, and hold up better in daily use.