Prefinished Birch Plywood: How to Choose It, Cut It, and Build With It

Considering prefinished birch plywood for a cabinet or shop build? It saves hours because the factory applies a clear, durable finish before the sheet reaches your saw. You get clean, bright interiors with no brush marks, dust nibs, or long curing waits. The tradeoff is that the finish changes how you glue, sand, and touch up edges. This guide covers what the panels are, how to pick the right grade and core, how to cut and assemble them, and how to avoid the common pitfalls.
Prefinished birch plywood is birch-faced hardwood plywood that manufacturers coat at the factory, often with a UV-cured clear finish. Woodworkers use it for cabinet interiors, shelving, and shop fixtures because it leaves the shop ready-to-install. Keep glue joints on raw wood, protect the faces during cutting, and cover edges with banding or solid wood.
What is prefinished birch plywood?
Prefinished birch plywood is hardwood plywood with a birch face veneer that manufacturers seal with a factory-applied finish. Many panels use a hard clear topcoat that resists scuffs better than a hand-applied single coat. Example below:
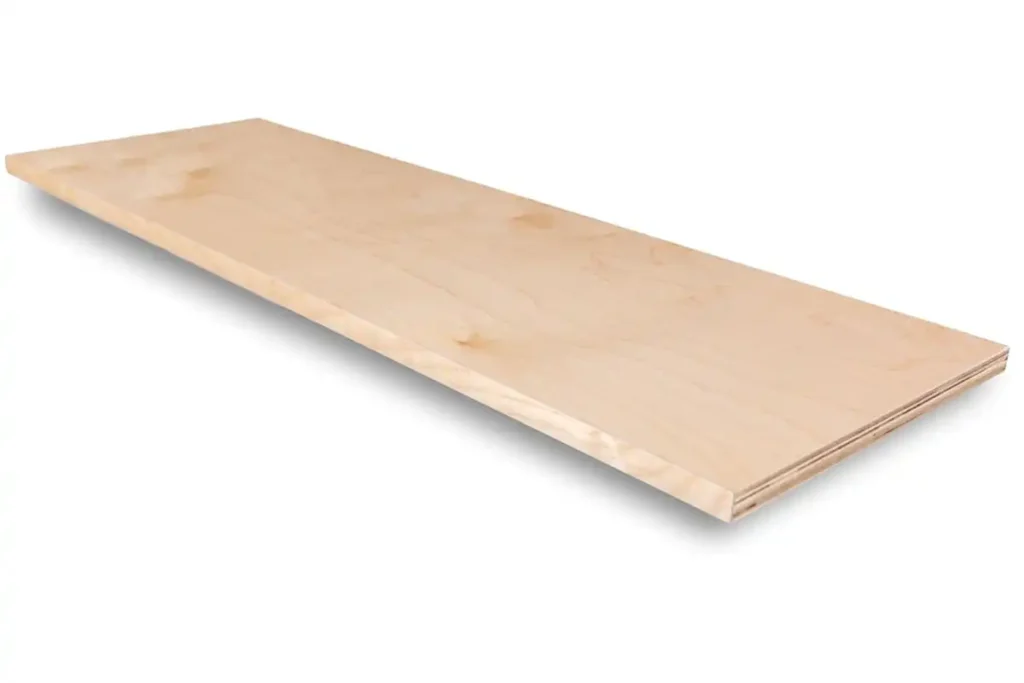
Most sheets come as “one-side prefinished” or “two-side prefinished.”
What you are buying, in plain terms
- Face veneer: Birch on the show side (sometimes both sides).
- Core: Veneer core, MDF core, particleboard core, or a multi-ply core depending on the product line.
- Finish: Usually a clear, smooth coat applied under controlled conditions.
Why it behaves differently than raw birch plywood
The factory finish seals the face. That helps with cleanup and wear, but it also means glue and filler do not bond well to the finished surface unless you prep it.
Know more: MDF vs Birch Plywood: Way to Pick the Right Sheet for Furniture
When should you choose it?
Prefinished birch plywood fits projects where speed and clean interiors matter.
Choose it when you want:
- Finished cabinet interiors without spraying
- Shelves that wipe clean
- Shop cabinets, drawers, and fixtures that need durability more than custom color
Skip it when the project depends on a custom stain or a perfectly blended touch-up. Factory finishes vary by supplier, and field repairs rarely disappear under bright light.
A quick decision check
- If you want “install-ready panels,” prefinished wins.
- If you want a stained, furniture-grade exterior, raw panels often win.
Also see: Russian Birch Plywood: What It Is, How to Buy It, and How to Work It
Where it works best
Prefinished panels shine where you see the surface every time you open a door.
Great uses
- Cabinet boxes and closet built-ins
- Drawer components and pull-out trays
- Utility shelving and pantry shelving
- Shop storage and tool cabinets
If you are comparing birch to other cabinet materials, it helps to understand what “cabinet grade” actually describes. My overview of cabinet-grade plywood basics puts the common terms in order.
Where to buy it and what to ask for
Retailers label prefinished birch in a few different ways, even when the panels look similar. Ask for three details before you load the cart:
- Prefinished one side or two sides
- Core type
- Face grade (how clean the veneer looks)
Most suppliers stock panels in common plywood dimensions. If you want a refresher before you plan cuts, use this guide to common plywood sheet sizes.
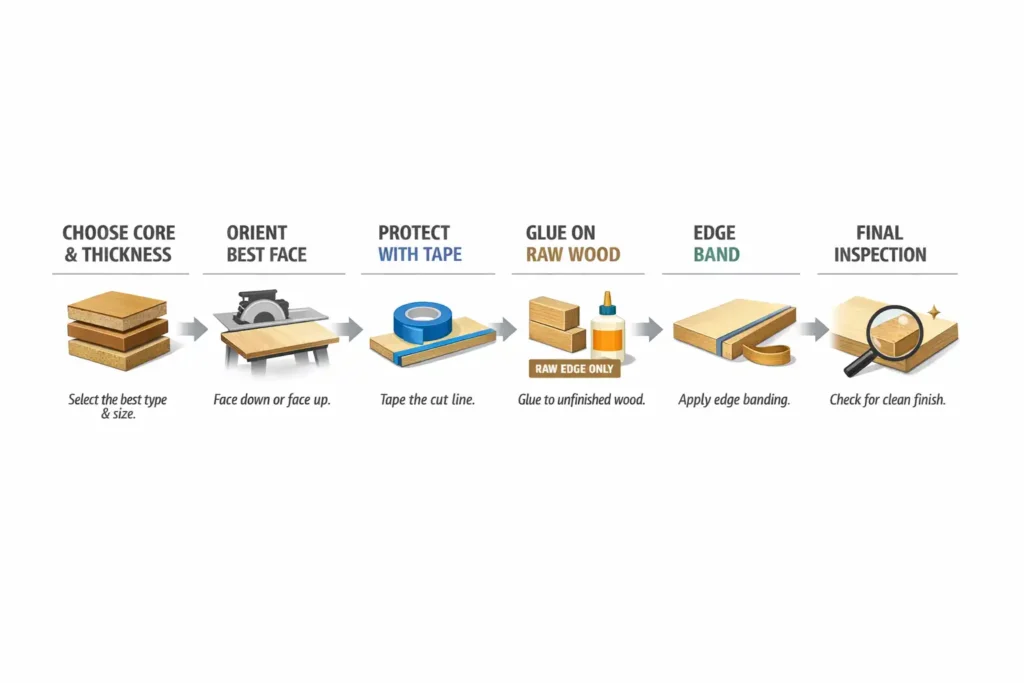
How to choose, cut, and build with prefinished birch plywood
This is the workflow I use in the shop, from selection to final cleanup.
1) Pick the right thickness for the job
Thickness controls stiffness, screw bite, and how much edge you have to work with.
- 1/4 inch (nominal): cabinet backs, drawer bottoms, skins
- 1/2 inch (nominal): light-duty boxes, dividers, some shelving
- 3/4 inch (nominal): cabinet sides, shelves, carcasses, face-frame-less builds
If you want a deeper breakdown (and what thickness matches common cabinet parts), my complete plywood thickness guide lays it out in practical terms.
2) Choose a core that matches your build
Core choice affects weight, screw holding, and flatness.
- Veneer core: Lighter, holds screws well, edges look more “wood-like.”
- MDF core: Flatter and heavier, edges need more attention, screw holding varies by fastener.
- Particleboard core: Flat and economical, but edges chip easier and screw holding depends on hardware and pilot holes.
- Multi-ply style core: Stiff and stable, edges look layered and accept machining well.
3) Inspect the faces before you buy
Look down the sheet under store lighting.
- Check for ripples, football patches, and mineral streaks.
- Confirm the finish looks even across the face.
- Look at both faces even on “one-side” sheets. The back often becomes visible inside cabinets.
If you want a quick overview of how birch panels are typically built and graded, start with what birch plywood is. For multi-ply sheet goods, see Baltic birch explained.
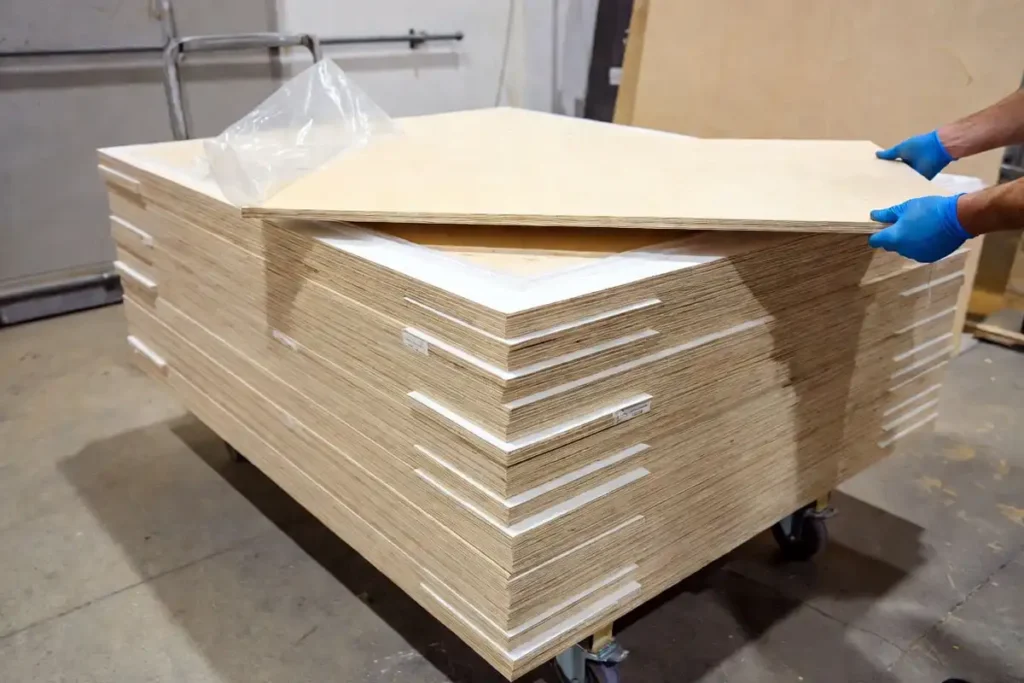
4) Store and handle sheets to protect the finish
Prefinished faces scratch from grit and sliding friction.
- Keep sheets flat and supported.
- Leave any protective film on until final assembly, if your panels include it.
- Use clean spacers between sheets in the shop.
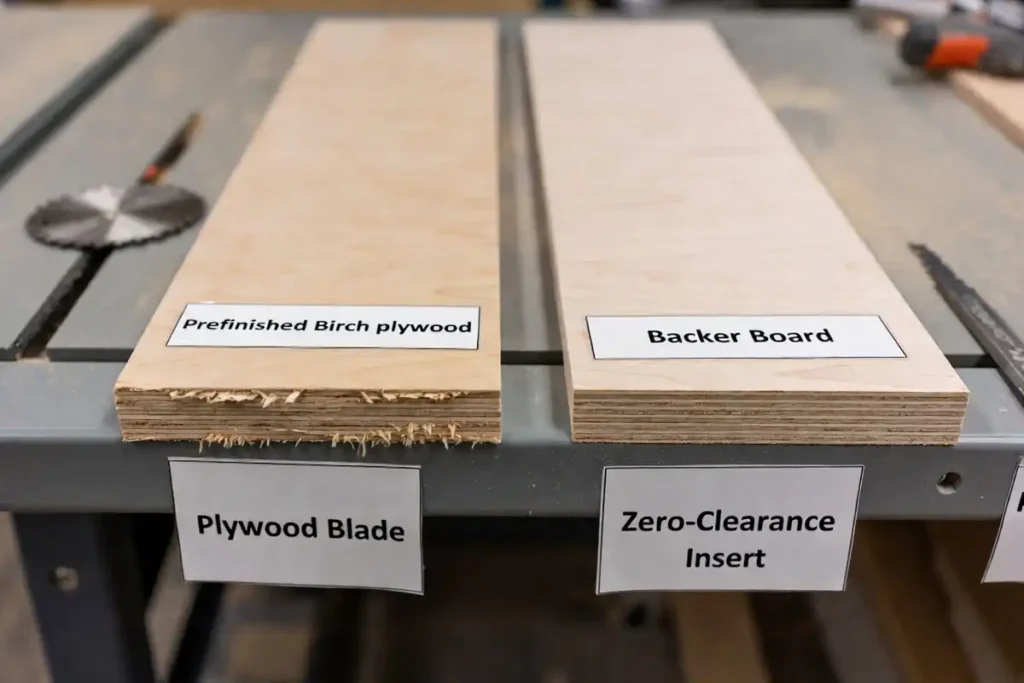
5) Cut it without chipping the finish
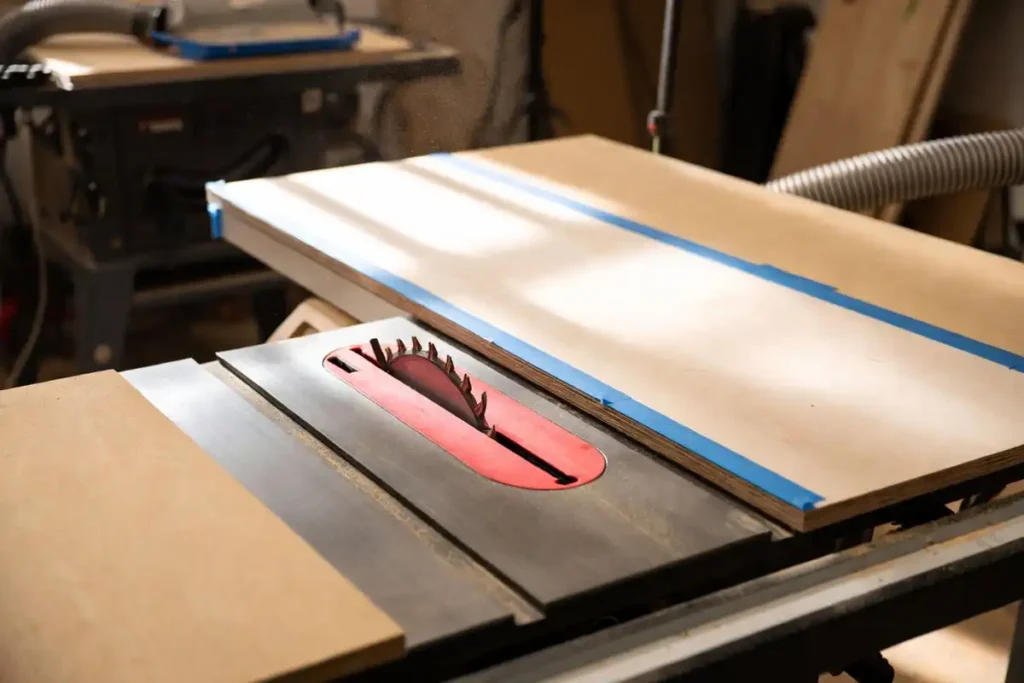
Chipping comes from unsupported fibers at the cut line.
- Use a sharp, high-tooth-count blade made for plywood.
- Support the sheet close to the cut with a zero-clearance insert or a sacrificial backer.
- Put the best face down on a table saw. Put the best face up on a track saw.
- For crosscuts, a backer board behind the exit side keeps edges crisp.
If you see chip-out, slow the feed and check blade sharpness first. A dull blade damages prefinished faces fast.
6) Plan joints so glue bonds to raw wood
Wood glue bonds to wood fibers, not to a slick factory topcoat.
Use one of these approaches:
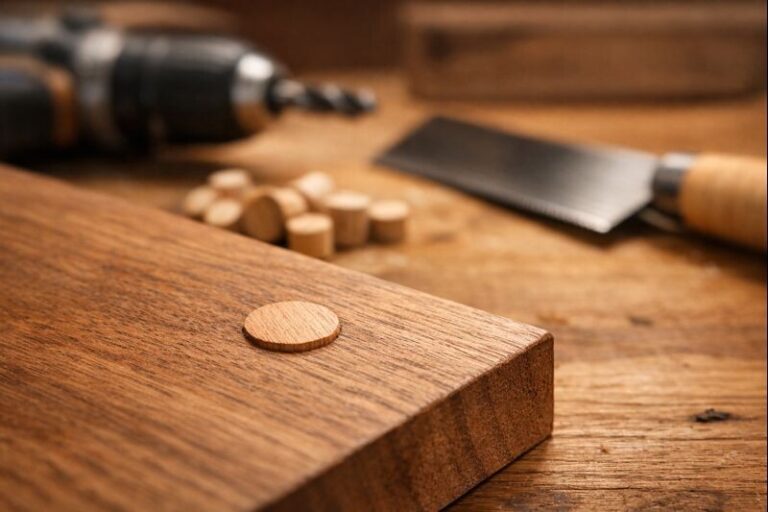
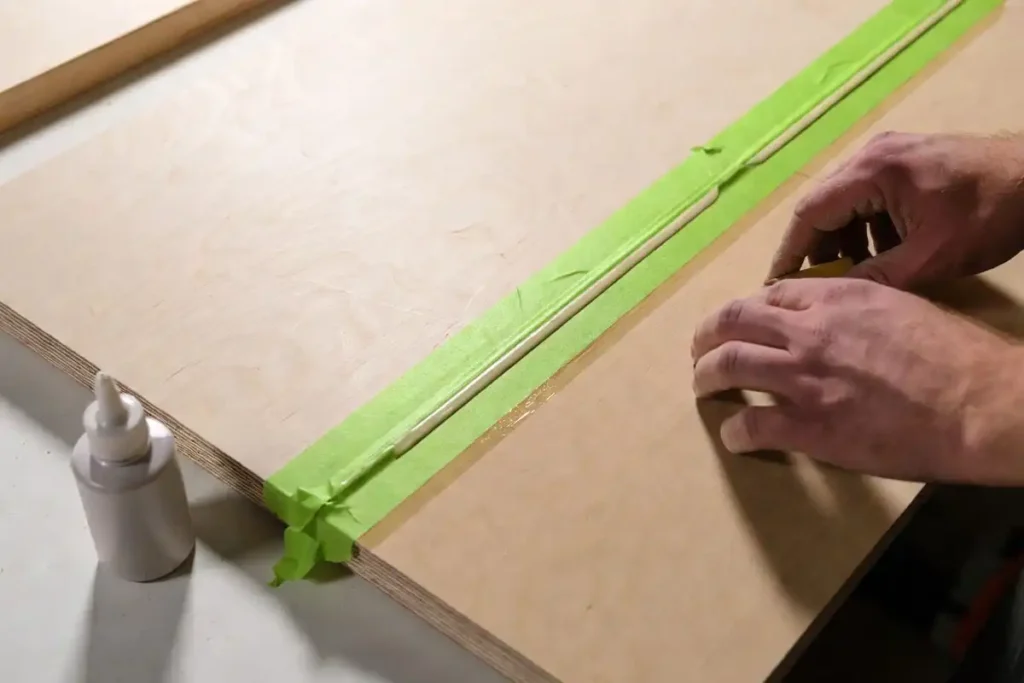
- Dados and rabbets: They expose raw core and increase glue surface.
- Edge strips: Solid wood edging gives a clean glue line and hides layers.
- Scuff and mask: When a glue line lands near a finished face, scuff that narrow area and mask the rest to control squeeze-out.
For adhesive choices that fit plywood work, see plywood wood glue.
7) Assemble without denting the faces
Clamps and screws leave marks when they bear on a hard finish.
- Use cauls or scrap pads under clamps.
- Pre-drill where screws pull faces tight.
- Wipe squeeze-out fast, or it hardens into a shiny smear that catches light.
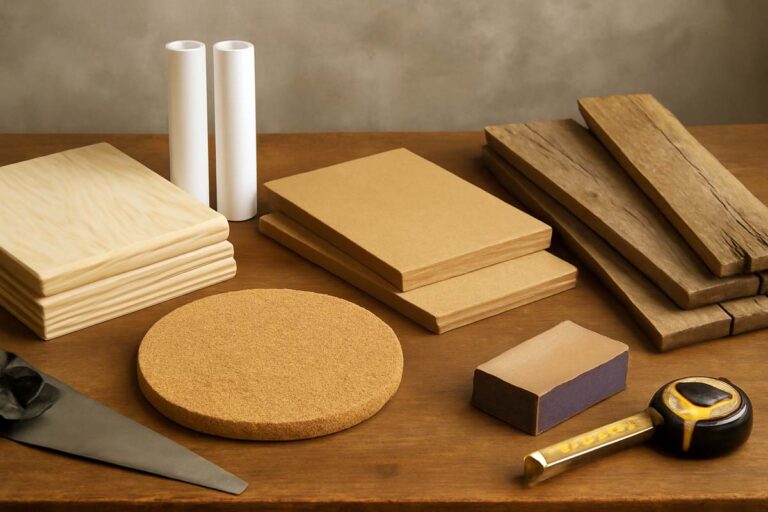
8) Treat edges like a separate finishing job
The faces arrive finished. The edges arrive raw.
Common edge options:
- Iron-on veneer banding: Fast and clean for cabinets and shelving.
- Prefinished banding: Matches sheen better when you buy it from the same supplier line.
- Solid wood lipping: Strong, durable, and forgiving when you want a rounded profile.
After edging, sand edges lightly and seal them with a compatible clear coat. Keep sanding on edges only. Heavy sanding on the face cuts through the factory finish.
Solutions: matching the material to real projects
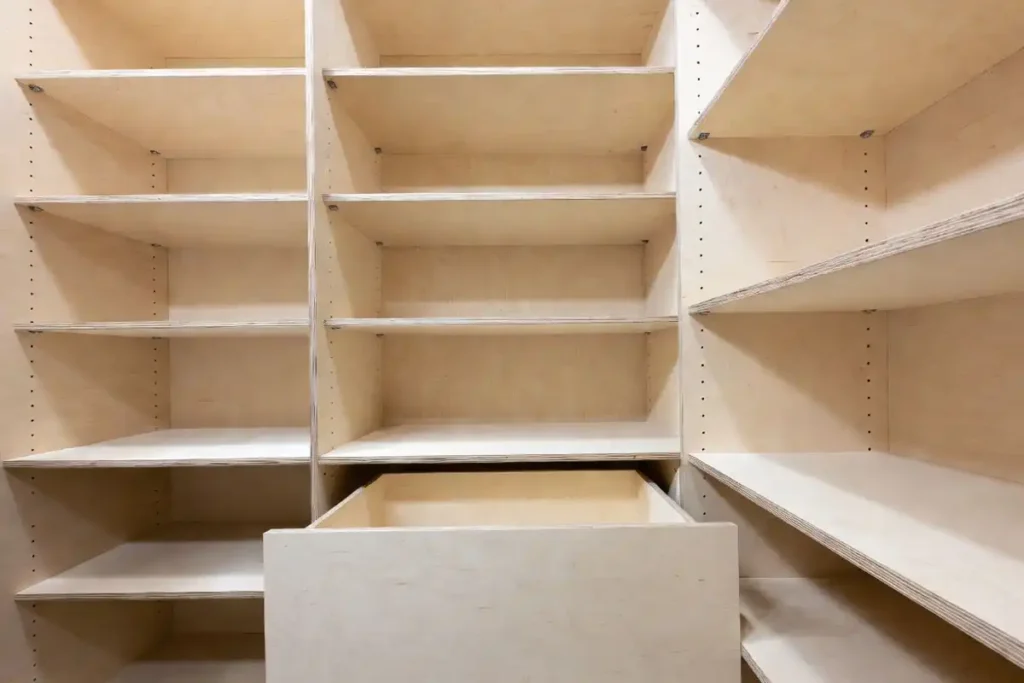
Clean cabinet interiors
Use two-side prefinished panels for boxes where the inside faces show.
- Build carcasses with dados or rabbets for reliable glue bonds.
- Edge band front edges before final install for a finished look.
If your project is a full kitchen or built-in run, it helps to confirm the panel type that fits cabinet work. This guide on plywood types for cabinets helps you compare the options.
Durable shelving that stays bright
Prefinished birch stays lighter than many stained shelves and cleans fast.
- Increase stiffness with thicker panels or a front edge strip.
- Add a solid wood nosing when the shelf spans a wide opening.
Shop fixtures that survive abuse
Prefinished faces resist glue drips and wipe clean.
- Use prefinished for cabinet interiors.
- Use raw plywood for parts that need paint, heavy modifications, or frequent rework.
Troubleshooting Guidelines
Why does glue not stick to the face?
Glue fails when it lands on the factory topcoat.
Fix: keep glue lines on raw wood. Cut joinery that exposes core (dados/rabbets), or scuff only the glue area and keep the rest masked and clean.
How do I fix chip-out on cuts?
Chip-out usually points to blade condition and support.
Fix: switch to a sharp plywood blade, use a zero-clearance insert, and add a sacrificial backer for crosscuts. Confirm you oriented the best face correctly for your saw type.
Why do I see shiny glue smears after cleanup?
A damp rag can spread glue into a thin film that dries glossy.
Fix: let the smear cure, then scrape it carefully with a sharp plastic scraper. Avoid aggressive sanding on the face. A light scuff and a compatible clear touch-up sometimes blends the sheen, but it rarely disappears fully.
Can I stain prefinished birch plywood?
Stain does not penetrate a sealed factory face.
Fix: stain raw edges or raw back faces only, or choose unfinished birch panels when stain drives the look. If you are working with raw birch, my guide to staining birch plywood covers blotch control and prep.
Avoid mistakes that waste sheets
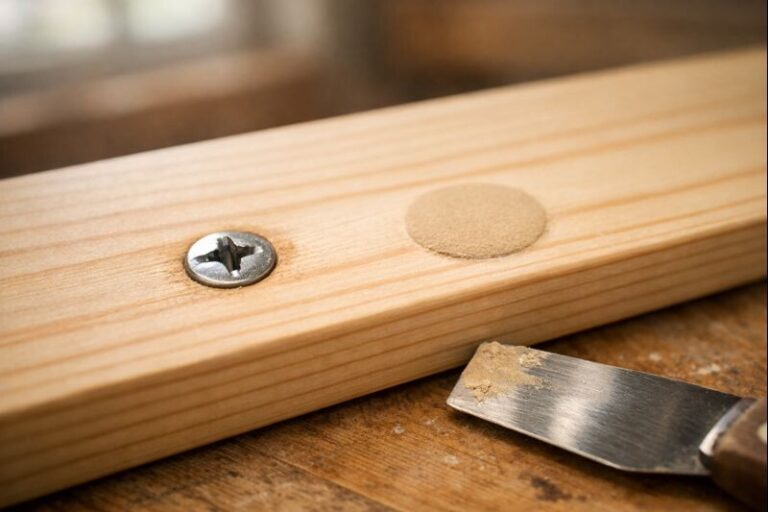
- Sanding the face “to help glue.” Sanding often cuts through the finish in patches that look cloudy. Prep only the glue zone, and keep it narrow.
- Skipping edge planning. The faces look done, but the edges still need a plan for durability and appearance.
- Dragging sheets across grit. One grain of sand under a panel scratches the finish in a long line. Lift and set panels, or use clean spacers.
- Driving screws without pilots. Prefinished faces chip around fasteners when threads wedge the veneer. Drill pilots and control torque.
- Treating touch-ups like furniture finishing. Factory sheen and hardness differ from brush-on finishes, so repairs look different under raking light.
Safety notes for cutting and handling
- Wear eye protection for every cut. Plywood chips travel fast.
- Use a respirator or dust mask and dust collection. Plywood dust irritates lungs.
- Support sheets so they do not pinch the blade or tip off the saw.
- Keep hands away from the cut line and use push tools on narrow rips.
- Handle finishes and solvents with ventilation. Even cured panels carry sanding dust that you do not want to breathe.
Final Words
Prefinished birch plywood earns its keep when you want clean interiors and fast build time. Pick the right core and thickness, cut with support to prevent chipping, and keep glue joints on raw wood. Treat edges as their own finishing step, because edges decide how the project looks and how it wears. If you plan the workflow up front, prefinished panels build cabinets and shop storage that look crisp on day one and stay easy to clean for years.