How to Remove a Stuck Screw From Wood: 9 Fast, Damage-Free Fixes
Remove a stuck screw from wood by slowing down and working through a simple escalation plan. Start with grip and bit fit. Then add controlled shock, lubrication, and heat. Only after that, move to drilling and extraction. This order keeps the wood clean, protects your project’s finish, and saves a lot of frustration.
Stuck screws show up constantly when repairing tiered tray stands, serving trays, and older walnut builds.
Sometimes the screw is rusted. Other times it’s glued in by finish, paint, or swollen wood fibers.
Either way, the goal stays the same. Get it out while leaving the surrounding wood strong enough to reuse.
Contents Here
- 1 Why screws get stuck in wood
- 2 Quick safety setup before touching the screw
- 3 The best escalation plan (use this order)
- 3.1 Step 1: Use the right bit, seated hard
- 3.2 Step 2: Try the “tighten first” trick
- 3.3 Step 3: Add lubrication (especially on hardwood or old hardware)
- 3.4 Step 4: Use controlled impact, not brute force
- 3.5 Step 5: Improve grip on a partially stripped head
- 3.6 Step 6: Cut a new slot when the head is toast
- 4 When the screw still won’t budge: extraction and drilling
- 5 Repairing the wood after removal (so it looks intentional)
- 6 A simple method table that keeps you from jumping to drilling too soon
- 7 Preventing stuck screws on future tray and stand builds
- 8 FAQs about to Remove a Stuck Screw From Wood
- 9 Final thoughts
Why screws get stuck in wood
A screw usually seizes for one (or more) of these reasons:
- Wrong driver bit rounded the recess, so the bit cams out instead of turning.
- Over-torqued assembly crushed wood fibers into the threads like a clamp.
- Moisture movement swelled the wood around the shank, common in dense hardwoods like walnut.
- Finish or paint bridged over the head and locked it in place.
- Rust or corrosion bit into the threads, especially on outdoor pieces or near kitchens.
Walnut is a great example of “strong but unforgiving.”
It holds threads well, but once a screw binds, forcing it can blow out a clean crater around the head.
If you’re building or repairing trays often, these related guides help prevent the problem in the first place: tool upkeep habits that keep drivers from stripping heads and safety gear that matters during drilling and extraction.
Quick safety setup before touching the screw
This is a 60-second setup that prevents most damage.
- Clamp the work so it can’t twist when torque hits.
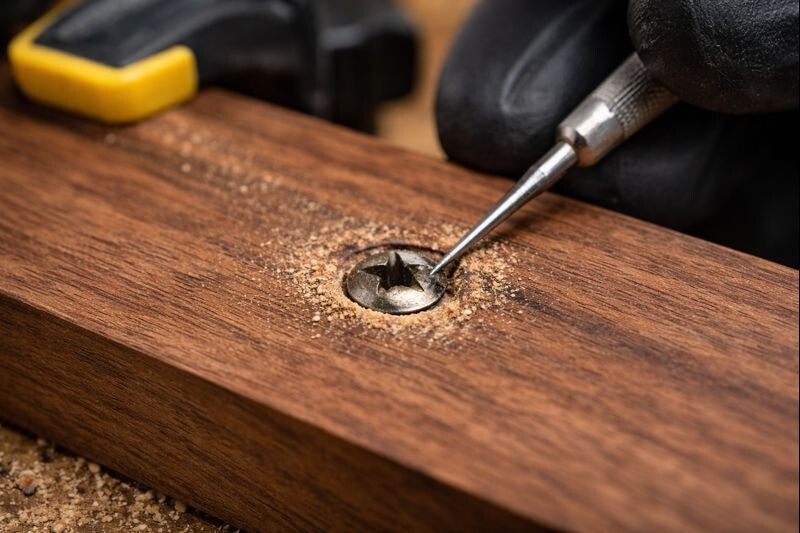
- Clear the head with an awl, pick, or stiff brush so the bit seats fully.
- Score the finish around the head with a sharp knife (a tiny circle). This helps prevent finish chipping.
- Choose the correct bit and test the fit before turning.
If the screw is on a tiered tray stand post or center rod area, stabilize the whole stand.
A wobbling base makes stripping almost guaranteed, and this fix guide pairs well with repairs: stop a tiered tray stand from wobbling.
If the screw head breaks off and you’re staring at a buried shank, this walkthrough on extracting snapped screws cleanly will keep the wood surface intact while you work. extracting snapped screws cleanly.
The best escalation plan (use this order)
Step 1: Use the right bit, seated hard
Most “stuck” screws aren’t stuck.
They’re stripped.
Use a fresh bit, push straight down, and keep the driver perfectly aligned.
A common mistake is using a Phillips bit on screws that actually fit better with a different profile.
If the bit rocks or feels sloppy, switch sizes or types immediately.
Practical tip that saves heads: give the driver a light tap with a hammer after seating the bit.
That little shock helps the bit bite into the recess and can break the bond at the threads.
Step 2: Try the “tighten first” trick
This sounds backward, but it works.
Turn the screw clockwise just a hair (like 1–2 degrees).
That tiny movement can crack the friction lock between threads and wood fibers.
Then back it out slowly.
If the screw creaks, stop and move to the next step.
Step 3: Add lubrication (especially on hardwood or old hardware)
For older screws, a penetrating oil can help it back out with less tearing.
Apply a small drop around the head and let it wick down.
This is most helpful when there’s rust or when a screw has been in place for years.
Try not to flood raw wood.
On open-grain woods, oil can stain around the head.
If you’re working on walnut and care about color matching later, it helps to understand how walnut takes finish: finishing walnut without dulling the grain and identifying real walnut before matching repairs.
Step 4: Use controlled impact, not brute force
An impact driver is one of the cleanest solutions when the head is still intact.
It delivers fast, sharp rotational hits that break the screw loose without needing a ton of steady torque.
Keep pressure straight in line with the screw, and start on a low setting.
If you don’t have an impact driver, a manual impact driver (hit with a hammer) is old-school but effective.
This is especially useful on long screws in dense hardwood.

When the driver keeps camming out and the recess is chewed up, this guide on backing out a rounded screw head lays out the safest fixes before drilling becomes the only option. backing out a rounded screw head.
Step 5: Improve grip on a partially stripped head
If the recess is starting to round:
- Put a wide rubber band over the head and seat the bit through it.
- Switch to a new bit (not the one that already slipped).
- Try a slightly larger bit if it seats deeper.
This won’t save a fully stripped screw.
But it often rescues one that’s just starting to fail.
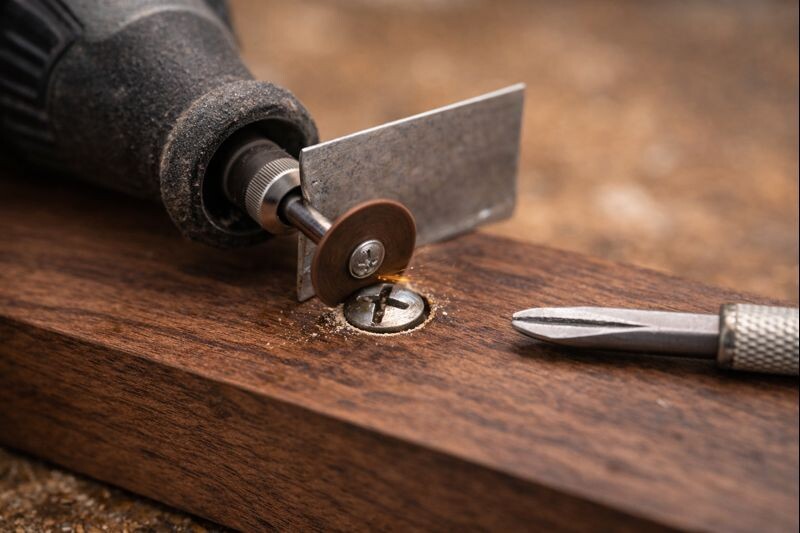
Step 6: Cut a new slot when the head is toast
When a Phillips head is smooth and rounded, create a new drive surface.
Use a rotary tool with a cut-off wheel to cut a straight slot across the head.
Then use a flathead screwdriver that fits the slot tightly.
Go slow.
If you cut too deep, you’ll chew into the wood and weaken the surface.
If the screw turns but won’t bite, this resource on tightening up spinning fasteners covers quick, reliable ways to restore holding power without over-sizing the hardware. tightening up spinning fasteners.
When the screw still won’t budge: extraction and drilling
At this point, the screw is truly seized or the head is too far gone.
Now you’re choosing between two goals:
- Save the wood surface as cleanly as possible
- Remove the screw as fast as possible
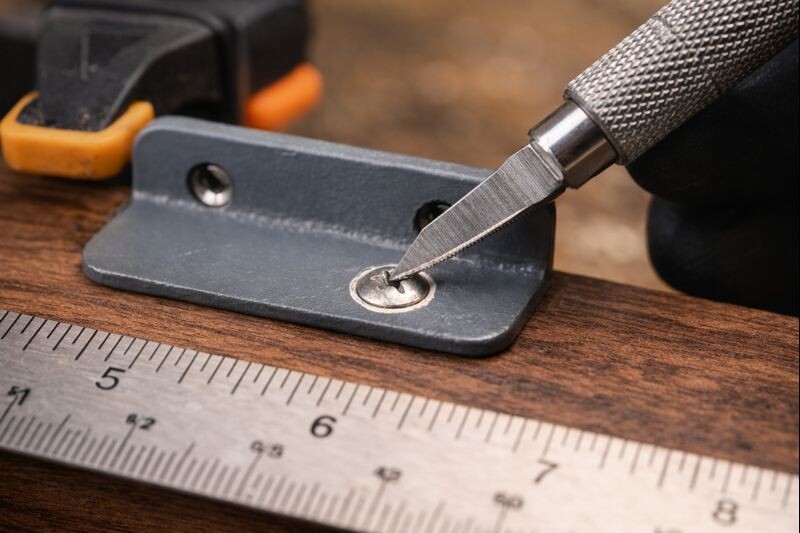
Option A: Grab the head with locking pliers (only if it’s proud)
If the head sticks up even a little:
- Clamp hard with locking pliers (Vise-Grips).
- Rock the screw gently back and forth.
- Turn slowly while pulling slightly upward.
This works best on pan-head and hex-head screws.
It rarely works on countersunk screws below the surface.
Option B: Use a screw extractor (carefully)
A screw extractor kit can work in wood, but it’s easy to overdo it.
Here’s the safer approach:
- Drill a centered pilot hole into the screw head (use the kit’s recommended size).
- Tap the extractor in lightly.
- Turn slowly by hand with a wrench, not a high-speed drill.
- If it feels like the extractor is twisting hard, stop before it snaps.
Extractors are hardened steel.
If one breaks inside the screw, drilling becomes much harder.
Option C: Left-hand drill bit (my favorite “last step” before total removal)
A left-hand bit spins counterclockwise.
Sometimes the drilling action itself backs the screw out without needing an extractor.
Drill straight, slow, and centered.
If the screw starts turning, stop drilling and back it out.
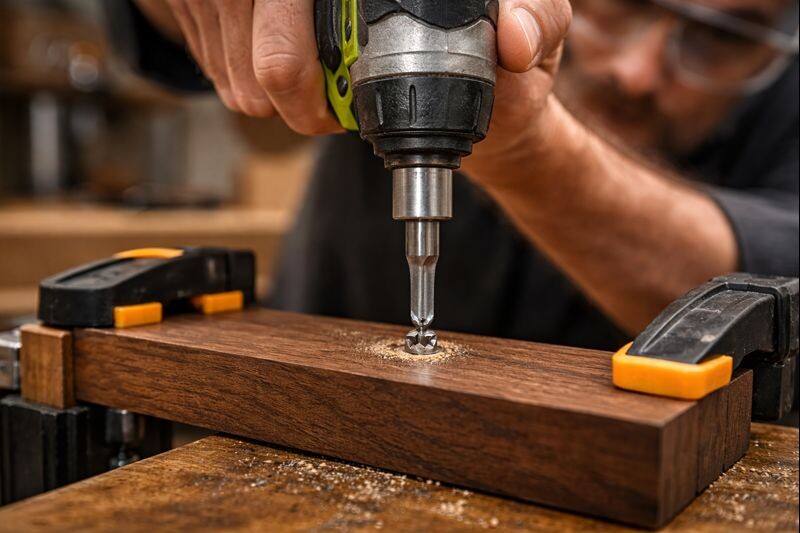
Option D: Drill the head off, then remove the shank
This is the most predictable “get it done” method.
- Use a bit slightly larger than the screw shank.
- Drill until the head pops off.
- Remove the hardware or part being held (tray bracket, stand flange, handle).
- Grip the remaining screw shank with pliers and turn it out.
If the shank won’t turn, drill it out and patch the hole.
After removal, if the hole is too blown out to reuse, this repair guide on rebuilding worn screw holes shows strong plug-and-redrill options that hold up well in hardwoods like walnut. rebuilding worn screw holes.
Repairing the wood after removal (so it looks intentional)
Even a clean removal can leave a crater, torn fibers, or an oversized hole.
Here are the repairs that look best on trays and tray stands.
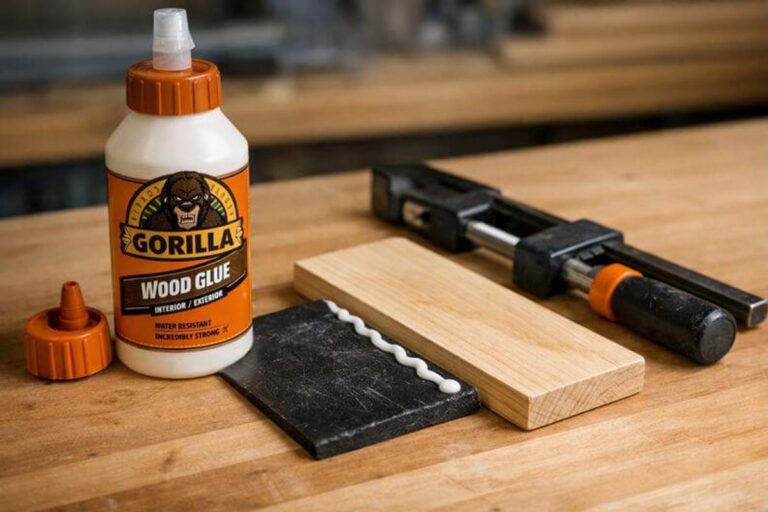
If the hole is slightly loose: glue + toothpicks (quick fix)
- Add a little wood glue into the hole.
- Tap in toothpicks or thin bamboo skewers.
- Let it dry, then trim flush.
- Re-drill a pilot hole and reinstall.
This is fast and solid for light-duty screws like small brackets.
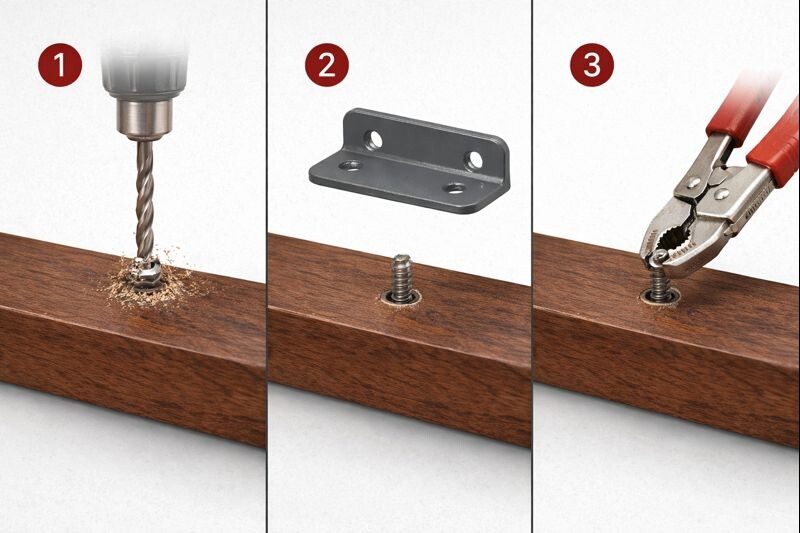
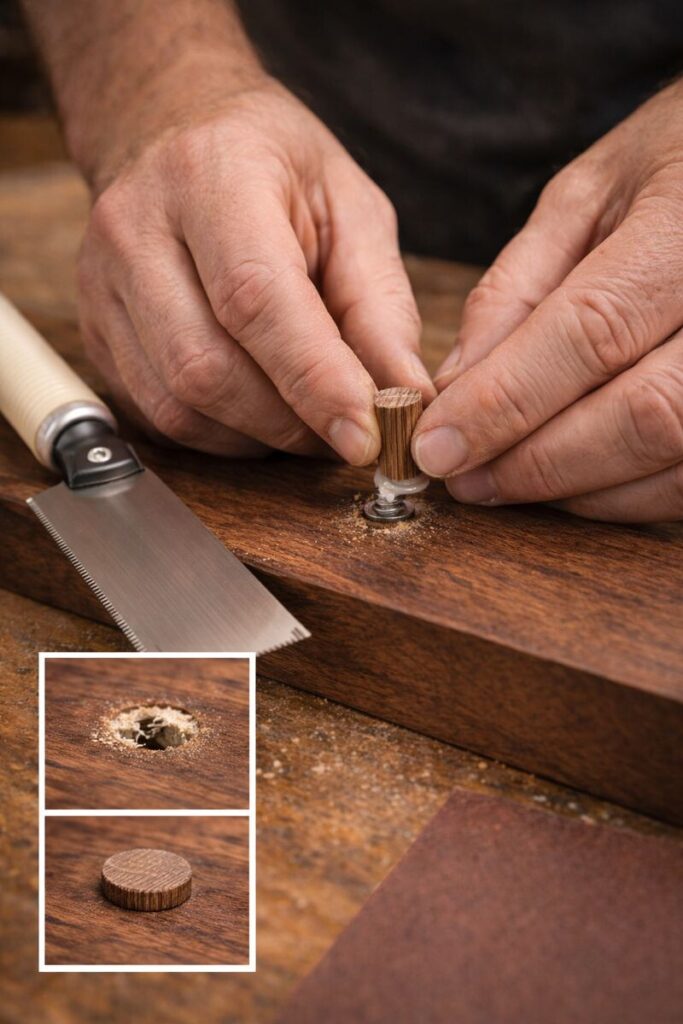
If the hole is blown out: dowel plug (best strength)
- Drill the hole round (clean edges).
- Glue in a hardwood dowel that matches the grain direction as best as possible.
- Trim flush, sand smooth, then re-drill a pilot hole.
On walnut, use a walnut dowel if possible.
It blends better, especially under clear finishes.
If you’re deciding wood species for builds that won’t strip out as easily, this helps: best wood choices for sturdy tiered tray stands and choosing between pine, oak, and maple for projects.
Matching walnut color after a repair
Walnut color matching is where a lot of repairs look “patched.”
Natural black walnut can range from chocolate brown to lighter tan streaks.
Sapwood can be creamy and bright.
A few practical color tips:
- Test stains on scrap from the same board, if possible.
- If the piece is meant to stay natural, a clear coat often deepens walnut nicely without stain.
- If you do stain, choose a tone that matches the darkest surrounding heartwood, then feather outward.
Minwax and Varathane both publish stain lines meant to enhance grain rather than hide it.
Also, a quick clarification that trips people up online.
“4514 Black Walnut Woods” is commonly seen as a search term, but it’s actually a street address (not a walnut lumber grade or stain color).
A simple method table that keeps you from jumping to drilling too soon
| Method | Best for | Risk to wood | Notes |
|---|---|---|---|
| Correct bit + heavy downward pressure | Intact head | Low | Fixes most cases fast |
| Tighten slightly first | Threads bound in hardwood | Low | Great “free” trick |
| Penetrating oil | Rust/old screws | Medium | Can stain raw wood |
| Impact driver / manual impact | Long screws, hardwood | Low | Keep driver perfectly straight |
| Cut a new slot | Stripped head | Medium | Don’t cut into the surface |
| Left-hand drill bit | Severely stuck screws | Medium | Often backs screw out while drilling |
| Drill head off | Worst-case | Medium-High | Predictable, followed by hole repair |
Preventing stuck screws on future tray and stand builds
This is the part that saves hours later.
- Always drill a proper pilot hole in hardwoods like walnut.
- Lubricate long screws with a little paste wax for smoother driving.
- Use quality screws (soft screws strip easily).
- Avoid driving screws through wet finish or thick paint without clearing the head first.
- Don’t over-torque. Stop when snug, not when the driver starts camming out.
If you’re building a tray stand from scratch, these guides help you avoid the common fastener mistakes: building a tiered tray stand with fewer headaches and a rustic tray stand build time-lapse for step order.
FAQs about to Remove a Stuck Screw From Wood
Can a stuck screw be removed without damaging the wood surface?
Yes. Start with the correct bit fit and strong downward pressure, then use controlled impact or lubrication. Only move to slot-cutting or drilling after simpler methods fail, because those steps increase the chance of surface scarring.
Does heat help loosen screws in wood?
Heat can help when finish, paint, or mild corrosion is binding the screw. Use gentle heat focused on the screw head and hardware, not the surrounding wood. Avoid overheating, because it can blister finishes and dry out fibers.
When should a screw extractor be used on wood screws?
Use an extractor after the head is too damaged to drive normally and after impact and grip methods fail. Drill a centered pilot hole and turn the extractor slowly by hand. If it binds aggressively, stop to prevent extractor breakage.
How should a stripped screw hole be repaired in walnut wood?
For light-duty holes, glue and toothpicks can tighten the grip. For structural repairs, plug the hole with a hardwood dowel, trim flush, and re-drill a pilot hole. Walnut dowels blend best under clear finishes.
Is “4514 black walnut woods” a wood type or a stain code?
No. “4514 Black Walnut Woods” is widely listed as a street address, not a walnut lumber designation or stain code. If you’re searching for walnut color, look for stain names like “dark walnut” or “walnut” from major finish brands instead.
Final thoughts
A stuck screw feels like a small problem until it ruins a clean surface.
Treat it like a process, not a battle.
Start with bit fit and pressure, then add impact, lubrication, and only then drilling or extraction.
That approach keeps tray stands, serving trays, and walnut builds looking sharp, even after repairs.