How to Make a Farmhouse Tiered Tray: 7 Easy Steps for Stunning Decor
Creating a farmhouse tiered tray has become one of my favorite weekend projects. I like the challenge of building something both functional and decorative, and I love how a tiered tray instantly makes any counter or table look put together.
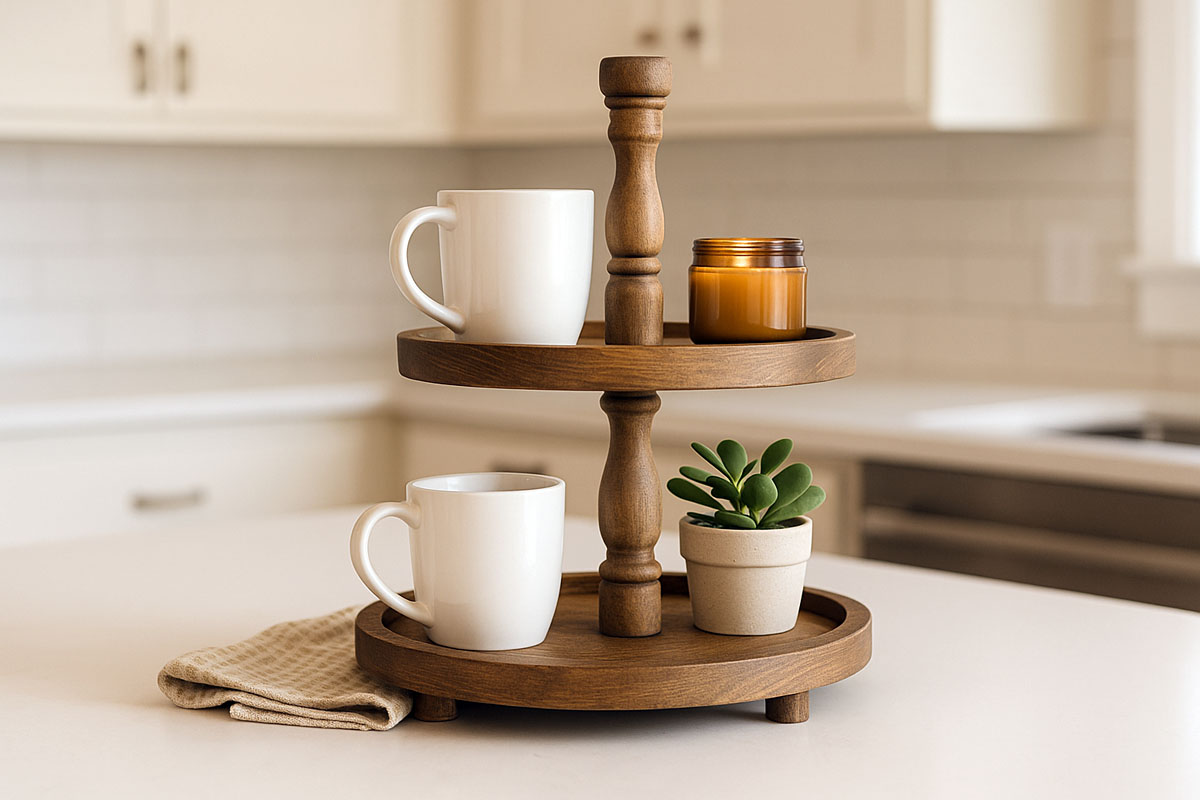
Farmhouse tiered trays are one of those pieces that seem small but quietly pull a whole room together. You can stack mugs, candles, plants, or seasonal decor without eating up counter space. Instead of buying one, I like building them myself so I control the size, color, and vibe.
In this article I’m going to walk you through everything I’ve learned about these rustic trays—what they are, why they’re so popular, how to build one step by step, and how to make the most of yours.
Contents Here
- 1 What is a farmhouse tiered tray?
- 2 Step 1: Decide how you’ll use it
- 3 Step 2: Choose your wood and finish
- 4 Step 3: Tools and hardware you’ll need
- 5 Step 4: Basic cut list for a 2-tier tray
- 6 Step 5: Cutting the tray shapes
- 7 Step 6: Shaping and prepping the center post
- 8 Step 7: Drilling the center holes
- 9 Step 8: Sanding everything smooth
- 10 Step 9: Dry fit and assemble
- 11 Step 10: Add feet for stability (optional but helpful)
- 12 Step 11: Finishing and farmhouse style
- 13 Common mistakes and how to avoid them
- 14 Where a farmhouse tiered tray actually helps
- 15 FAQs about to Make Farmhouse Tiered Tray
- 16 Final Thoughts
What is a farmhouse tiered tray?
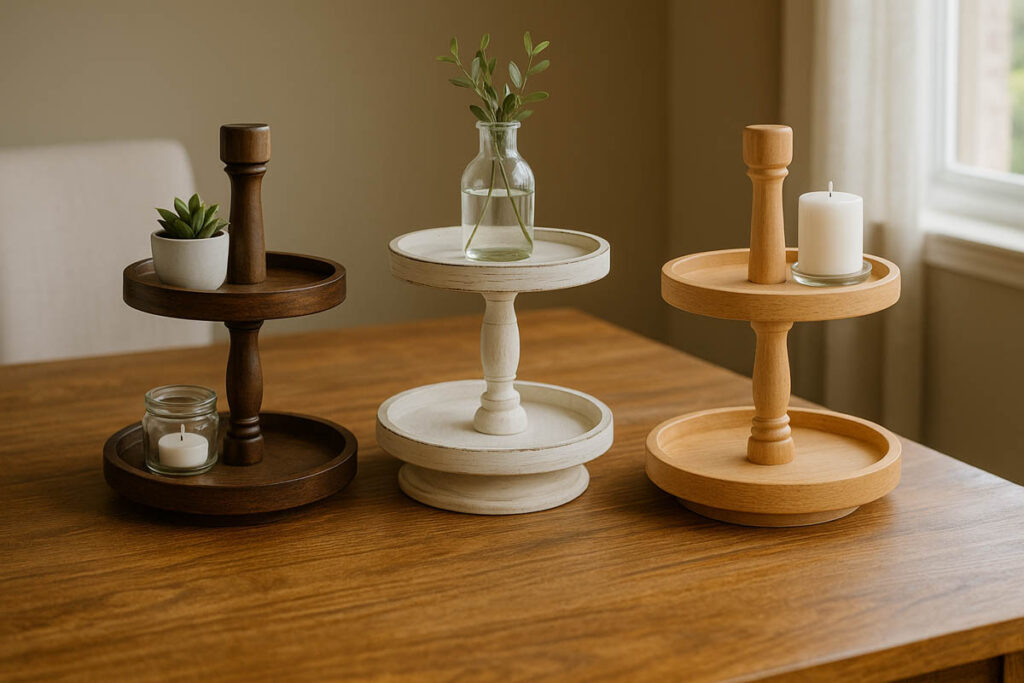
When people say “farmhouse tiered tray,” they usually mean:
- Two or three wooden trays
- Stacked vertically with a center post
- Rustic or slightly worn finish
- Used for decor, coffee setups, or small storage
You see them on kitchen counters with mugs and sugar, on bathroom vanities holding jars, or on entry tables with keys and mail.
You can build one from cheap pine and paint it, or from nicer hardwood and just seal it. The structure stays the same: flat circles or rectangles, a sturdy center post, and a stable base.
Also learn: A DIY guide to make a tiered tray stand
Step 1: Decide how you’ll use it
Before touching tools, decide where you want this tray to live and what it will hold. That drives almost everything else.
Ask yourself:
- Is it for decor only or will it hold food?
- Will it sit on a kitchen counter, dining table, bathroom vanity, or coffee bar?
- How tall can it be without bumping upper cabinets?
- Do you want 2 tiers or 3 tiers?
Simple size guidelines
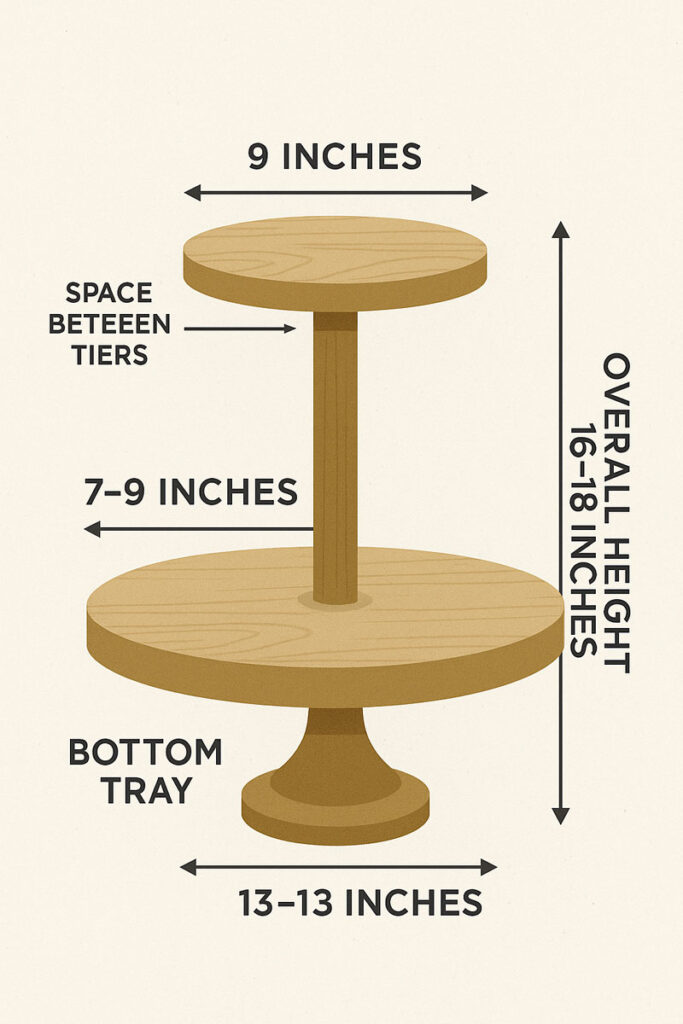
For a typical 2-tier farmhouse tray:
- Bottom tray: 12–14 inches wide
- Top tray: 8–10 inches wide
- Space between tiers: 7–9 inches
- Overall height: around 16–18 inches
If it goes under cabinets, measure from counter to the bottom of the cabinet and leave at least 2 inches of clearance so it doesn’t feel cramped.
Step 2: Choose your wood and finish
You’ve got two main paths: decor only or food contact.
Wood choices
- Pine or spruce – Easy to find, easy to sand, takes paint and stain well. Good for painted/distressed farmhouse look.
- Poplar – Sands smoother than pine, nice for painted trays.
- Oak, maple, walnut – More durable, look nice with clear finish. Better if you want a more natural wood look.
Finish choices
For decor only:
- Stain plus clear coat
- Chalk paint with a matte clear coat
- “Distressed” paint (we’ll talk about that later)
For food contact (cookies, fruit, etc.):
- Use a food-safe finish like mineral oil or a curing oil labeled food-safe.
- Avoid leaving raw stain where food touches.
- If you’re not sure yet, treat it as decor. You can still set wrapped food on it later.
Know more: Elegant Farmhouse 2 Tier Tray Stand
Step 3: Tools and hardware you’ll need
You don’t need a full furniture shop for this. Here’s a simple list that works for most people:
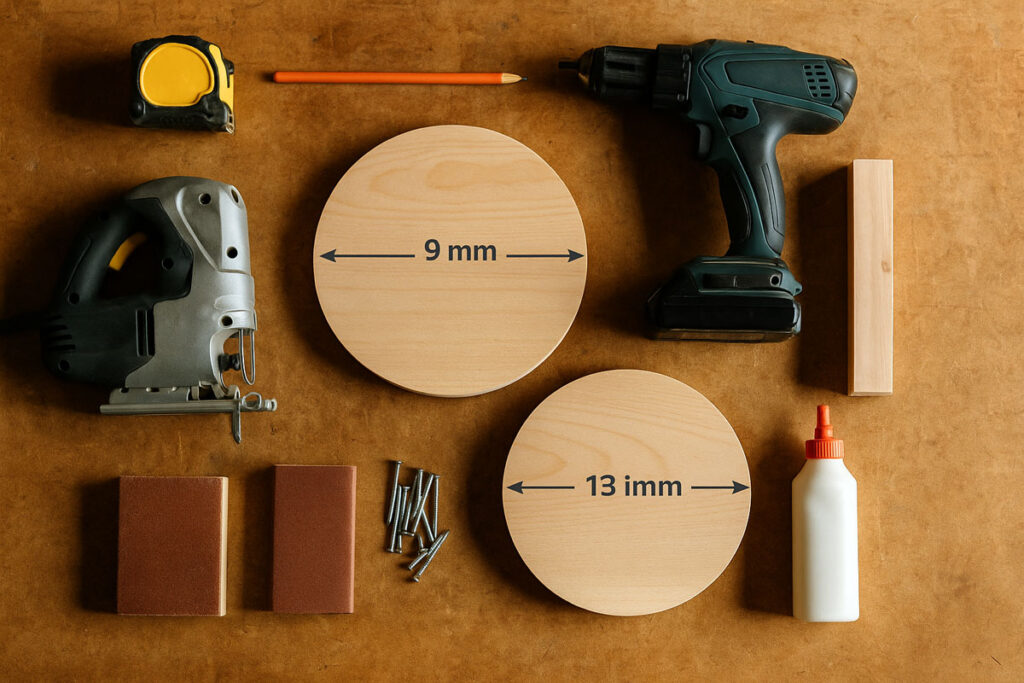
Tools:
- Tape measure and pencil
- Jigsaw, bandsaw, or circular saw (or buy pre-cut rounds)
- Drill + drill bits
- Orbital sander or sanding block
- Clamps (nice but not always required)
- Square (to keep things straight)
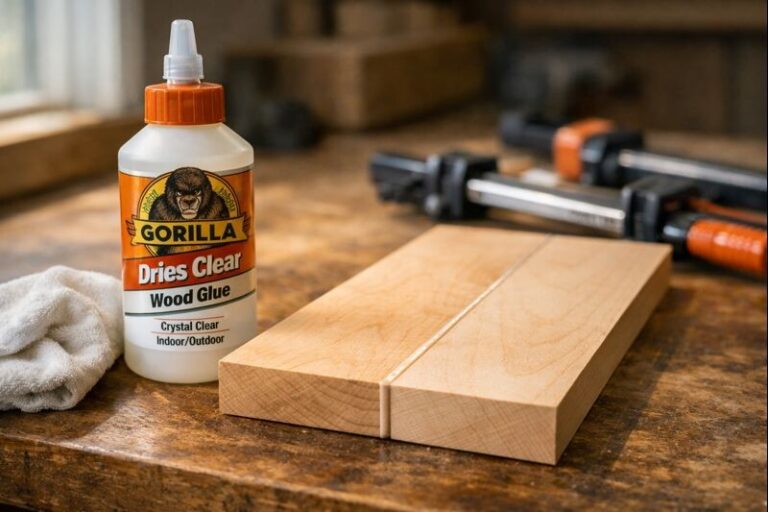
Hardware / supplies:
- Wood screws (1 ¼” or 1 ½” for attaching trays to the post)
- Wood glue
- Sandpaper (80, 120, 180 or 220 grit)
- Finish: stain, paint, and/or topcoat
- Felt pads or rubber feet for the bottom
You can also use a threaded rod with nuts and washers inside the center post if you want a tray that can be disassembled, but screws work fine for most builds.
Step 4: Basic cut list for a 2-tier tray
Here’s a sample setup that works well on most counters:
- Bottom tray: 1 piece, 13″ diameter, ¾” thick
- Top tray: 1 piece, 9″ diameter, ¾” thick
- Center post:
- 1 piece, 1 ½” x 1 ½” x 14″ long
- Or a turned spindle or stair baluster cut to length
- Base feet (optional): Three or four small blocks, about 1″ x 1″ x ¾”
You can tweak those dimensions, but stay in that neighborhood if you want a stable, easy-to-use tray.
Step 5: Cutting the tray shapes
If you have a bandsaw and circle jig, life is easier, but a jigsaw still works.
Option 1: Cutting circles yourself
- Mark the center of your board.
- Use a compass or a string and pencil to draw your circle (half the diameter is your radius).
- Clamp the board so it doesn’t move.
- Cut just outside the line with the jigsaw.
- Sand to the line, smoothing the curve.
Option 2: Using pre-cut rounds
Most big box stores sell pre-cut wooden rounds. If you don’t feel like fighting a jigsaw, just buy two in the sizes you want and move on to sanding.
Step 6: Shaping and prepping the center post
The center post is what makes the tray feel solid or cheap. You can keep it simple or get fancy.
Simple square post:
- Rip or buy a 1 ½” square stick.
- Cut it to around 14″ for a 2-tier tray.
- Chamfer or round the edges with a sander if you want softer corners.
Using a turned spindle:
You can also cut a stair spindle or table leg to length. It gives more of that farmhouse look without needing a lathe.
Whatever you use, mark the exact center on the top and bottom of the post. Those marks guide your screws or threaded rod.
See more: 2-Tier Farmhouse Tiered Tray Decor
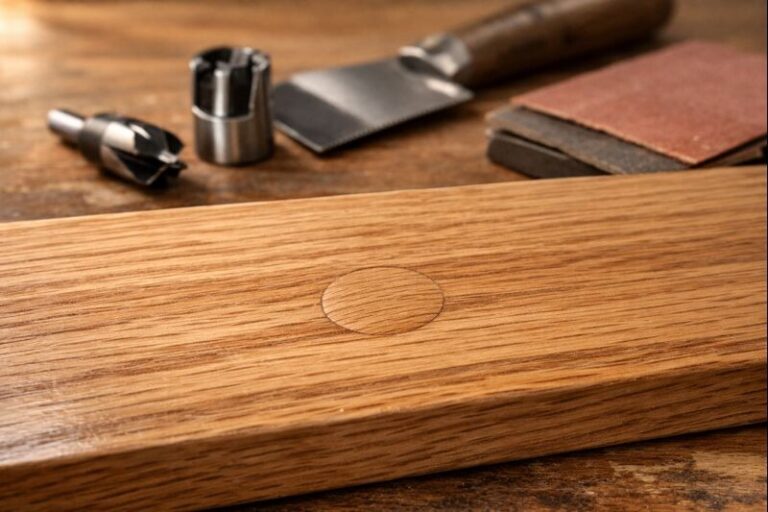
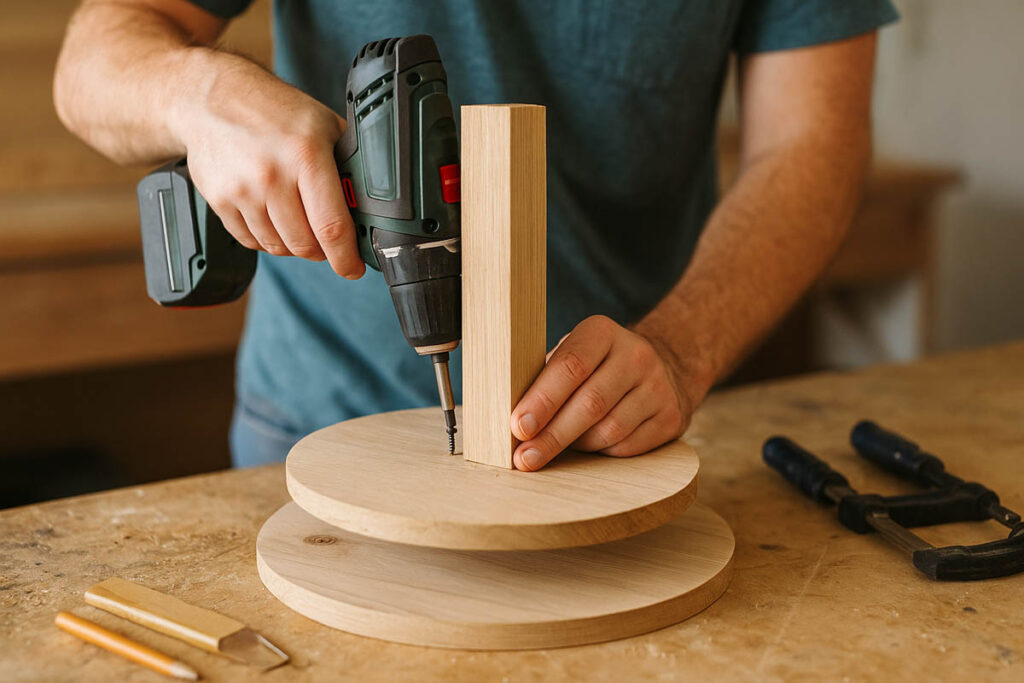
Step 7: Drilling the center holes
You want each tray centered on the post so the tray doesn’t look crooked.
- Draw diagonal lines corner-to-corner (or in a cross) on each tray to find the middle.
- Mark that center.
- Use a drill bit slightly larger than your screw shank or threaded rod.
- Drill a clean, straight hole through each tray.
If you’re using screws from underneath, you may only need a shallow pilot hole in the tray and a deeper hole in the post, depending on how you plan to attach things.
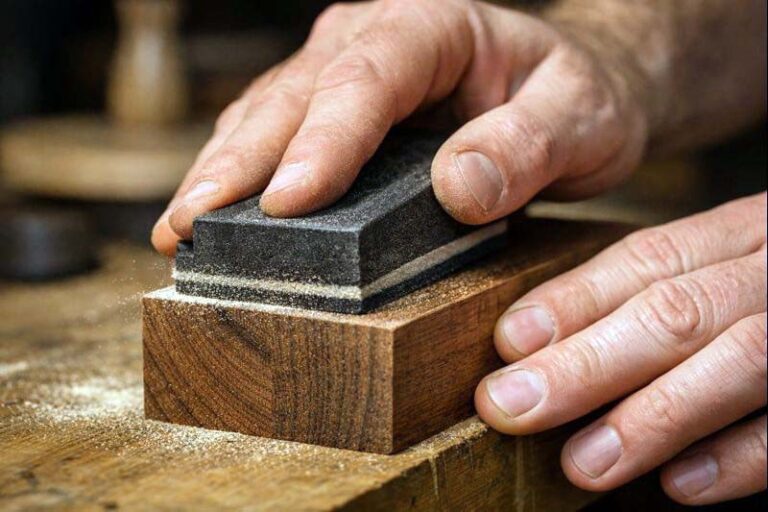
Step 8: Sanding everything smooth
This is the boring part, but it’s what makes the tray feel nice in your hands.
- Start with 80 or 100 grit to remove saw marks.
- Move to 120 grit to smooth the surface.
- Finish with 180 or 220 grit, especially on edges.
- Slightly round all edges so they don’t feel sharp.
Blow or wipe off dust between grits. Dust stuck under your sandpaper will leave scratches that show up after staining.
Step 9: Dry fit and assemble
Before glue or screws, do a dry fit:
- Slide the trays onto the post (or line them up where they’ll sit).
- Make sure everything looks centered and the spacing feels right.
- Adjust your layout if needed.
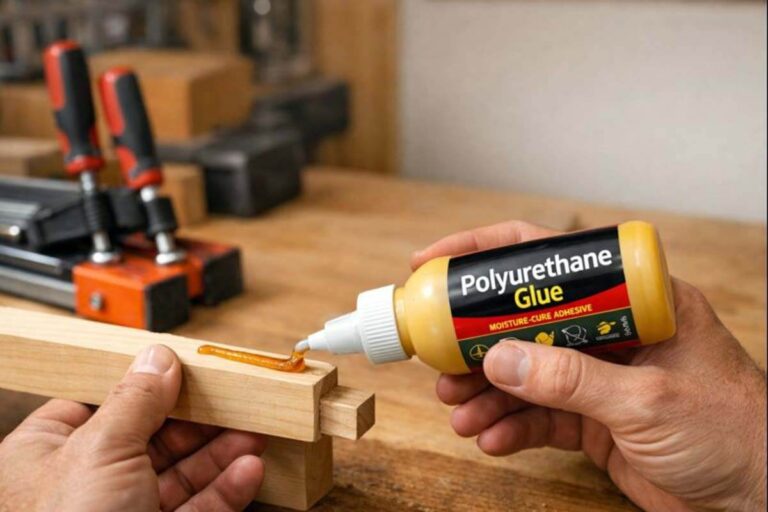
Simple screw assembly (from below)
This is a straightforward way:
- Flip the bottom tray upside down.
- Mark where the center post will sit.
- Add glue on the end of the post.
- Hold or clamp the post in place.
- Drill a pilot hole up through the bottom tray into the post.
- Drive one or two screws to lock it in.
Then:
- Flip the assembly upright.
- Slide the top tray down to its position on the post.
- From the top, drill a pilot hole down into the post.
- Drive a screw down through the top tray.
- Countersink slightly if you plan to fill the hole or hide it under decor.
If you use a threaded rod, the order changes a bit, but the idea is the same: trays clamped between nuts and washers on the rod.
Step 10: Add feet for stability (optional but helpful)
Three or four small feet under the bottom tray help with:
- Stability on uneven surfaces
- Keeping the tray out of small spills
- Making it look more finished
Glue and screw or just glue them in a triangle or square pattern near the outer edge. Check that it doesn’t rock; if it does, sand one foot slightly.
Step 11: Finishing and farmhouse style
Here’s where you dial in the farmhouse look.
For a classic stained look
- Wipe off all dust.
- Apply stain with a rag or brush, working with the grain.
- Wipe off excess after a few minutes.
- Let it dry fully.
- Add two or three coats of clear finish (poly, water-based topcoat, or wipe-on finish), sanding lightly between coats.
For painted farmhouse style
- Seal knots if you’re using knotty pine (or they may bleed through).
- Apply a primer coat if needed.
- Paint with a matte or satin paint.
- For a distressed look, sand lightly on edges and corners after the paint dries so some wood shows through.
- Add a clear coat to protect the paint.
And For food contact
If food will sit directly on the trays:
- Skip standard poly on the flat surfaces.
- Use a food-safe oil or finish approved for contact.
- Reapply oil over time as the wood dries out.
Common mistakes and how to avoid them
1. Tray feels wobbly
- Cause: Base too small or post not straight.
- Fix: Use a wider bottom tray, keep the center post plumb, and add feet that all touch the surface.
2. Trays not centered
- Cause: Eyeballing instead of marking centers.
- Fix: Always mark center lines and drill from those marks.
3. Finish looks uneven
- Cause: Rushing sanding or skipping grits.
- Fix: Take your time with sanding, wipe off dust, and test stain on a scrap from the same board.
4. Tray too tall for the space
- Cause: Guessing instead of measuring.
- Fix: Measure your actual space before deciding on final height.
Where a farmhouse tiered tray actually helps
A tiered tray isn’t just decor if you set it up well. A few ideas:
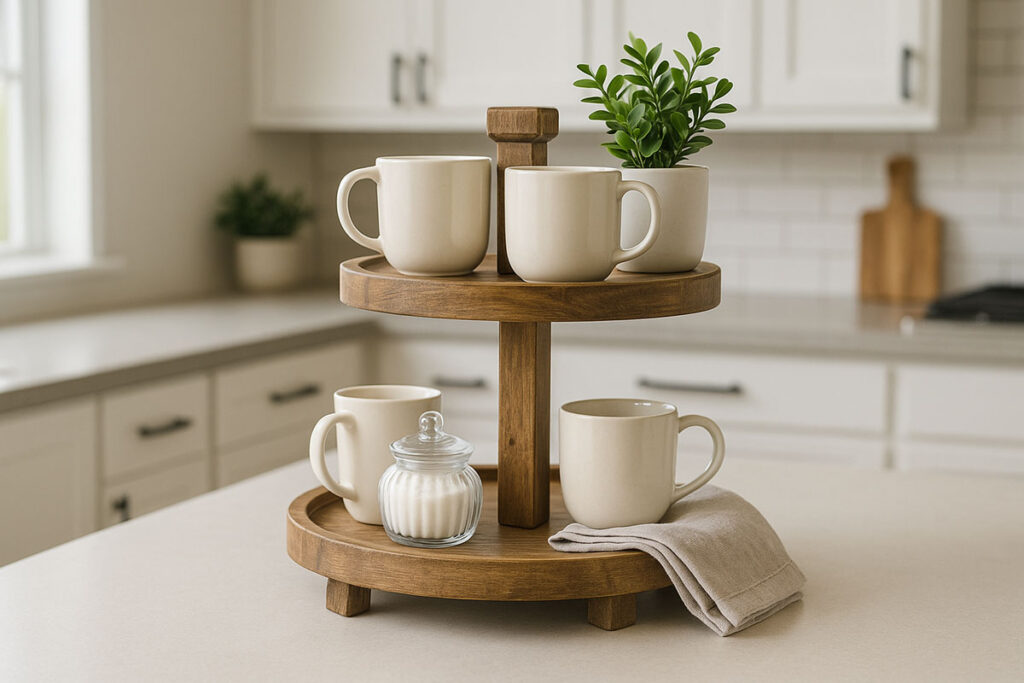
- Coffee bar: mugs on bottom, sugar and spoons on top
- Kitchen: salt, pepper, oil, and a small plant
- Bathroom: cotton balls, Q-tips, small towels, and lotion
- Entry: keys, sunglasses, mail, and a small bowl for loose change
Think of it as vertical organization with a bit of style.
FAQs about to Make Farmhouse Tiered Tray
What is a good height for a 2-tier farmhouse tray?
For most kitchens, a total height between 16 and 18 inches works well. It gives enough vertical room for mugs and small decor without bumping upper cabinets. Always measure from your counter to the cabinet bottom and leave a couple of inches of clearance.
Can I build a farmhouse tiered tray without power tools?
You can, but it’s slower. You’ll need pre-cut wooden rounds, a hand drill, and sandpaper blocks. The biggest challenge is drilling straight and sanding enough by hand. It’s absolutely possible if you’re patient and don’t rush the sanding or finishing.
What wood thickness should I use for the trays?
Three-quarter-inch (about 19 mm) thick boards work well. They’re sturdy enough not to warp easily and don’t look bulky. Thinner boards can flex if you load them up, and thicker boards just add unnecessary weight without much benefit for a small tray.
How do I keep my tiered tray from tipping?
Use a wide enough bottom tray, keep the center post in the true center, and avoid stacking heavy items near the edges. Adding three or four small feet under the bottom tray and checking for wobble on a flat surface also helps stabilize the whole piece.
Can I make a three-tier version from the same plan?
Yes, you can extend the same idea. Use three trays, each a bit smaller as you go up, and add more height to the center post. Just watch your total height and make sure the bottom tray is wide enough so the added top tier doesn’t make the tray feel top-heavy.
Final Thoughts
I like projects like this because they sit right in the sweet spot: useful, not too complex, and easy to customize. You can keep the first one simple, then tweak the next one. Maybe he wants darker stain, you want white paint, and your kids want bright colors. The structure stays the same, but each tray reflects whoever made it.
If you get comfortable with one build, you can crank out a few for gifts. People notice handmade pieces, especially when they see them sitting on your counter getting used every day.
Building a farmhouse tiered tray is basically: plan the size, cut two trays, add a solid center post, and finish it in a style that fits your home. If you measure carefully, drill straight, and don’t rush the finish, you end up with a tray that looks intentional and actually works hard on your counter instead of just taking up space. Stay connect with Tray Edit for more woodworking information.