How to Join Two Pieces of Wood With Screws: 9 Pro Steps for Rock-Solid Joints
Join two pieces of wood with screws and you’ll get a connection that’s fast, strong, and easy to service later. It’s also a joint that can fail if the screw choice is wrong or the holes aren’t prepped right. This guide walks you through screw selection, pilot holes, countersinks, clamping, and clean assembly so your projects stay tight and square.
Contents Here
- 1 When screws are the right choice (and when they aren’t)
- 2 Pick the right screw first (this matters more than people think)
- 3 Joint style matters as much as the screw
- 4 Step-by-step: the clean, reliable way to screw two boards together
- 4.1 Step 1: Mark the joint and plan screw placement
- 4.2 Step 2: Clamp the parts so they can’t “walk”
- 4.3 Step 3: Drill a pilot hole (don’t skip it)
- 4.4 Step 4: Add a countersink when you want a flush finish
- 4.5 Step 5: (Often) add wood glue for extra stiffness
- 4.6 Step 6: Drive the screw with control, not speed
- 5 Avoid splitting: quick fixes that work every time
- 6 Joining into end grain (where screws get misunderstood)
- 7 Screws for tray stands and tiered trays: what works well
- 8 Fast troubleshooting: when screw joints go wrong
- 9 Safety and tool setup that keeps work clean
- 10 Quick reference table: common screw-joining decisions
- 11 FAQs
- 11.1 Should wood glue be used with screws for most joints?
- 11.2 What pilot hole size should be drilled for wood screws?
- 11.3 How close to the edge can a screw be placed without splitting wood?
- 11.4 Are screws strong enough for end-grain joints?
- 11.5 What is the best way to hide screws in woodworking projects?
- 12 Final thoughts
When screws are the right choice (and when they aren’t)
Screws shine when you need speed, repeatable strength, and the option to remove parts later.
Common “screw-friendly” projects include tray stands, tiered tray posts, shop jigs, cabinet backs, face frames, and quick knock-down fixtures.
However, screws aren’t always the best solution.
Benefits of joining with screws
- Fast assembly with basic tools.
- Good clamping force as the threads pull parts together.
- Repairable: parts can be removed without destroying the whole build.
- Strong in many directions when used with the right joint style and spacing.
Drawbacks to plan around
- Splitting risk near ends or in brittle hardwoods if you skip pilot holes.
- End-grain weakness: screws in end grain can pull out easier.
- Visible hardware unless you plug, countersink, or hide screws.
- Seasonal movement: wide boards can crack if screws lock them too rigidly.
If you’re building something like a tiered tray stand, the “serviceable” side of screws is a big deal. Being able to snug hardware later keeps the stand from loosening over time (more on that below).
For wobble issues, this guide pairs nicely with my post on stopping a tiered tray stand from wobbling.
Pick the right screw first (this matters more than people think)
A good joint starts with matching the screw to the wood, load, and location.
If you want a deeper breakdown, these reference posts help a lot: wood screw basics explained simply, reading screw sizes without guessing, and understanding the numbers printed on screw boxes.
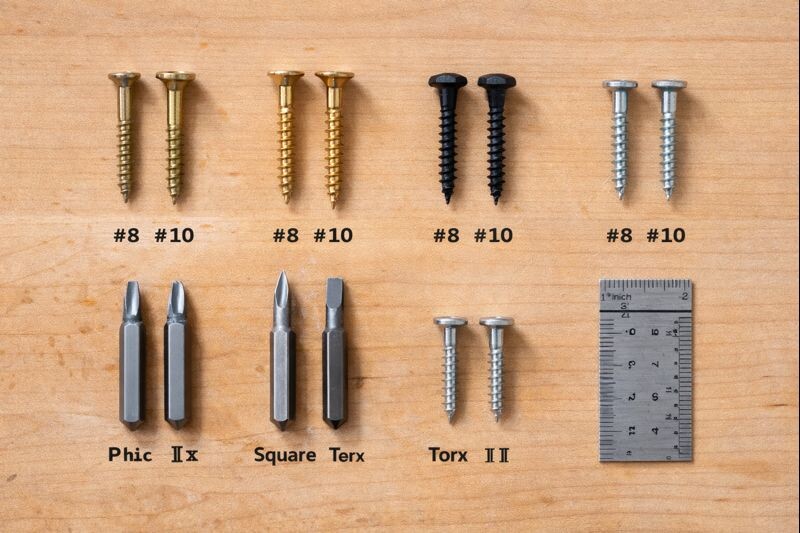
Screw type: the practical shortlist
- Construction screws: strong, great for shop projects, often coated, usually not ideal for fine furniture.
- Wood screws (traditional): good for clean woodworking, especially with tapered shanks.
- Pocket-hole screws: designed to pull joints tight without splitting (best with pocket-hole joinery).
- Stainless steel: best outdoors or damp areas (no rust bleed).
- Brass: looks great but snaps easier; pilot holes are mandatory.
Head style: choose based on how you want it to look
- Flat head: seats into a countersink for a flush finish.
- Pan/truss head: sits on top; useful when you don’t want a countersink.
- Washer head pocket screws: spreads load and resists pull-through.
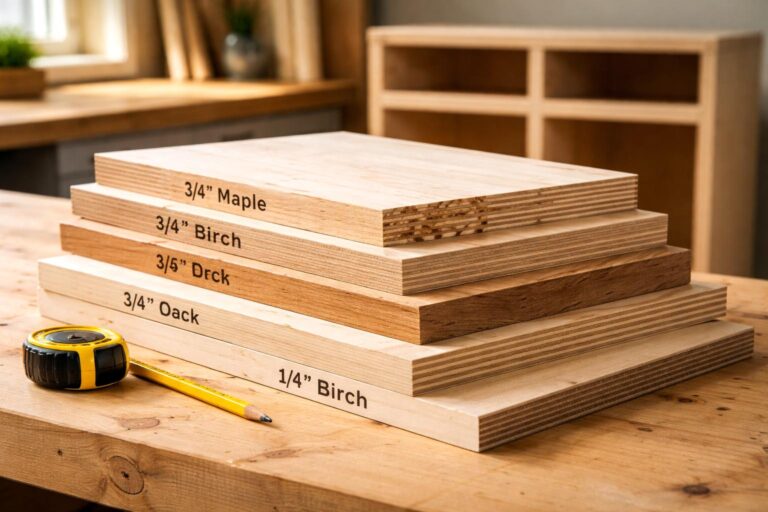
Length: a simple rule that stays reliable
Aim for the screw to bite 1/2 to 2/3 into the second piece without poking out.
Examples:
- Joining 3/4″ to 3/4″ (face-to-face): 1-1/4″ to 1-1/2″ is common.
- Joining 3/4″ into 1-1/2″ leg stock: 1-1/2″ to 2″ often works.
Diameter: don’t over-muscle it
Thicker screws can split wood faster.
For many tray stand builds (like attaching a post bracket or base blocks), #8 is a solid all-around size. Step up to #10 for heavier loads or softwood that strips easily.
Joint style matters as much as the screw
Screws aren’t magic. They reinforce a joint that already makes sense.
Here are the most useful “everyday” screw joints.
Butt joint (fast, but needs support)
Two boards meet at a right angle or end-to-face. Use it when you can add glue, corner blocks, or brackets.
Best for quick frames, boxes, and tray stand bases when a hidden cleat supports the joint.
Lap joint (stronger without fancy tools)
Remove half the thickness from each board so they overlap. This gives you more long-grain contact and better alignment. It’s a great option when you want strength without specialty joinery.
Pocket-hole joint (clean and beginner-friendly)
The screw goes in at an angle through a pocket. It pulls the joint tight and hides screws on the back or underside.
If you’re building stands, this pairs well with guides like making a tiered tray stand from scratch.
Edge-to-edge panel joining (screws are usually not the star)
When making wider panels, screws alone can cause misalignment and visible seams.
Clamps and glue do most of the work, while screws are sometimes used temporarily from the underside.
If you go this route, plan plug holes or keep screws hidden.
Learn more: How Far Should a Screw Go Into Wood
Step-by-step: the clean, reliable way to screw two boards together
This workflow prevents 90% of the usual problems (splits, misalignment, stripped holes).
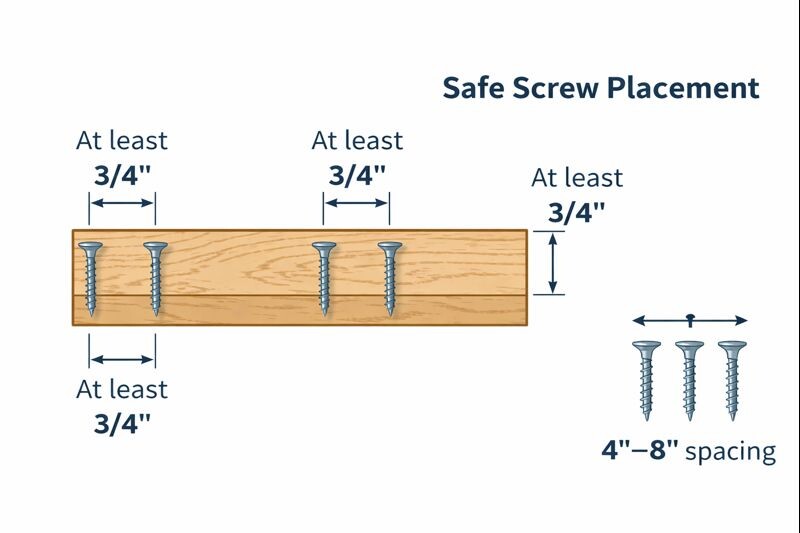
Step 1: Mark the joint and plan screw placement
Start by laying the boards exactly where they’ll sit. Mark your screw locations.
Spacing guidelines that work in most projects:
- Keep screws at least 3/4″ from board ends (more in hardwood).
- Place screws every 4″–8″ depending on load.
- Use two screws in wider pieces to prevent twisting.
Step 2: Clamp the parts so they can’t “walk”
Screws love to pull boards out of alignment.
Clamp first, then drill.
If clamps can’t reach, use temporary brad nails, double-sided tape, or a corner jig to lock alignment.
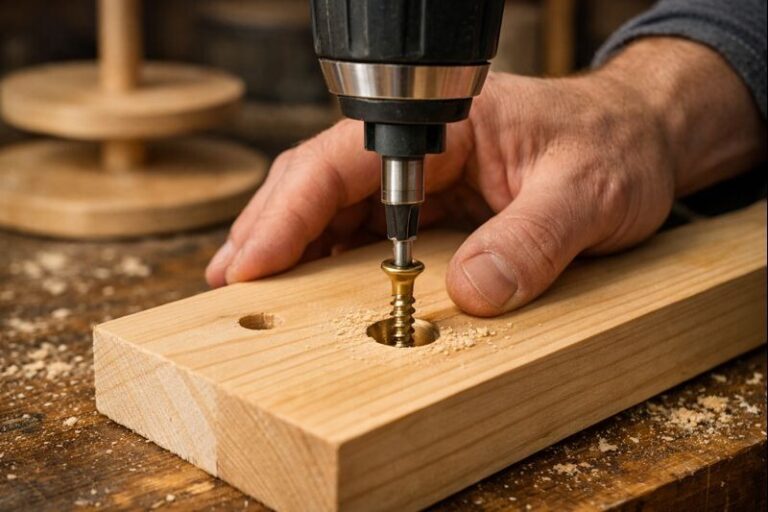
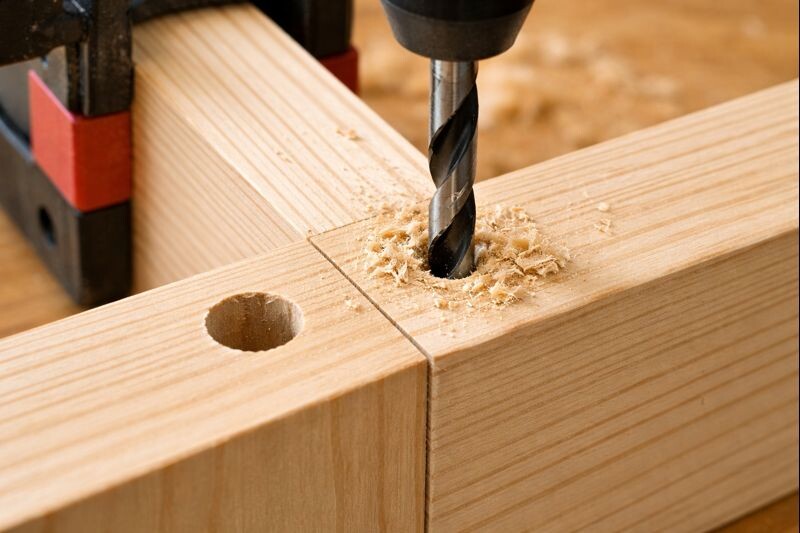
Step 3: Drill a pilot hole (don’t skip it)
Pilot holes reduce splitting and make the screw drive straight.
A practical method:
- Pilot in the first board (clearance hole): same diameter as the screw shank (so it slides).
- Pilot in the second board (bite hole): slightly smaller than the threads (so it grips).
If you only drill one hole, at least drill into the first board so the screw can pull the joint tight instead of “jacking” the boards apart.
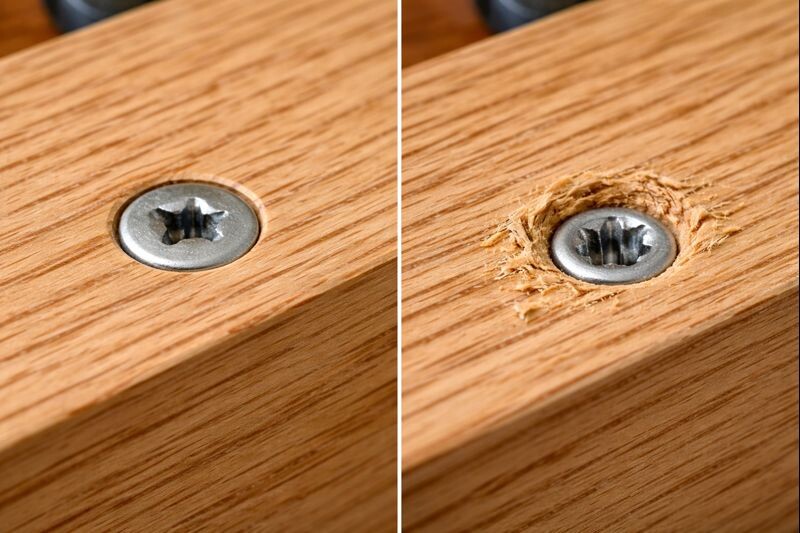
Step 4: Add a countersink when you want a flush finish
For flat-head screws, countersink so the head seats cleanly. Keep it shallow at first, then test.
A countersink that’s too deep weakens the surface and looks sloppy.
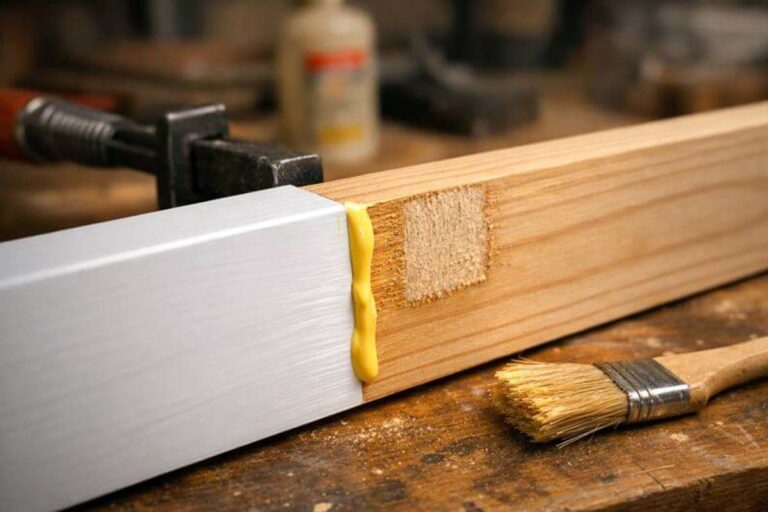
Step 5: (Often) add wood glue for extra stiffness
Screws clamp. Glue bonds.
When the joint is meant to be permanent, spread a thin, even layer of glue on the mating surfaces.
Then clamp and screw. However, skip glue when the project needs disassembly or when wood movement demands flexibility (like wide tabletops).
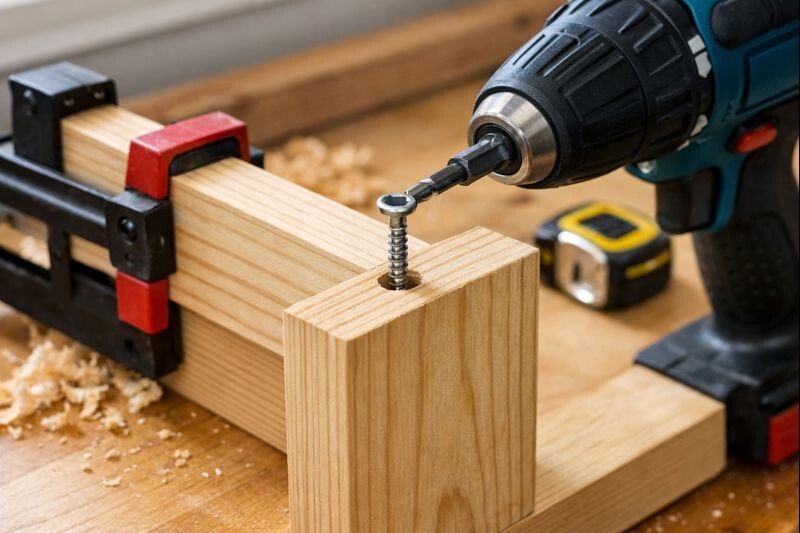
Step 6: Drive the screw with control, not speed
Use a driver bit that fully matches the screw head.
Drive until snug, then stop. Overdriving strips the hole and crushes wood fibers, which weakens the joint. If a screw squeals or binds hard, back it out and widen the pilot hole slightly.
Avoid splitting: quick fixes that work every time
Splitting happens when the wood can’t compress fast enough around the threads.
Use these habits:
- Drill pilots in hardwoods every time.
- Increase end distance near board ends.
- Lubricate threads with paste wax (especially in oak, maple, walnut).
- Consider self-drilling or thread-cutting screws for dense stock.
If you’re choosing wood for stands and small builds, this guide helps: strong wood options for sturdy tiered tray stands.
Joining into end grain (where screws get misunderstood)
Screws into end grain can hold, but they’re easier to pull out than long-grain fastening.
When end grain is unavoidable:
- Use longer screws with more thread engagement.
- Add a glue block or cleat so screws bite into long grain too.
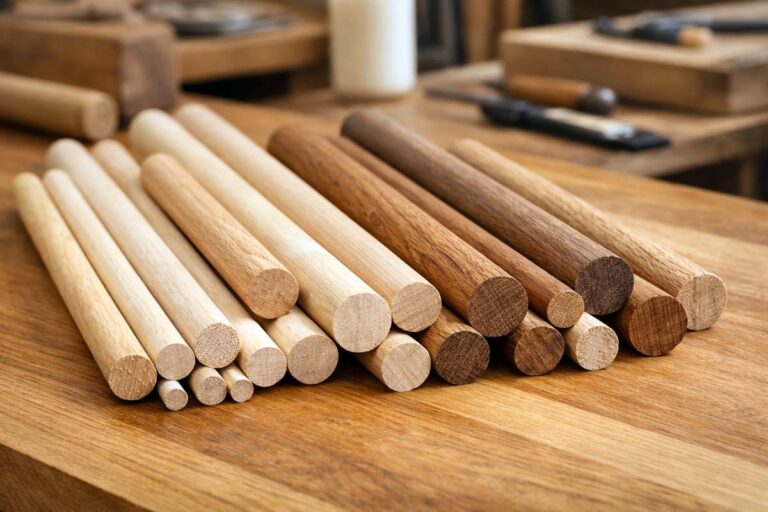
- Consider dowels or pocket holes instead, depending on the part.
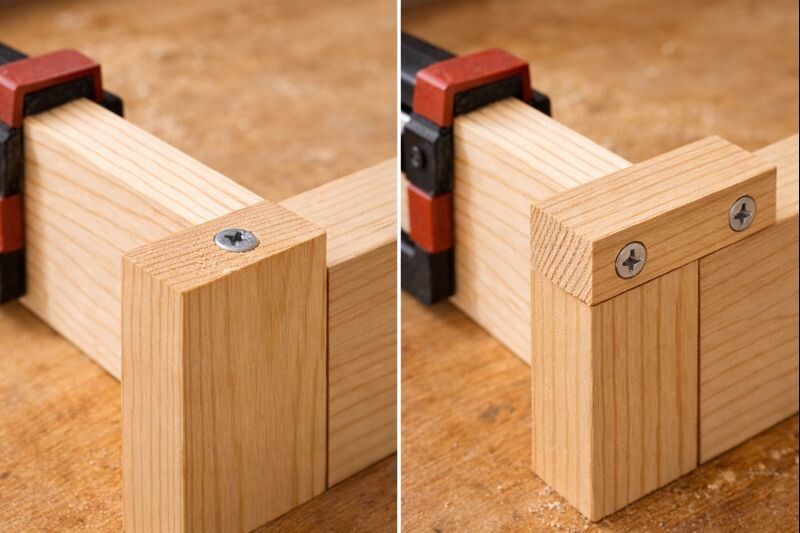
For tray stands, a common mistake is screwing straight into the end grain of a center post with no support.
A better approach is adding a base block or bracket so screws engage long grain and resist rocking.
Screws for tray stands and tiered trays: what works well
Tray stands see twisting loads. Hands grab the top handle, trays get bumped, and the post wants to loosen over time.
A few proven habits:
- Use two screws per connection point to stop rotation (like base blocks or tray supports).
- Add corner blocks under trays where possible.
- Pre-drill and countersink so the screw seats cleanly and stays tight.
- Re-check tightness after the finish cures (wood fibers compress slightly).
If you’re building a stand from scratch, these posts help with structure and layout: a full tray stand build guide and my time-lapse rustic stand build.
Fast troubleshooting: when screw joints go wrong
Most problems have a clean fix.
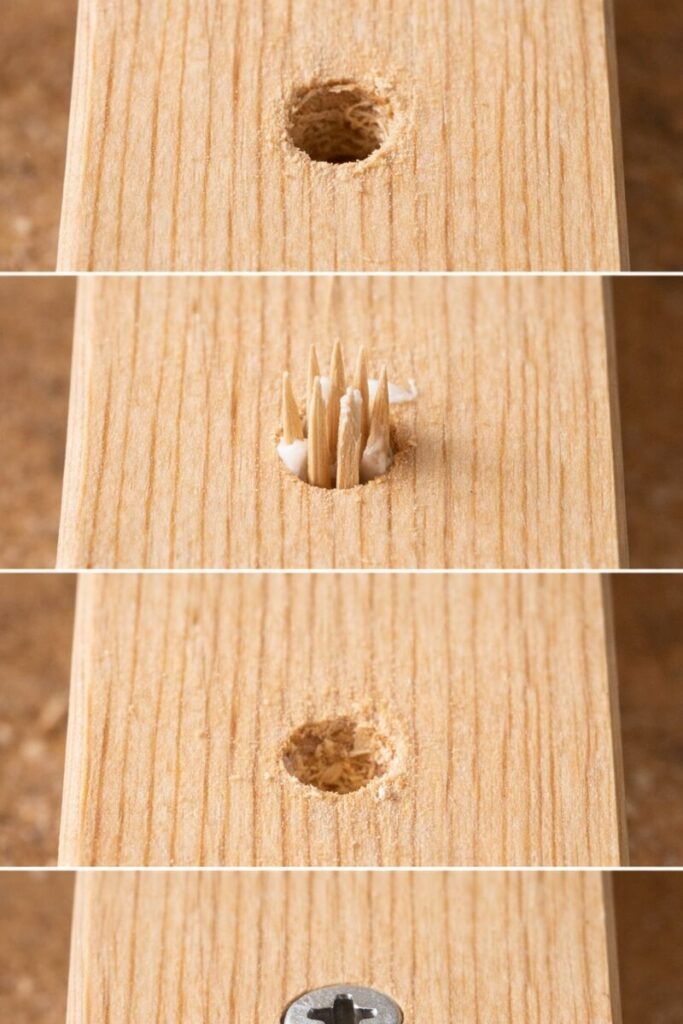
Stripped hole
If the screw spins and won’t tighten, don’t force it. Use the repair steps in fixing a stripped screw hole in wood.
Loose screw that keeps coming back
That usually means crushed fibers or movement in the joint. This guide helps: fixing loose screws in wood the right way.
Stripped screw head
Stop before it gets worse. Use safe removal tips for stripped screws.
Broken screw
That’s usually from driving too fast, no pilot, or brittle screws. Use a practical method for removing a broken screw.
Safety and tool setup that keeps work clean
Screw joinery seems simple, but it’s still drilling and driving with real force.
Keep these basics tight:
- Wear eye protection.
- Clamp workpieces whenever possible.
- Use sharp bits (dull bits wander and overheat).
- Keep driver bits fresh so heads don’t strip.
For a solid baseline, read my essential safety gear list for tray stand builds and basic tool maintenance habits.
Quick reference table: common screw-joining decisions
| Situation | Best joint approach | Pilot hole? | Extra tip |
|---|---|---|---|
| 3/4″ board to 3/4″ board (edge or face) | Butt joint + glue or pocket hole | Yes | Clamp to prevent shifting |
| Screwing near an end | Any, but give more distance | Yes | Wax threads to reduce splitting |
| Screwing into hardwood (oak/maple/walnut) | Pocket hole or lap joint | Yes, always | Use quality screws, drive slower |
| Outdoor or damp area | Butt/lap + stainless screws | Yes | Avoid coated screws that can fail |
| Tray stand base to post support | Blocks + two screws | Yes | Two screws prevent rotation |
FAQs
Should wood glue be used with screws for most joints?
Wood glue is recommended when the joint is permanent and wood movement will not cause stress. Screws provide clamping pressure, while glue provides long-term bonding strength. For removable parts or wide boards that move seasonally, skip glue.
What pilot hole size should be drilled for wood screws?
Pilot size depends on screw diameter and wood hardness. A practical method is drilling a clearance hole in the first piece and a smaller bite hole in the second piece. Dense hardwoods generally require larger pilots than softwoods.
How close to the edge can a screw be placed without splitting wood?
A safe starting point is keeping screws at least 3/4 inch from ends and a similar distance from edges, especially in hardwood. When working near an edge, always drill a pilot hole and reduce driving speed to prevent splitting.
Are screws strong enough for end-grain joints?
End-grain screw holding strength is limited compared to long-grain fastening. For reliable strength, reinforce end-grain connections with blocks, cleats, or joinery that adds long-grain contact. Longer screws help, but reinforcement is still recommended.
What is the best way to hide screws in woodworking projects?
Countersinking and plugging is a clean option for visible surfaces. Pocket-hole screws can also be hidden on the underside or back. For painted projects, wood filler over countersunk screws can work well when sanded smooth and finished properly.
Final thoughts
Screws can make wood joinery feel easy, but the strength comes from the prep. Pilot holes, smart spacing, and the right screw style keep joints tight without splits. Treat screws like clamps that stay behind, not like brute-force fasteners. Do that, and even a lightweight tray stand frame will stay square, solid, and easy to maintain.