How to Hide Screws in Wood: 8 Fast Ways to Get a Clean, High-End Look
Hide screws in wood so your project looks clean, feels smooth, and holds up over time. The trick is matching the hiding method to the joint type, the wood species, and the finish you’re planning to use. Some techniques disappear completely. Others stay “quiet” and simply don’t grab attention.
This guide lays out the reliable options, step by step, plus when not to hide a screw at all.
Contents Here
- 1 Why hiding screws matters (and when it doesn’t)
- 2 Quick decision table: best method by situation
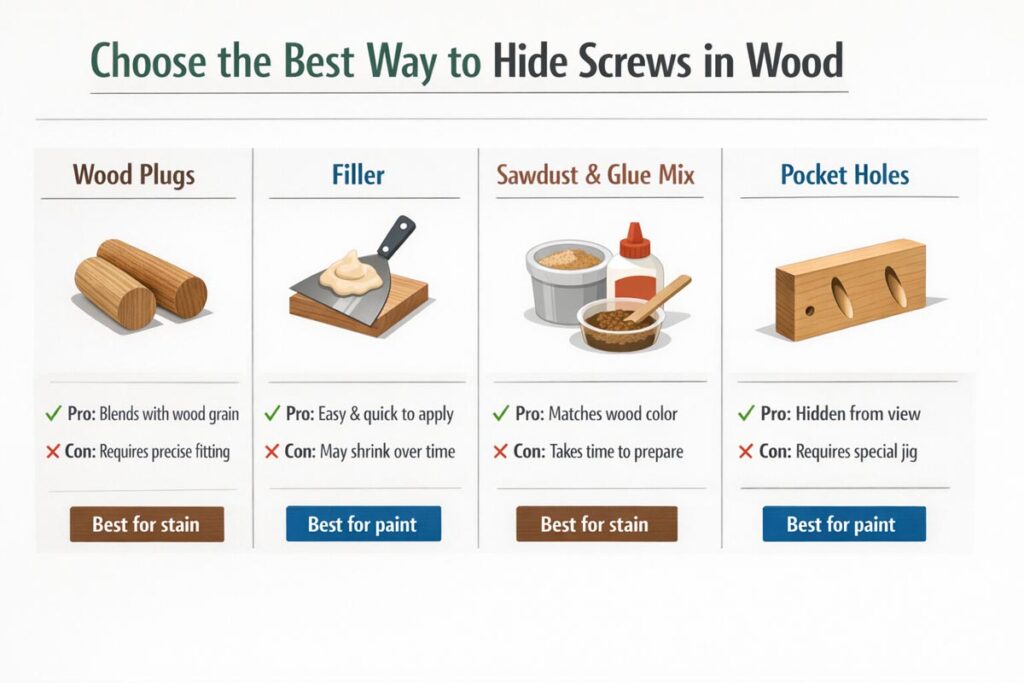
- 3 Method 1: Countersink + wood plug (the “furniture standard”)
- 4 Method 2: Sawdust + glue (useful, but easy to mess up)
- 5 Method 3: Store-bought wood filler (best for paint, OK for “hidden faces”)
- 6 Method 4: Pocket-hole screws on the hidden side (strong and clean)
- 7 Method 5: Trim-head or washer-head screws (a “low-visibility” compromise)
- 8 Method 6: Hide screws with design choices (the cleanest trick of all)
- 9 Common mistakes that make hidden screws obvious
- 10 FAQs about Hide Screws in Wood
- 11 Final thoughts
Why hiding screws matters (and when it doesn’t)
A visible screw can be totally fine on shop furniture, jigs, or anything meant to look industrial.
However, on trays, tiered tray stands, cabinet faces, and display pieces, exposed screw heads usually create three problems:
- Looks: shiny heads and countersinks pull the eye away from the grain.
- Touch: raised heads catch rags, fingers, and decor items.
- Finishing: paint and stain tend to telegraph metal edges and divots.
On the flip side, hiding screws can make repairs harder later. If a part may need to come apart (like a removable tray handle, a replaceable foot, or a seasonal tiered tray top), consider a “low-visibility” approach instead of a permanent hide.
If screw basics feel fuzzy, it helps to review wood screw anatomy and purpose in this primer on what a wood screw is and the practical sizing notes in how screws are sized .
Quick decision table: best method by situation
| Project situation | Best-looking option | Fastest option | Strong + removable |
|---|---|---|---|
| Furniture-grade face (oak, walnut, maple) | Countersink + wood plug | Color-matched filler | Plug (removable only by drilling) |
| Painted projects (MDF, poplar, pine) | Filler + sand + prime | Filler | Trim-head screws + light filler |
| Pocket-hole joinery | Pocket-hole plug | Leave pocket on underside | Pocket screws on hidden face |
| Screws near an edge (risk of splitting) | Pilot + countersink + plug | Trim-head screws | Confirmat/appropriate screw + plug |
| Softwood that dents easily | Plug (same board) | Filler (careful) | Hidden from underside |
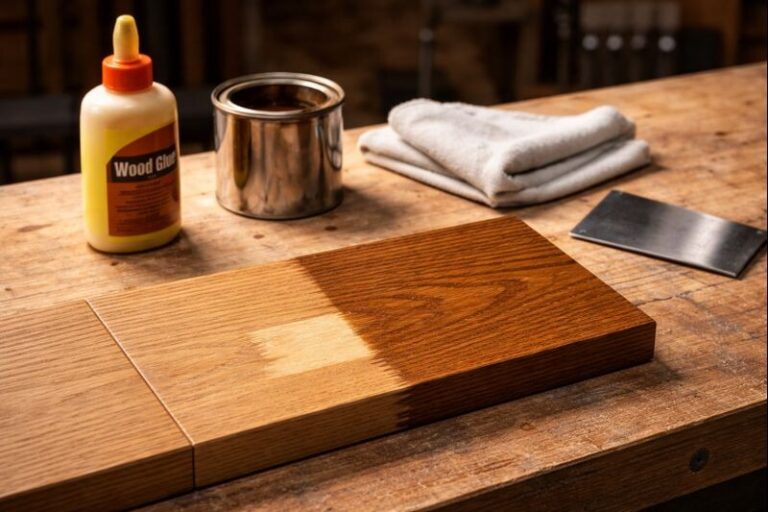
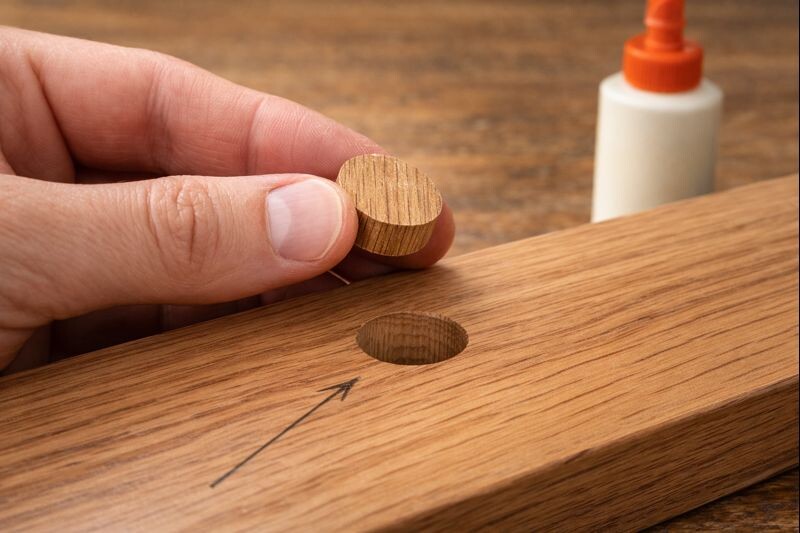
Method 1: Countersink + wood plug (the “furniture standard”)
This is the cleanest, most traditional way to make a screw vanish in solid wood.
Why it works
A real wood plug reflects light like the surrounding grain. Filler usually doesn’t, especially under stain.
Drawbacks
It takes longer. And if the plug grain doesn’t match, the “hidden” spot can stand out more than a screw head.
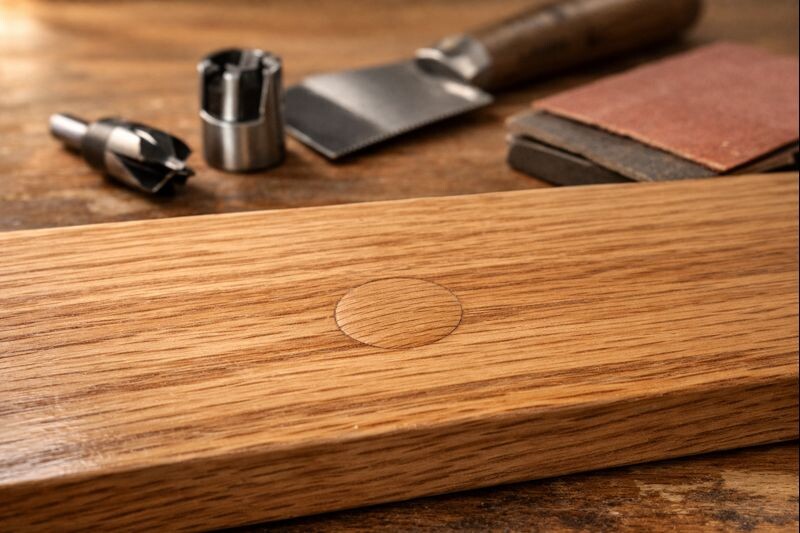
Step by step Hide Screws in Wood
- Choose plug size: Most common is 3/8″ for #8 screws and 1/2″ for larger heads. Bigger plugs are easier to blend.
- Drill a clean counterbore: Use a Forstner bit for a flat-bottom hole. Aim for a depth that leaves at least 1/8″ of wood under the screw head.
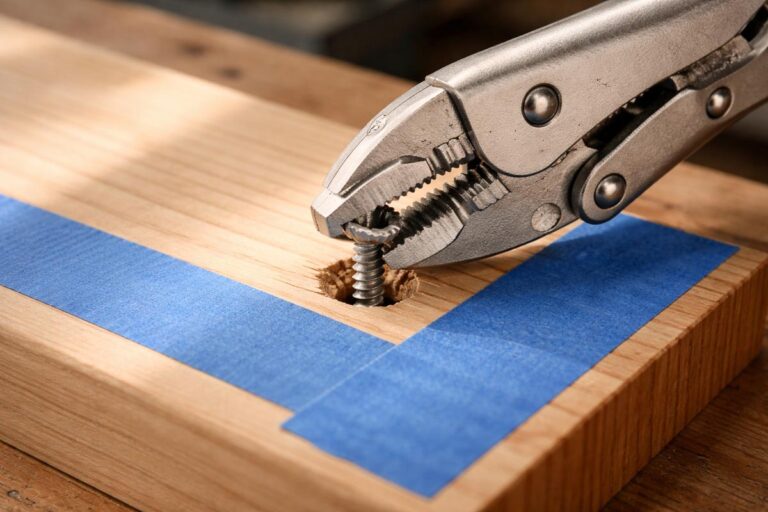
- Drill the pilot hole: Pilot size matters. Too small splits wood, too big strips. If stripping happens, fix it using the steps in how to fix a stripped screw hole in wood.
- Drive the screw: Stop when snug. Overdriving crushes fibers and creates a dip that’s hard to hide.
- Fit the plug: Use store-bought plugs or cut custom ones from scrap using a plug cutter. Custom plugs match better.
- Align the grain: Rotate the plug so the grain direction matches the board. This is the difference between “invisible” and “obvious.”
- Glue lightly: A small dab is enough. Too much glue squeezes out and can block stain.
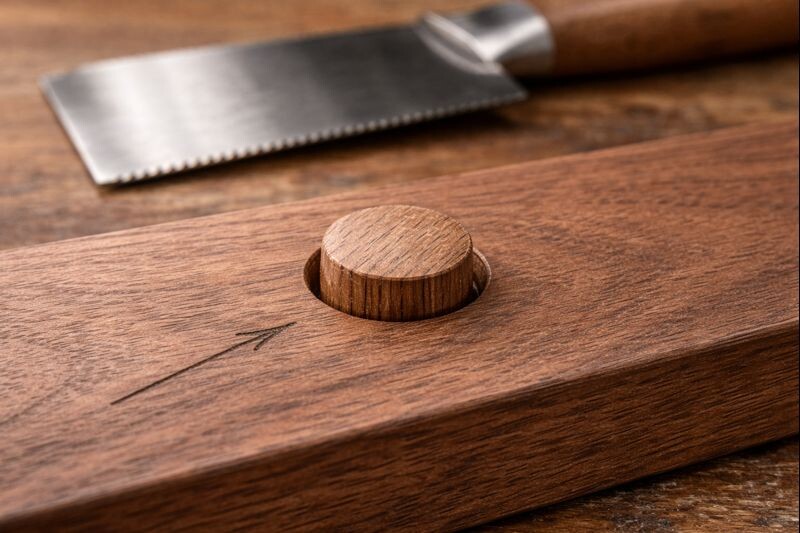
- Trim flush: A flush-cut saw is ideal. Then sand lightly.
- Sand the area properly: Keep sanding controlled so the plug doesn’t become a low spot. If end grain is involved, this guide on sanding end grain smooth helps prevent halos.
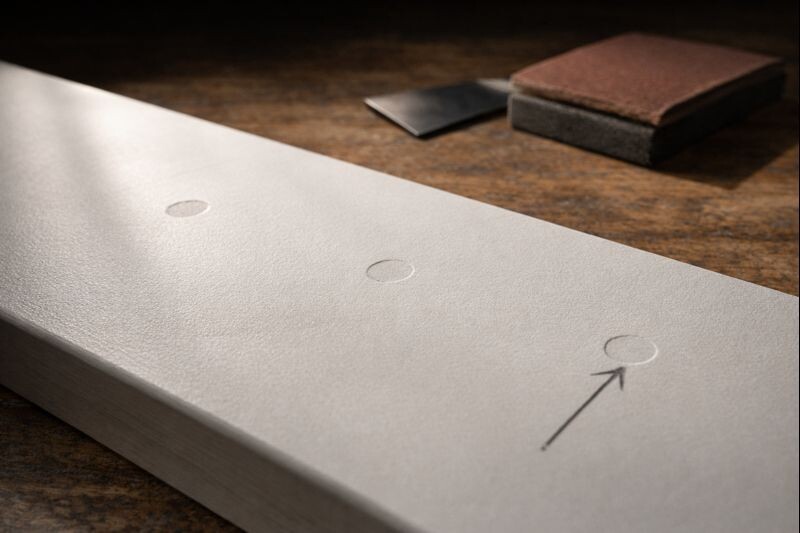
Method 2: Sawdust + glue (useful, but easy to mess up)
This one gets recommended a lot. It can work, but it’s not the miracle fix people hope for.
Benefits
- Cheap and fast
- Good for small gaps and tiny countersinks
- Blends decently under paint
Drawbacks
- Under stain, it often turns darker and muddy
- Can crumble if packed too dry
- Can shrink slightly
Step by step (the version that behaves)
- Collect fine sanding dust from the same wood: Dust from a different species won’t match.
- Use a glue that dries hard: Standard wood glue is fine, but keep the mix thick.
- Pack it in slightly proud: A small “mound” allows sanding flush later.
- Let it fully cure: If it feels rubbery, wait. Sanding early can tear it out.
- Sand carefully and test finish: Always test stain on a scrap patch first.
For stained walnut projects, a plug usually beats filler. If walnut finishing is the goal, keep this nearby: how to finish walnut wood without dulling the grain.
A quality filler is the simplest way to hide screws, especially on painted builds like tray risers, bases, and small décor.
Benefits
- Fast
- Sands easily
- Great under primer and paint
Drawbacks
- Often shows under stain
- Can shrink if applied in one heavy pass
Step by step (so it doesn’t sink later)
- Countersink the screw head slightly below the surface: Flush isn’t enough. A shallow recess gives filler thickness.
- Apply filler in two thin passes: First pass fills the hole. Second pass levels it.
- Sand smooth with a flat block: Finger sanding creates dips.
- Prime before paint: Primer shows flaws early, before the final coat locks them in.
If brush marks are the bigger issue on painted projects, this walkthrough on getting a smooth painted finish without brush marks pairs well with screw hiding.
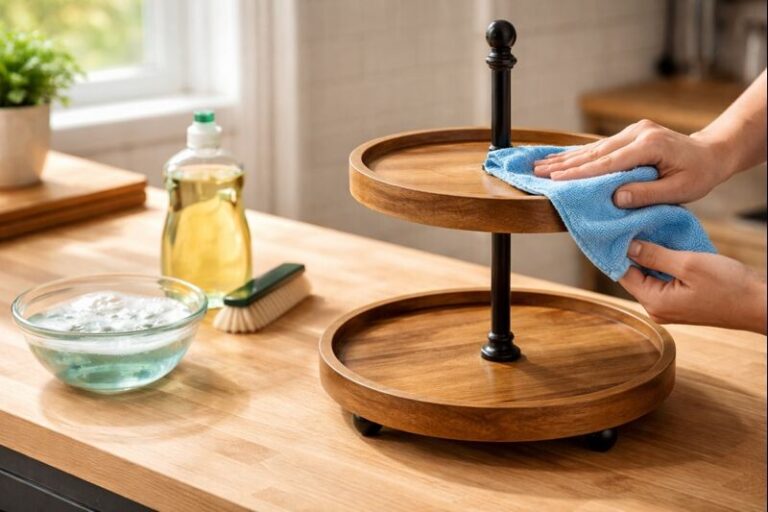
Pocket holes are perfect when the “ugly side” is the underside, back, or inside face.
This is common on tiered tray stands, where the underside of each tray is rarely seen. If building one from scratch, the joinery plan matters as much as the finish. This build guide helps place fasteners where they won’t show: how to make a tiered tray stand.
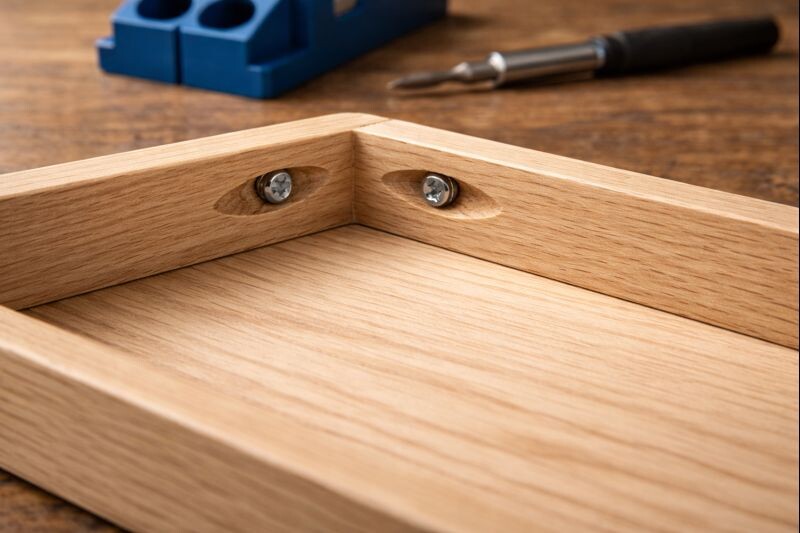
Two ways to hide pocket holes
- Put pockets on the underside/back so no one sees them.
- Plug the pockets with matching pocket-hole plugs if the underside might be visible.
Step by step (quick and clean)
- Drill pocket holes with the jig set to your stock thickness.
- Dry-fit and clamp tight so the joint doesn’t creep.
- Drive pocket screws until snug.
- If plugging: glue plug, tap it in, trim flush, sand.
If screws loosen over time in a high-use piece, this fix is dependable: how to fix loose screws in wood.
Method 5: Trim-head or washer-head screws (a “low-visibility” compromise)
Sometimes hiding isn’t necessary. Sometimes it’s smarter to make the screw less noticeable.
- Trim-head screws leave a tiny head that disappears with a small dot of filler.
- Black or brass screws can look intentional on rustic builds.
- Washer-head screws can be used where strength matters and the screw is on a hidden face.
Best use case: quick tray stand builds where the screw sits underneath, and repairs might be needed later.
Method 6: Hide screws with design choices (the cleanest trick of all)
The easiest screw to hide is the one that never lands on the show face.
A few layout habits make a huge difference:
- Fasten from underneath whenever possible (tray bases, risers, feet).
- Use cleats or corner blocks inside so screws stay internal.
- Add a thin trim band to cover fasteners along an edge.
- Use a removable bottom panel to access internal screws later.

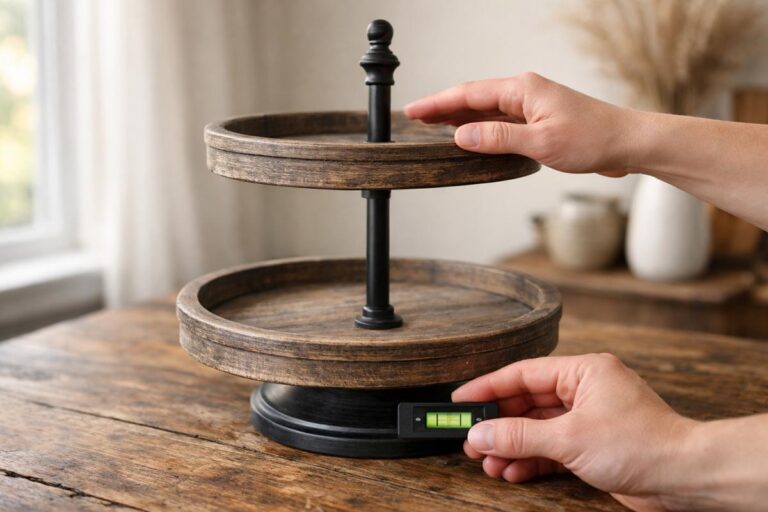
If wobble is the real enemy on a stand build, fixing structure first prevents “extra screws” later. This guide helps: how to stop a tiered tray stand from wobbling.
These show up all the time, even on careful builds:
- Wrong plug grain direction (it catches light immediately).
- Glue squeeze-out around the plug (stain won’t penetrate there).
- Over-sanding a softwood surface (you get a dish-shaped low spot).
- Filler over an un-countersunk head (it pops as the wood moves).
- Rushing the finish (paint reveals everything you tried to ignore).
Plus, if a screw head strips during install, it’s better to stop and fix it than force it deeper. These removal steps are the safest route: how to remove a stripped screw from wood.
FAQs about Hide Screws in Wood
Which method hides screws best on stained wood?
Countersink and wood plugs usually blend best because the plug takes stain more like surrounding fibers. Filler and glue-sawdust mixes often stain darker or blotchy. For the cleanest look, cut plugs from the same board and align the grain.
Can wood filler be stained to match the wood?
Most fillers do not stain the same way real wood does, even when labeled “stainable.” They often turn dull or darker than expected. If the surface will be stained and visible, a matching wood plug is the safer choice.
How deep should a countersink or counterbore be?
A shallow recess is enough to bury the screw head and leave room for filler or a plug. Typically, aim for the screw head to sit slightly below the surface. For plugs, drill deep enough to cover the head with solid wood thickness.
Are pocket-hole plugs strong enough for high-stress joints?
Pocket-hole plugs are mostly cosmetic. The strength comes from the pocket screw and tight joint fit. If the joint carries weight or leverage, focus on proper screw length, good clamping, and solid wood contact rather than relying on the plug.
What’s the cleanest way to hide screws on the underside of a tray?
Fastening from underneath into a cleat or corner blocks keeps the top surface untouched. This approach stays strong, looks clean, and allows future repairs. It also avoids plug work on visible faces where grain matching can be tricky.
Final thoughts
Hidden screws are mostly about planning. Put fasteners on hidden faces first. When that’s not possible, use plugs for stained wood and filler for paint. Keep sanding flat, keep glue under control, and test your finish before committing. Do that, and the hardware disappears while the craftsmanship stays front and center.