How to Get a Smooth Painted Finish Without Brush Marks
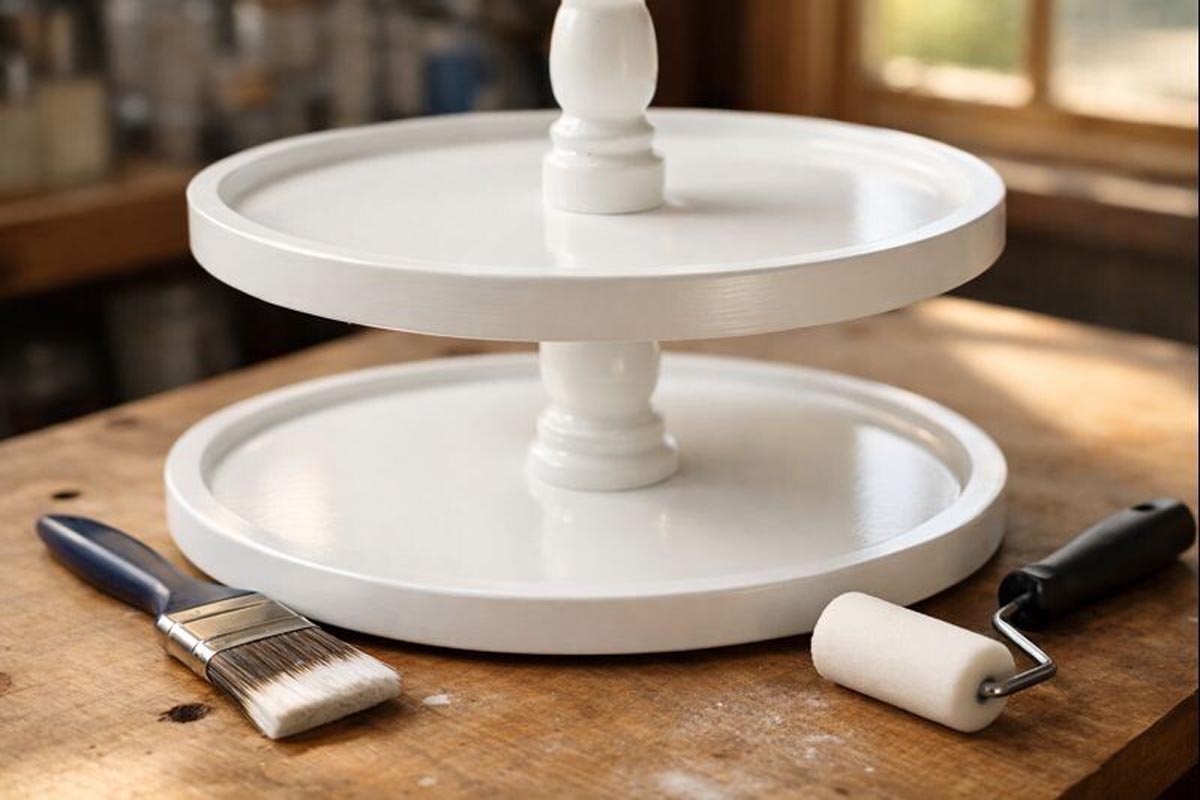
Smooth painted finish without brush marks starts with surface prep, the right applicator, and a calm pace between coats. This is the same routine that keeps painted tiered tray stands looking clean, not “crafty,” even up close.
If brush marks keep showing up on your trays, risers, and turnings, the fix usually isn’t fancy.
It’s a handful of small steps that stack together.
Contents Here
- 1 Why brush marks show up in the first place
- 2 What “smooth” actually means on a tray stand
- 3 Pick the right paint (it matters more than most people think)
- 4 Choose the applicator that matches the surface
- 5 Step 1: Prep the surface until it feels boring
- 6 Step 2: Prime for leveling, not just color coverage
- 7 Step 3: Control your environment (paint hates surprises)
- 8 Step 4: Condition the paint when needed (without turning it into soup)
- 9 Step 5: Load the brush correctly (most people overload)
- 10 Step 6: Apply paint in thin coats, then stop touching it
- 11 Step 7: Sand between coats the right way
- 12 Step 8: Know when to switch to a roller (even if you love brushes)
- 13 Step 9: Give paint enough cure time before assembly and styling
- 14 Step 10: Topcoat only when it actually helps
- 15 Quick “no brush marks” workflow for a painted tray stand
- 16 Common problems and fast fixes
- 17 Final thoughts
Why brush marks show up in the first place
Brush marks happen when paint can’t “level” before it sets.
That comes from a few common causes:
- Paint is too thick for the temperature and humidity.
- The surface is rough, dusty, or porous in spots.
- The brush is too stiff or overloaded.
- The coat is too heavy, so the brush grooves stay put.
- Dry time is too short between coats, so the next pass drags.
On tray stand parts, brush marks love to hide on vertical posts, around knob bases, and along tray rims.
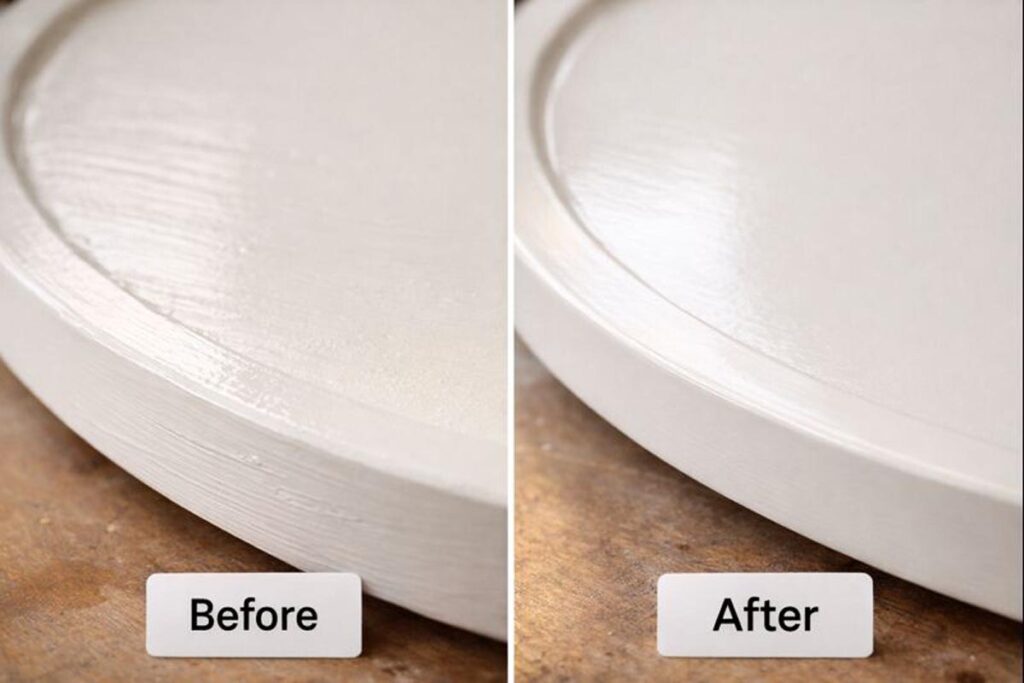
If the goal is a smooth finish, the paint has to flow, settle, and cure without being messed with.
What “smooth” actually means on a tray stand
For tiered trays and stands, “smooth” usually means one of these two looks:
- Smooth farmhouse: slight texture is okay, but no visible brush lines or ridges.
- Furniture-smooth: looks sprayed, feels flat, and reflects light evenly.
The second one takes more prep and lighter coats.
Plus, it’s easier on flat trays than on turned spindles or decorative edges.
Pick the right paint (it matters more than most people think)
Not all paints level the same.
Here’s a quick, practical guide for tray stands and small decor.
| Paint type | Best use on tray stands | Benefits | Drawbacks | Brush-mark risk |
|---|---|---|---|---|
| Water-based acrylic/latex (trim/cabinet) | Trays, posts, bases | Easy cleanup, durable options | Can dry fast and drag | Medium |
| Water-based enamel (cabinet/door) | High-touch pieces | Harder finish, better leveling | Longer cure time | Low–Medium |
| Chalk-style paint | Rustic decor | Forgiving, easy distressing | Softer unless topcoated | Medium |
| Milk paint (powder) | Aged, textured looks | Great character | Not the smoothest look | High |
| Oil-based enamel | Maximum leveling | Flows and levels well | Odor, cleanup, yellowing risk | Low |
If a tray stand is going near food (cookies, fruit, etc.), painted surfaces should be fully cured and topcoated with something appropriate.
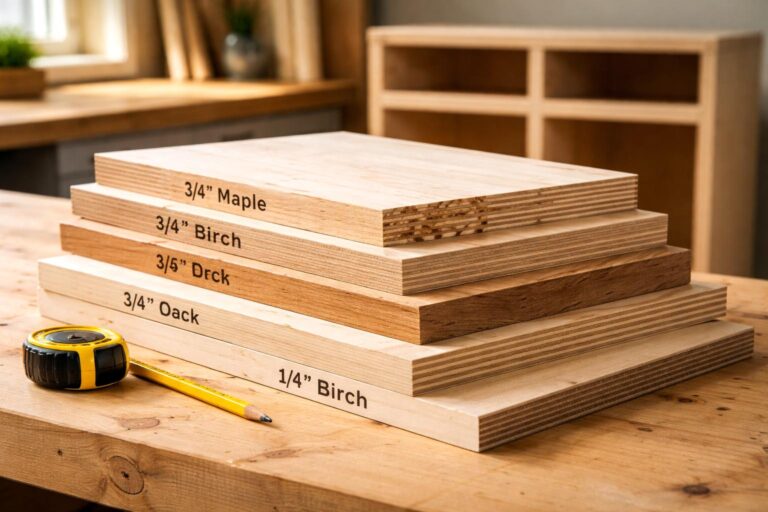
Also, if you’re deciding what wood to build with before painting, choosing a stable, easy-to-prep species makes the whole finishing job easier (this guide on picking pine vs oak vs maple helps).
Choose the applicator that matches the surface
A brush isn’t always the best tool, even if the label says “brushable.”
For tray stands, a combo approach works best.
Use these rules:
- Flat trays and bases: foam roller (high-density) or microfiber mini roller.
- Edges, inside corners, around hardware: a quality angled brush.
- Turned posts and tight curves: smaller soft synthetic brush, light pressure.
Cheap brushes leave tracks.
A good brush holds paint evenly, releases it smoothly, and doesn’t shed bristles into your finish.
If the tray stand build is new to you, it also helps to keep tools clean and shaped, since a crusty brush edge prints lines into wet paint.
Step 1: Prep the surface until it feels boring
A smooth finish is mostly made before paint ever opens.
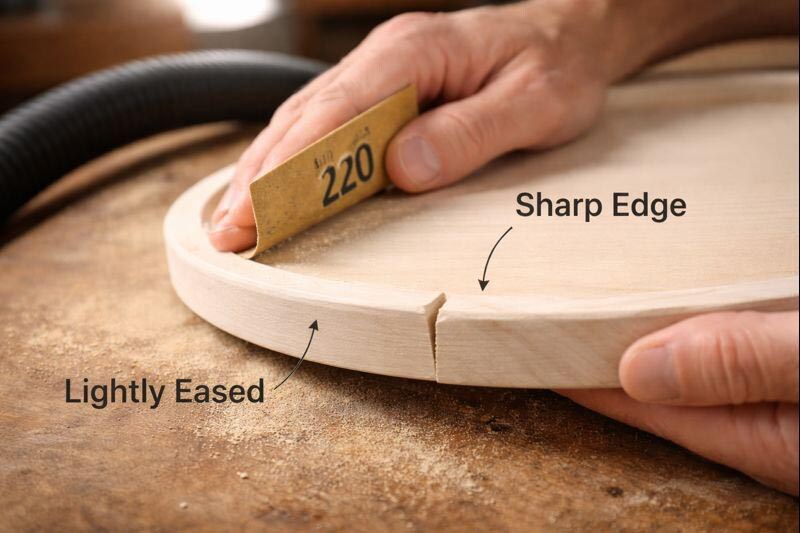
For raw wood tray parts:
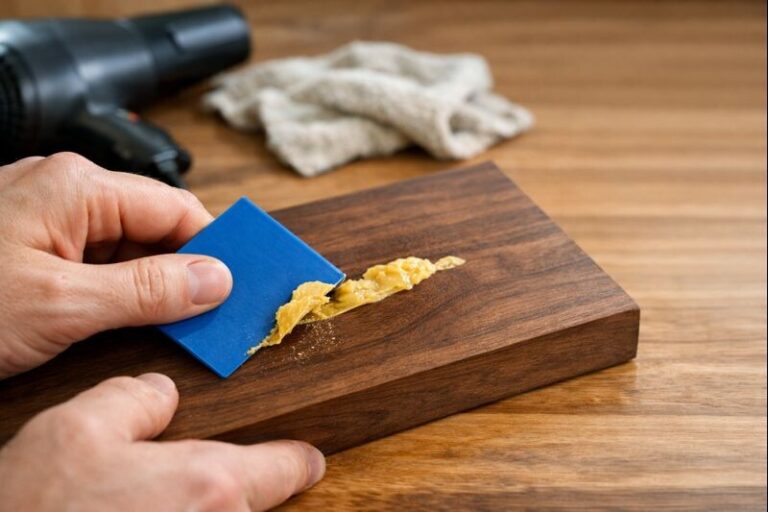
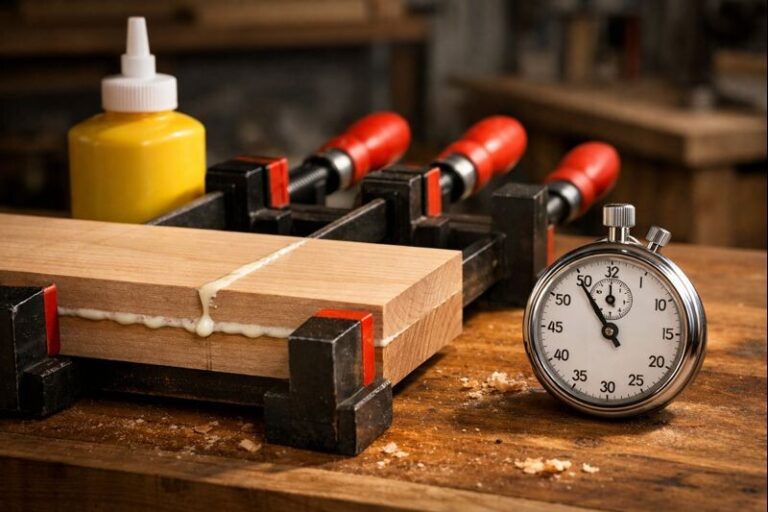
- Fill dents and gaps first. Use a paintable wood filler.
- Sand flat surfaces to 180–220 grit. Stop at 220 on most woods.
- Break sharp edges lightly. Paint hates razor edges and will pull back.
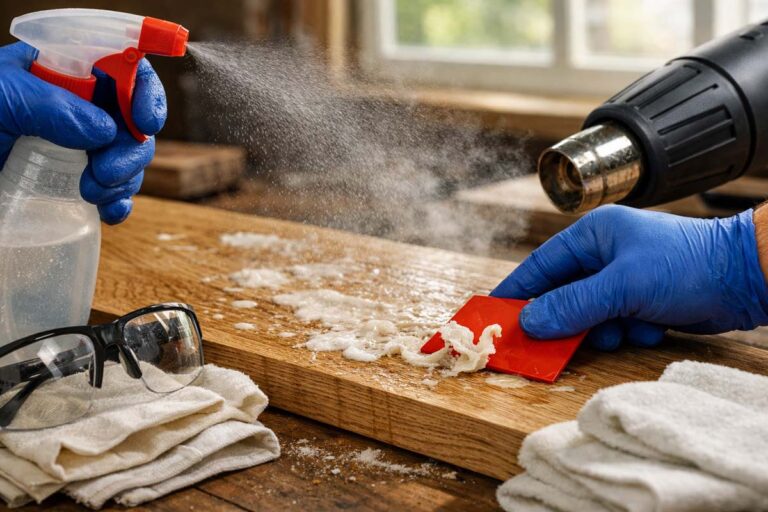
- Vacuum dust. Then wipe with a damp microfiber or tack cloth.
For already-painted pieces:
- Wash off grease and fingerprints. Mild soap and water works.
- Scuff sand to dull the sheen. 220 grit is usually enough.
- Clean dust again. No shortcuts here.
If you’re working with walnut or open-grain woods, pores can telegraph through paint unless the surface is filled and leveled. This is also why understanding grain matters even when painting.
Step 2: Prime for leveling, not just color coverage
Primer isn’t only for stain-blocking.
Primer also evens absorption, which helps paint level consistently.
Use this simple approach:
- Raw wood: bonding primer or quality wood primer.
- Knots, tannins, mystery stains: stain-blocking primer.
- Previously finished surfaces: bonding primer after scuff sanding.
Apply primer in a thin coat.
Then let it dry fully and sand it smooth with 320 grit.
That sanding step is where the “sprayed” feel starts.
Step 3: Control your environment (paint hates surprises)
Paint behaves differently depending on weather.
In Eugene, damp air can slow drying, while a warm garage can dry paint too fast.
Aim for:
- 60–75°F
- 40–60% humidity
- No direct sun
- No fan blasting across wet paint
Fast drying is not your friend when brush marks are the problem.
If paint sets before it levels, the lines freeze in place.
Step 4: Condition the paint when needed (without turning it into soup)
Some paints are thick by design.
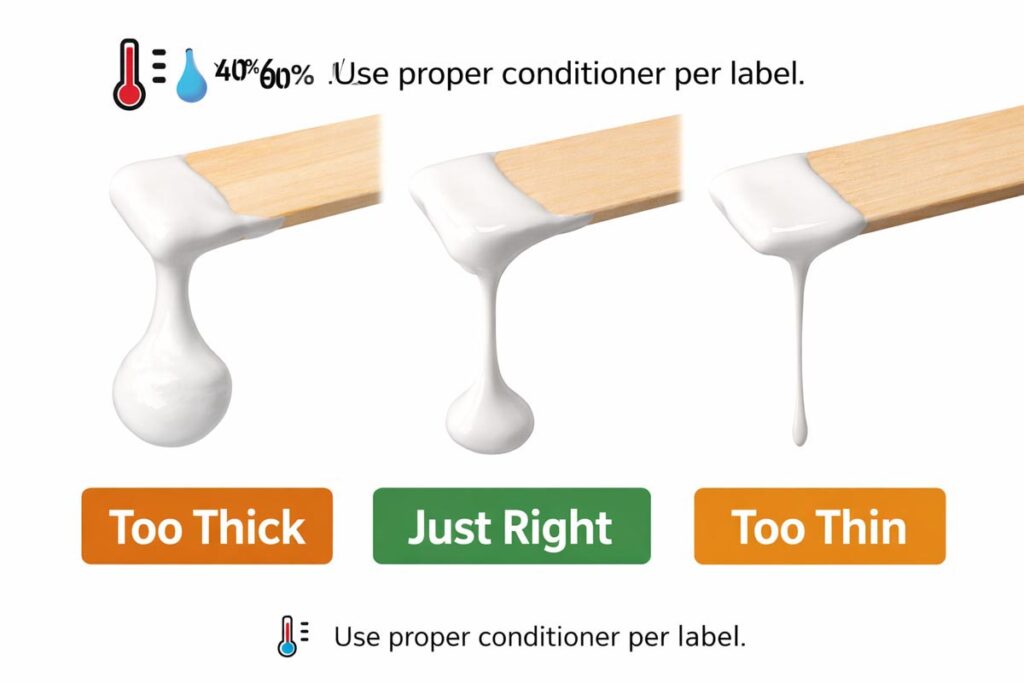
That’s fine, but thick paint needs help to level on small woodcraft pieces.
Do this instead of guessing:
- Stir slowly for 2 minutes (don’t whip bubbles in).
- If the paint drags, add the proper conditioner:
- For most water-based paints: a leveling additive (per label).
- For oil-based: the recommended reducer (per label).
Avoid dumping water in randomly.
A little conditioner improves flow without weakening the film.
Step 5: Load the brush correctly (most people overload)
A brush should be loaded about 1/3 of the bristle length, not buried to the ferrule.
Then tap (don’t scrape) one side on the can.
Scraping hard bends bristles and creates uneven release.
For trays, a mini roller should be dampened slightly (water for water-based) and spun out, so it doesn’t drink paint.
Step 6: Apply paint in thin coats, then stop touching it
This is the habit that fixes brush marks faster than anything else.
Use this sequence:
- Lay paint on with light pressure.
- Spread it out evenly.
- Finish with one gentle “lay off” pass in one direction.
- Stop. Let it level.
“Laying off” means barely grazing the surface to remove ridges.
On a tray top, lay off from back to front.
On a post, lay off top to bottom.
However, once the paint starts getting tacky, do not re-brush.
That’s when lines, drag marks, and torn edges happen.
Step 7: Sand between coats the right way
If a coat dries and still shows faint texture, sanding between coats levels it.
Use:
- 320 grit after primer
- 400 grit between paint coats (when chasing a really smooth finish)
Keep sanding light.
The goal is to knock down dust nibs and tiny ridges, not cut through to bare wood.
Then remove dust completely before the next coat.
A clean surface is also a safety issue, especially when sanding finishes—eye and lung protection should be standard shop habits.
Step 8: Know when to switch to a roller (even if you love brushes)
If brush marks are showing on a big flat tray surface, a foam or microfiber mini roller usually solves it immediately.

Roll a thin coat.
Then “tip off” lightly with a soft brush if needed.
This combo gives roller-level smoothness without heavy stipple.
Step 9: Give paint enough cure time before assembly and styling
Paint can feel dry and still be soft underneath.
For tray stands, this matters because:
- hardware can twist and dent fresh paint
- trays can stick to risers
- decor can leave imprints
Follow the can’s “recoat” time, but also respect cure time.
As a practical rule, treat the piece gently for at least a few days.
If you’re building or upgrading stands often, it helps to use a proven layout so parts don’t rub and scuff during assembly.
Step 10: Topcoat only when it actually helps
A clear coat can improve durability and cleanability.
It won’t magically erase brush marks, though.
Topcoat makes sense when:
- the tray is handled daily
- the stand is used in a kitchen or coffee bar
- decor gets swapped constantly
If a topcoat is needed, apply it just like paint: thin coats, level passes, and light sanding if required.
Also, if the look is meant to stay farmhouse-rustic, heavy topcoat shine can fight the style.
If that’s the vibe you’re going for, seeing how farmhouse trays are styled helps you choose the right sheen.
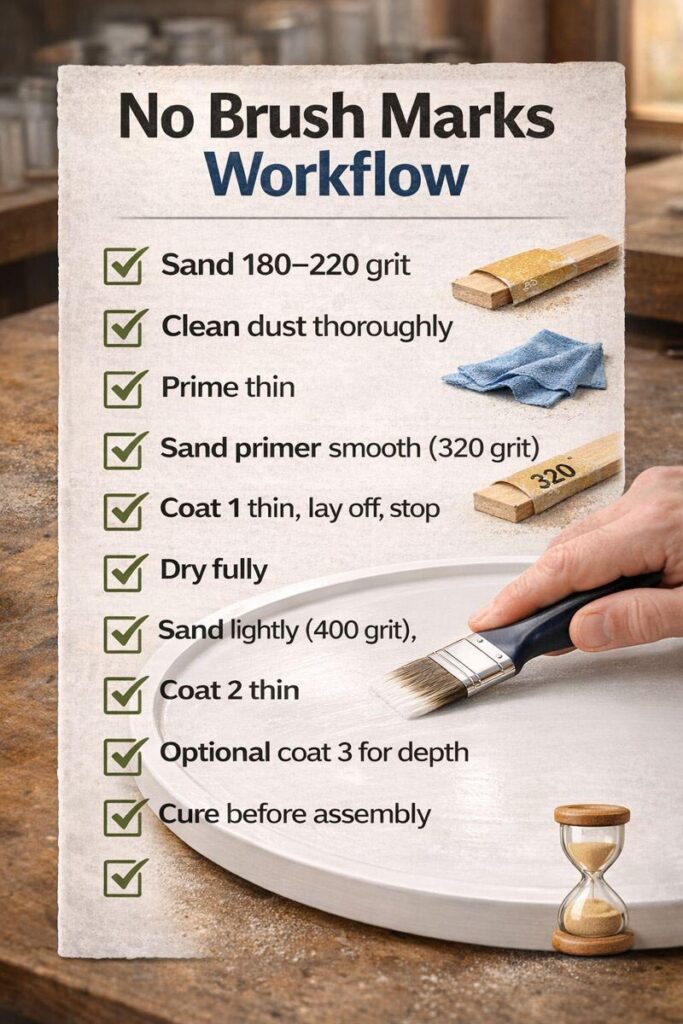
Quick “no brush marks” workflow for a painted tray stand
This is the routine that keeps results consistent.
- Sand raw wood to 180–220 grit
- Clean dust thoroughly
- Prime thin, dry fully
- Sand primer smooth (320 grit)
- Paint thin coat #1, lay off once, stop
- Dry fully
- Sand lightly (400 grit), clean
- Paint thin coat #2
- Optional coat #3 for depth
- Cure before assembly and decorating
Common problems and fast fixes
Problem: Visible brush lines after drying
Fix: Next coat goes on thinner, with conditioner if needed, then light sanding between coats.
Problem: Paint drags and feels sticky while brushing
Fix: Room is too warm, paint is drying too fast, or you’re overbrushing. Slow down, thin properly, and stop touching it once it starts setting.
Problem: Orange peel or roller texture
Fix: Use a higher-density foam or microfiber roller and roll lighter. Avoid thick coats.
Problem: Dust nibs everywhere
Fix: Vacuum the area, wipe the piece, and let dust settle before painting. Also keep clothing lint away from wet paint.
Final thoughts
A smooth painted finish without brush marks isn’t about having perfect hands. It’s about building a finish with thin layers, clean surfaces, and the patience to let paint level on its own.
Once the prep is right and the coats are light, even a simple tiered tray stand can look crisp enough to pass for a factory finish.