How to Get a Broken Screw Out of Wood: 8 Easy Methods for Any Break
Get a broken screw out of wood without wrecking your project by slowing down and choosing the method that matches what’s actually left in the hole. Most removals fail because the wrong tool gets forced too early. The good news is this fix is usually clean and quick once the screw’s condition gets assessed. Use the steps below, and the wood can stay tight, flat, and ready for finish.
Contents Here
- 1 Why screws snap in the first place
- 2 Safety and prep that saves the surface
- 3 Identify the screw situation in 20 seconds
- 4 Fast decision table: pick the least-destructive method
- 5 Method 1: Back it out with locking pliers (best when metal is proud)
- 6 Method 2: Cut a new slot and drive it out (good for flush breaks you can reach)
- 7 Method 3: Use a left-hand drill bit (the “works more often than people expect” option)
- 8 Method 4: Use a screw extractor (powerful, but easy to mess up)
- 9 Method 5: Drill it out and plug the hole (best when looks matter more than saving the original hole)
- 10 After removal: rebuild the hole so the next screw holds
- 11 Prevent broken screws next time
- 12 Common pitfalls that cause extra damage
- 13 Final thoughts
Why screws snap in the first place
A screw usually breaks for one of four reasons.
- The pilot hole was too small, so the screw bound up and twisted off.
- The screw was cheap or too brittle for hardwood.
- The driver cammed out, so the head got damaged, then the screw got torqued anyway.
- The screw hit glue, a knot, or a hidden fastener, then snapped at the weakest point.
However, the “why” matters because it affects removal. A screw that broke from binding tends to be tight and stubborn. A screw that snapped from a defect often comes out easier once it gets moving.
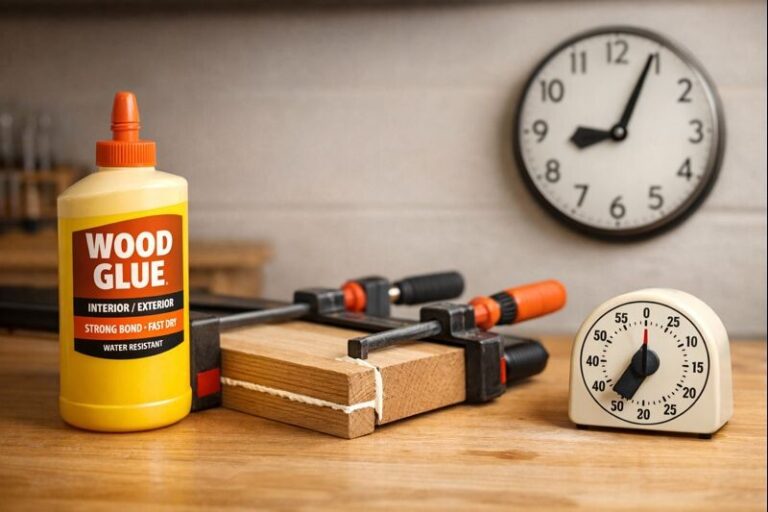
Safety and prep that saves the surface
Before any extraction step, set the piece up so the wood doesn’t get chewed up.
- Clear the area around the screw. Scrape off finish build-up, dried glue, or paint ridges.
- Tape the surface. Painter’s tape reduces skids from pliers, drills, and extractors.
- Clamp the work. A wobbling board makes drills wander and chips edges.
- Put on eye protection. Extractors and bits can snap.
- Keep a vacuum nozzle close. Dust hides the screw center and causes bit drift.
If you need a solid safety checklist for the shop, the guide on essential protective gear for build days is worth keeping bookmarked.
Identify the screw situation in 20 seconds
Look at the screw and answer these quick questions.
- Is any metal sticking above the surface?
- Is the break flush, slightly recessed, or deep?
- Is the screw in softwood, hardwood, plywood, or MDF?
- Is the hole on a show face or a hidden face?
- Is there room to drill straight down?
Next, grab a magnet if you’re unsure it’s a screw and not a brad or pin. A quick confirmation prevents drilling into the wrong thing.
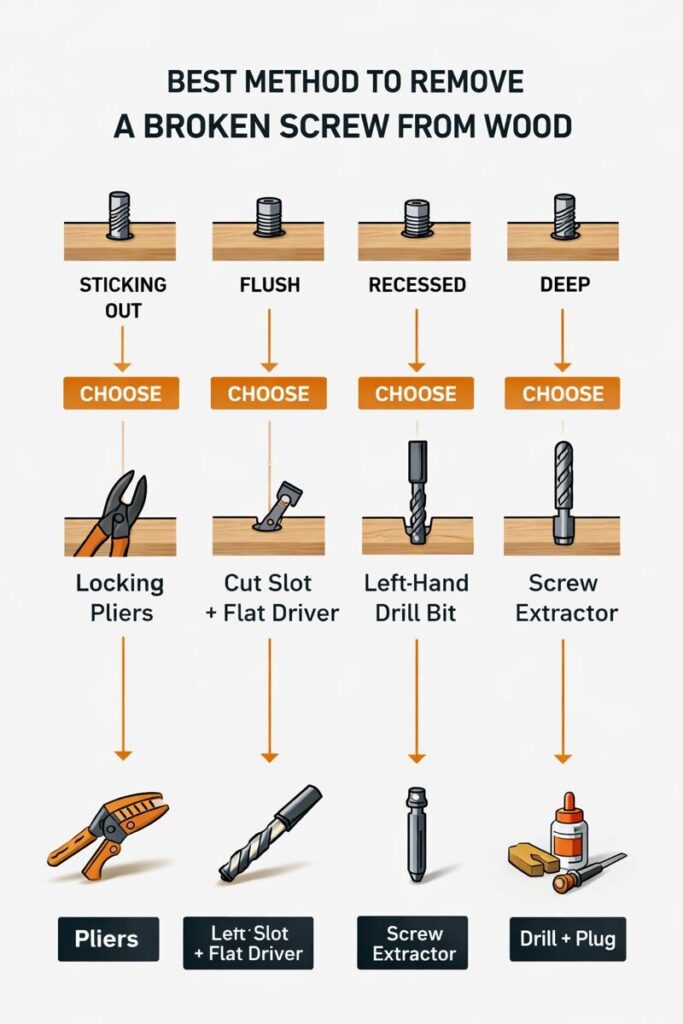
Fast decision table: pick the least-destructive method
Use this table to choose your first move. Starting with the gentlest option is usually the difference between “fixed” and “repair work.”
| What you see | Best first method | Why it works | Risk level |
|---|---|---|---|
| Screw shank sticking out 1/16″ or more | Locking pliers + gentle rocking | Uses existing grip, no drilling | Low |
| Screw broken flush with surface | Left-hand drill bit | Often backs screw out while drilling | Low–Medium |
| Screw broken slightly recessed | Left-hand bit + small pilot | Centers the bit and reduces wandering | Medium |
| Screw deep in hole | Extractor after proper pilot | Extractor needs depth to bite | Medium–High |
| Show face must look perfect | Drill + plug (planned repair) | Predictable, clean final look | Medium |
| Hardware pocket or tight corner | Slot cut + flat driver | Minimal drill access needed | Medium |
Method 1: Back it out with locking pliers (best when metal is proud)
This is the cleanest removal when the screw is sticking up.
- Protect the wood with tape around the screw.
- Clamp locking pliers (Vise-Grips) as tight as possible on the shank.
- Rock the screw slightly left and right first.
- Then turn counterclockwise in short moves.
- Add a drop of penetrating oil only if the wood is unfinished and you can clean it after.
Plus, gentle rocking breaks the screw’s “bite” without tearing fibers.
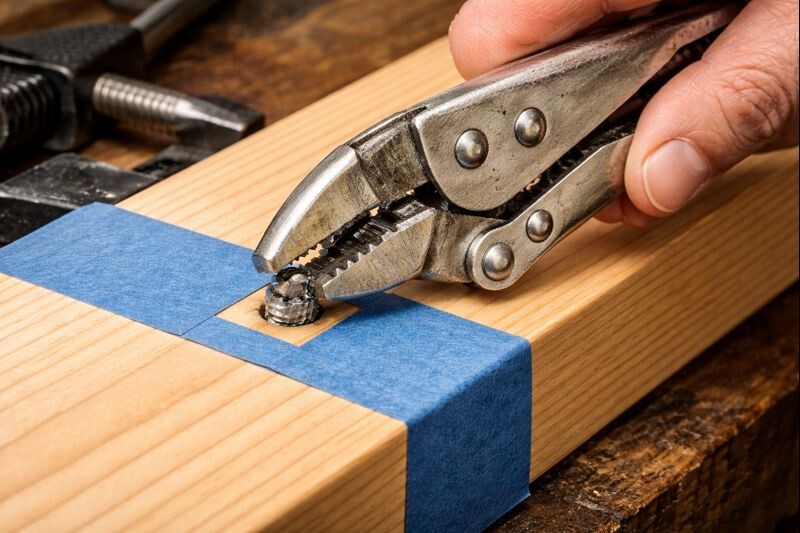
Common mistake: twisting hard immediately. That rounds the shank and leaves nothing to grab.
If the driver keeps slipping, use this guide on getting a stripped screw out of wood before the hole gets worse.
Method 2: Cut a new slot and drive it out (good for flush breaks you can reach)
If the screw broke flush but you can see metal, a fresh slot can give you a new “head.”
- Use a rotary tool with a thin cut-off wheel (or a small metal file).
- Cut a straight slot across the screw top. Keep it centered.
- Press a wide flathead driver into the slot firmly.
- Turn counterclockwise with steady pressure.
- If it won’t budge, stop and switch to Method 3. Forcing it snaps the slot edge off.
However, this only works when the screw isn’t extremely tight and there’s room to cut cleanly.
If the joint wiggles after reassembly, follow these steps for tightening loose screws in wood so the hardware bites again.
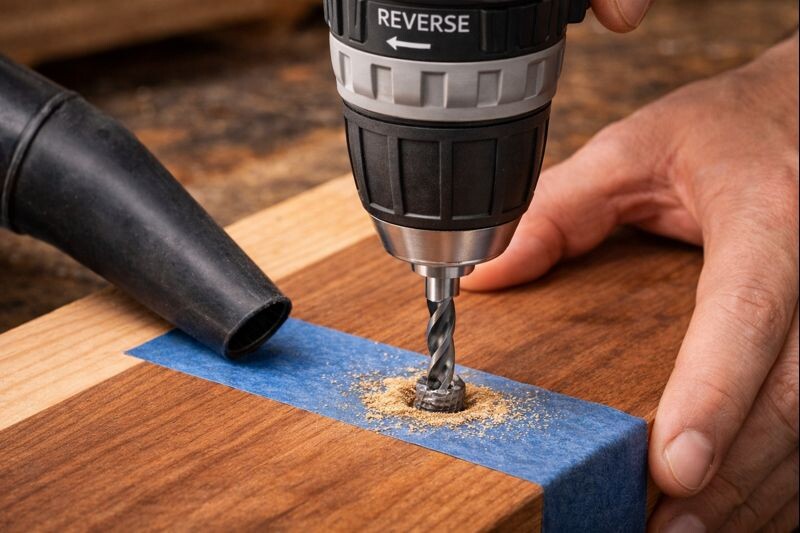
Method 3: Use a left-hand drill bit (the “works more often than people expect” option)
Left-hand bits spin counterclockwise. That means the act of drilling often unscrews the broken screw.
- Center punch the screw. Even a nail set can work.
- Start with a small left-hand bit (around 1/16″–3/32″).
- Run the drill in reverse at a slow speed.
- Drill straight down the center. Use light pressure.
- If the screw starts turning out, stop drilling and let the bit walk it out.
- If it doesn’t move, step up one bit size and repeat.
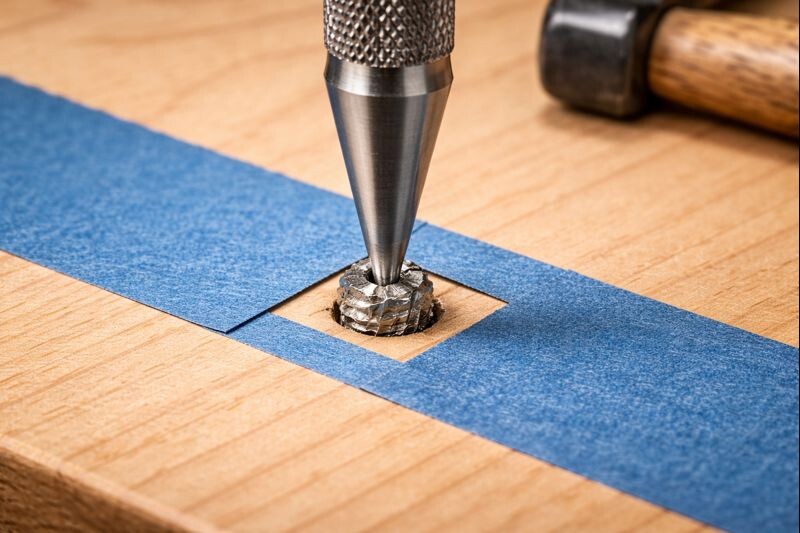
Next, keep the bit cool. Heat can seize the screw tighter in some woods and burn the surrounding fibers.
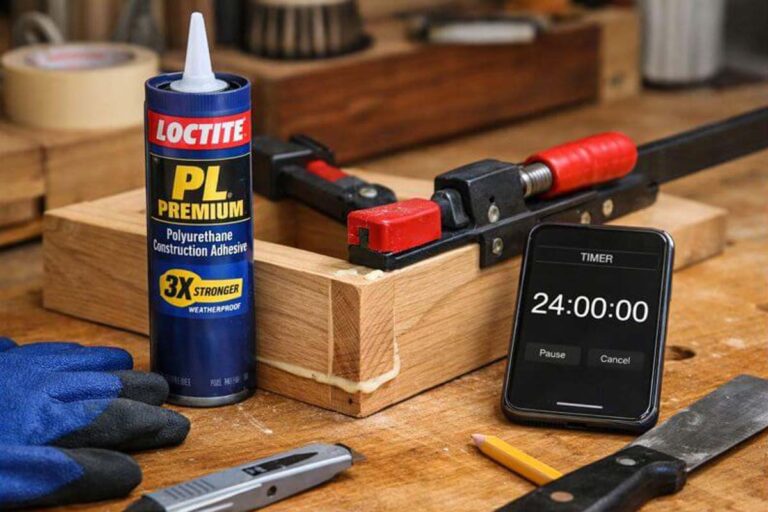
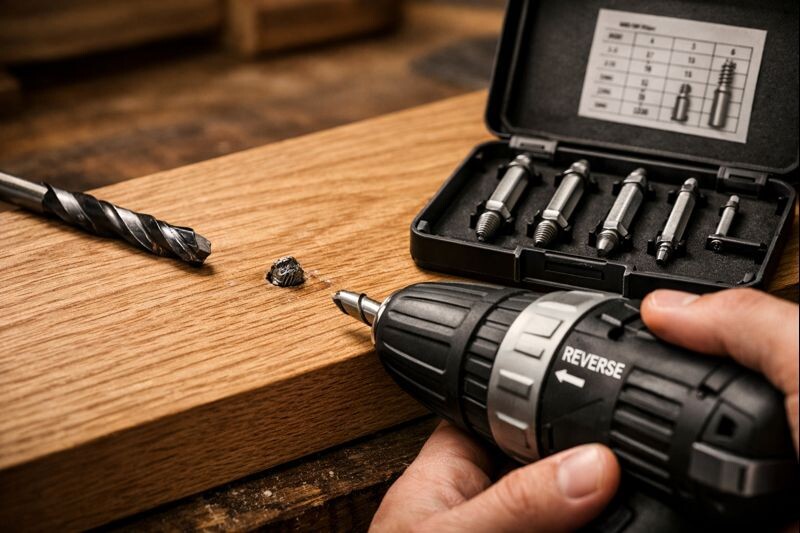
Method 4: Use a screw extractor (powerful, but easy to mess up)
Extractors work, but they demand accuracy. They’re hardened and brittle, so snapping one off inside the screw is a bad day.
- Drill a centered pilot hole using the extractor’s chart.
- Keep the drill perfectly vertical. Use a drill guide if possible.
- Insert the extractor and tap it lightly so it seats.
- Turn counterclockwise slowly with a T-handle or wrench.
- Stop if it feels like it’s binding hard. Add a larger pilot hole instead of muscling it.
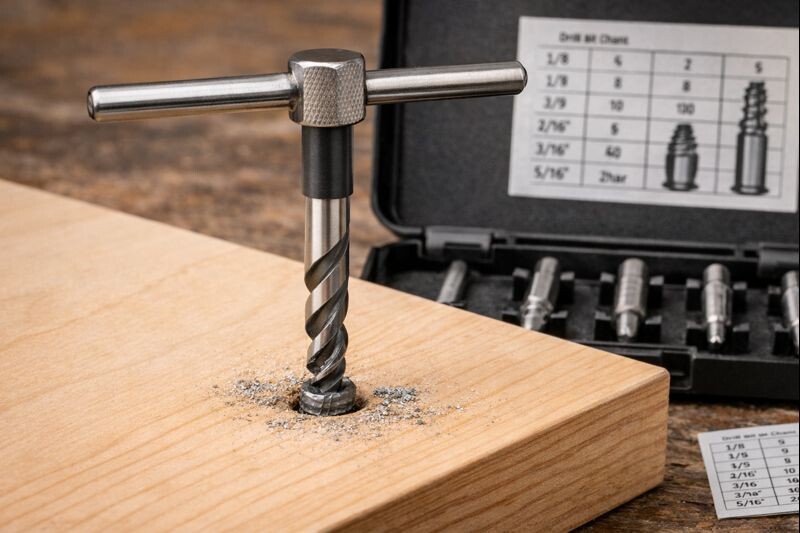
Extractor tips that prevent failure
- Don’t use high speed. Slow turning gives control.
- Don’t skip the pilot size. Too small makes the extractor wedge and snap.
- Don’t lean sideways. Side load breaks extractors fast.
If tool care is a weak spot, the routine in basic tool maintenance for new woodworkers helps keep bits sharp and extractors usable.
Method 5: Drill it out and plug the hole (best when looks matter more than saving the original hole)
Sometimes the “clean repair” is the right call, especially on show faces like tray stands, serving trays, and display pieces.
- Drill out the screw using a bit just slightly larger than the shank diameter.
- Keep drilling until the screw fragments release.
- Clean the hole walls with a sharp chisel or reamer.
- Glue in a dowel or a plug cut with a plug cutter (match grain if possible).
- Trim flush and sand smooth.
- Re-drill a proper pilot hole and drive a new screw.
Plus, this method resets the wood fibers and often ends up stronger than the original hole.
If you’re building a tiered piece and want a predictable, clean look, the build steps in a practical tiered tray stand tutorial show the kind of joinery planning that avoids these “surprise fixes” later.
After removal: rebuild the hole so the next screw holds
Once the broken screw is out, the hole is usually enlarged or damaged. Fix it before reinstalling.
Quick fixes for slightly loose holes
- Toothpicks + wood glue (softwood, small screws)
- A sliver of wood shim + glue (works better than toothpicks in hardwood)
- Matchstick-sized hardwood splinters (strong and clean)
- Add glue to the filler wood, not just the hole.
- Tap it in snug, then let it dry fully.
- Trim flush.
- Re-drill a pilot hole.
Strong fixes for badly blown-out holes
- Glue in a dowel (best for structural joints)
- Plug cutter plug (best for visible faces)
If you want a smooth, invisible patch, sanding matters. The steps in sanding end grain without fuzz translate well to plug repairs too.

If the hole is blown out and the screw won’t hold, use this method for repairing a stripped screw hole in wood with a clean, strong fix.
Prevent broken screws next time
Most snapped screws are avoidable with a few habits.
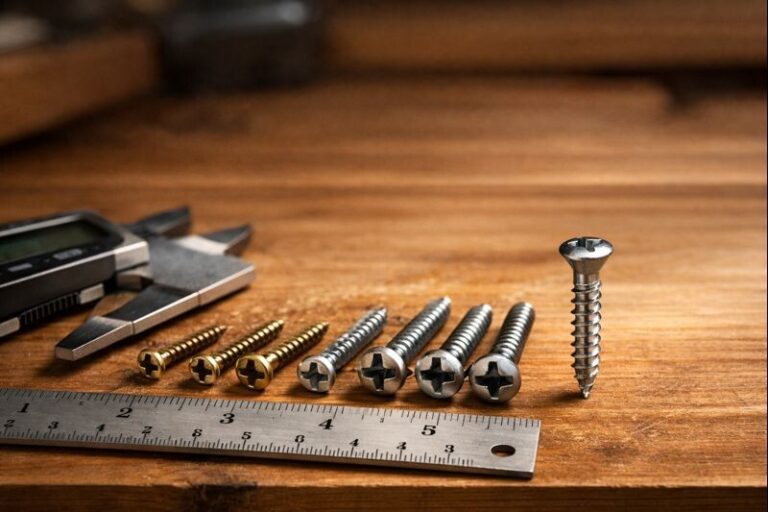
Drill the right pilot, not a “close enough” pilot
- Softwood: pilot near the screw’s root diameter
- Hardwood: pilot slightly larger than the root diameter
- Near edges: always pilot and consider a countersink to prevent splitting
Wax or soap the threads in hardwood
Rub the screw on paste wax or a bar of soap. That reduces friction and torque. It’s simple and it works.
Use better screws when it matters
Cheap screws snap more. For hardwood joinery, choose quality construction screws or reputable wood screws.
If you’re selecting wood for projects where screws matter, the notes in choosing between pine, oak, and maple and wood species that hold tray stand hardware well help set expectations about density and screw behavior.
Drive smarter
- Use a drill/driver with a clutch. Set it low, then increase as needed.
- Avoid impacts for delicate hardware. Impacts can snap small screws easily.
- Stop when resistance jumps. Back the screw out, deepen the pilot, then try again.
Finish awareness
If the surface is already finished, protect it. Tape, clamp, and work clean. If the finish gets scuffed, the troubleshooting in fixing cloudy clear coats can help you recover after repairs.
Common pitfalls that cause extra damage
These are the mistakes that turn a simple removal into a bigger repair.
- Drilling without a center punch, then wandering into surrounding wood
- Using an extractor with the wrong pilot size
- Clamping pliers too loose and rounding the shank
- Overheating the screw and scorching the hole
- Reinstalling a screw into a loose hole without reinforcing it
Next time a tray stand wobbles because a screw joint loosened, the fix list in stopping a tiered tray stand from wobbling pairs well with the hole-rebuild steps above.
Final thoughts
Broken screws feel like a momentum-killer, but they’re usually a quick fix when the lightest method gets tried first. Start by assessing how much metal is exposed, then move from pliers to left-hand bits to extractors. If the surface is important, drilling and plugging is often the cleanest “pro” solution. Once the hole gets rebuilt, the next screw should drive smoothly and hold tight.