How Much Wood Glue to Use: 7 Simple Tests for Stronger Joints
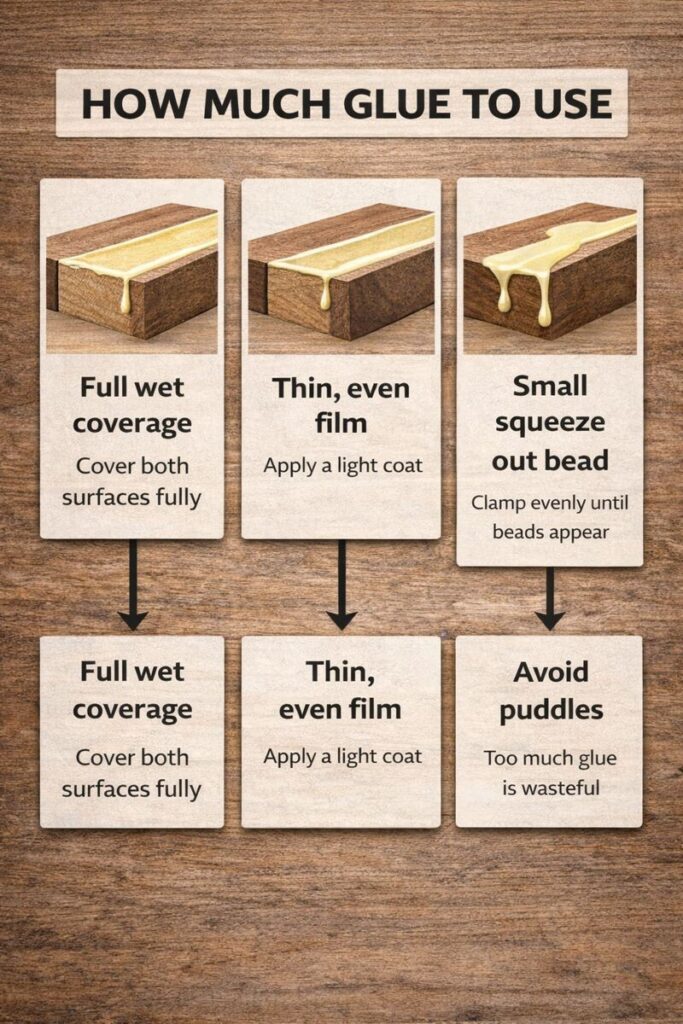
How much wood glue to use comes down to one thing: full surface coverage without making a mess. In short, use just enough wood glue to fully wet both mating surfaces in a thin, even film—then clamp until you see a small, consistent squeeze-out bead.
If you’ve ever had a joint fail, parts slide during clamping, or stain turn blotchy from glue smears, the glue amount (and how you spread it) was likely the culprit. In this guide, I’ll show you the simple visual cues I use in the shop, how the “right amount” changes by joint type, and how to clamp and clean up without ruining your finish.
Contents Here
- 1 What “enough wood glue” really means
- 2 Too little vs too much glue: what goes wrong
- 3 What changes how much glue you need
- 4 How much glue to use for common joints
- 5 A step-by-step method that works every time
- 6 Squeeze-out cleanup without ruining your finish
- 7 Clamp time, dry time, and full cure: don’t mix them up
- 8 Common mistakes to avoid
- 9 FAQs on how much wood glue to use
- 10 Conclusion
What “enough wood glue” really means
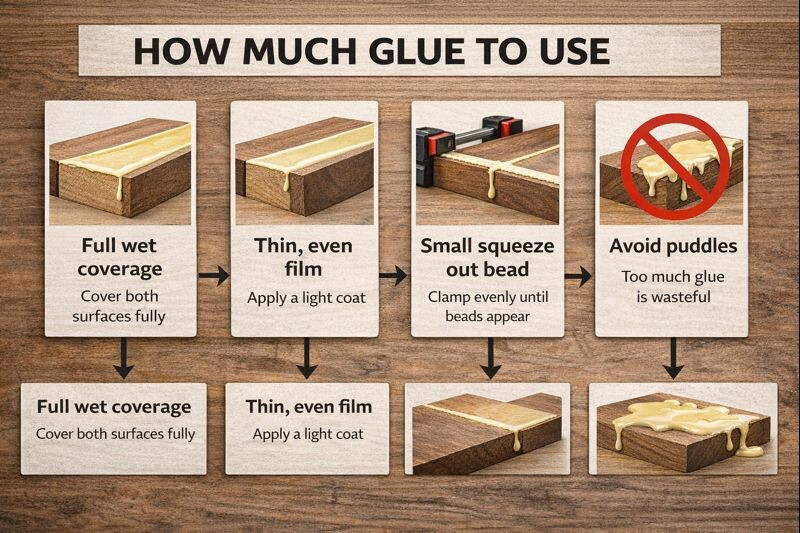
“Enough” doesn’t mean a thick line of glue oozing everywhere. It means you’ve got full coverage across the mating surfaces with a thin, even film. The wood fibers need glue touching wood, not glue piled on glue.
The simplest shop rule is this: if both surfaces look evenly “wet” with glue, you’re in the zone.
Also learn: How Long for Wood Glue to Dry Before Sanding: 6 Fast Checks
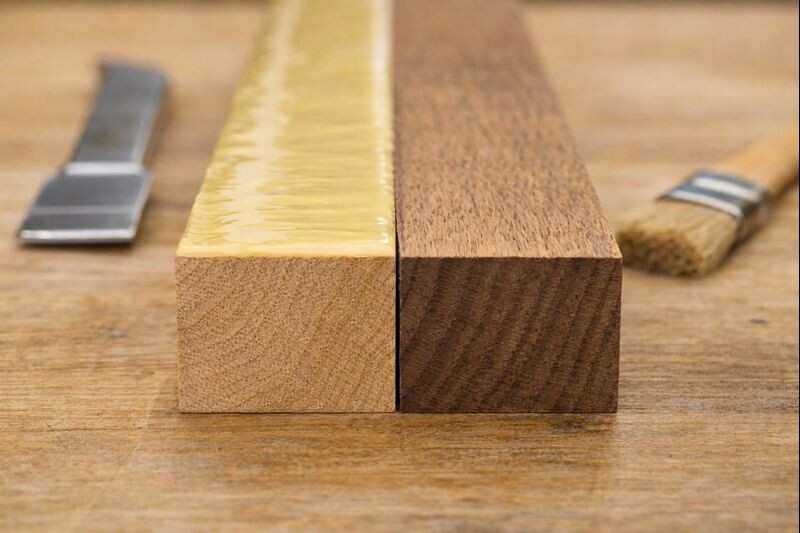
The thin-film coverage test
After you apply glue, spread it until the surface has no dry islands. You’re aiming for a uniform sheen, like you wiped on a thin coat of finish. If you can still see dry patches or dusty-looking areas, that’s where joints fail.
A bead straight from the bottle can fool you. A heavy bead in one spot doesn’t help the dry spot an inch away. Coverage beats volume every time.
The squeeze-out bead test
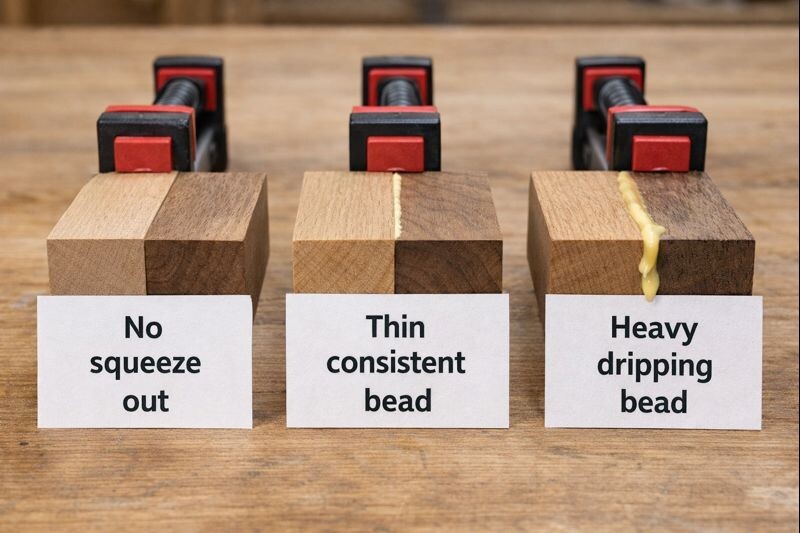
A little squeeze-out is a good sign. The sweet spot is a small, consistent bead along the seam—enough to prove coverage, not enough to drip down the work. If you clamp and get no squeeze-out anywhere, you likely missed coverage on at least one area.
If you’re getting fat ropes of glue everywhere, you’re not making the joint stronger. You’re just adding cleanup and increasing the chance the parts skate around.
Too little vs too much glue: what goes wrong
Wood glue is forgiving, but it still has limits. When joints fail, it’s usually because the glue wasn’t spread, the clamp pressure was wrong, or the wood wasn’t prepped.
Too little glue and starved joints
A starved joint happens when there isn’t enough glue left in the bond line. That can come from:
- Not applying enough glue in the first place
- Spreading too thin and missing spots
- Over-clamping so hard you squeeze nearly everything out
The fix is simple: apply enough to wet the surface, spread it evenly, then clamp only until the joint closes tight and steady.
Too much glue mostly creates practical problems:
- Parts skate during clamping, especially on long edge joints
- Hydraulic lock in tight joinery (mortise-and-tenon) so the joint won’t seat
- Messy squeeze-out that can stain wood and show under finish
- Veneer/laminations can trap puddles that cause bubbles later
The goal is a thin film that bonds wood-to-wood without puddling.
What changes how much glue you need
The “right amount” shifts based on the joint, the wood, and the glue itself.
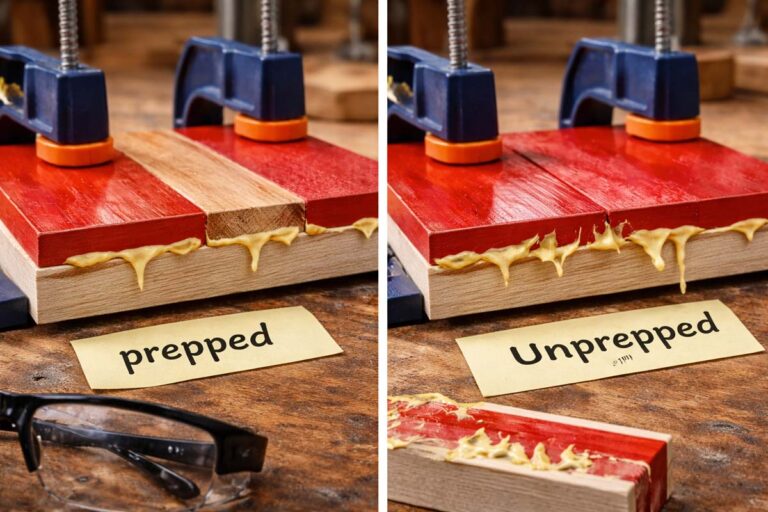
Joint fit and surface prep
Tight, well-milled joints need less glue than gappy ones. Glue isn’t a gap-filling miracle unless you’re using a product designed for that job. Also, glue doesn’t like dust, oily residue, or old finish.
Before you glue, dry-fit the parts and make sure they close cleanly. If your joint won’t close dry, it won’t magically close wet.
Wood species, end grain, and moisture
Open-grain woods and end grain drink glue fast. End grain is basically a bundle of straws, so it can pull glue away from the actual bond line.
If you’re gluing end grain to anything structural, plan on a sizing coat.
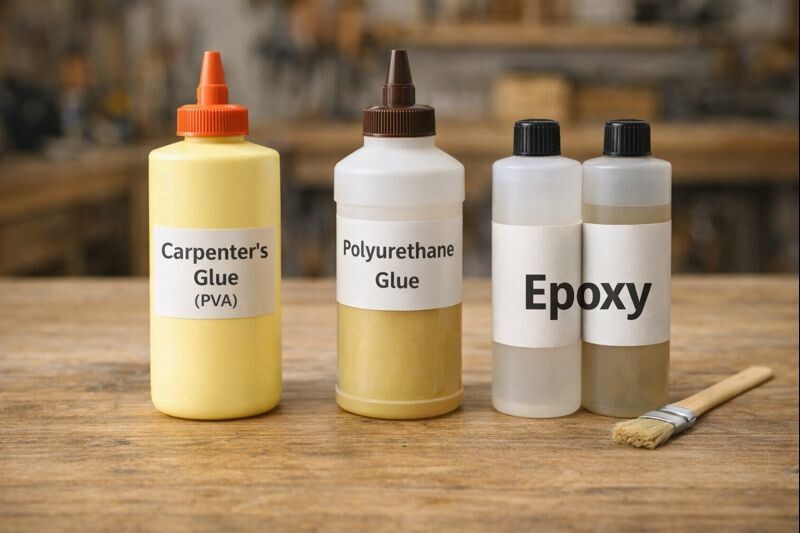
Glue type changes the target
Most woodworking uses PVA (yellow or white carpenter’s glue). It likes thin, even films and good clamping pressure. Polyurethane glue expands and gets messy fast, so you use less and control squeeze-out. Epoxy is a different animal—excellent for certain repairs, but it still benefits from clean surfaces and sensible glue thickness.
If you’re unsure which glue fits your project, it helps to read a dedicated breakdown like this guide on choosing a reliable adhesive for furniture fixes before you even start applying it.
How much glue to use for common joints
Here’s the practical, shop-floor answer: you’re not measuring tablespoons. You’re aiming for full contact coverage with a thin film, plus a small squeeze-out cue.
Edge joints and panel glue-ups
For edge joints, run a modest bead down the edge, then spread it. You want the entire edge face coated, not just the middle.
What “right” looks like:
- Even wet sheen along the full edge
- A thin, consistent squeeze-out bead after clamping
- No dry spots and no dripping waterfalls
If you’re building a wide panel, work efficiently. PVA glue has an open time, and big panels eat that time quickly.
Mortise-and-tenon and dowels: avoid hydraulic lock
With mortise-and-tenon joints, more glue can actually block assembly. If you flood the mortise, you can trap air and glue, and the tenon won’t seat.
A better approach:
- Brush a light coat on the mortise walls
- Coat the tenon with a thin film
- Avoid filling the bottom of the mortise like a cup
For dowels, coat the dowel lightly and add a little glue into the hole—enough to wet the walls, not enough to pool.
Miters, trim, and small parts
Miters don’t have much long-grain surface area, so fit matters. A thin, even coat on both faces usually beats a heavy bead on one face.
Painter’s tape works great as a hinge during assembly. It keeps parts aligned and reduces clamp-fights that smear glue everywhere.
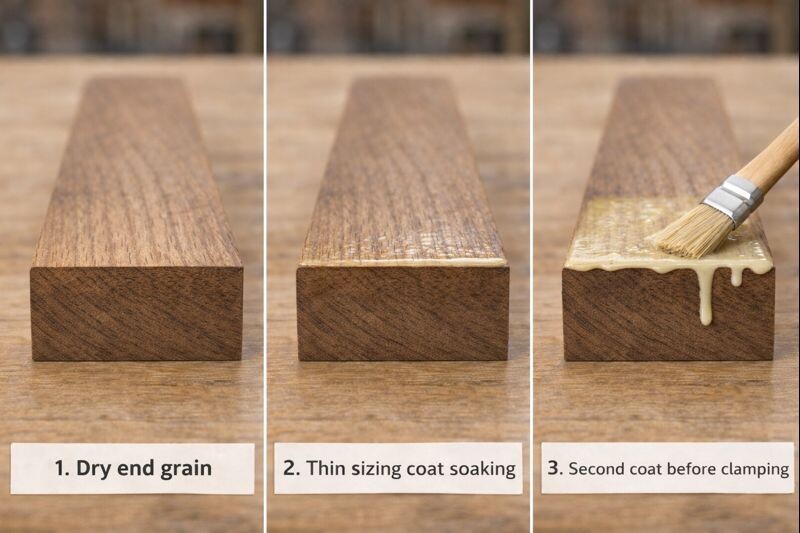
End grain: the sizing coat that saves joints
When gluing end grain, do this:
- Rub a thin coat of glue into the end grain first
- Let it soak for a minute or two
- Add a fresh thin coat, then assemble and clamp
That first coat reduces absorption so the final glue layer stays where it belongs.
A step-by-step method that works every time
If you want consistent results, follow a simple rhythm. It keeps you from over-applying, over-clamping, and panicking when the glue clock starts.
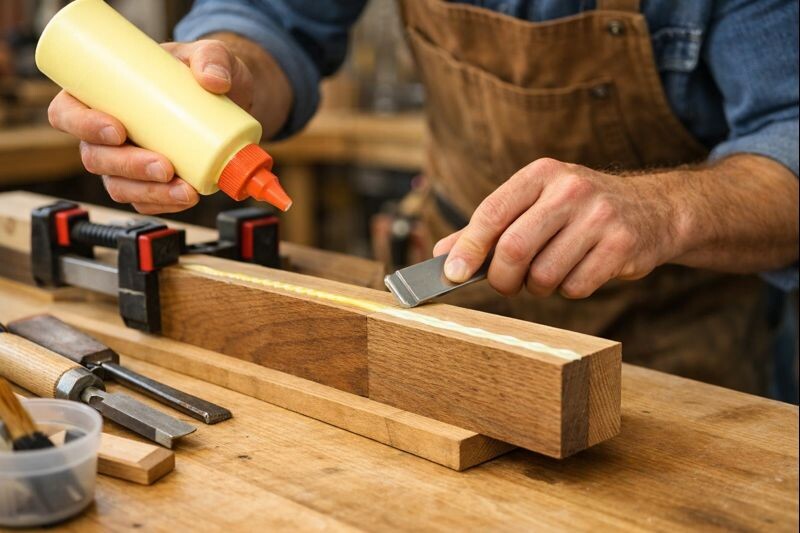
Apply, then spread to a film
Apply a bead, zig-zag, or dots depending on the surface size, then spread it.
Good spreading tools:
- Small acid brush
- Silicone glue roller
- Plastic spreader
- A gloved finger for quick touch-ups
Stop spreading when the surface looks evenly wet, not frothy or puddled.
Assemble and clamp with “just enough” pressure
Clamps should close the joint, not crush it. Tighten until:
- The joint lines close evenly
- The parts stop shifting
- You see a thin, consistent squeeze-out bead
If you’re reefing on the clamps hard enough to bow boards, you’re past “helpful.”
If you’re unsure when it’s safe to remove clamps, this breakdown on when glued joints are typically ready to unclamp will keep you from rushing the job.

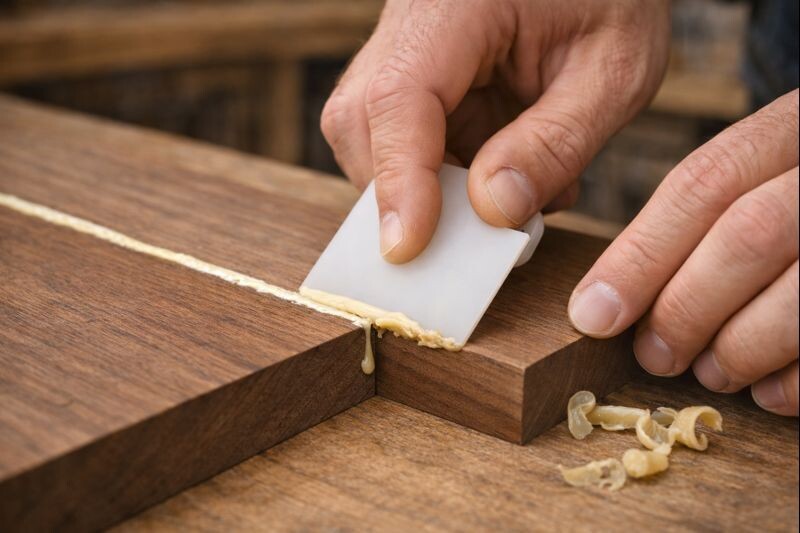
Squeeze-out cleanup without ruining your finish
Glue squeeze-out isn’t just messy—it can wreck a stain job if you smear it into the grain.
Two cleanup methods work well:
The tape-and-wipe approach
Before glue-up, apply painter’s tape near the joint line. After clamping, lightly wipe squeeze-out with a damp rag. Don’t flood water into the joint—just enough to lift surface glue.
Peel tape while the glue is still soft, and you’ll save a ton of sanding.
The wait-and-scrape approach
If wiping tends to smear glue for you, wait until the squeeze-out turns rubbery. Then slice it off with a sharp chisel or scrape it with a plastic scraper. This keeps glue from getting pushed into pores.
If your project timeline is tight, read this guide on speeding up glue drying without weakening the bond so you’re not tempted to “cheat” with heat in risky ways.
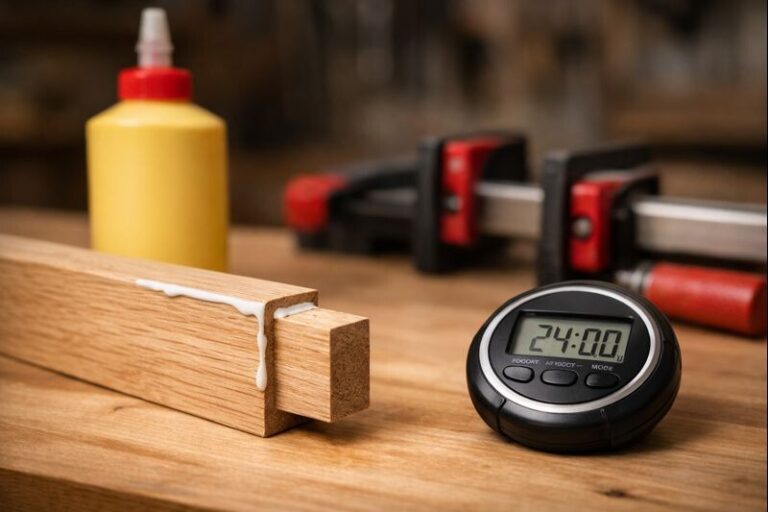
Clamp time, dry time, and full cure: don’t mix them up
A joint can feel solid long before it’s truly cured. “Dry to the touch” is not the same as “ready for heavy stress.”
For most PVA glues, you’ll clamp for a while, then handle gently, then wait longer for full strength. If you want the deeper timeline and what it means for sanding, planing, and load-bearing, check this explanation of how long it takes before glue reaches full strength and this companion guide on what ‘dry’ means in practical shop terms.
Common mistakes to avoid
This quick list catches most glue-ups before they go sideways:
- Skipping the dry-fit and finding problems mid-glue
- Using a heavy bead and never spreading it
- Clamping hard enough to bow boards or starve the joint
- Cleaning squeeze-out by smearing it into open grain
- Stressing the joint because it “feels dry”
- Gluing dusty, oily, or finished surfaces

FAQs on how much wood glue to use
How do I know if I used enough glue without overdoing it?
Look for full wet coverage on the mating surfaces and a thin squeeze-out bead after clamping.
Is no squeeze-out always a problem?
Not always, but it’s a common sign you missed coverage somewhere. On most joints, a small bead is reassuring.
Can too much glue weaken a joint?
Usually it doesn’t weaken strength directly, but it can prevent full seating in tight joinery, make parts skate, and cause finishing issues.
How much glue should I use on mortise-and-tenon joints?
Use light, controlled coats on the mortise walls and tenon. Avoid pooling glue that can create hydraulic lock.
What’s the best way to glue end grain?
Use a sizing coat first, let it soak briefly, then add a fresh thin coat before assembly.
Conclusion
How much wood glue to use comes down to full coverage and a thin, even film. Aim for surfaces that look evenly wet, then clamp until you see a small, consistent squeeze-out bead. Practice on scrap, and you’ll stop guessing—and your joints will get cleaner and stronger.