How Far Should a Screw Go Into Wood: 7 Proven Rules for Rock Solid Joints
Screw depth in wood is the difference between a joint that stays tight for years and one that slowly loosens, squeaks, or splits. Most screw problems in small builds (including tray stands) come from two things: not enough bite in the receiving wood, or too much bite that blows out the back or cracks the edge. Get the depth right, and everything else—pilot holes, screw choice, and load strength—starts working with you.
Contents Here
- 1 Why screw depth matters more than people think
- 2 Quick rule-of-thumb: the depth you actually want
- 3 The part that confuses people: “length” vs “how far into the second board”
- 4 Step-by-step: choose screw length the easy way
- 5 A practical table: common board thickness and good screw lengths
- 6 The biggest “gotchas” that change the depth rule
- 7 Pilot holes: the quiet secret behind “perfect screw depth”
- 8 Tray stand builds: where screw depth shows up the most
- 9 Benefits of getting screw depth right
- 10 Drawbacks of going “as deep as possible”
- 11 A quick checklist before driving the screw
- 12 Final thoughts
Why screw depth matters more than people think
A screw holds in wood in two main ways.
Withdrawal strength is the screw resisting being pulled straight out. That’s mostly about thread engagement, wood density, and whether the threads are biting into solid face grain.
Shear strength is the screw resisting sideways force. That’s mostly about the screw shank diameter, the joint design, and whether the parts are tight together.
Depth affects both, but withdrawal strength is where most DIY joints fail first.
If the screw doesn’t go far enough into the receiving piece, the threads barely grab. The joint can feel “tight” at first, then loosens with vibration, seasonal wood movement, or repeated use.
If the screw goes too far, you risk:
- Tip blowout (sharp point pokes through and scratches hands or surfaces)
- Splitting near edges or ends
- Stripping out the hole from over-driving
- Misleading strength (the screw feels solid until the wood fibers finally tear)
Know more: How to Stop Wood Splitting When Screwing
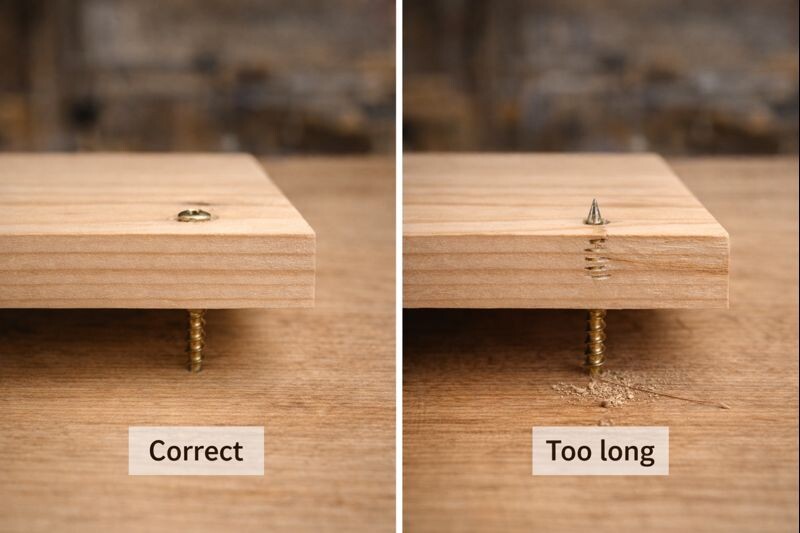
Quick rule-of-thumb: the depth you actually want
For wood-to-wood joints, aim for this:
- At least 3/4″ of thread bite into the receiving board for typical home projects
- Closer to 1″–1-1/4″ of bite for anything that gets handled a lot (like tray stands, handles, or posts)
Then apply this safety check:
- The screw tip should end about 1/8″–1/4″ short of the far side of the receiving piece.
That’s the sweet spot: enough grip without break-through.
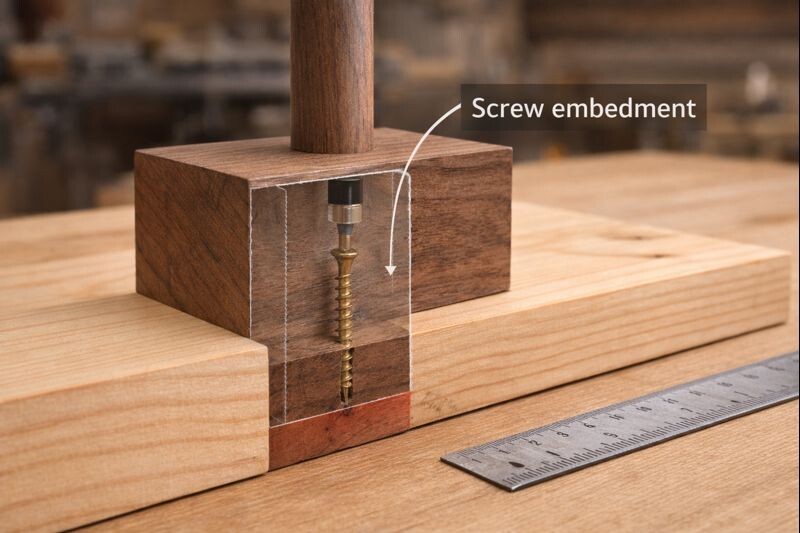
The part that confuses people: “length” vs “how far into the second board”
When someone says “use a 2-inch screw,” that’s the full screw length.
What really matters is embedment depth: how much threaded portion is actually inside the receiving wood.

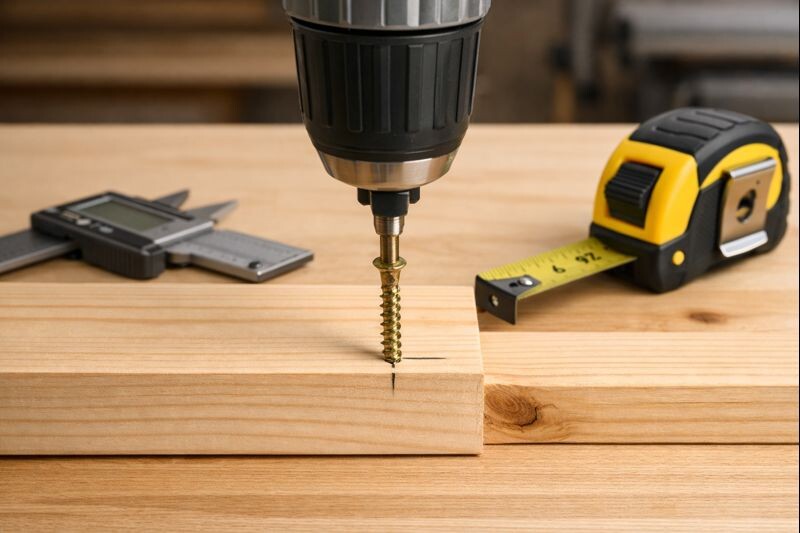
Step-by-step: choose screw length the easy way
Use this every time. It’s fast and avoids guessing.
Step 1: Measure both pieces
- Top piece (the one being attached) = thickness A
- Receiving piece (the one holding the threads) = thickness B
Step 2: Decide the embedment target
Pick embedment based on load and wood type.
- Light-duty (trim, small signs, light decor):
- 5/8″–3/4″ embedment is usually enough
- Medium-duty (shelves, small furniture parts, tray stand tiers):
- 3/4″–1″ embedment
- Heavy-duty (handles, posts, structural braces):
- 1″–1-1/2″ embedment
Hardwoods (oak, maple, walnut) grip well, but they split easier without pilot holes. Softwoods (pine, fir) need a bit more depth because fibers crush and loosen sooner.
If a fastener keeps loosening, this guide on fixing loose screws in wood can save a project without rebuilding.
Step 3: Account for countersink or hardware
If the screw head sits below the surface, subtract the countersink depth (usually small, but it matters on thin stock).
- Countersink or hardware thickness = thickness C
Step 4: Calculate the screw length
Screw length ≈ A + embedment + C
Then check that the screw tip won’t exit the back side of the receiving piece.
Step 5: Choose the right screw type for the job
A coarse-thread construction screw behaves differently than a fine-thread wood screw.
If screw labels are confusing, these guides help:
A practical table: common board thickness and good screw lengths
This table assumes a typical wood-to-wood joint, no thick hardware, and you want solid hold without blowout.
| Top piece thickness (A) | Receiving piece thickness (B) | Recommended screw length | Notes |
|---|---|---|---|
| 1/2″ | 3/4″ | 1-1/4″ | Leaves ~3/4″ embedment (good for light/medium duty) |
| 1/2″ | 1-1/2″ | 1-1/2″ to 1-3/4″ | Safer on thicker bases, better grip |
| 3/4″ | 3/4″ | 1-1/4″ | Works if pilot holes are correct; don’t overdrive |
| 3/4″ | 1-1/2″ | 1-1/2″ to 2″ | Great for tray stand bases and uprights |
| 1″ | 1-1/2″ | 2″ | Strong general-purpose choice |
| 1″ | 2″ | 2″ to 2-1/2″ | Use pilot + clearance holes to prevent splitting |
The biggest “gotchas” that change the depth rule
End grain holding power is weaker
Screws into end grain don’t hold like screws into face grain. That’s not opinion—end grain fibers behave like a bundle of straws.
If a screw must go into end grain:
- Increase embedment depth if possible
- Use a thicker screw shank (within reason)
- Consider adding a glue block, corner brace, or dowel support
- Drill a correct pilot hole to reduce splitting
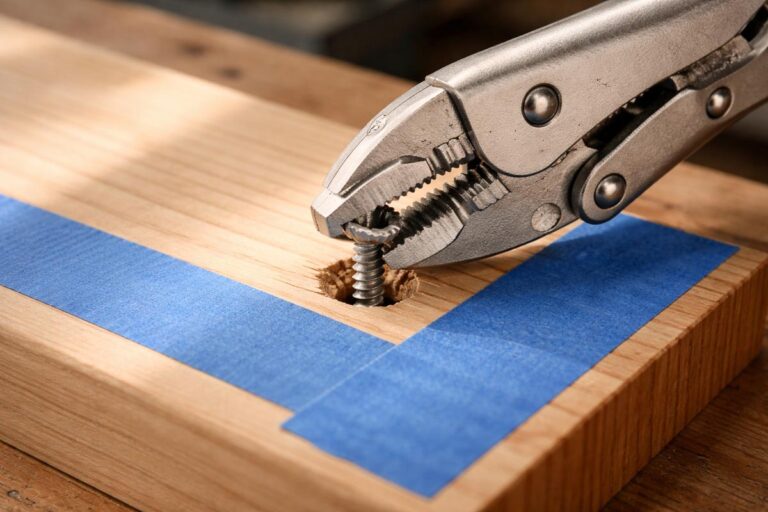
When end-grain joints fail, the hole often strips. This walkthrough on repairing a stripped screw hole is the quickest recovery method.
Plywood and MDF need different thinking
- Plywood holds screws fairly well, but the best hold happens when threads bite into multiple plies, not just the top veneer.
- MDF strips easily. Use special MDF screws, pre-drill carefully, and avoid over-tightening.
Hardware and brackets change everything
When mounting a bracket, hinge, or tray stand handle, the screw may be short even though the load is high. In those cases:
- Use more screws, not just longer screws
- Choose a wider head (washer head or pan head) when appropriate
- Add backing blocks inside the project if needed
Pilot holes: the quiet secret behind “perfect screw depth”
A screw can be the perfect length and still fail if the hole prep is wrong.
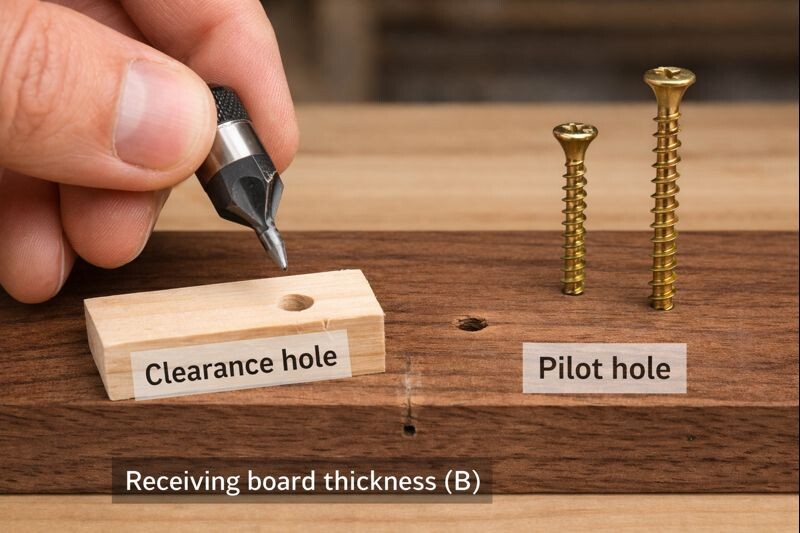
Use this approach:
1) Clearance hole in the top piece (optional but recommended): This lets the top piece slide tight to the receiving wood instead of “jacking” apart.
2) Pilot hole in the receiving piece: This prevents splitting and reduces stripping.
3) Countersink only as much as needed: Too much countersink weakens the surface around the head.
If stripping happens during driving, this guide on removing a stripped screw from wood is a clean way out without tearing up the project.
Tray stand builds: where screw depth shows up the most
Tray stands look simple, but they have two stress points:
- The center post/rod connection
- The tray-to-support attachment
If a two-tier or three-tier stand wobbles, it’s often a screw bite issue combined with uneven tightening. This troubleshooting guide on stopping a tiered tray stand from wobbling pairs well with the depth rules here.
Practical tray stand targets:
- Attaching a tray base to a center support block: Aim for 1″ embedment if wood thickness allows.
- Attaching a handle or top finial block: Use shorter screws + multiple fasteners, or add a hidden backing block.
- Mounting trays through thin stock (like 1/2″ tray bottoms): Avoid long screws. Use 1-1/4″ only if the receiving block is thick enough and a pilot hole is drilled.
Benefits of getting screw depth right
When the depth is right (and the hole prep is right), you get:
- Joints that stay tight through seasonal wood movement
- Less splitting on edges and corners
- Fewer stripped holes during assembly
- Better alignment, because parts pull together cleanly
- Stronger builds without needing oversized screws
Drawbacks of going “as deep as possible”
It’s tempting to think deeper equals stronger. However, past a certain point, the risk goes up faster than the strength.
Common problems with overly long screws:
- Blowout that ruins a finished face
- Splits that only appear later (after the wood dries or moves)
- Bent screws from hitting knots or dense grain
- Future repairs become harder because fasteners are buried or snapped
If a screw breaks or refuses to back out, this guide on getting a broken screw out of wood is the best next step.
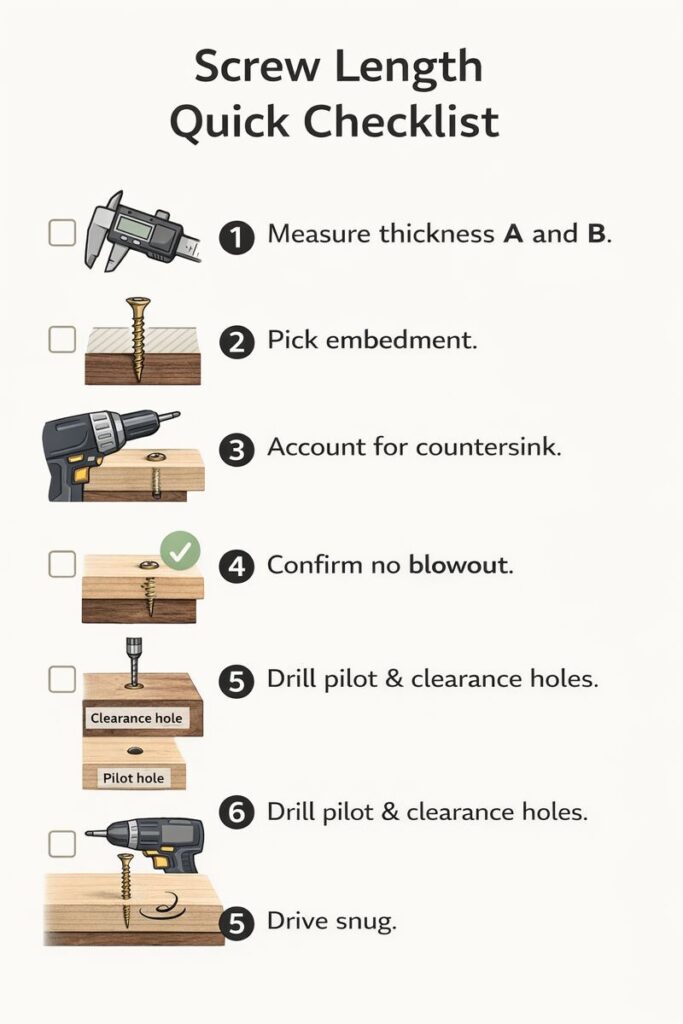
A quick checklist before driving the screw
Use this every time, especially on tray stands.
- Measure both piece thicknesses
- Choose embedment depth (3/4″–1-1/4″ for most projects)
- Confirm the tip won’t exit the back face
- Drill pilot hole in hardwoods and near edges
- Consider a clearance hole in the top piece
- Drive until snug, then stop—don’t crush the fibers
- If it spins without tightening, stop and repair the hole
For general safe shop habits while drilling and driving, it’s worth reviewing basic safety gear for small woodworking builds and keeping bits in good shape using simple tool maintenance routines.
Final thoughts
Screw depth in wood shouldn’t be guesswork. Aim for solid thread engagement in the receiving piece, keep the tip shy of blowout, and match the depth to the load. Add pilot holes and smart hole prep, and even small projects like tray stands feel “locked in” instead of flimsy. When in doubt, choose a slightly shorter screw and improve the joint design with better support and more fasteners.