Does Wood Glue Stick to Paint? 5 Essential Fixes for Glossy Coats
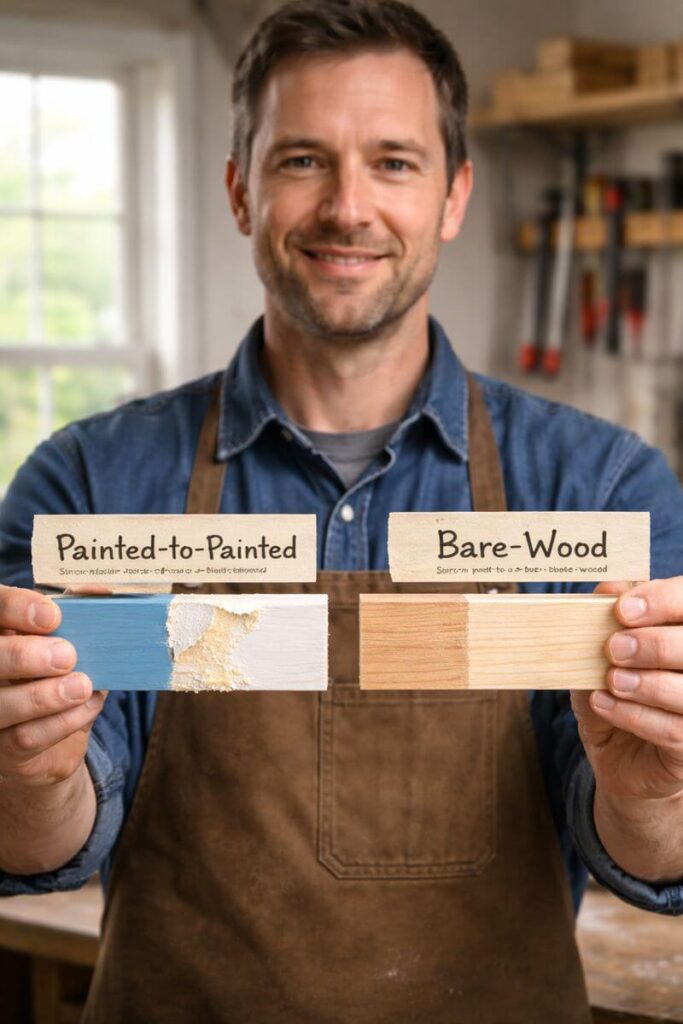
Short answer, yes—wood glue can stick to paint, but the bond is usually weak and only as strong as the paint layer, so it’s unreliable for anything structural unless you sand to bare wood first.
If the paint is glossy, loose, or still curing, the bond usually fails where paint meets wood. I’ll show you when it’s okay, when to strip to bare wood, and which adhesives behave better on painted surfaces.
Contents Here
- 1 Does wood glue stick to paint? The honest answer
- 2 Why standard wood glue struggles on painted surfaces
- 3 Paint types that matter for glue adhesion
- 4 Should you remove paint before gluing?
- 5 Surface prep checklist that actually makes a difference
- 6 Best adhesives if the paint must stay
- 7 Step-by-step: How to glue painted wood successfully
- 8 Reinforcement options when paint stays put
- 9 Troubleshooting: why it failed and how to fix it
- 10 Finishing after glue-up: cleanup and painting
- 11 Conclusion
Does wood glue stick to paint? The honest answer
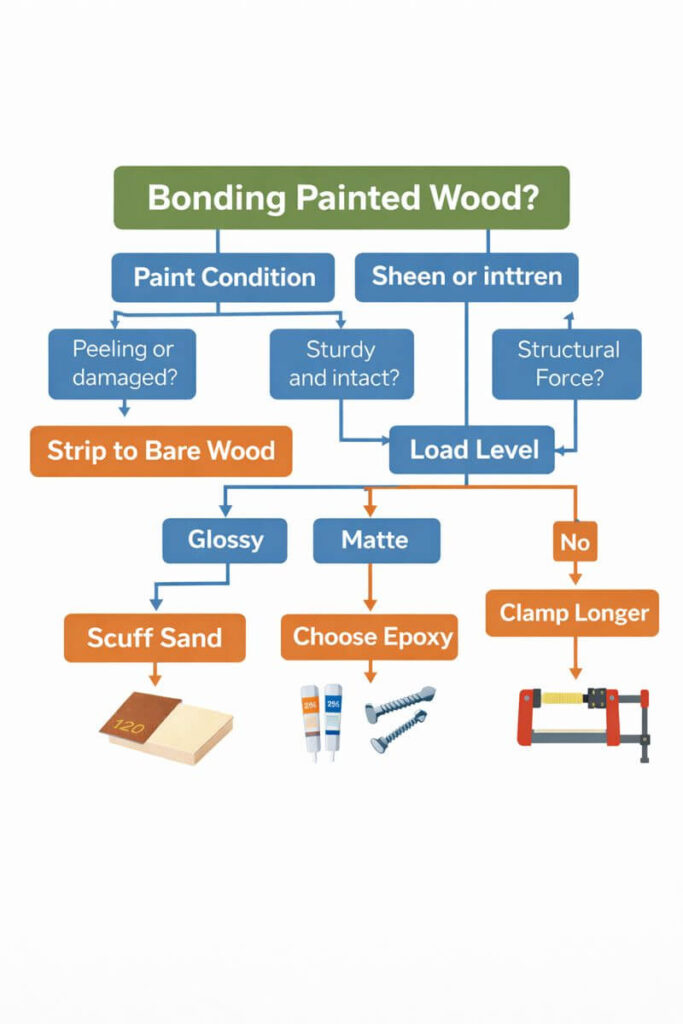
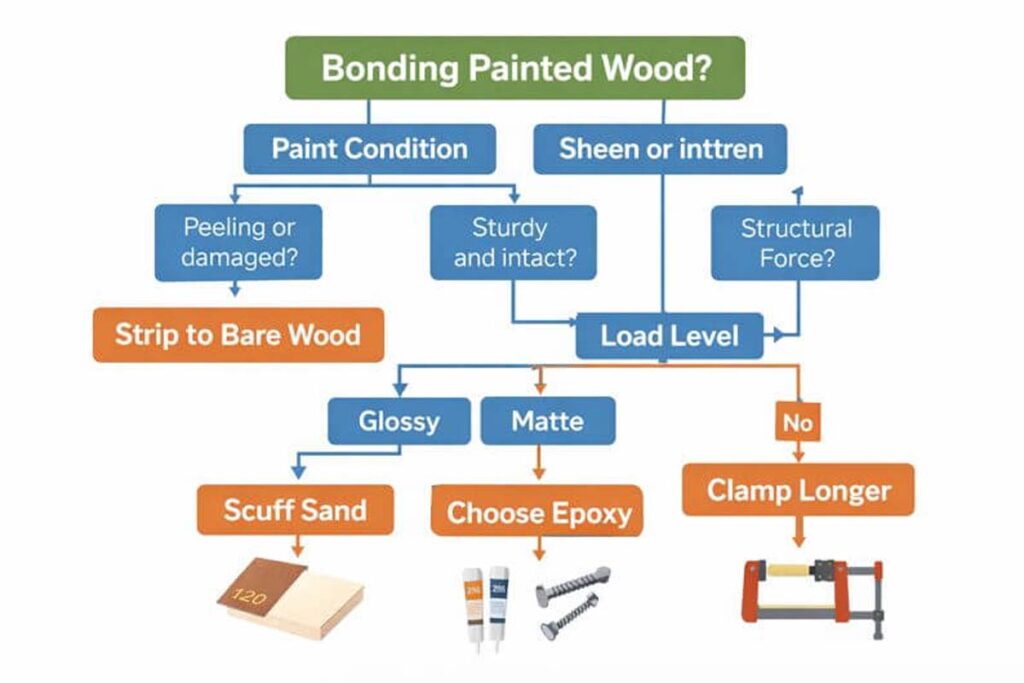
Wood glue will often grab paint, especially if the paint is matte and scuffed. The problem is that most wood glues are made to soak into wood fibers, not cling to a sealed coating. So the glue might hold… until stress, vibration, or humidity makes the paint release from the wood underneath.
If you need a structural joint—chair rungs, table aprons, load-bearing shelves—treat paint like a weak layer and glue wood-to-wood instead. If it’s a light-duty piece—trim, a small decor repair, a tray handle that won’t see much force—you can sometimes get away with prepping the paint and choosing the right adhesive.
What decides whether it holds or fails
A painted glue-up succeeds or fails because of a handful of shop realities:
- Paint type: Latex/acrylic behaves differently than oil/enamel.
- Sheen: Glossy surfaces give glue very little “bite.”
- Paint condition: If it can peel, your glue joint will peel with it.
- Cure time: Fresh paint can feel dry but still be soft.
- Load: A shear load (sideways force) exposes weak paint fast.
- Contact area: Small glue footprints fail sooner than wide ones.
Learn more: Can You Use Wood Glue on Plastic? 9 Mistakes to Avoid Today
Why standard wood glue struggles on painted surfaces
Most common wood glues are PVA or aliphatic resin, and they’re happiest when they can sink into open grain. That’s how you get a strong mechanical lock between two pieces of wood. Paint blocks that penetration, so you end up with glue stuck to a coating rather than wood fibers.
If you want the quick refresher on what’s inside the bottle and why it behaves that way, see what PVA wood glue actually is.
The barrier effect, in plain shop talk
Paint is basically a thin plastic film sitting on top of wood. Wood glue can stick to that film, sure, but it can’t key into the grain. When the joint fails, you’ll often see paint on one side and bare wood on the other. That’s the giveaway that the paint let go first.
Paint types that matter for glue adhesion
Paint isn’t just “paint.” The binder and the surface it cures into make a big difference.
Water-based paint (latex/acrylic)
Latex and acrylic paints can bond reasonably well to some adhesives when they’re fully cured and lightly scuffed. They’re still not ideal for wood glue, but they’re often more forgiving than slick enamel. If the paint is thick, rubbery, or peels with a fingernail, don’t trust it for any joint that matters.
If you’re working with craft acrylics that stay soft or tacky, fix that first. Here’s a helpful read on sealing acrylic craft paint on wood so it cures harder.
Oil-based paint / enamel / alkyd
Oil and enamel finishes tend to cure into a harder, smoother, more sealed surface. That’s great for durability, and lousy for wood glue. If you must glue over it, you’ll usually get better results with epoxy or polyurethane glue than with standard PVA.
Primer vs topcoat
Primer is usually more porous and “grabby” than a slick topcoat, so some adhesives cling to it better. Still, primer can fail if it’s chalky, dusty, or not well-bonded. If you’re unsure, do a small test bond in a hidden spot and try to break it the next day.
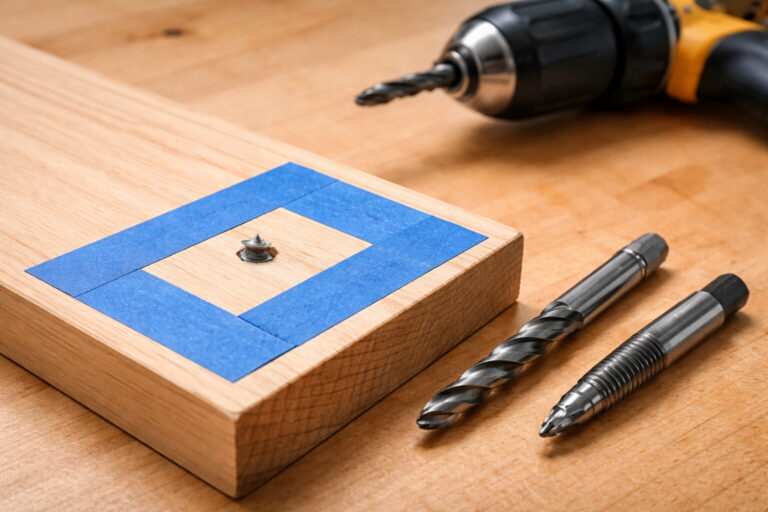
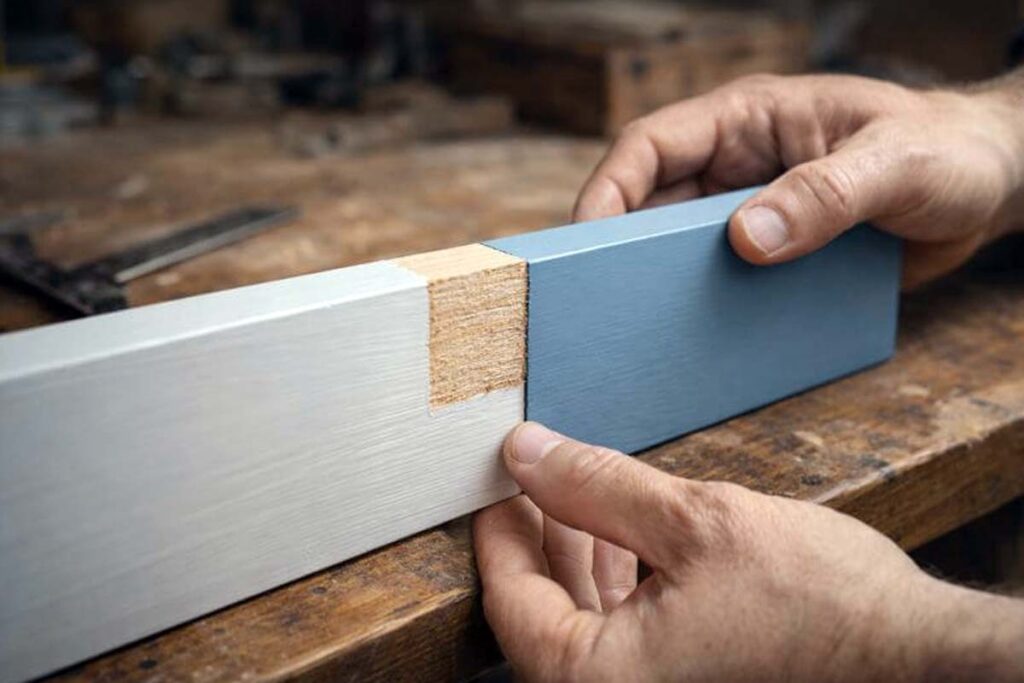
Should you remove paint before gluing?
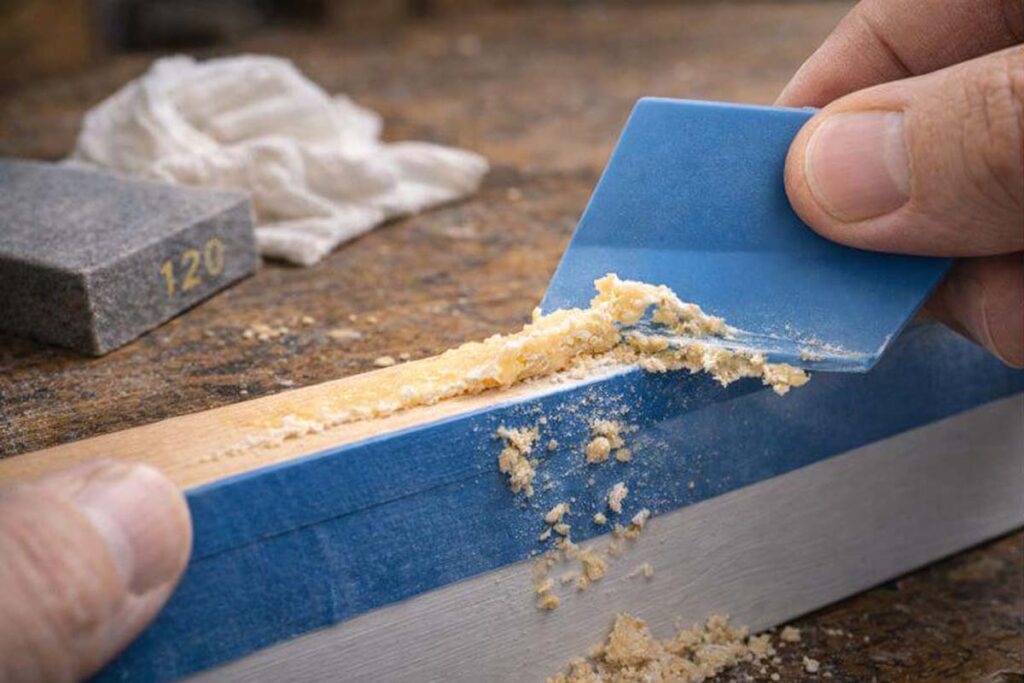
If you want the strongest bond, yes—remove paint at the joint. You don’t have to strip the whole board. Just expose bare wood wherever glue needs to do real work.
If it’s a decorative, low-stress repair, scuff sanding can be enough. But you should assume the paint layer is the weak link and plan accordingly.
How much paint to remove (minimum effective area)
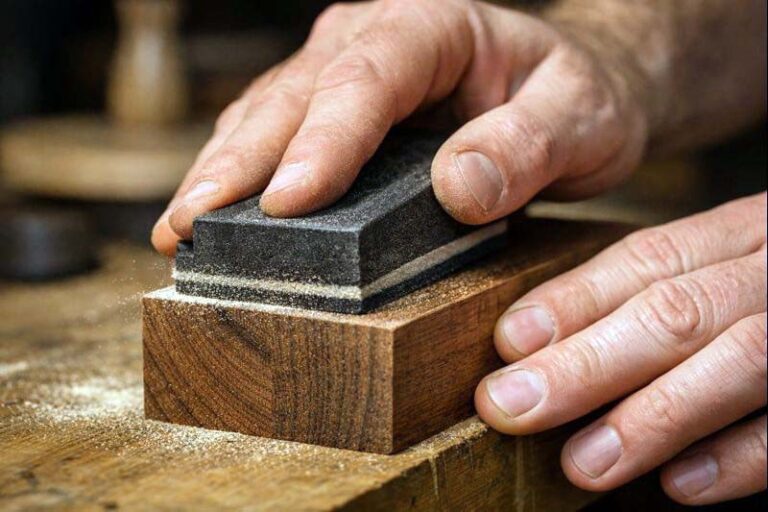
Strip only the mating faces—the exact footprint where two pieces touch. I usually start around 80–120 grit to get through paint quickly, then clean up the surface so it’s flat and fresh. After sanding, remove dust completely before glue touches anything.
Safety note: If the piece is old and you suspect lead-based paint, don’t sand it dry. Use safer methods and proper precautions.
Surface prep checklist that actually makes a difference
The prep matters more than brand names on the glue bottle. Here’s the simple checklist I use in the shop:
- Clean first: Remove wax, oils, and hand grime.
- Decide your path: Strip to bare wood for strength, or scuff for best-effort.
- Create tooth: Lightly roughen glossy paint if you’re keeping it.
- Remove dust: Vacuum and wipe down, then let it dry.
- Dry fit: Make sure the joint closes fully before gluing.
Cleaning and degreasing
Painted surfaces collect invisible stuff—polish, cooking grease, silicone spray, even skin oils. Any of that can make a joint fail early. Wipe down with a cleaner that leaves no residue, then let it evaporate fully before you glue.
Scuff sanding vs stripping to bare wood
- Scuff sanding is for “good enough” bonds on non-structural parts. You’re creating micro-scratches so adhesive can grip.
- Stripping to bare wood is for strong joints. You’re giving the glue actual wood fibers to lock into.
If you’re using PVA wood glue and you care about strength, stripping wins almost every time.
Best adhesives if the paint must stay
If you can’t remove paint—maybe it’s a finished face, a decorative panel, or you’re bonding to a painted wall surface—pick an adhesive that tolerates non-porous coatings.
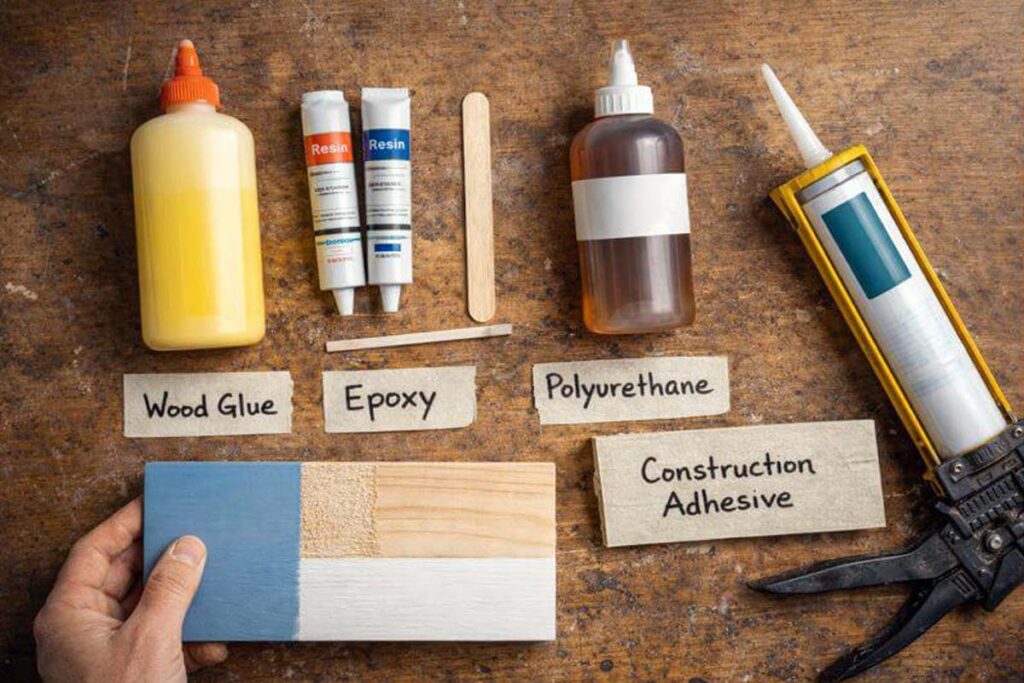
Two-part epoxy (best for strength on painted surfaces)
Epoxy cures chemically rather than drying by water loss, and it tends to bond well to scuffed paint. It’s also great when the joint isn’t perfectly tight. The tradeoff is mixing, mess, and needing patience for a full cure.
Polyurethane glue (gap-filling and water resistant)
Polyurethane glue can work well when surfaces aren’t perfect, and it handles moisture better than many basic glues. It expands as it cures, so you need clamp pressure and careful cleanup. Don’t treat the foam as “strength.” The strength comes from the thin glue line, not the bubbles.
Construction adhesive (trim, panels, and mixed materials)
For larger contact areas—like attaching trim blocks, backers, or panels—construction adhesive can be a practical choice. It’s not a fine joinery glue, but it’s useful when you’re bonding painted surfaces and need a bit of flexibility.
CA glue or hot glue (small crafts and quick fixes)
These are for small, light-duty jobs where speed matters more than strength. If a joint needs to hold weight or survive bumps, skip these and choose epoxy or mechanical fasteners.
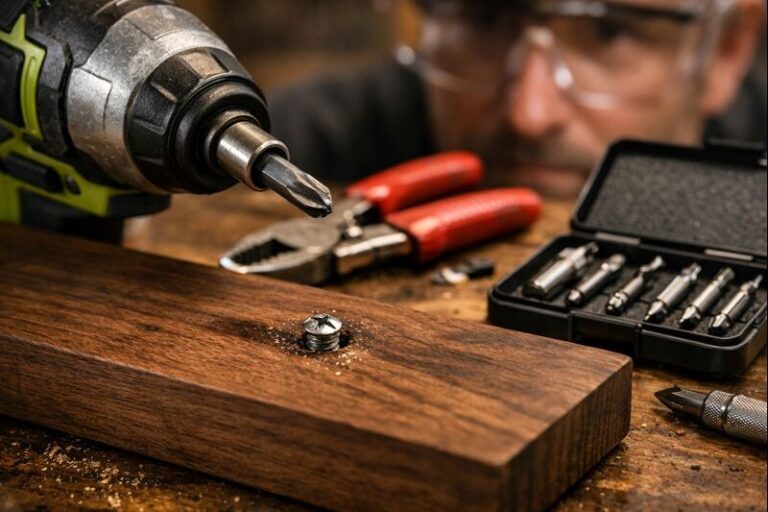
Step-by-step: How to glue painted wood successfully
There are two reliable paths. Pick the one that matches the job, not the one that feels easiest.
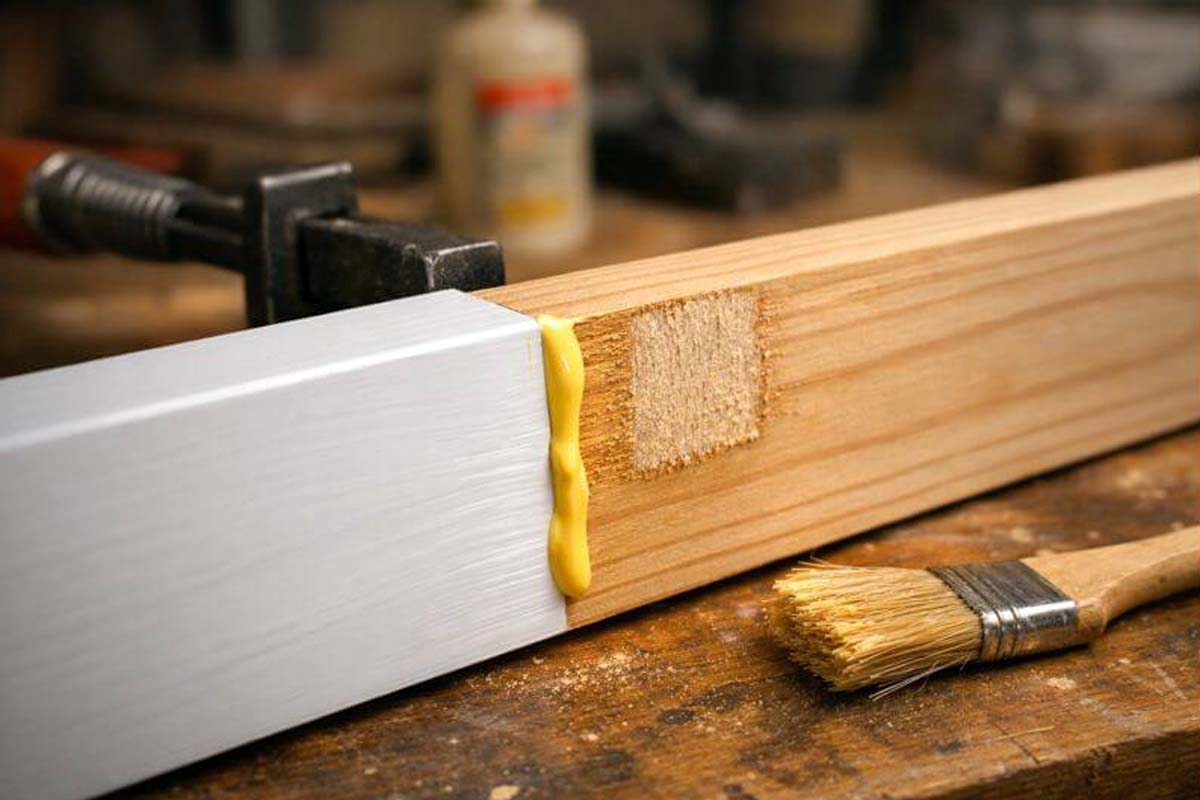
Path A — Strip to bare wood and use wood glue (best strength)
- Mark the joint area so you only remove paint where needed.
- Sand to bare wood on both mating faces until you see clean grain.
- Dry fit so the joint closes without forcing.
- Apply a thin, even coat of wood glue to one side.
- Clamp firmly and evenly so the joint seats fully.
Clamping time matters, and so does cure time. If you want a solid baseline, follow a guide on how long to clamp a glue-up before it stops creeping, then give the joint enough time to reach real strength. For projects that will be stressed, I follow a full cure timeline before heavy use.
Path B — Keep the paint and choose a surface-friendly adhesive
- Clean the painted surface to remove oils and residue.
- Scuff sand until the sheen is gone and the surface feels “grabby.”
- Remove dust completely and let the surface dry.
- Use epoxy, polyurethane glue, or construction adhesive based on your job.
- Clamp or brace so nothing shifts during cure.
On painted surfaces, a longer cure is your friend. Don’t rush it, even if it feels set.
Reinforcement options when paint stays put
If the paint can’t be removed and the joint still needs strength, add reinforcement so the glue isn’t doing everything.
- Screws from the back into solid wood, plugged if needed.
- Brads or pins for trim blocks and light frames.
- Dowels or splines when you can drill into real wood under the paint.
- Corner blocks inside boxes, trays, and small cabinets.
This is also where it helps to understand how strong common wood glue really is in ideal conditions, because painted conditions are never ideal.
Troubleshooting: why it failed and how to fix it
Most failures fall into a few patterns, and they’re easy to diagnose.
The glue peeled off cleanly from the paint
That usually means the paint was too glossy, dirty, or not scuffed enough. Fix it by cleaning better, sanding until the shine is gone, or switching to epoxy.
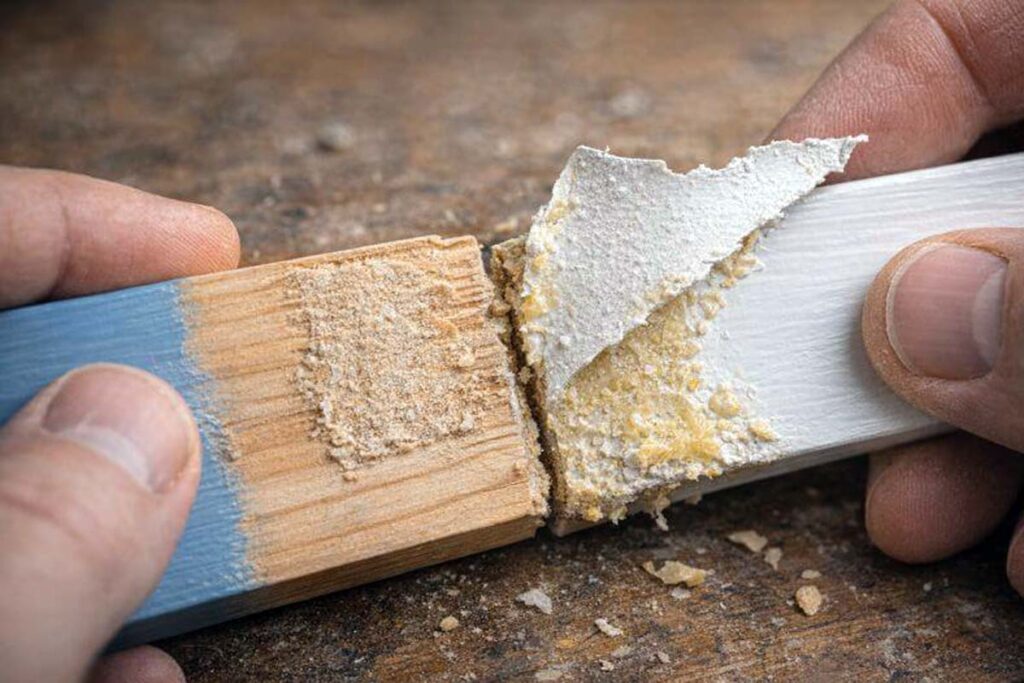
The paint peeled off the wood
That’s the classic one. The glue held to the paint, and the paint failed. The only real fix is to strip to bare wood in the joint area and glue wood-to-wood.
The joint slipped during clamping
Too much glue, not enough clamp control, or parts not supported. Dry fit first, use cauls if needed, and follow guidance on when to remove clamps without disturbing the joint.
The joint feels weak after “drying overnight”
“Dry” isn’t always “strong.” Many glues need longer to reach full strength, especially in cool or humid shops. If you’re building something that will carry load, it’s worth learning how much weight a glued joint can realistically hold.
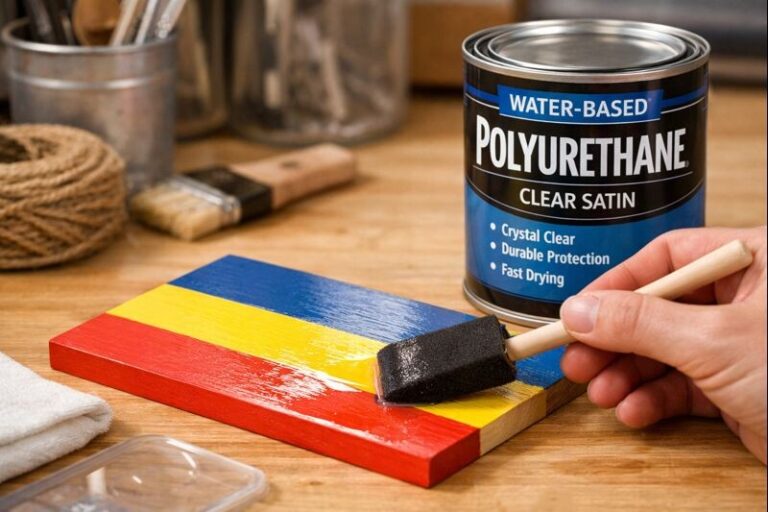
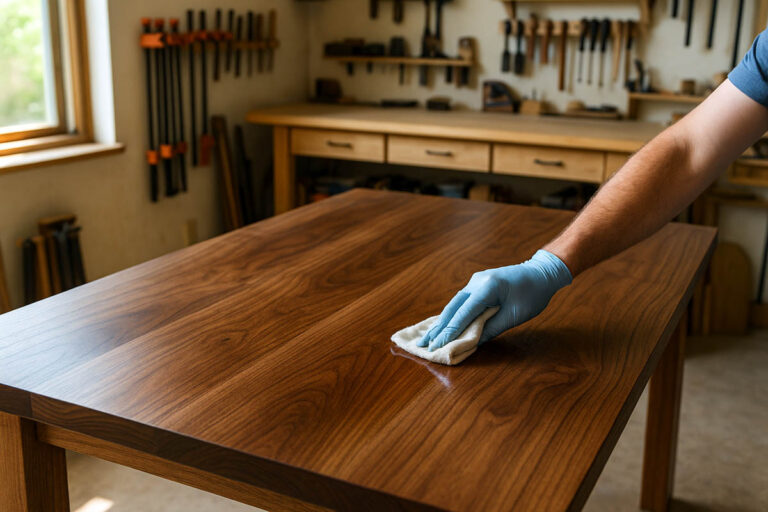
Finishing after glue-up: cleanup and painting
Glue squeeze-out can ruin paint and leave shiny spots that show through topcoats. Clean it while it’s rubbery, or scrape it carefully after it hardens.
If you’re already dealing with painted parts, the finish work matters. For a cleaner final look, use tips for getting a smooth painted finish without brush marks.
If you plan to sand after gluing, timing helps you avoid gummy paper and torn fibers. Here’s a practical reference for when it’s safe to sand after gluing.
If you accidentally left hardened glue where paint needs to stick, don’t hack at it with a chisel. Use a safer method to remove dried glue without gouging the grain.
Conclusion
Wood glue can stick to paint, but you’re betting the joint on the paint’s grip. For strong, long-lasting work, strip paint at the joint and glue bare wood-to-wood. If paint must stay, scuff it, clean it, and choose epoxy or polyurethane glue, then brace it until fully cured.