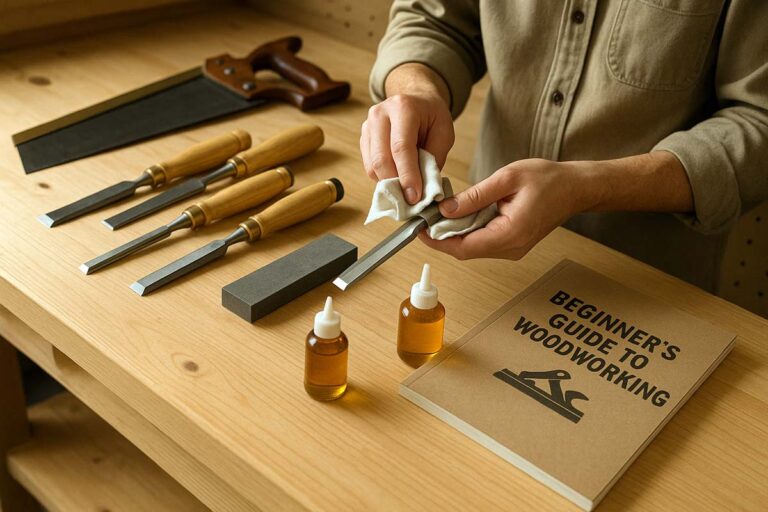
Basic Woodworking Tools: 22 Must Have Essentials for Beginners
Basic woodworking tools are the first step for every woodworker. Beginner woodworking tools build safe habits and help you measure, cut, drill, and sand with control.
Even experienced makers lean on the same essential tools for woodworking because accuracy starts with layout and solid workholding.
This guide shows what to buy first, what to skip, and how to keep each tool working in a home woodworking shop. I focus on home woodworking setups that live in a garage, shed, or spare room, with upgrades that make sense when your projects grow.
Contents Here
- 1 What “essential tools for woodworking” means in a real shop
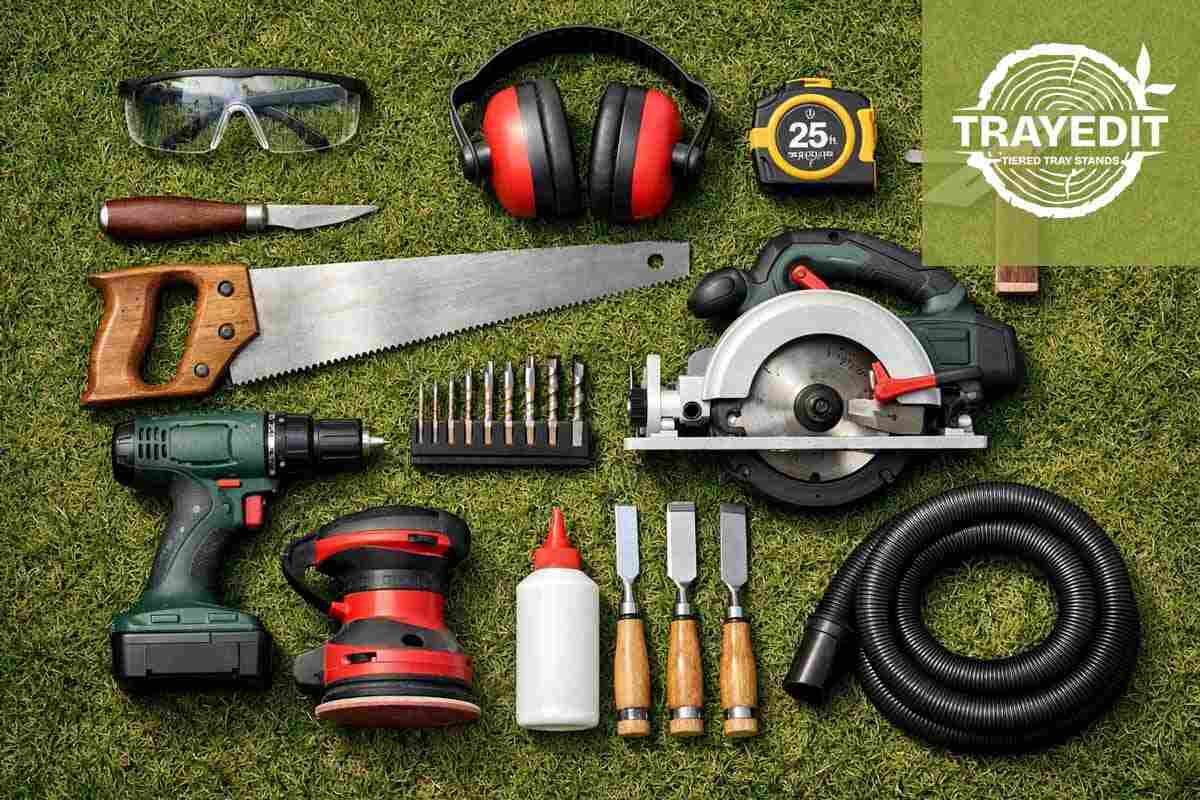
- 2 Basic Woodworking Tools Checklist: Quick-Start Kit
- 3 How to Choose Beginner Woodworking Tools Without Wasting Money
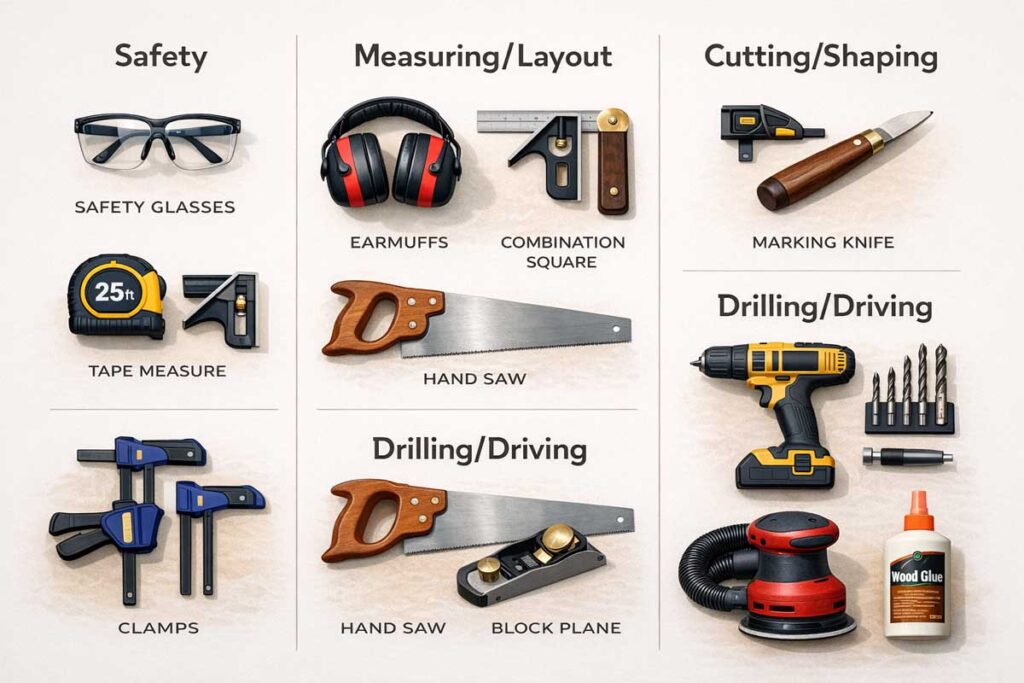
- 4 Safety and Dust Control Tools: Must Have Woodworking Tools That Keep You Safe
- 5 Measuring, Layout, and Marking: Best Measuring Tools for Woodworking
- 6 Cutting and Shaping Tools: Essential Power Tools for Woodworking Shop
- 7 Drilling and Driving Tools for Beginner Woodworkers
- 8 Workholding and Assembly Tools for Beginner Woodworking
- 9 Sanding and Surface Prep Tools for New Woodworkers
- 10 Sharpening and upkeep tools beginner woodworkers
- 11 Common beginner mistakes when buying tools and how to avoid them
- 12 Simple maintenance habits that keep beginner woodworking tools reliable
- 13 FAQs about Basic Woodworking Tools
- 13.1 What are the first basic woodworking tools I should buy?
- 13.2 How much should I spend on beginner woodworking tools?
- 13.3 What safety gear do I need for basic woodworking?
- 13.4 What are the best tools for woodworking?
- 13.5 Should I buy used or new woodworking tools?
- 13.6 Do I need a table saw to start woodworking?
- 13.7 How much for a basic woodworking tool set?
- 13.8 What are the best layout tools for woodworking?
- 13.9 How do I maintain woodworking tools so they last longer?
- 14 Closing thoughts
What “essential tools for woodworking” means in a real shop
Woodworkers call tools “essential” when they do three jobs well:
- They prevent mistakes (square layout, accurate cuts, controlled drilling).
- They prevent injuries (eye, ear, lung protection; stable workholding).
- They prevent rework (sharp edges, flat surfaces, clean sanding, tight joints).
That’s the backbone of beginner woodworking tools and basic carpentry tools. You can build shelves, small tables, tray projects, and simple home repairs with this kit if you use it in the right order.
If you want a safety-first baseline for building small stands and tray projects, see my guide to essential safety gear for tray stand builds.
Basic Woodworking Tools Checklist: Quick-Start Kit
This quick list covers the most versatile basic woodworking tools across categories, with one line on what each does.
- Safety glasses: protect eyes from chips, dust, and snapped bits.
- Hearing protection: reduce hearing damage from saws and sanders.
- Respiratory protection: block fine dust; add vapor cartridges for many finishes.
- Tape measure: set rough dimensions and confirm part sizes.
- Combination square: mark 90 degrees, check squareness, set depth.
- Bevel gauge: copy and repeat angles for trim and joinery.
- Carpenter’s pencil or marking knife: lay down cut lines you can see or register a saw against.
- Marking gauge: scribe consistent lines parallel to an edge.
- Hand saw (panel saw): make controlled cuts without noise or cords.
- Circular saw: break down sheet goods and cut long boards.
- Cordless drill/driver: drill holes and drive screws with control.
- Drill bit set: drill pilots, clearance holes, and countersinks.
- Clamps: hold parts for glue-up, drilling, and sawing.
- Hammer: set nails, tap parts, and persuade assemblies.
- Screwdriver set (or bits + one manual): drive and finish fasteners without stripping.
- Chisel (1–2 sizes) + mallet: pare joinery, clean corners, fit hardware.
- Block plane: trim edges, ease corners, tune fit.
- Sandpaper + sanding block: flatten, smooth, and break edges by hand.
- Random orbit sander: speed up smoothing and finish prep.
- Wood glue: create strong joints with clean clamping.
- Sharpening tools: keep chisels and plane irons cutting clean.
- Shop vacuum with hose: capture dust at the source and clean the bench.
This is a practical list of must have woodworking tools for home woodworking because it supports the full workflow: layout → cut → fit → assemble → finish.
How to Choose Beginner Woodworking Tools Without Wasting Money
The best tools for woodworking are not always the most expensive. They’re the ones that stay accurate and predictable.
- Buy accuracy first: a square that stays square beats a fancy saw used on crooked layout.
- Buy sharpness next: a sharp chisel and plane prevent tear-out and split edges.
- Buy control third: clamps, a good bit set, and a drill with a clutch prevent stripped screws and blow-outs.
- Upgrade when a tool blocks progress: replace what slows you down or forces risky workarounds.
If you want a simple upkeep plan that keeps beginner tools working, my guide on beginner tool maintenance for woodworking pairs well with the tool-by-tool notes below.
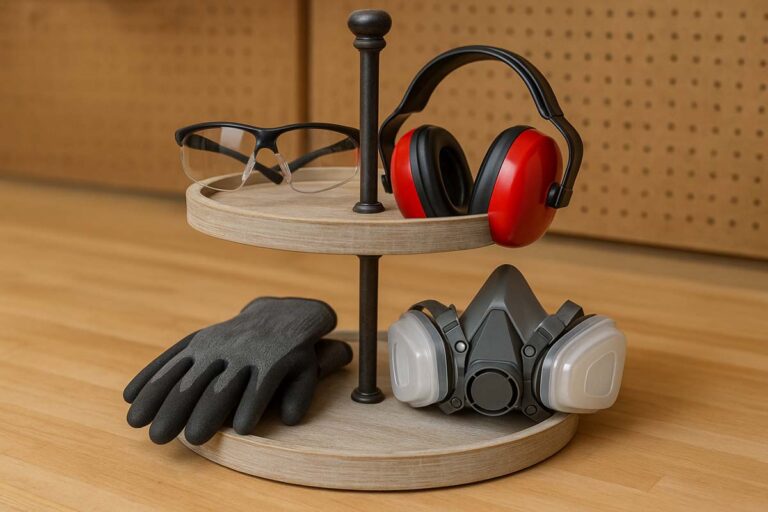
Safety and Dust Control Tools: Must Have Woodworking Tools That Keep You Safe
Safety gear is part of your tool system, not a side purchase. Wood chips move fast. Dust lingers. Noise damage adds up quietly. Put protection where you reach for it without thinking, because “I’ll grab it later” rarely happens once a project gets rolling.
Safety Glasses

Safety glasses are impact-rated eye protection that blocks chips, dust, and snapped-off drill bit fragments. Woodworkers wear them during cutting, drilling, sanding, and cleanup because a small chip can cause a big problem fast.
Look for a comfortable frame, side shields, and anti-fog lenses if you sweat. Clean lenses with mild soap and water, then store them in a case so they do not scratch.
Replace glasses when lenses haze or frames crack. Alternatives include a full face shield for turning or heavy chipping.
Beginner mistake: wearing them on the forehead. Keep them on your eyes.
Hearing Protection (Earmuffs or Plugs)

Hearing protection reduces sound energy that damages hearing during sawing, routing, sanding, and shop vacuum use. Woodworkers use earmuffs for quick on-off convenience and foam plugs for a tight seal in hot weather.
Choose a comfortable fit that stays sealed when you move your jaw. Keep earmuff cushions clean and replace them when they stiffen or crack. Replace foam plugs after use; dirty plugs irritate ears. An alternative is reusable filtered earplugs with a cord.
Beginner mistake: lifting one cup “for a second” during a cut. Put protection on before the tool starts and keep it on until it stops.
Respiratory Protection: P100/Particulate + Optional Organic Vapor Cartridges
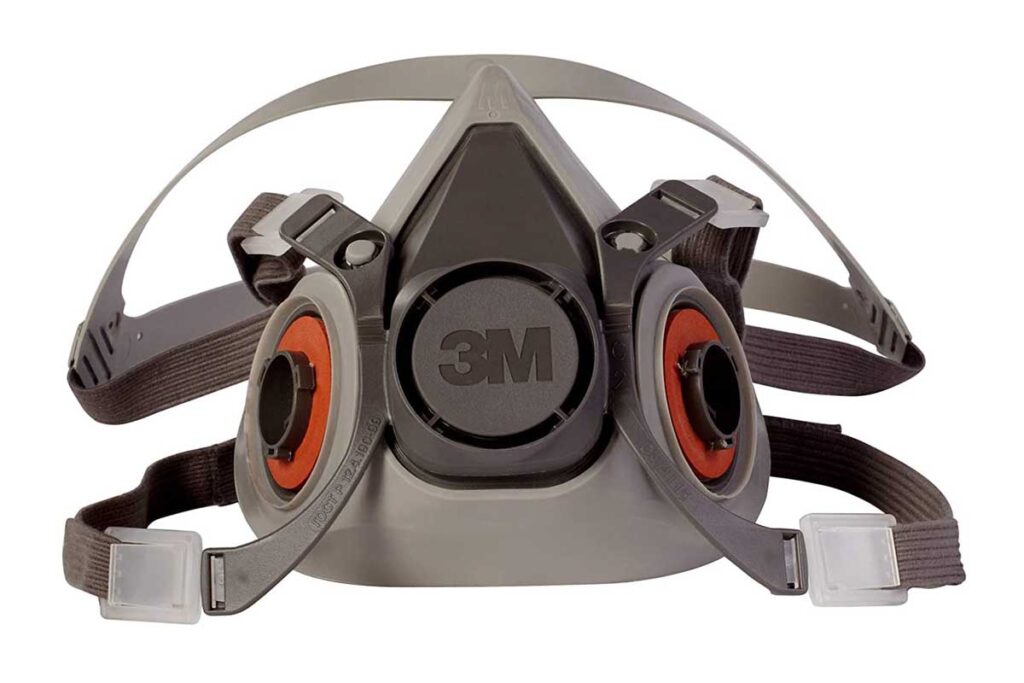
A respirator is a face-sealing mask that filters airborne particles; P100 filters capture fine sanding dust better than loose paper masks. Woodworkers wear it when sanding, sweeping, using a random orbit sander, and cutting dusty sheet goods.
Add organic vapor cartridges for many solvent-based finishes and strong odors, following the cartridge maker’s guidance.
Buy a respirator that fits your face, seals at the nose, and accepts replaceable filters. Store it in a sealed bag to keep filters clean. Replace filters when breathing resistance rises.
Alternative: a powered respirator.
Beginner mistake: skipping a fit check.
Shop Vacuum with Hose
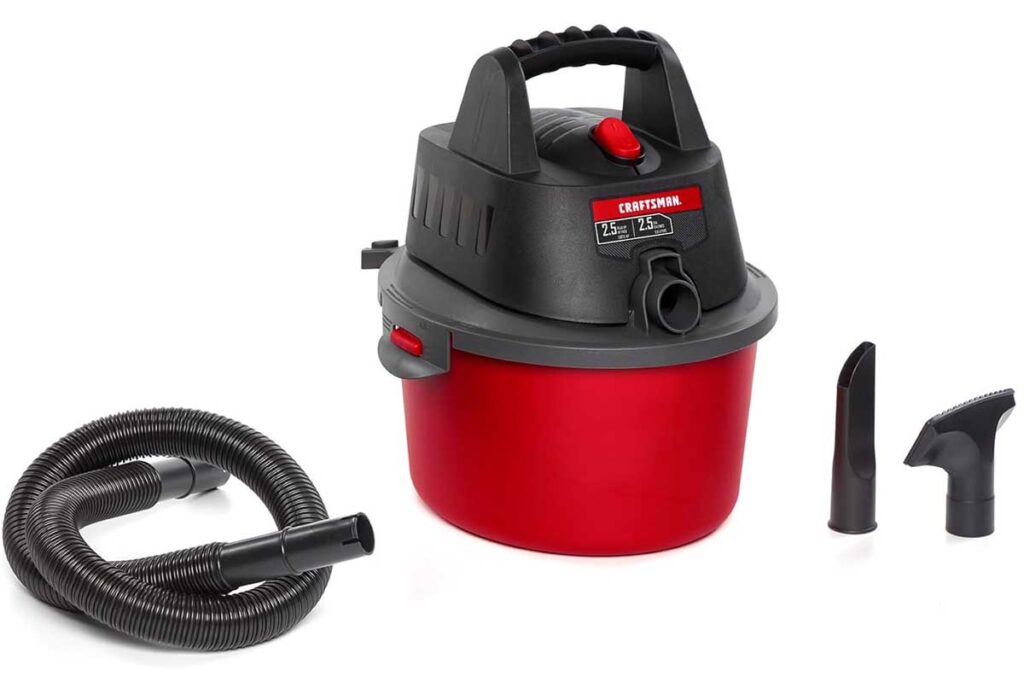
A shop vacuum is a high-suction vacuum that captures debris and dust from tools, floors, and benches. Woodworkers use it to reduce cleanup time and keep sanding dust from spreading through the house.
Look for a stable base, a locking hose, and a filter suited for fine dust. Empty it before it packs solid, and keep filters clean so suction stays strong. Replace a torn hose or cracked fittings because leaks cut performance.
An alternative is a dust extractor or a broom and dustpan, but those leave more fine dust behind.
Beginner mistake: vacuuming hot metal sparks or wet finish waste. Keep it for wood dust.
Measuring, Layout, and Marking: Best Measuring Tools for Woodworking
Accurate layout turns “close enough” into repeatable fit. Most beginner frustration comes from marking sloppy lines, cutting on the wrong side, or losing reference edges. Build a layout system where one tool sets the standard and the others support it.
Tape Measure
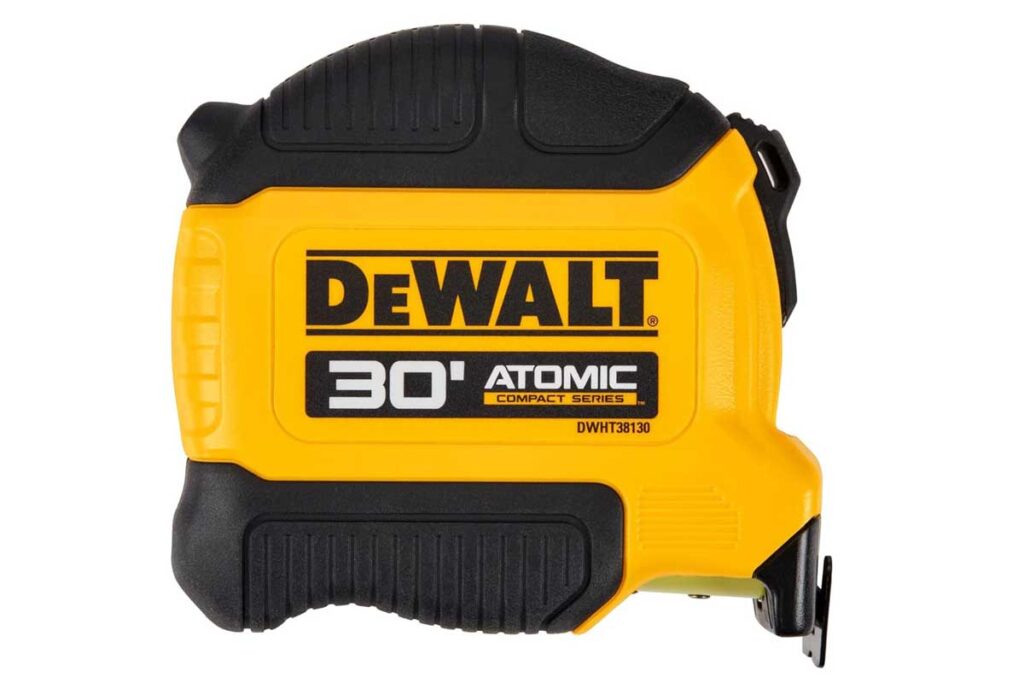
A tape measure is a retractable steel rule that reads inches or millimeters for sizing parts and setting rough cut lengths. Woodworkers rely on it for breakdown work, but they confirm critical fit with a square and direct marking.
Look for a readable blade, a solid lock, and a hook that moves smoothly without wobble. Keep it clean and retract it slowly so the return spring lasts. Replace it when the hook bends, the blade kinks, or markings wear off.
Alternatives include a folding rule or a story stick.
Beginner mistake: measuring from a damaged hook. Burn an inch or use an inside scale when accuracy matters.
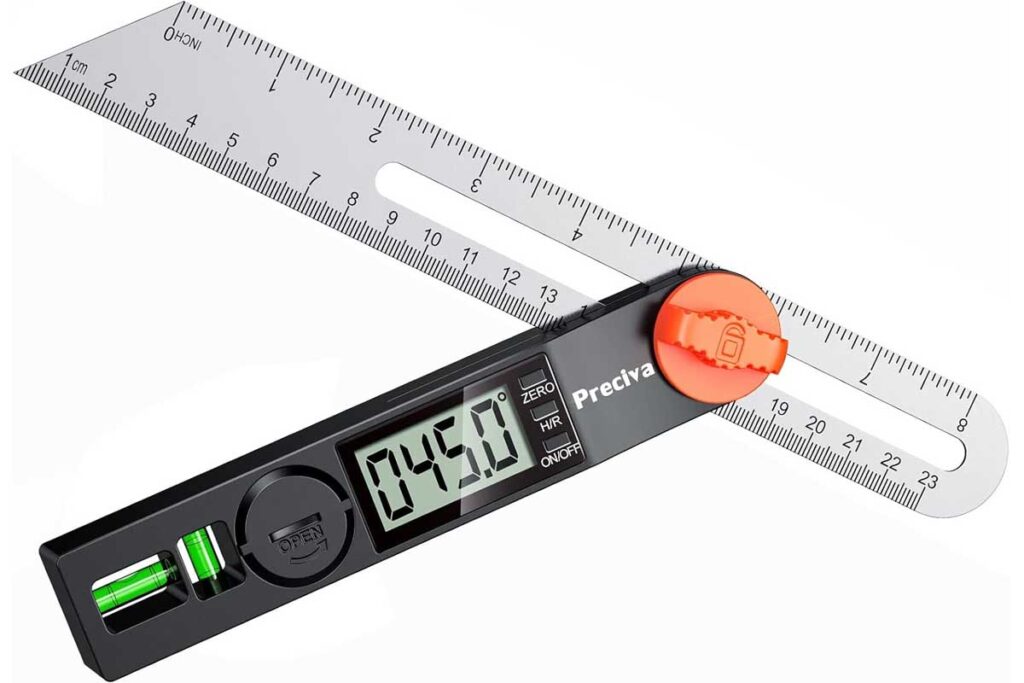
Combination Square
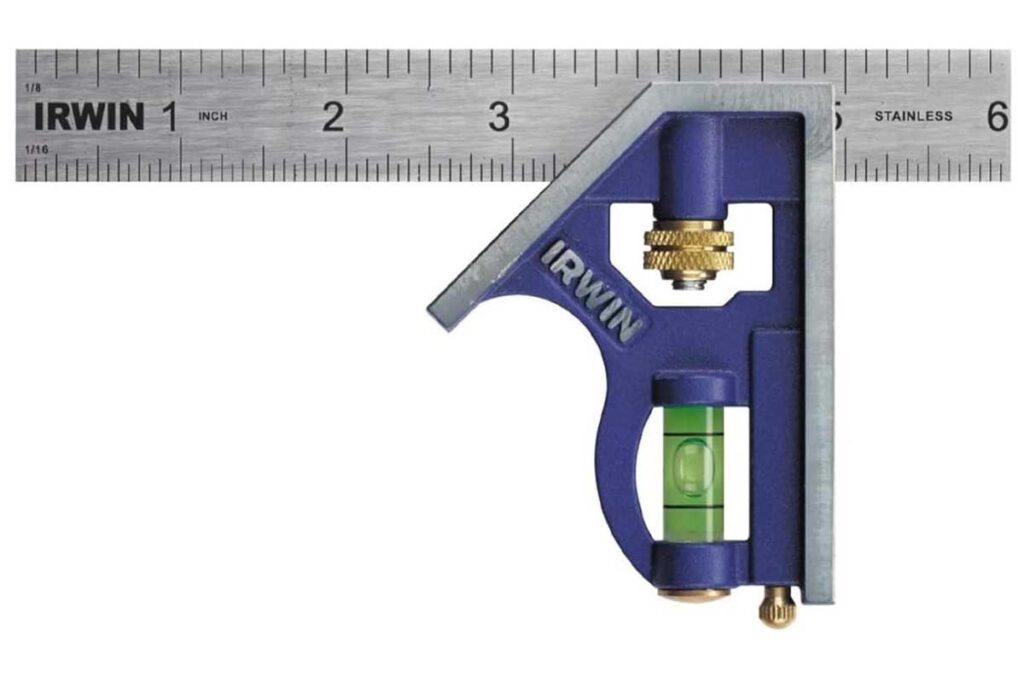
A combination square is a steel rule with an adjustable head that registers 90 degrees and 45 degrees and sets depths. Woodworkers use it to mark straight cut lines, check assembly squareness, and set blade heights on small cuts.
Look for a head that locks tight, a rule with clear markings, and a reference face that sits flat. Keep it free of pitch and grit so it seats fully.
Replace it if it fails a simple squareness check. Alternatives include a fixed try square and a separate depth gauge.
Beginner mistake: letting sawdust ride under the head. Wipe the work and the square before marking.
Bevel Gauge
A bevel gauge is an adjustable angle tool that captures an angle and transfers it to another part. Woodworkers use it for scribing trim, laying out tapered legs, and repeating a miter that matches a wall or existing piece.
Look for a blade that locks without slipping and a handle that fits your grip. Keep the pivot clean so it clamps evenly. Replace it if the lock slips under light hand pressure. An alternative is a protractor head on a combination square, but a bevel gauge copies odd angles faster.
Beginner mistake: tightening the lock on sawdust. Clean the blade and handle faces before clamping.
Carpenter’s Pencil or Marking Knife
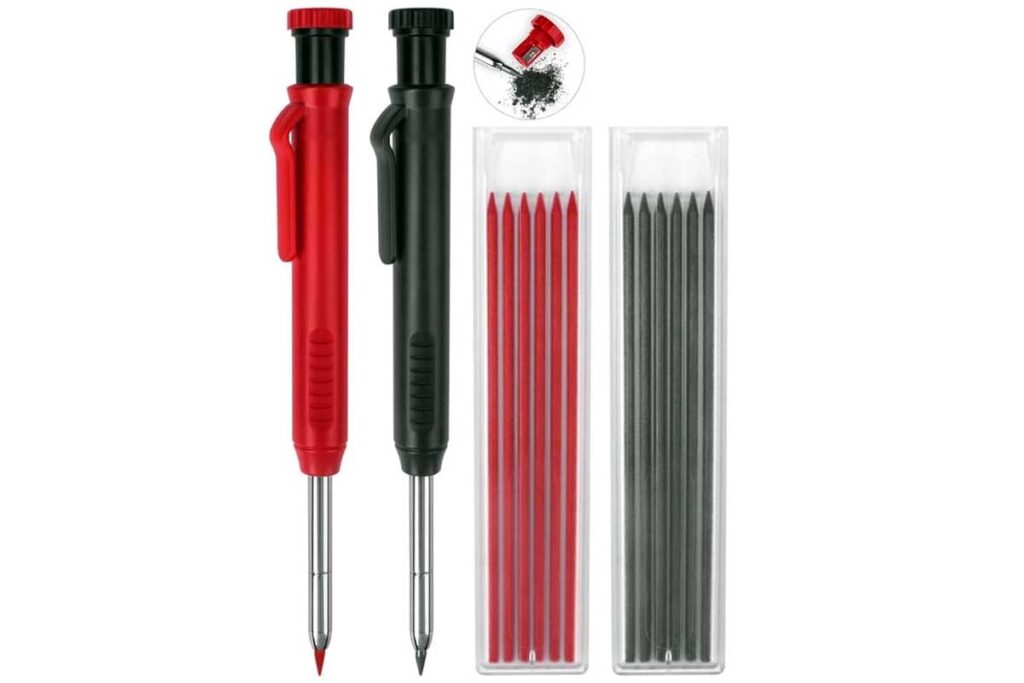
A carpenter’s pencil lays down thick graphite lines that stay visible on rough lumber; a marking knife cuts a fine line that guides a saw or chisel. Woodworkers use pencils for rough layout and knives for joinery and clean shoulders.
Buy pencils that sharpen easily or use a mechanical carpenter pencil for consistent points. Choose a marking knife with a flat back and a handle that gives control. Keep pencil points sharp and knife edges honed. Replace a knife if the blade chips or the handle loosens. Alternative: a fine-tip marker, though it can bleed into end grain.
Beginner mistake: cutting to the wrong side of a fat pencil line. Use a knife when fit matters.
Marking Gauge
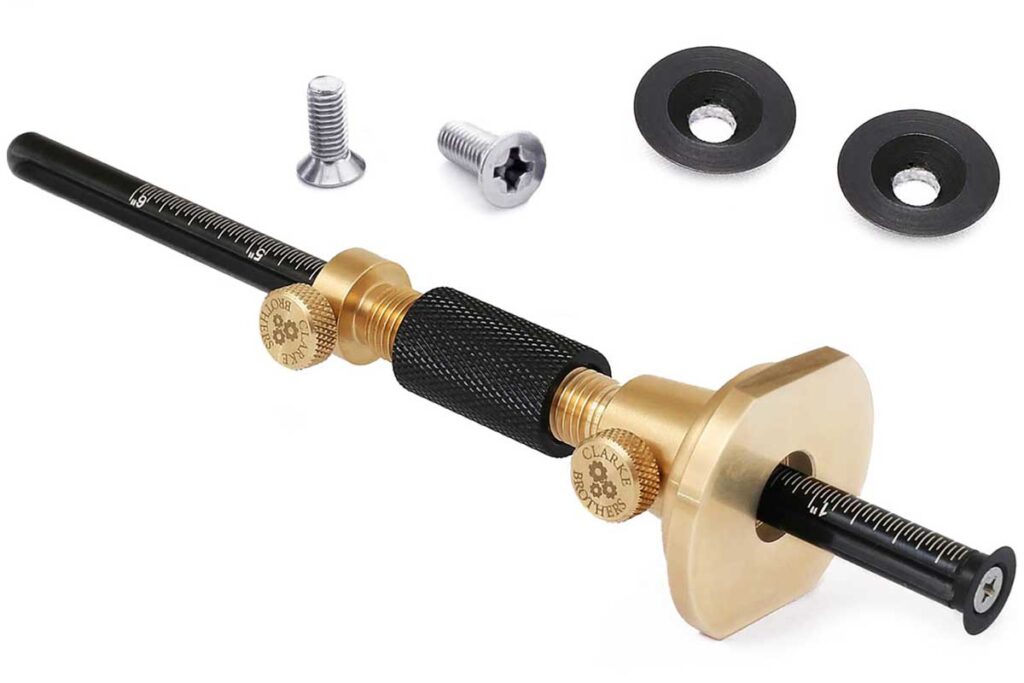
A marking gauge is a tool with a fence and a cutter or pin that scribes a line parallel to an edge. Woodworkers use it to lay out tenon shoulders, rabbets, and consistent reveals because the fence references the same face every time.
Look for a fence that locks solid and a cutter that scribes clean without tearing. Keep the cutter sharp and the fence face smooth. Replace it if the fence racks or the lock slips. Alternatives include a combo square used carefully, but a gauge reduces cumulative error.
Beginner mistake: referencing from different faces. Pick one reference face and stick to it for the whole project.
If you work with sheet goods, this pairs well with my detailed plywood thickness guide because layout changes when thickness changes.
Cutting and Shaping Tools: Essential Power Tools for Woodworking Shop
Power tools add speed and repeatability when you batch parts. The goal is not “more horsepower.” The goal is safe control and clean cuts that reduce sanding and fixing. These are the essential woodworking power tools I see earn their space in a small shop.
Hand Saw (Panel Saw)
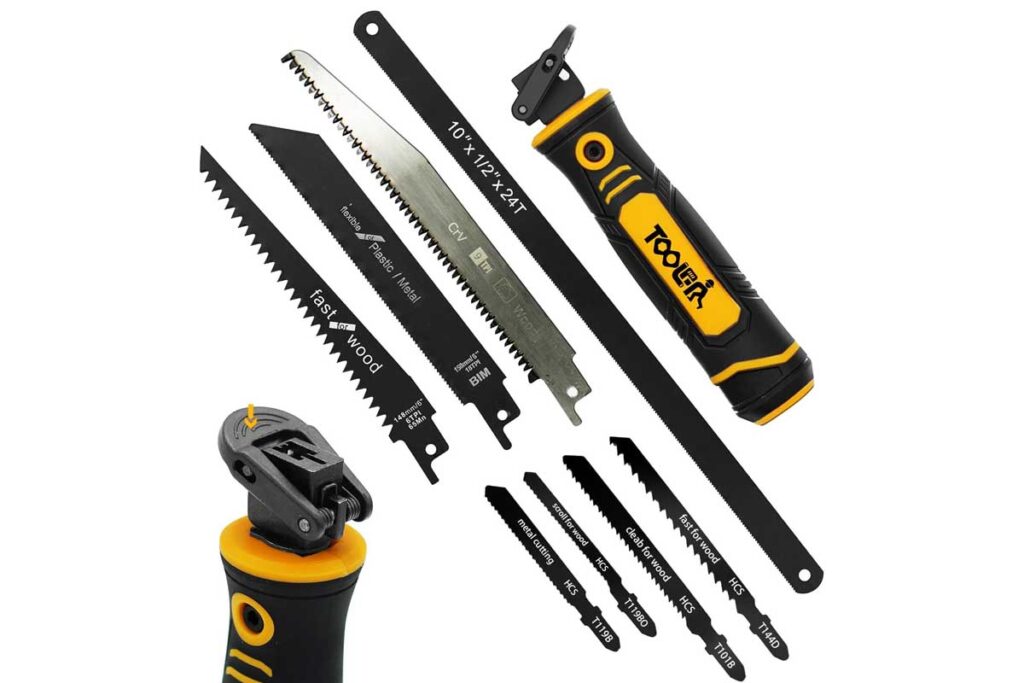
A panel saw is a full-size hand saw that cuts boards with tooth patterns suited for rip or crosscut work. Woodworkers use it for quick cuts, quiet work, and jobs where a power saw feels unsafe or inconvenient.
Look for a comfortable handle, a straight plate, and teeth that match your common cuts. Keep it dry and lightly oiled to prevent rust.
Replace it when the plate kinks or teeth are too worn to sharpen cost-effectively. Alternative: a Japanese pull saw for thinner kerfs and control.
Beginner mistake: forcing the stroke and bending the blade. Start with light strokes and let the teeth cut.
Circular Saw
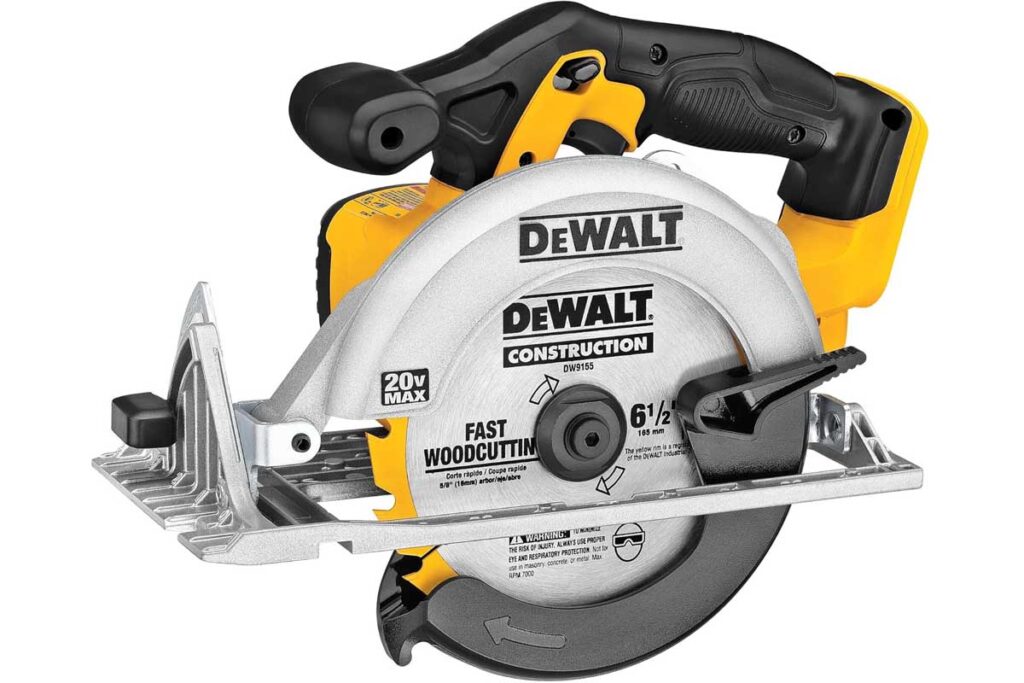
A circular saw is a handheld power saw that cuts boards and sheet goods with a spinning blade and an adjustable base plate. Woodworkers use it for breaking down plywood, cutting long parts, and rough sizing before fine trimming.
Look for a flat base, a stable depth adjustment, and a blade suited to the material. Keep blades clean and sharp; pitch buildup heats the cut and increases tear-out. Replace a blade when it burns wood, chips edges, or requires extra force.
Alternatives include a table saw or a track saw.
Beginner mistake: cutting without supporting the offcut. Support both sides so the kerf does not pinch and kick.
Chisel (1–2 Sizes) + Mallet
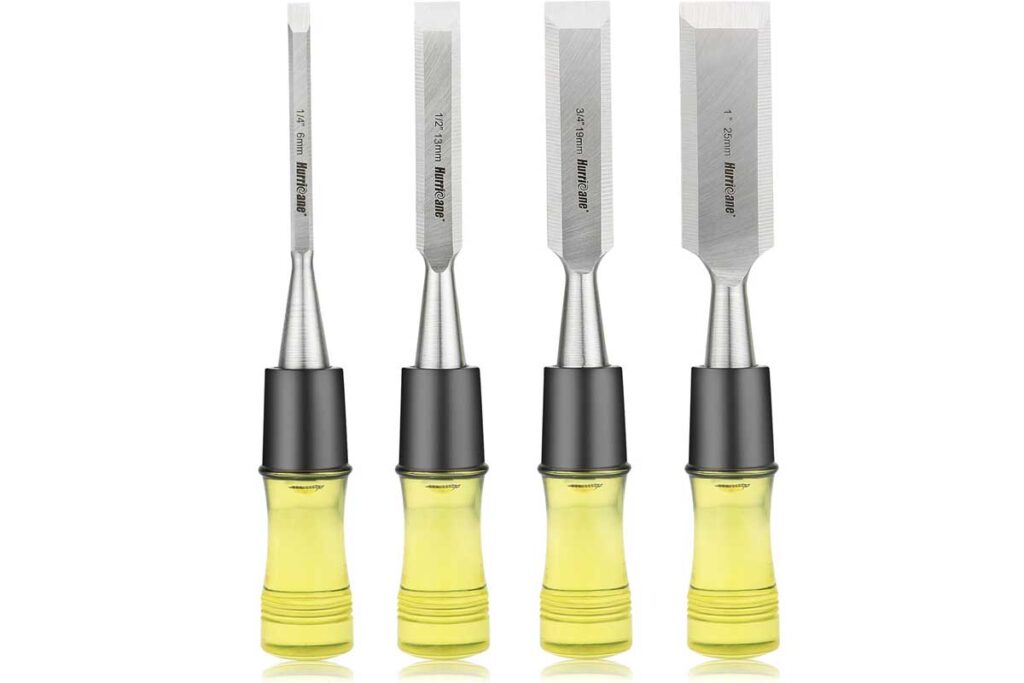
A chisel is a hardened steel edge tool that pares wood fibers and cleans joinery corners. Woodworkers use a 1/2-inch chisel for general work and a 1/4-inch for tighter areas, paired with a mallet for controlled strikes.
Look for a flat back, a comfortable handle, and steel that holds an edge. Keep chisels sharp and store them with edge guards. Replace a chisel if the handle splits repeatedly or the blade is badly chipped.
Alternative: a sharp utility knife for light paring, though it lacks leverage.
Beginner mistake: prying like a screwdriver. Use chisels for cutting and paring, not levering.
Block Plane
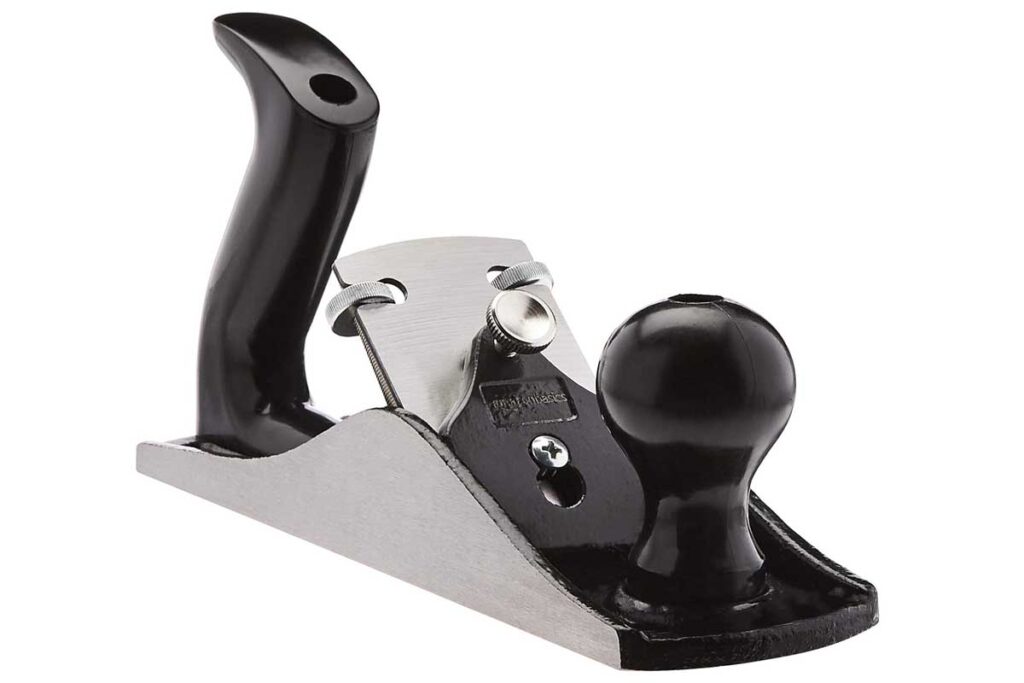
A block plane is a small hand plane that shaves thin curls to true edges, chamfer corners, and tune fit. Woodworkers use it to remove mill marks, ease sharp edges, and sneak up on a tight joint without sanding away crisp lines.
Look for a flat sole, an iron that adjusts smoothly, and a mouth opening that fits the work. Keep the blade sharp and the sole clean so it slides without scratching. Replace it if the casting cracks or the adjustment mechanism strips.
Alternative: a sanding block, though it rounds edges faster than you intend.
Beginner mistake: planing against the grain and tearing fibers. Read grain direction and take light cuts.
Drilling and Driving Tools for Beginner Woodworkers
Fasteners and holes look simple until they split wood or misalign parts. A good drilling setup prevents most beginner failures. If screws give you trouble, my guides on way to screw into wood and way to stop wood splitting when screwing pair well with the tool choices below.
Cordless Drill/Driver
A cordless drill/driver is a battery-powered tool that drills holes and drives screws with a clutch that controls torque. Woodworkers use it for furniture assembly, hardware installation, and pilot holes that prevent splitting.
Look for a comfortable grip, a clutch with clear settings, and batteries that match your project pace. Keep the chuck clean and avoid storing batteries in extreme heat. Replace it if the chuck slips consistently or the gearbox grinds.
Alternatives include a corded drill for steady power or a manual brace for quiet work.
Beginner mistake: driving screws without a pilot. For cleaner joints, follow my guide on way to stop wood splitting when screwing.
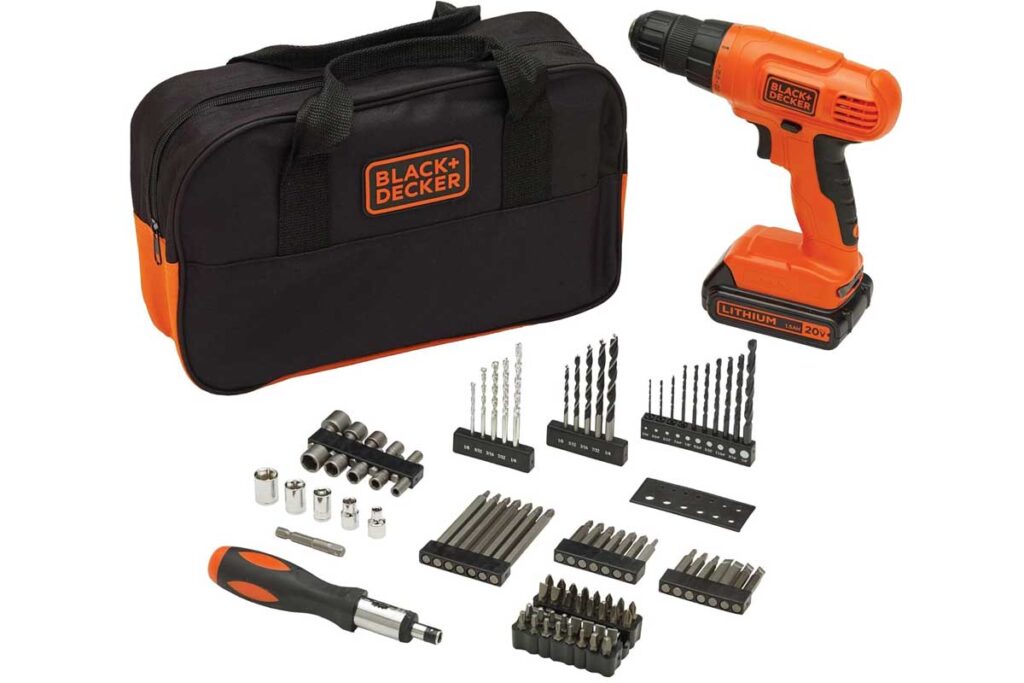
Looking for a long-time worker with high performance motor? Check out this DEWALT 20V Max Cordless Drill Driver Set.
Drill Bit Set
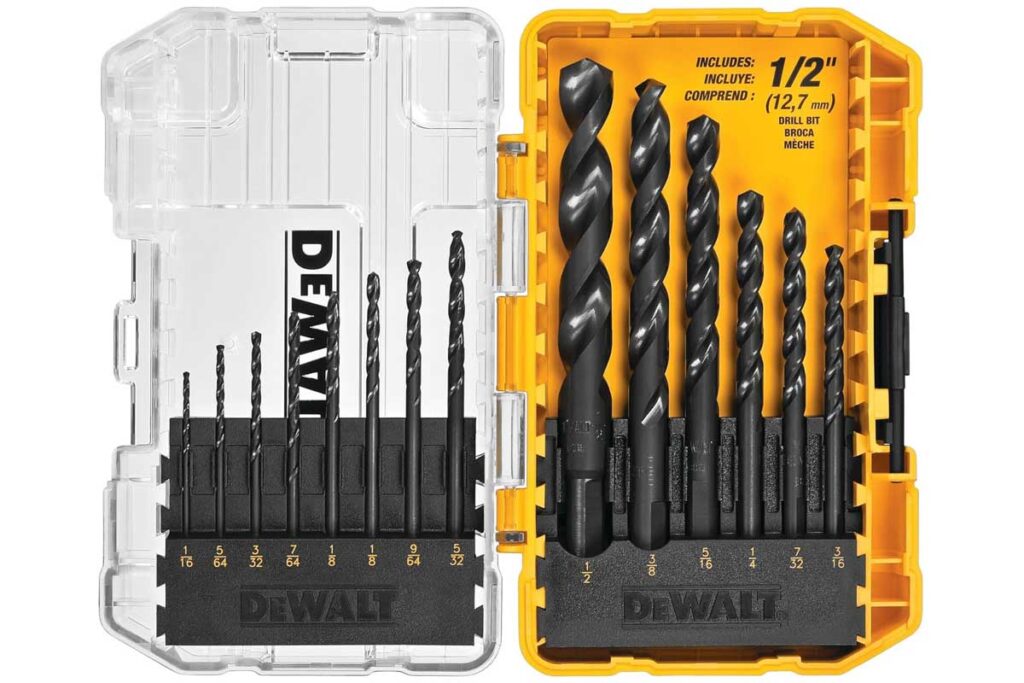
A drill bit set includes twist bits for wood, plus common add-ons like brad-point bits, countersinks, and driver bits. Woodworkers use sharp bits to drill straight holes without wandering and to create pilots that match screw shanks.
Look for bits made for wood, with clean cutting spurs if you use brad-points. Keep bits organized and wipe off pitch so they cut cool. Replace bits that burn, wobble, or chip at the tip.
Alternatives include a dedicated brad-point set for clean entry holes.
Beginner mistake: using dull bits and pushing harder. Pressure heats the bit and enlarges holes. Let sharp edges do the work.
Screwdriver Set (or Bit Set + One Manual Screwdriver)
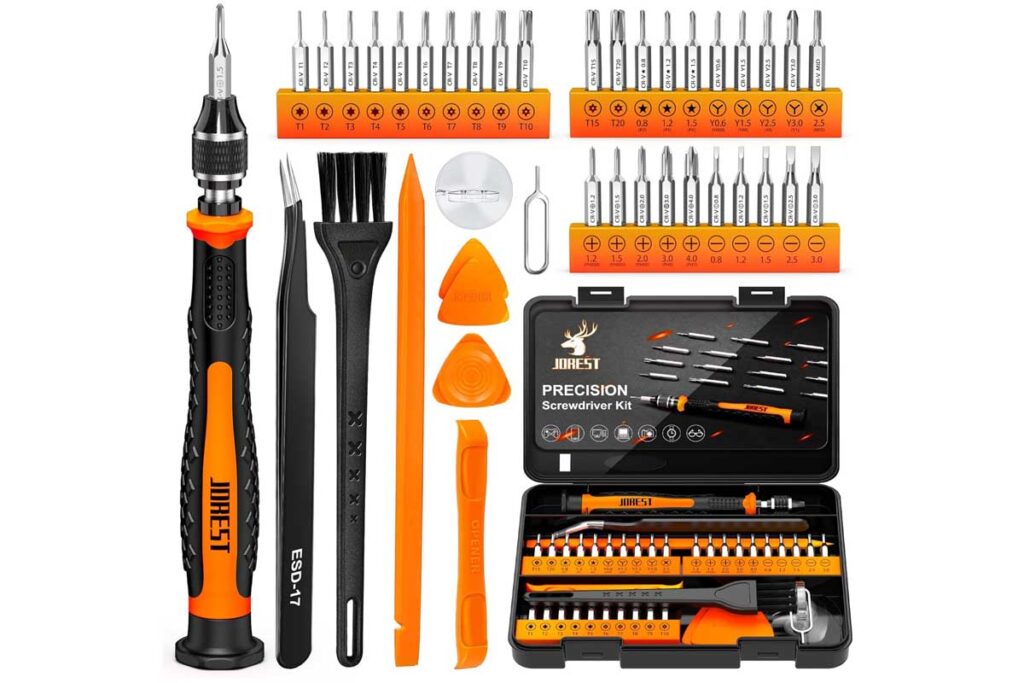
A screwdriver is a hand tool that turns screws with direct feel; a bit set extends your drill/driver with common drive types. Woodworkers use manual drivers for final snugging and delicate hardware where a drill can strip heads.
Look for hardened tips that fit screws tightly and handles that allow control. Keep tips clean and replace worn bits because cam-out damages screws and work surfaces.
Alternatives include a ratcheting screwdriver for speed.
Beginner mistake: using the wrong size tip. Match the tip to the screw so it fills the recess. If you do strip a fastener, my guide on way to remove a stripped screw from wood helps.
Workholding and Assembly Tools for Beginner Woodworking
If a board moves, your layout and cuts stop matching. Workholding is where “cheap tools” cause expensive mistakes because a slip ruins a workpiece fast. Start with stable support, then add clamps that match your projects.
Clamps
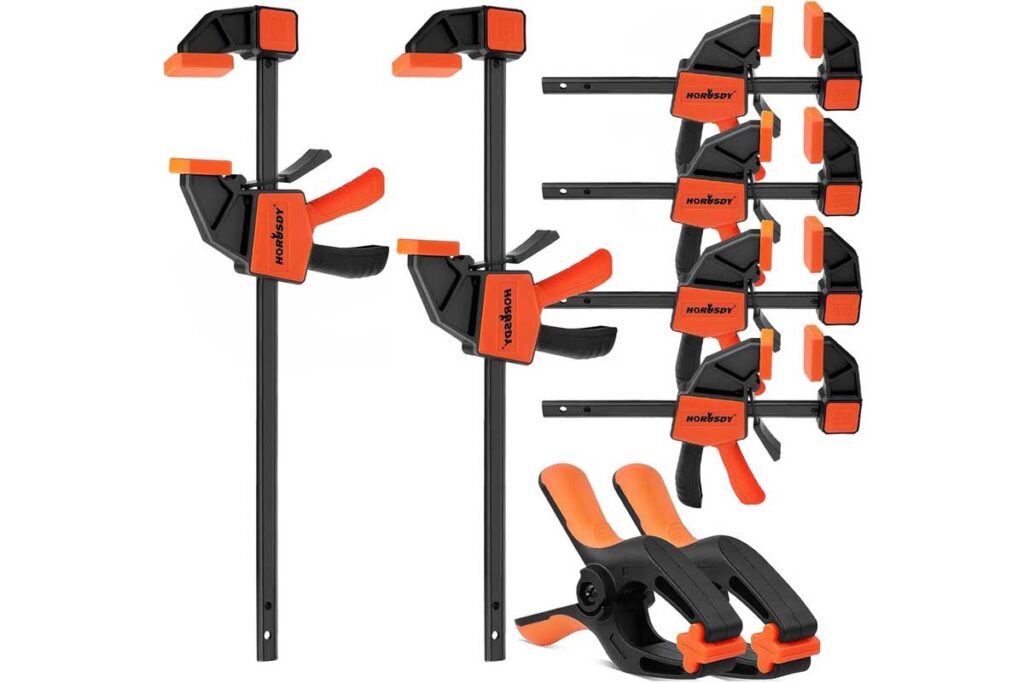
Clamps apply pressure to hold parts in position during glue-up, drilling, and cutting. Woodworkers use them to keep joints aligned and to free both hands for accurate work. Start with a small mix: a couple of bar clamps, a few F-style clamps, and some spring clamps.
Look for straight bars, smooth threads, and pads that protect wood. Keep screws clean and wax threads lightly for smooth action. Replace clamps that twist under load or crack at the jaws.
Alternative: temporary screws used as clamps, though they leave holes.
Beginner mistake: over-tightening and bowing parts. Tighten until the joint closes, then stop.
Wood Glue

Wood glue is an adhesive that bonds wood fibers and creates strong joints when parts fit well and clamps hold alignment. Woodworkers use it for edge joints, face frames, small repairs, and many tray-style projects.
Look for fresh glue from a trusted brand, a cap that seals, and an open time that matches your pace. Store it above freezing and keep the nozzle clean. Replace glue that smells off, separates badly, or forms lumps.
Alternatives include epoxy for gap filling or hide glue for reversibility.
Beginner mistake: flooding the joint. Spread a thin, even film and clamp firmly. If you want timing details, my guide on understanding how long wood glue takes to set clears up the wait.
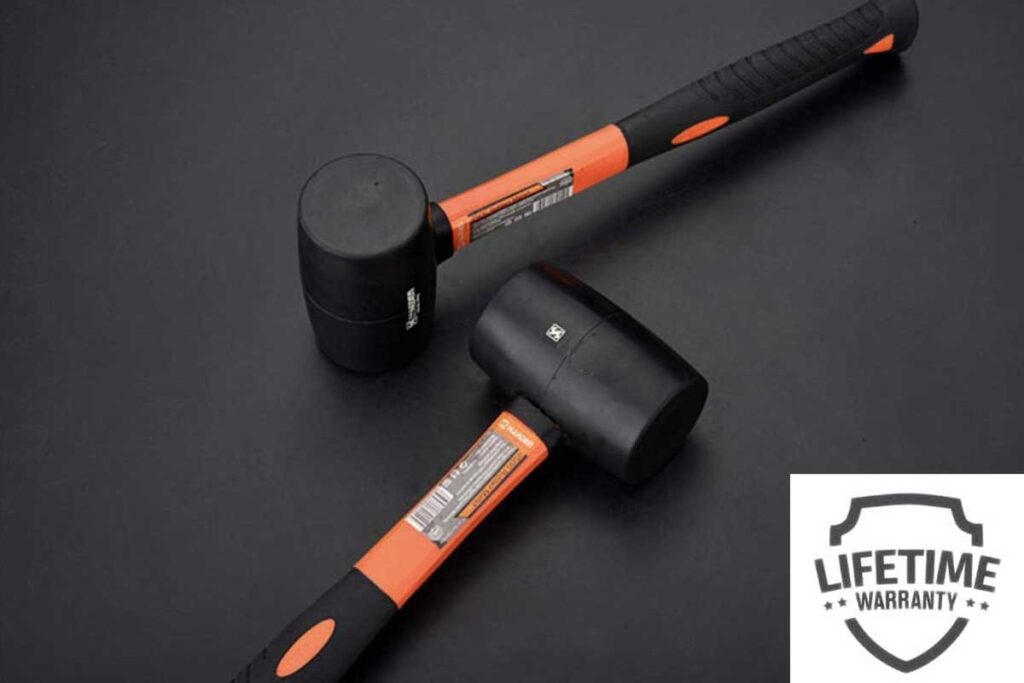
Hammer
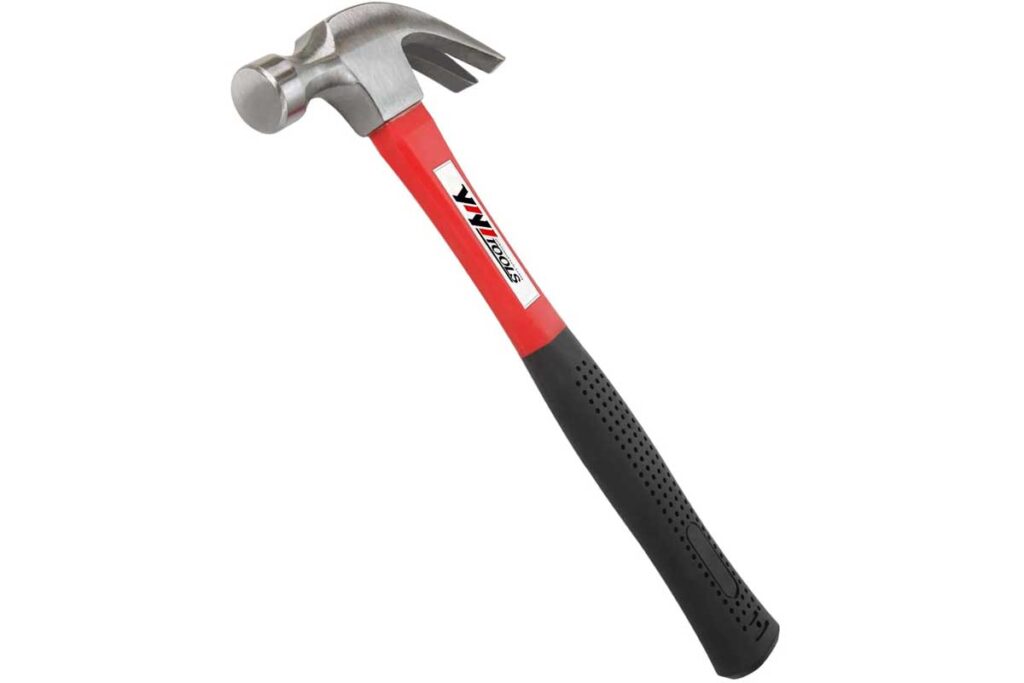
A hammer drives nails, sets brads, and taps assemblies into position. Woodworkers also use a hammer with a scrap block to persuade parts without bruising wood.
Choose a hammer that feels balanced, with a comfortable handle and a face that stays smooth. Keep the face clean; a nicked face leaves dents. Replace a loose handle or a chipped striking face. Alternative: a dead-blow mallet for assembly work, which reduces bounce.
Beginner mistake: striking directly on finished wood. Use a block or switch to a mallet when appearance matters.
Sanding and Surface Prep Tools for New Woodworkers
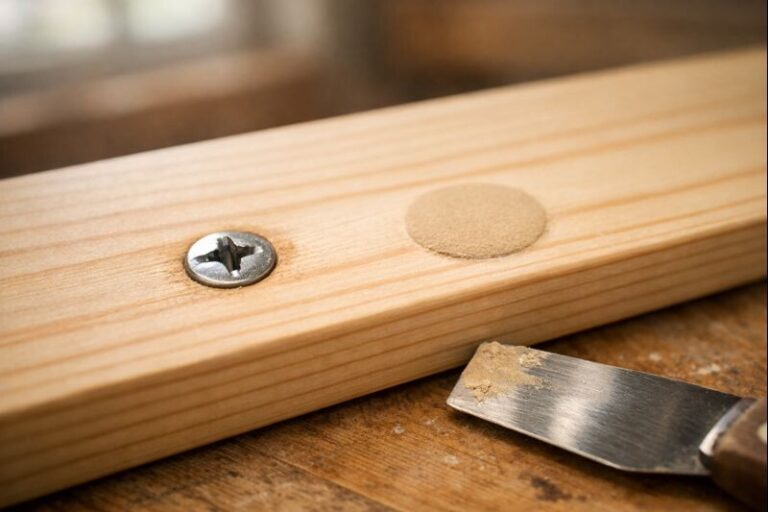
Sandpaper + Sanding Block
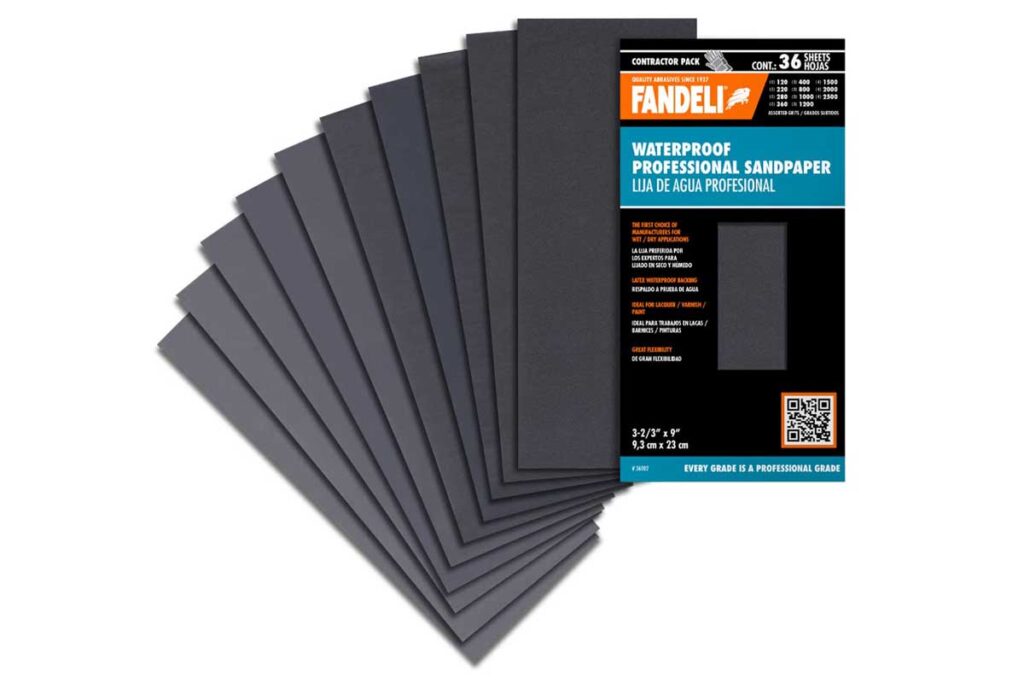
Sandpaper is abrasive paper that smooths surfaces; a sanding block holds it flat so you level high spots instead of rounding edges. Woodworkers use it for edge breaking, spot leveling, and finish prep in tight areas.
Look for quality paper that resists clogging and covers grits from coarse to fine. Keep sheets dry and fold them to expose fresh abrasive. Replace paper when it loads up or loses bite; dull paper heats wood and polishes dust into pores.
Alternatives include abrasive pads for profiles.
Beginner mistake: skipping grits and chasing scratches. Move through grits in steps and sand with the grain where possible.
If end grain gives you trouble, my guide on way to sand end grain smooth helps you avoid fuzzy edges and dull-looking finish.
Random Orbit Sander
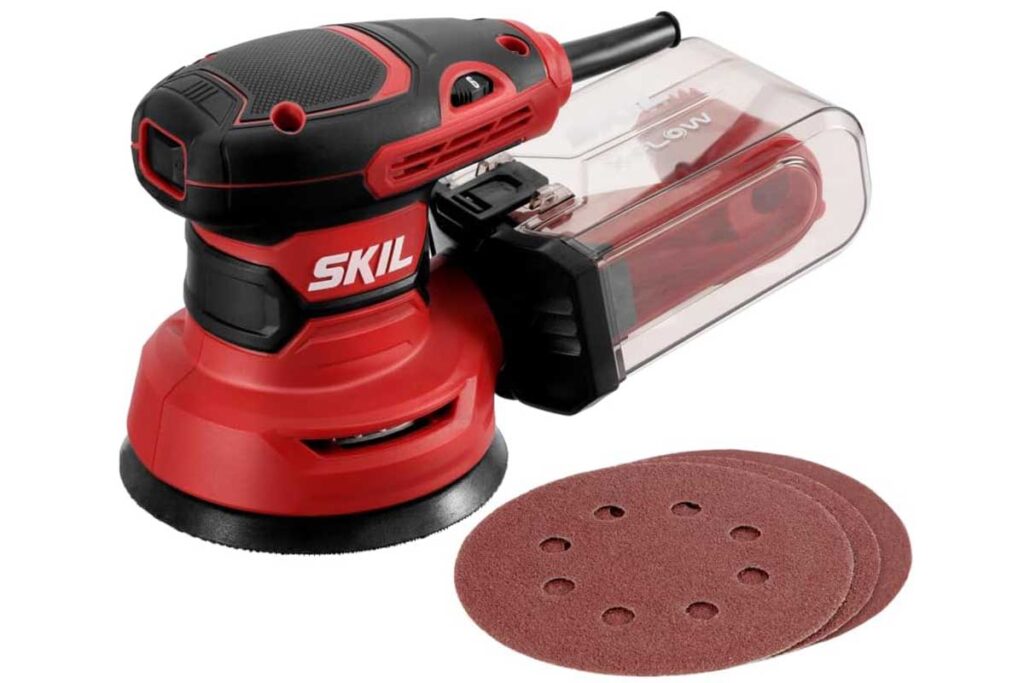
A random orbit sander is a power sander that spins and oscillates a sanding pad to reduce swirl patterns compared to straight-line sanding. Woodworkers use it for fast surface prep on flat parts and panels.
Look for good dust collection, comfortable vibration control, and common pad size so paper is easy to find. Keep the pad clean and replace it when the hook-and-loop loses grip. Replace worn bearings if the tool wobbles or screams.
Alternatives include a finish sander for light work or hand sanding for small parts.
Beginner mistake: pushing down hard. Let the sander float so the grit cuts evenly.
Sharpening and upkeep tools beginner woodworkers
Sharpening Tools (for Chisel/Plane)
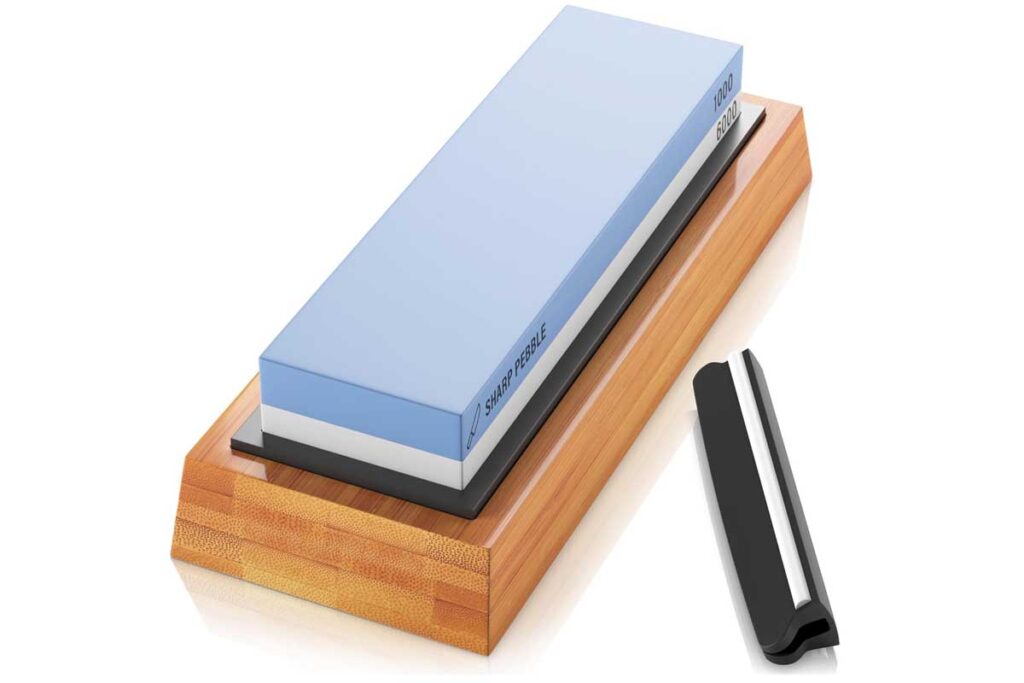
Sharpening tools include stones, plates, guides, or sandpaper systems that restore a clean edge on chisels and plane irons. Woodworkers sharpen because sharp tools cut fibers instead of crushing them, which improves accuracy and surface quality.
Look for a simple system you will actually use, plus a way to keep angles consistent. Keep stones flat and clean; rinse swarf off and store them dry. Replace stones that dish badly or crack.
Alternatives include a powered sharpener, but it can overheat edges if used carelessly.
Beginner mistake: waiting until tools are blunt. Touch up edges early so sharpening stays quick.
Common beginner mistakes when buying tools and how to avoid them
Most beginner mistakes come from rushing the first purchase. Fix the system and the mistakes drop.
- Buying too many tools before building a work surface: fix it by building a sturdy bench or sawhorse setup early.
- Skipping clamps and “hand-holding” assemblies: fix it by buying clamps in stages, then storing them visibly.
- Using dull blades and bits: fix it by budgeting for consumables and learning basic sharpening and cleaning.
- Measuring from different reference faces: fix it by marking a reference face and edge on each part.
- Sanding without dust pickup: fix it by hooking the sander to a vacuum and cleaning between grits.
- Finishing over glue contamination: fix it by masking glue zones and scraping squeeze-out before it cures.
For screw failures, these guides solve the usual headaches fast: best way to fix a stripped screw hole in wood and right way to remove a stripped screw from wood.
Simple maintenance habits that keep beginner woodworking tools reliable
Tool maintenance is not complicated. It’s small, repeated actions.
- Wipe metal tools after use to prevent rust.
- Store squares and rules where they do not fall off a bench.
- Keep saw blades clean; pitch buildup acts like a brake.
- Empty the shop vacuum before suction drops.
- Touch up chisel and plane edges before they feel dull.
If you want a straightforward routine, refer back to tool maintenance for woodworking and set a weekly 10-minute reset: clean, sharpen, and put tools back where they live.
FAQs about Basic Woodworking Tools
What are the first basic woodworking tools I should buy?
Start with safety glasses, hearing protection, and a dust mask. Then buy a tape measure, combination square, pencil/knife, a cordless drill/driver, a handsaw, sandpaper, and four to six clamps.
How much should I spend on beginner woodworking tools?
Spend enough to get accurate layout and safe cutting, even if it means fewer tools. Put your money into a good square, sharp blades/bits, and a reliable drill before buying specialty gadgets.
What safety gear do I need for basic woodworking?
Use impact-rated safety glasses, hearing protection, and a snug dust respirator for sanding. Add nitrile gloves for finishing, a push stick for saw work, and keep a small first-aid kit nearby.
What are the best tools for woodworking?
The “best” tools fit your projects and stay accurate after adjustment. For most home woodworking, start with a combination square, drill/driver, circular saw with a straightedge guide, random orbit sander, and solid clamps.
Should I buy used or new woodworking tools?
Buy used for clamps, cast-iron hand tools, and corded tools if they run smooth and square. Buy new for safety gear, batteries, and cutting bits or blades, since wear hides there.
Do I need a table saw to start woodworking?
No. A circular saw with a guide, a drill/driver, and a sander handle most starter projects, especially plywood work. Add a table saw later when you need fast, repeatable ripping.
How much for a basic woodworking tool set?
A basic woodworking tool set typically costs $500–$1,500 for safety gear, layout tools, a drill/driver, saw, sander, and clamps. A full workshop with bigger machines and dust collection can easily exceed $6,000.
What are the best layout tools for woodworking?
For layout, start with a combination square and a sharp pencil or marking knife for thin lines. Add a tape measure for rough sizing and a marking gauge for repeatable offsets from an edge.
How do I maintain woodworking tools so they last longer?
Brush off dust after each session, wipe metal with a light rust-preventing oil, and keep blades and bits sharp. Store tools dry, and replace worn sandpaper, batteries, and cracked cords before they fail.
Closing thoughts
The best starter kit is not the biggest kit. A small set of basic woodworking tools that stays safe, square, and sharp builds cleaner projects than a garage full of random gear. Start with protection, measuring and marking, then cutting and drilling, then workholding and surface prep. As your projects get more precise, upgrade the tools that limit accuracy first. That approach keeps spending focused and helps you build skill with every board you cut.