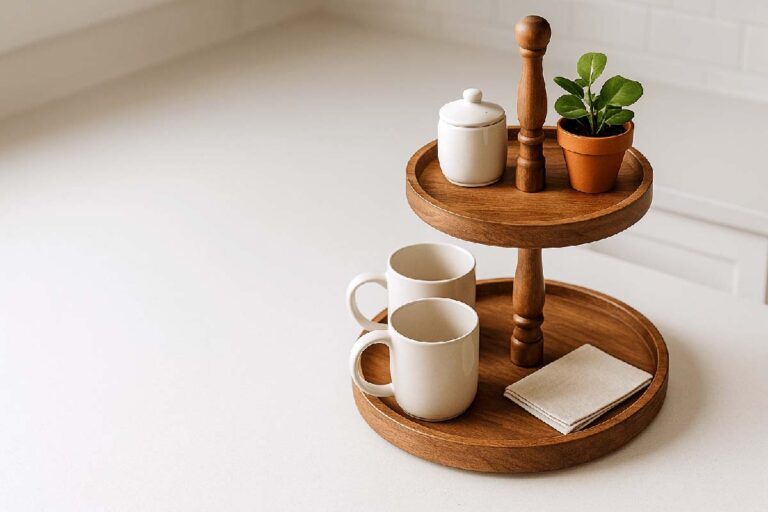
3 Tier Wood Serving Tray: 7 Fixes That Stop Wobble Fast
A 3 tier wood serving tray looks simple. Three plates. One center post. Done. But if the spacing is off, the tray wobbles. If the finish is wrong, it stains. If the tiers aren’t aligned, it looks “homemade” in the bad way.
This guide walks through what matters, step by step, so you end up with a tray that serves well and styles well.
What a 3-tier wood serving tray actually is
A 3-tier wood serving tray is a vertical stand with three platforms (tiers). Each tier holds small items—food, cups, decor, or pantry goods—while saving counter space.
It’s not the same thing as a heavy-duty cake stand with thick metal hardware. Wood can be sturdy, but it needs smart spacing, a stable base, and the right finish.
If you want a broader breakdown of styles and use-cases, the overview on TrayEdit is a helpful reference point—see the “3-tier serving tray” guide here: a full 3-tier serving tray overview.
Why people like 3-tier trays (and when they’re a bad fit)
Why they work
A good 3-tier tray solves a few common problems:
- Small footprint, more storage: vertical space gets used instead of spreading items across the counter.
- Fast “reset”: everything has a home, so cleaning up takes seconds.
- Easy seasonal styling: swap small pieces without redoing the whole space.
Drawbacks to know upfront
A 3-tier tray can be annoying if these aren’t handled:
- Top-heavy wobble if the base tier is too small or the column flexes.
- Crowding if tier spacing is too tight for mugs, jars, or decor.
- Staining if the finish isn’t matched to how it’s used (dry snacks vs. messy foods).
If the tray will mostly hold tall items (coffee syrups, oil bottles, large canisters), a 2-tier layout often feels less cramped. If it’s small items (tea packets, napkins, cupcakes, ornaments), 3 tiers shines.
Plan the size first (this prevents 80% of regrets)
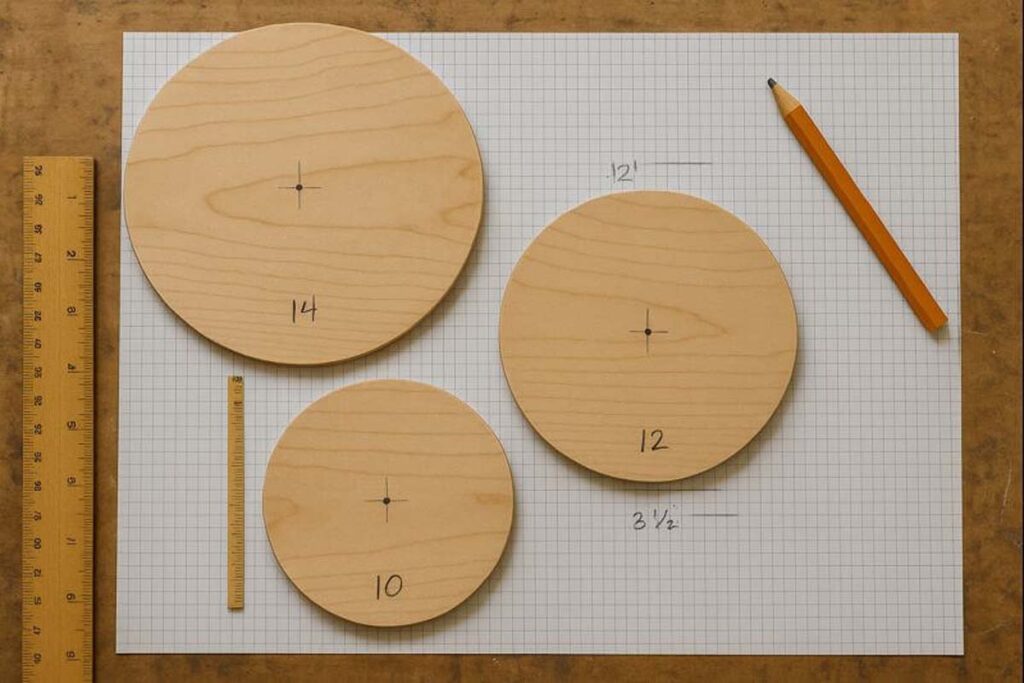
Before cutting any wood, lock in three numbers:
- Tier diameters (or widths)
- Spacing between tiers
- Total height
A practical starting point for round tiers:
- Bottom: 12–14 in
- Middle: 10–12 in
- Top: 8–10 in
Spacing between tiers: 6–8 in clear space (measured from tier surface to the tier above).
Total height: usually 18–24 in.
Quick rule: the bottom tier should be wide enough that the tray still feels stable when the top tier is loaded.
Wood choice: what matters for a serving tray
Wood selection isn’t about “fancy vs. cheap.” It’s about:
- Stability (warping and seasonal movement)
- Dent resistance (softwoods mark up fast)
- Grain and pores (open pores can hold grime if the finish is thin)
- Ease of machining (tearout and burn marks)
If you want a deeper walk-through on selecting species, these two TrayEdit references are handy:
A simple wood comparison table
| Wood | Why you’d use it | What to watch for |
|---|---|---|
| Pine | Easy to cut, affordable, takes paint well | Dents easily, can look rough if edges aren’t clean |
| Poplar | Smooth, stable, great for painted trays | Not as pretty for natural finish, can fuzz while sanding |
| Maple | Hard, tight grain, cleans up well for “serving” use | Can burn when routing/cutting, needs sharp bits |
| Oak | Strong, classic look, handles daily handling | Open pores need proper finishing to stay clean |
| Walnut | Rich color, machines nicely, looks finished even before stain | Costs more, oil finishes can darken it further |
Hardware and structure options (pick one and stick with it)
Most 3-tier trays use one of these builds:
Option A: Threaded rod + spacers (common and adjustable)
- A center threaded rod
- Washers and nuts under/above each tier
- Spacers (wood blocks, metal spacers, or stacked washers)
Why it’s useful: spacing can be adjusted, and tiers can be leveled during assembly.
Option B: Wood column + fixed supports (clean look, more woodworking)
- A turned or square column
- Fixed blocks/dados where tiers seat
Why it’s useful: looks seamless and “built,” but spacing must be perfect.
If you like the turned-column look, TrayEdit has a solid reference build style here: the turned-leg 3-tier stand style.
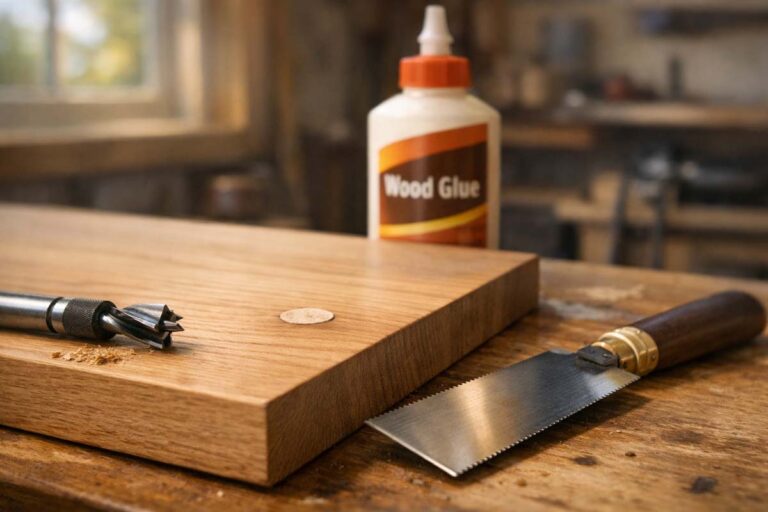
Tools and materials to gather
Keep it simple. Here’s what typically gets the job done:
- Circular saw or jigsaw (or bandsaw) for cutting tiers
- Drill + brad point bits (clean center holes)
- Random orbit sander + sanding discs (80, 120, 180, 220)
- Router (optional) for a clean edge profile
- Clamps, square, tape measure, pencil
- Threaded rod kit or center column parts
- Finish supplies (more on that below)
Safety matters more than people think on small projects like this. Fingers get close to bits and blades. If you need a checklist, TrayEdit keeps one here: safety gear that actually gets used in the shop.
Step-by-step: building a 3-tier wood serving tray
Step 1: Cut the tiers cleanly
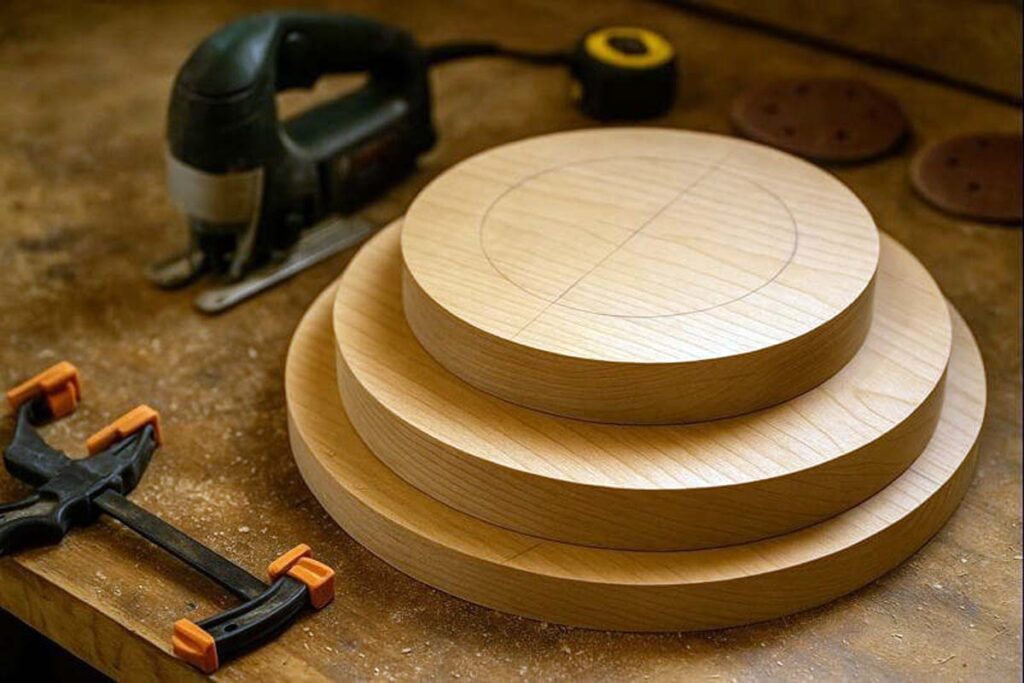
Choose round, square, or rectangle tiers. Round tiers are forgiving and classic.
- Mark centers carefully.
- Cut slightly oversized.
- Sand down to the final line.
Tip that saves time: make one hardboard template for the bottom tier and trace it. Then reduce the template for middle and top tiers.
Step 2: Shape edges so they don’t look sharp
A tray feels better when edges are eased. It also looks more finished.
Options:
- Light round-over with a router bit
- Chamfer edge (also router or sanding block)
- Hand-sanded eased edge (slow but safe)
Don’t overdo it. A heavy round-over can make tiers look thin.
Step 3: Drill the center holes (accuracy matters here)
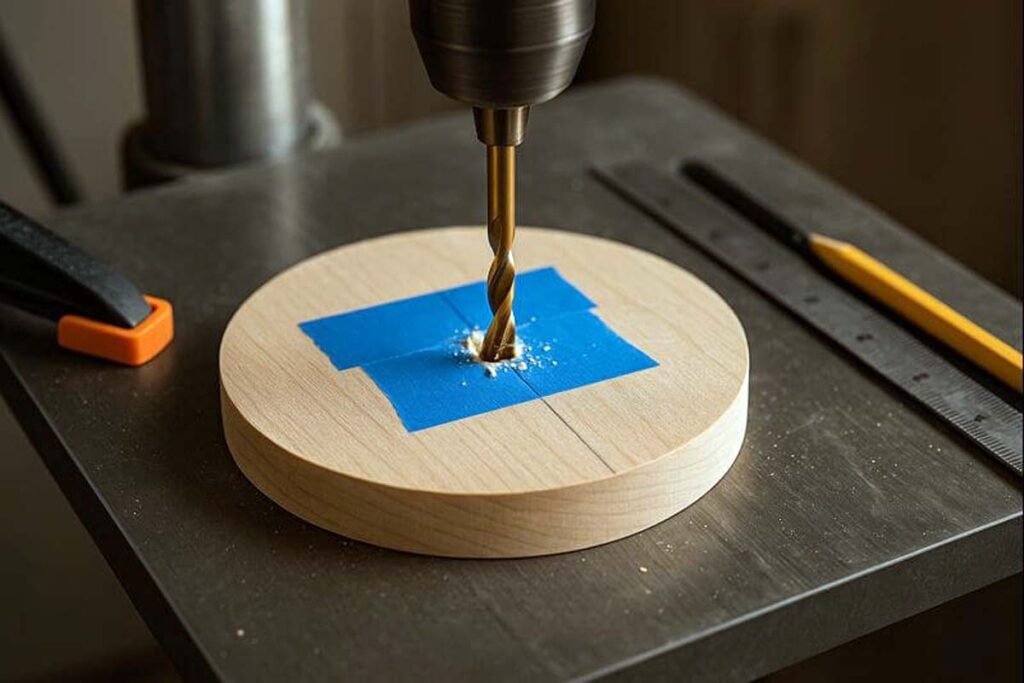
Use a brad point bit or Forstner bit.
- Clamp the tier.
- Drill halfway from one side.
- Flip and finish from the other side.
That prevents blowout and keeps the hole crisp.
If using a threaded rod: size the hole so the rod slides without forcing, but not so loose that tiers “wander.”
Step 4: Add feet or weight to the base tier (for stability)
If wobble is the enemy, the base is the solution.
Two easy upgrades:
- Add 3–4 rubber feet under the bottom tier.
- Add a thin hidden weight plate (metal washer plate) recessed under the base.
If the tray is intended for a slick countertop, rubber feet make it feel planted.
Step 5: Dry-fit the whole tray before finishing
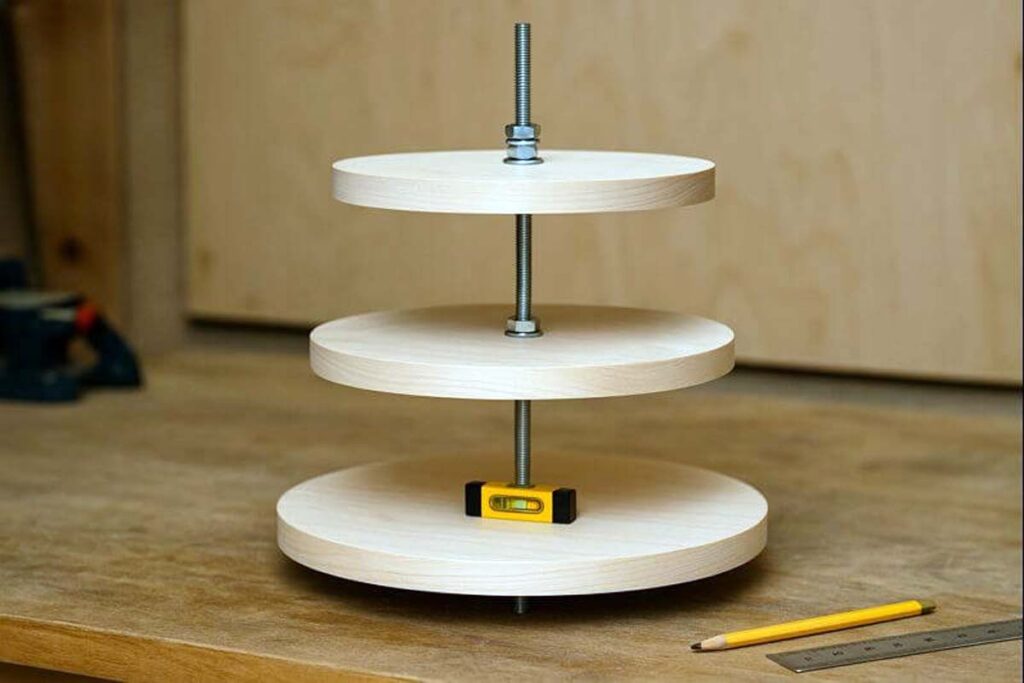
Dry-fit catches mistakes while fixes are still easy.
Check:
- Tiers sit flat (no rocking)
- Spacing looks balanced
- Total height feels right for where it’ll sit
If building with threaded rod, this is where washer stacks and spacers get dialed in.
Step 6: Sand in a clean progression
This is where the tray becomes “nice” instead of “rough.”
A practical sanding path:
- 80 grit (only if needed for saw marks)
- 120 grit (level and smooth)
- 180 grit (refine)
- 220 grit (finish-ready)
Always break the edges lightly. Sharp corners chip and look messy.
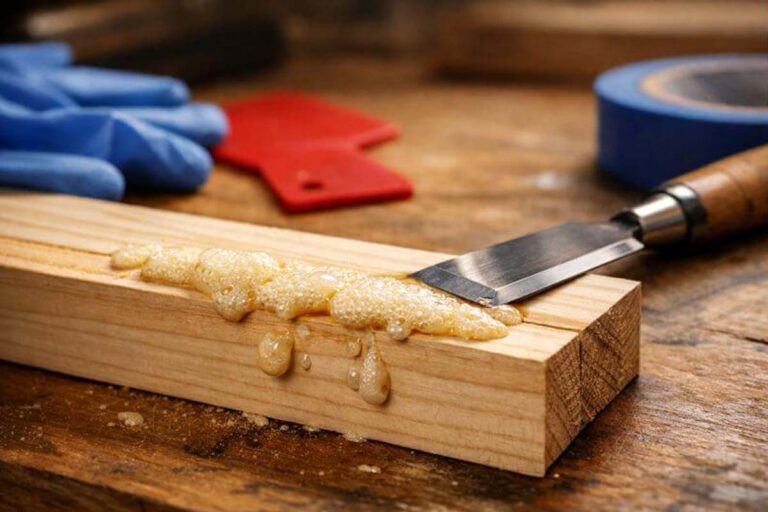
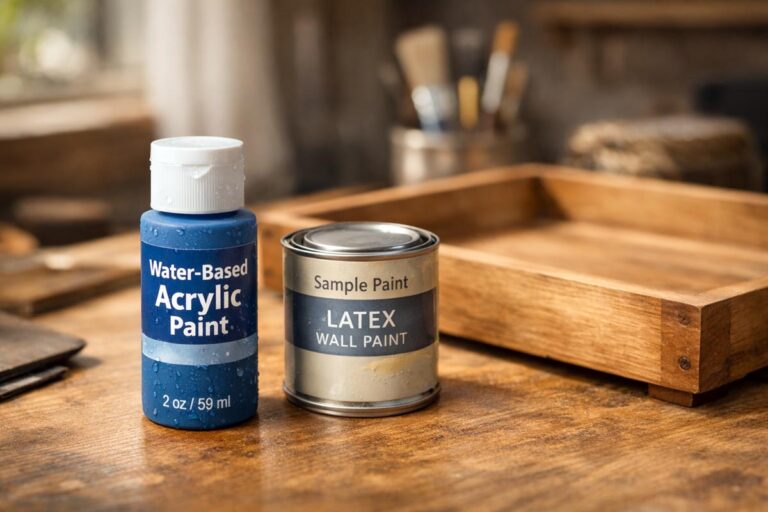
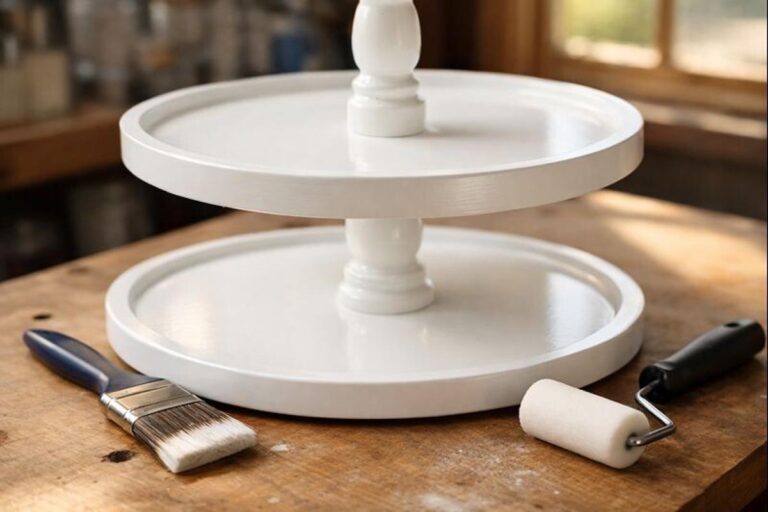
Step 7: Finish it for the way it will be used
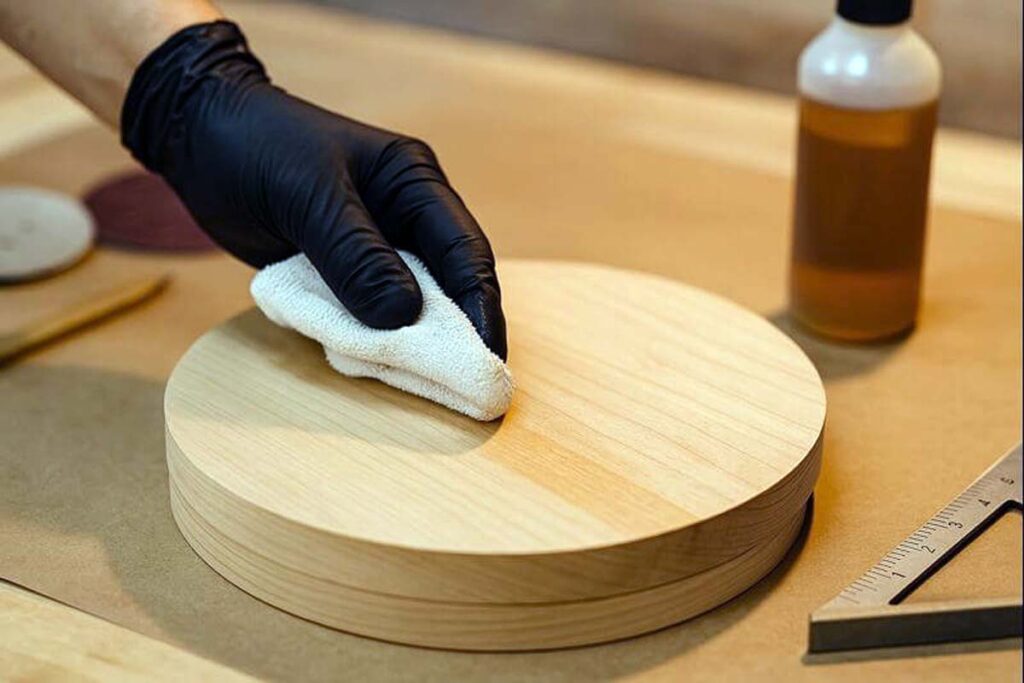
This is the part people skip, then regret.
First question: Will food touch it directly?
If the tray is for packaged snacks, fruit with peels, or decor, finish options are wide. If it’s for direct contact with greasy foods, finishing needs more thought.
Common finish directions:
Option 1: Oil + wax (easy to refresh, not “sealed”)
- Apply mineral oil (or similar food-contact oil)
- Let it soak
- Wipe off excess
- Top with a wax blend for feel
Option 2: Curing oil (more durable, slower)
- Thin coats, wiped on
- Longer cure time
- Better resistance than plain mineral oil
And Option 3: Film finish (more sealed, more prep)
- Poly or similar film finish can resist water better
- Needs full cure before use
- Scratches can look obvious if repairs aren’t blended
If walnut is part of the build, TrayEdit has a focused reference on finishing it here: steps for finishing walnut the right way.
Simple finishing routine that works for most serving trays:
- Remove dust (vac + tack cloth or microfiber).
- Apply first coat, thin.
- Wait the recommended time.
- Light scuff with 320 grit (only for film finishes).
- Add 2–3 total coats.
- Let it cure fully before loading it.
Step 8: Final assembly and alignment
Assemble on a flat surface.
- Tighten hardware evenly.
- Make sure tiers are level.
- Add a drop of removable thread locker if nuts loosen over time (optional).
If the tray spins at a tier, add a thin rubber washer between wood and metal washer.
Styling a 3-tier wood serving tray so it looks intentional
A tray can hold a lot and still look clean. The trick is structure.
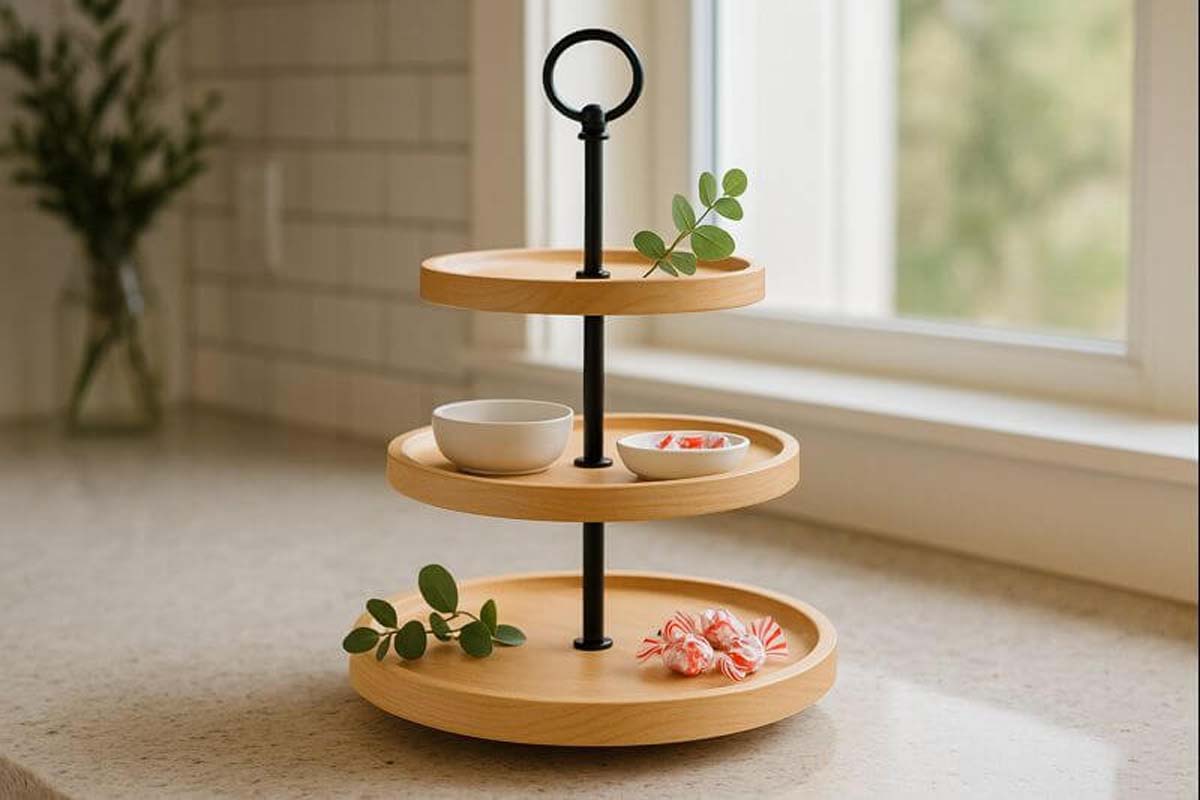
Use “zones” by tier
- Top tier: light and small items (tea bags, mini decor, candies)
- Middle tier: daily grabs (napkins, packets, utensils, small jars)
- Bottom tier: heavier items (mugs, small bowls, canisters)
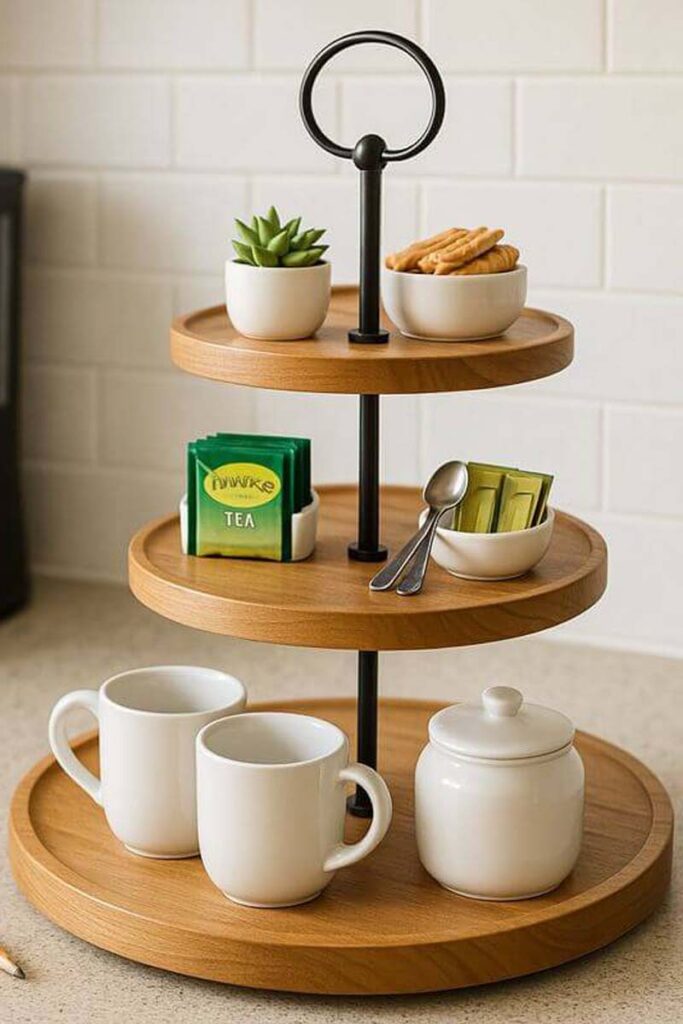
Keep a simple visual rule
- Pick one main material (wood + white ceramic, or wood + glass).
- Pick one accent color that repeats 2–3 times.
If you want styling examples to copy without overthinking, these are useful references:
- How to style a tiered tray without clutter
- 3-tier decor ideas that fit different seasons
- For a farmhouse direction: Farmhouse styling ideas that still feel clean
Care and maintenance (so it still looks good next year)
- Wipe with a damp cloth. Don’t soak it.
- Keep it out of the dishwasher. Wood and heat don’t mix.
- Re-oil when the surface looks dry (for oil finishes).
- Check hardware every few weeks if it’s moved around often.
Keeping tools sharp and clean makes projects like this safer and cleaner. If maintenance has been ignored, this guide helps: basic tool care that prevents rough cuts.
Common problems and quick fixes

Problem: Wobble
Fix: wider base tier, rubber feet, stiffer center column, or add weight under the bottom.
Problem: Tiers aren’t level
Fix: adjust washer stacks, check center holes, assemble on a flat surface.
Problem: Finish feels sticky
Fix: too thick or not cured; wipe off excess oil, allow more cure time, and keep airflow moving.
Problem: Stains from food or drinks
Fix: switch to a more protective finish, or use small liners/plates for messy items.
Final thoughts
A 3-tier wood serving tray works when the build is planned around stability, spacing, and real use. Tier sizes should step down cleanly. The center column should stay stiff. The finish should match what touches the surface. Once those basics are right, styling becomes the easy part.
In my Eugene shop, the trays that last are the ones built like they’ll be picked up every day.
Keep the base stable. Keep the edges comfortable. Finish it like it’s going to get used, not just photographed. That’s what makes a 3-tier tray feel like it belongs in your home.