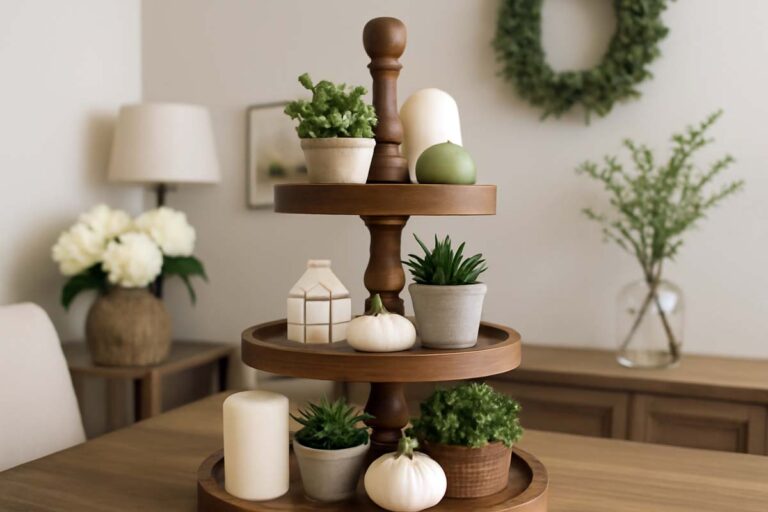
Farmhouse Tiered Tray Decor: 2-Tier Plan You Can Scale to 3
Farmhouse tiered tray decor is simple and useful. It stacks storage and display without eating counter space. You can style one for coffee, holidays, or the bathroom and change it in minutes. In this guide I show you what to buy or build, with a clear plan for a two-tier wooden tray you can scale to three.
We’ll cover materials, cut sizes, finishes, safety, and quick styling recipes that don’t feel cluttered. I’ll also share fixes for wobble and crooked tiers so your stand stays solid. Built once, used all year long, easily. Stay connected with TrayEdit.
What is a farmhouse tiered tray?
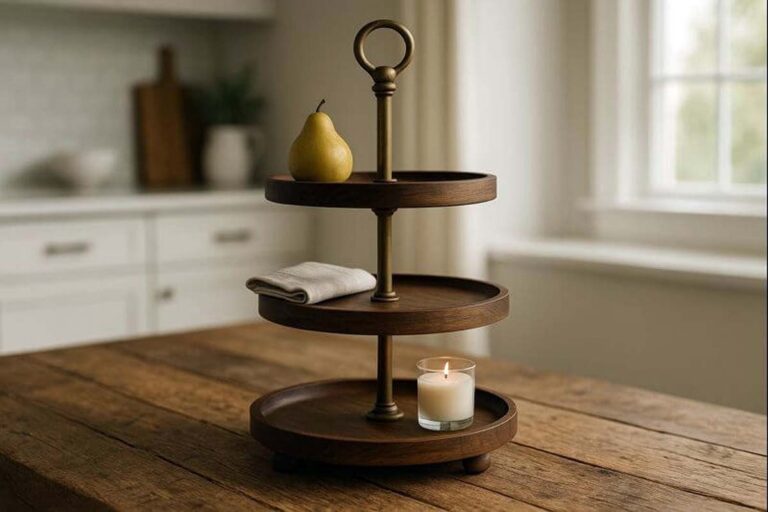
It’s a small, vertical display stand—usually wood—with two or three platforms stacked on a center post. Think “mini shelving tower” for your counter. You’ll see round options, but a two tier tray rectangle shape makes placement against a wall or backsplash easy. You can set mugs, greenery, and seasonal pieces without eating up the whole counter. I treat it like a flexible vignette: a few anchors, some fillers, and a bit of height.

Why use one?
Benefits.
- Saves counter space by going vertical.
- Changes with the season or task (coffee bar this month, cocoa bar next).
- Easy to clean and reset.
- Looks warm and lived-in—classic farmhouse vibe.
Drawbacks.
- They collect dust. Plan a quick weekly reset.
- Three tiers can look busy in tight kitchens.
- Cheap stands wobble. You fix that with a wider base, better joinery, and real wood.
Where a tiered tray shines
- Kitchen: coffee or tea station; baking zone with measuring cups and spices.
- Dining table: centerpiece with a candle, mini vase, and napkins.
- Entryway: keys, sunglasses, mail tray.
- Bathroom: cotton rounds, soap, small plant.
- Office/craft: tape, pens, washi, a timer.
I keep mine on a 24″ counter run under upper cabinets. Watch total height if you’ve only got 16–17″ of clearance.
What to buy vs. what to build
Buying gets you speed. Look for a tiered tray wooden model with a metal center rod or a solid wood post, a base at least 9–10″ wide, and non-slip feet.
Building gets you sturdiness, custom size, and a finish you trust. It’s also a good weekend project if you’re hunting diy farmhouse tiered tray decor. If you’re on the fence, build once—you’ll see why it’s worth it.
DIY Build: 2-Tier Wooden Tray (rectangle)
Assumptions. You have a circular saw (or jigsaw), drill/driver, sander, and clamps. If you’ve got a router, great, but it’s optional. Dimensions below fit small kitchens and under-cabinet spaces. Scale up 10–15% for a three-tier.
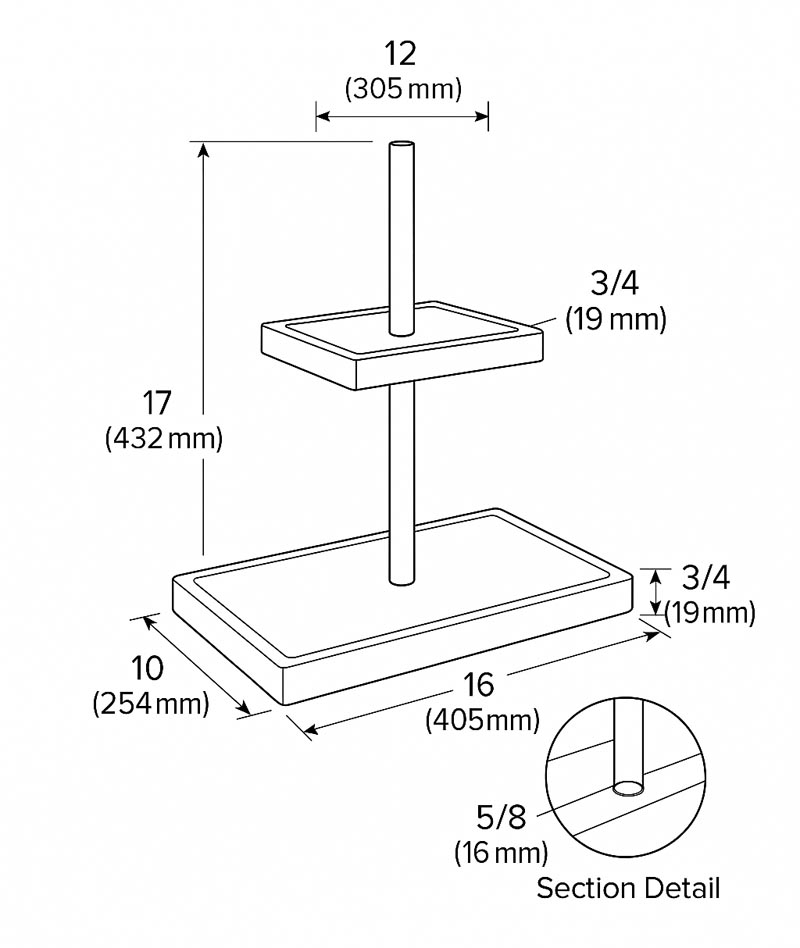
Finished size (2-tier)
- Bottom tray: 10″ × 16″ (254 × 406 mm)
- Top tray: 8″ × 12″ (203 × 305 mm)
- Clear space between tiers: 8″ (203 mm)
- Overall height with handle: ~17″ (432 mm)
Materials
- 3/4″ (19 mm) hardwood or quality plywood. Poplar, maple, oak, or pine all work.
- 5/8″ (16 mm) hardwood dowel or a 3/8″ (10 mm) threaded rod kit for the center post.
- Four 3/4″ (19 mm) feet (store-bought or cut from scrap).
- Wood glue (PVA).
- Screws: #8 × 1-1/4″ (32 mm), washers if using a rod.
- Optional: small metal handle or wooden knob for the top.
Read more: The 6 Best Wood Types
Tools & PPE
- Circular saw or jigsaw; drill/driver; countersink bit; 5/8″ Forstner bit (if using dowel); 3/8″ bit (if using rod).
- Sandpaper: 120/150/180 grit.
- Square, tape, pencil, clamps.
- Safety glasses, hearing protection, dust mask or respirator, gloves for finishing.
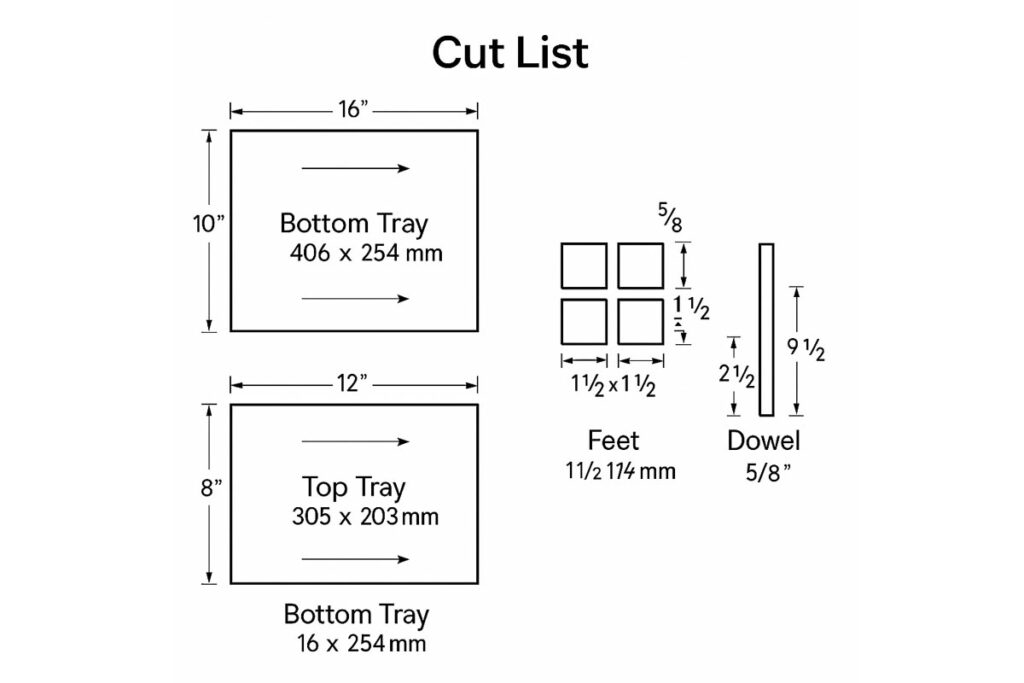
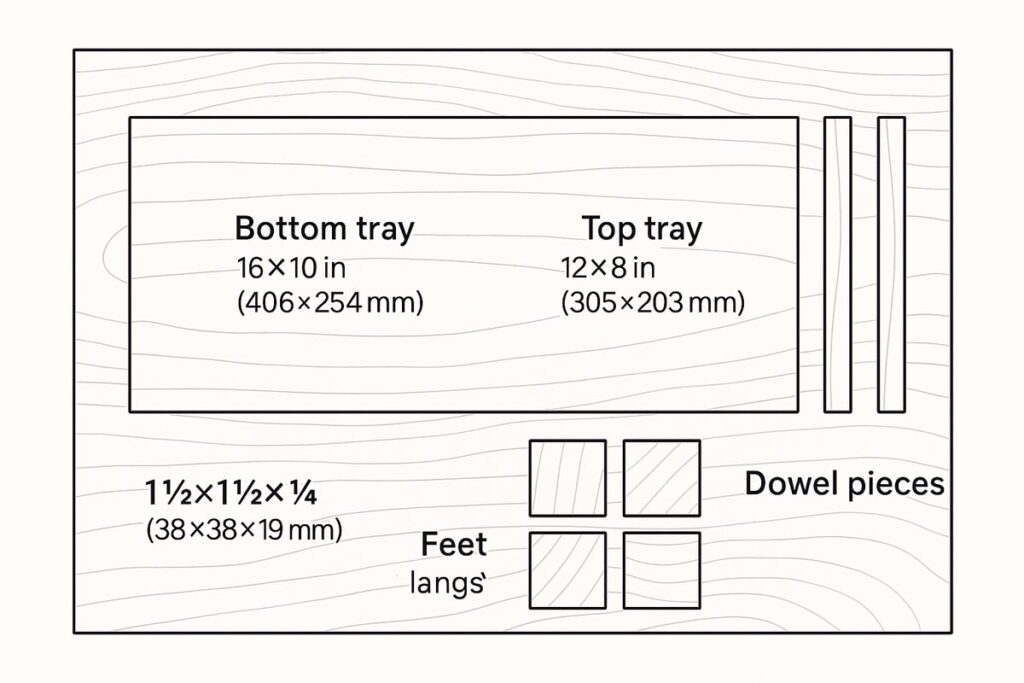
Cut list (imperial + metric)
| Part | Size (in) | Size (mm) | Qty |
|---|---|---|---|
| Bottom tray | 10 × 16 × 3/4 | 254 × 406 × 19 | 1 |
| Top tray | 8 × 12 × 3/4 | 203 × 305 × 19 | 1 |
| Center post (dowel) | 5/8 dia × 9‑1/2 | 16 dia × 241 | 1 |
| Handle/finial | 5/8 dia × 2‑1/2 | 16 dia × 64 | 1 |
| Spacer (optional) | 5/8 dia × 1 | 16 dia × 25 | 1 |
| Feet | 1‑1/2 × 1‑1/2 × 3/4 | 38 × 38 × 19 | 4 |
3-tier notes: Add a middle tray around 9″ × 13″ (229 × 330 mm). Use two posts (lower and upper) with a hidden nut or dowel tenon between. Increase base to 11″ × 17″ for stability and keep at least 7–8″ clearance between trays for mugs.
Joinery choices (quick pros/cons)
- Center dowel through holes (dowel tenons): clean, all-wood look; needs precise drilling.
- Threaded rod with nuts/washers: easy to tighten and re-square; hardware shows unless you cap it.
- Screws from below into post: fast; can loosen over time; add glue once squared.
I usually run a dowel for the look, with a hidden screw up from the bottom into the dowel to resist racking.
Step-by-step build Farmhouse Tiered Tray
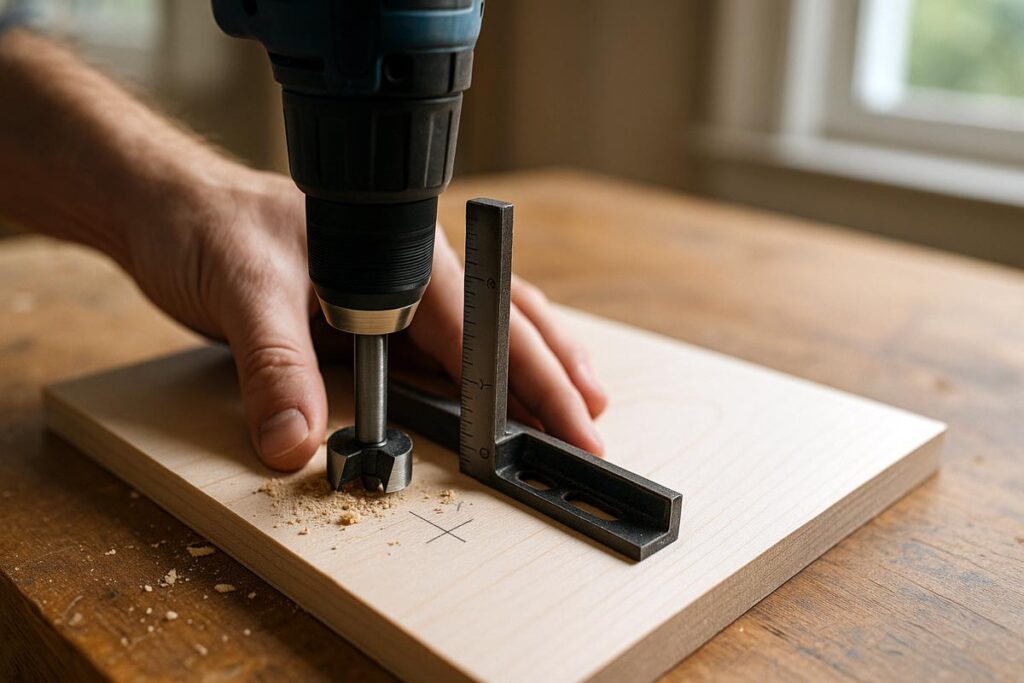
- Break down panels. Cut trays to size; soften corners with a 1″ radius if you want a friendlier farmhouse look.
- Layout centerlines. Draw diagonals on each tray; that intersection is your post center. On the top tray, shift the center back 1/2″ so the front has more usable space.
- Drill plumb holes. Dowel build: 5/8″ holes—1/2″ deep on the underside of the top tray, 3/4″ deep on the top of the bottom tray. Rod build: 3/8″ through‑holes. Check plumb on two axes.
- Cut and test‑fit the post. Aim for 8″ clear space between tiers.
- Add feet. Screw and glue four feet near corners, inset ~5/8″ from edges.
- Edge treatment (optional). 1/8″ roundover or a light chamfer hides small tearout and feels good in the hand.
- Sand. 120 → 150 → 180. Don’t burn through plywood veneer.
- Assembly.
- Dowel method: glue post into the bottom tray only; friction‑fit the top so it’s serviceable. Add one #8 screw up from below into the post to resist racking.
- Rod method: run rod up from the bottom with a recessed washer/nut; cap the top with a decorative nut or knob.
- Handle/finial. Glue on a short dowel stub or install a cabinet knob.
- Finish. Apply your chosen finish (below). Let it cure fully before styling.
Also see: How to Make a Tiered Tray Stand Right Way
Tolerances & stability
- Keep trays within ±1/32″ (±1 mm).
- Post plumb within ~0.5°.
- If you go 3-tier, widen the base or add hidden steel washers under the bottom tray to lower the center of gravity.
- For solid wood trays wider than ~10″, avoid cross-grain battens glued across the width. If you must screw battens, slot the batten holes to allow seasonal movement.
Finishing: food contact vs. decorative
You’ve got two paths. If snacks might touch wood, keep it simple and use a product marketed for food contact. If it’s purely decor, a tougher hard‑wax oil is great.
Food-contact friendly oils/waxes (cutting-board style)
- Tried & True Original (polymerized linseed oil + beeswax) is solvent-free and listed by the maker as compliant with FDA 21 CFR 175.300 for food contact surfaces. It leaves a warm, low-sheen look. Expect multiple thin coats, buffed out, with generous cure time.
- Mineral oil + beeswax works if you’re placing unwrapped snacks. It’s easy to renew but offers the least protection. Use food-grade/USP mineral oil.
Hard-wax oils / film finishes (decor-first but durable)
- Rubio Monocoat Oil Plus 2C is a popular one-coat hard-wax oil. Light use after 24–36 hours; about 80% cured at 48 hours; full cure ~5 days with Part B. If you skip Part B, cure can take ~21 days. That timeline matters before styling.

Reality check: Once fully cured, common clear finishes are generally considered safe for incidental food contact. If you can still smell solvent, it isn’t cured. When in doubt, use a product labeled for food contact and follow the label.
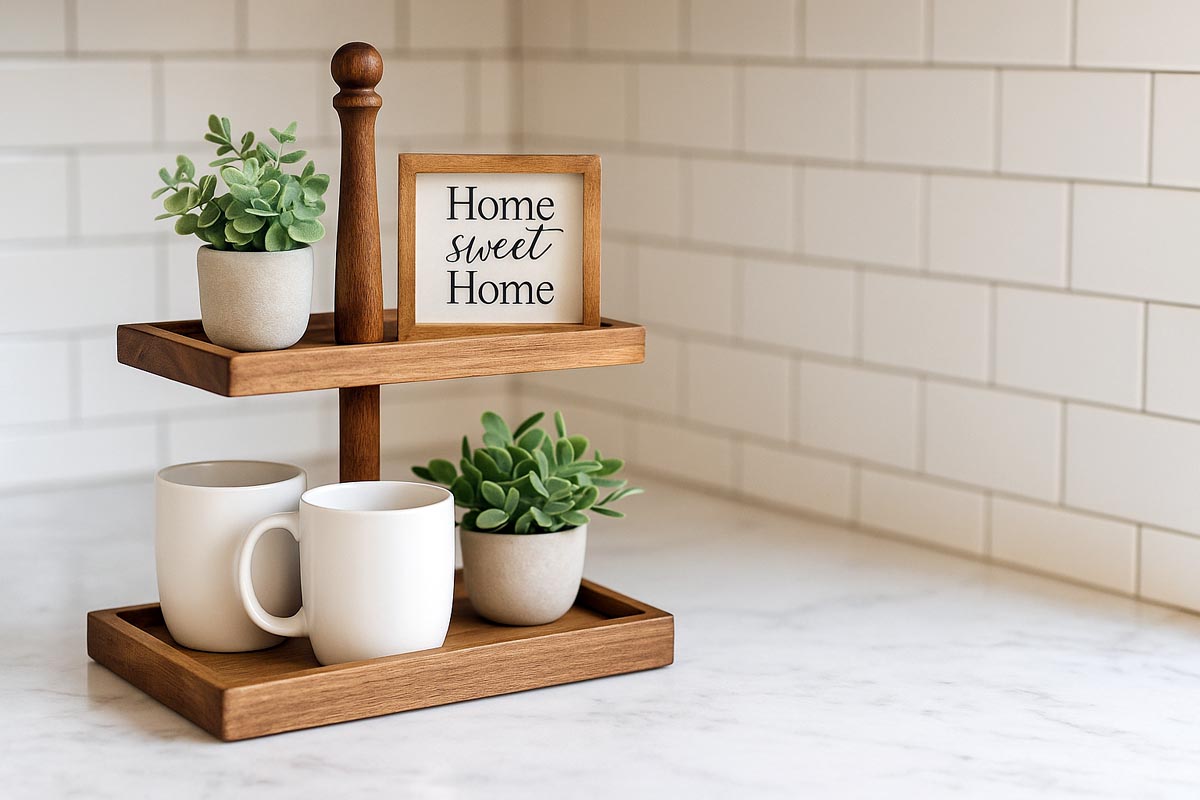
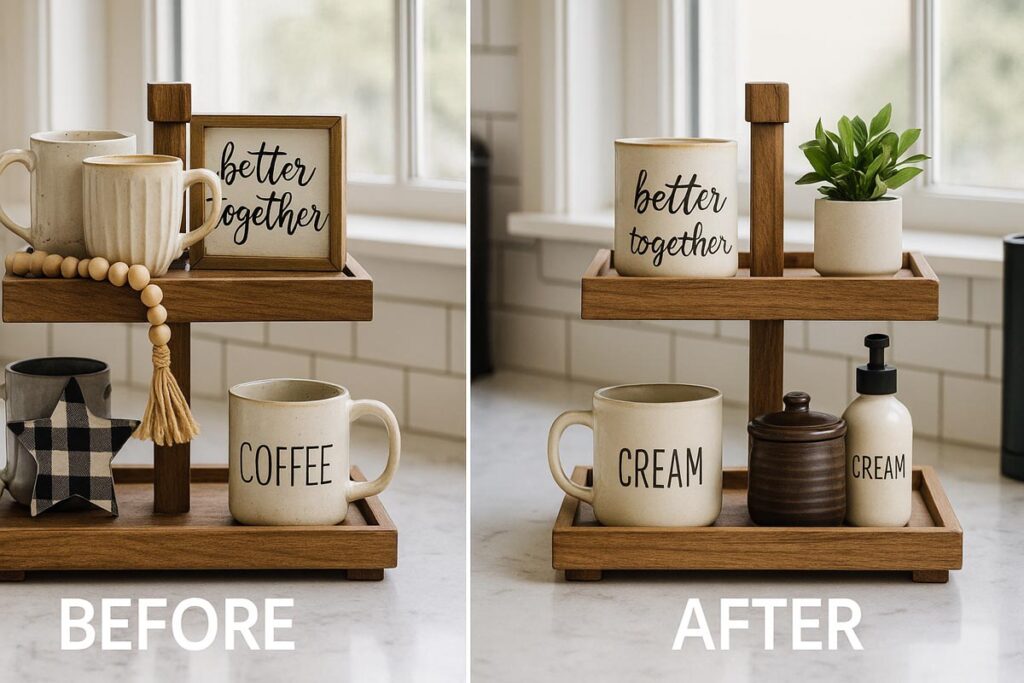
Farmhouse tiered tray decor ideas (styling without the fuss)
Here’s how I make a tiered tray look finished in five minutes:
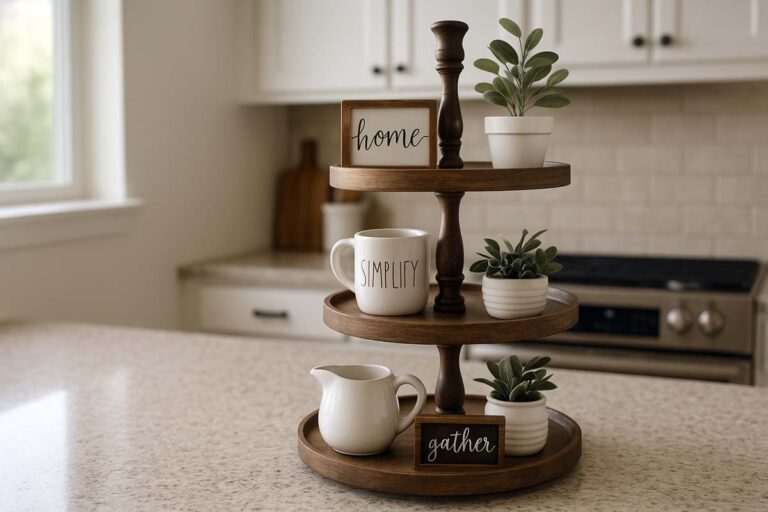
Pick a palette
Farmhouse reads best with neutrals (white, cream, gray), warm wood, and a touch of green. Add one accent color that repeats twice—rust, black, or soft blue.
Anchor item per tier
Bottom: a stack of two mugs or a short pitcher. Top: a small sign or candle. Anchors give your eye a place to land.
Fillers, not clutter
Sprigs of eucalyptus, a small strand of wooden beads, a creamer, a sugar bowl. Use odd numbers: groups of 3s feel natural.
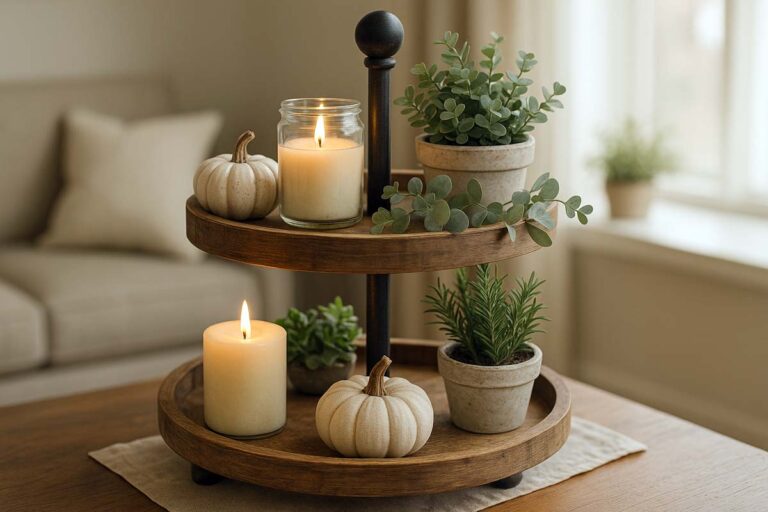
Height & overlap
Layer items slightly. Let a sprig overlap a mug. Add a riser (a little wood block) to stagger heights.
Negative space is allowed
Leave a 3–4″ blank corner. It keeps the whole thing from yelling at you.
Also see: 3 Tier Tray Christmas Decor Ideas
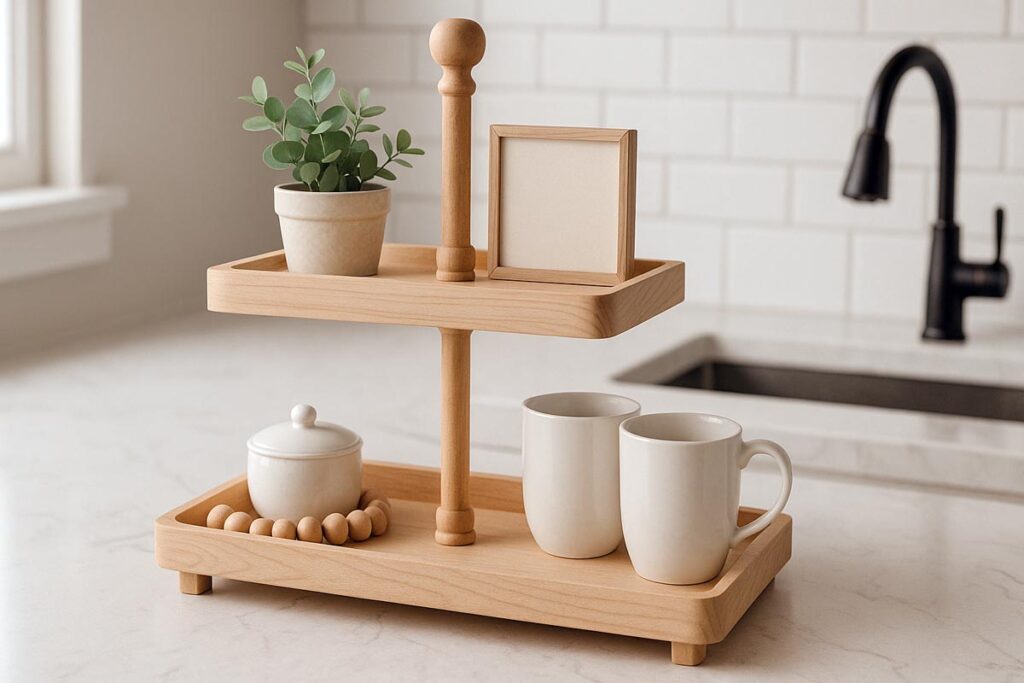
Copy-ready mini recipes
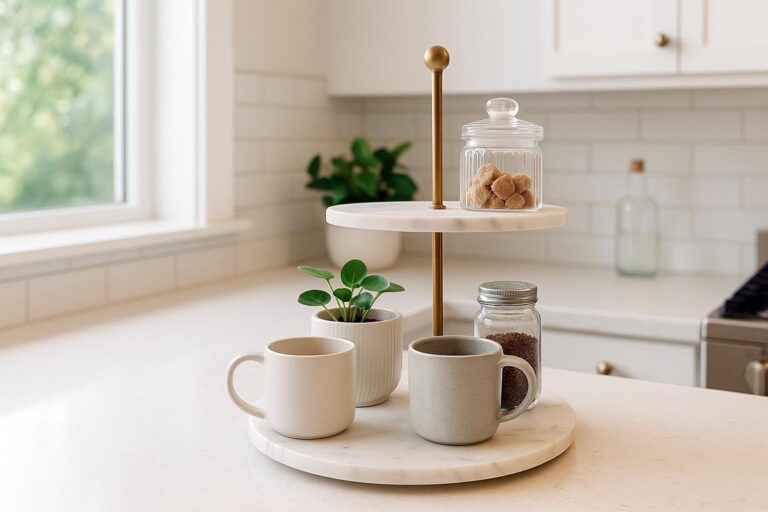
Coffee bar two tiered tray:
- Bottom: canister (beans), two mugs, greenery.
- Top: sugar bowl, scoop, small sign.
- Accent color: black (scoop + sign frame).
- Swap mugs seasonally.
Baking station tiered tray:
- Bottom: measuring cups, vanilla, whisk in a short mason jar.
- Top: timer, pinch bowls, greenery.
- Accent: soft blue.
Bathroom two tier tray rectangle:
- Bottom: folded face cloths, soap dispenser.
- Top: cotton rounds jar, small plant.
- Accent: matte black pump.
Holiday 3 tier tray farmhouse decor:
- Bottom: candle ring + two mugs.
- Middle: small house figurine + beads.
- Top: mini wreath.
- Accent: deep green repeated twice.
Entryway “drop zone” tiered tray:
- Bottom: shallow dish for keys, sunglasses.
- Top: mail clip, small notepad + pencil.
- Accent: brass dish repeated with brass clip.
Tip: If items slide, add a thin cork or leather circle to each tier or a dot of museum gel under problem pieces.
Troubleshooting: wobble, racking, finish issues
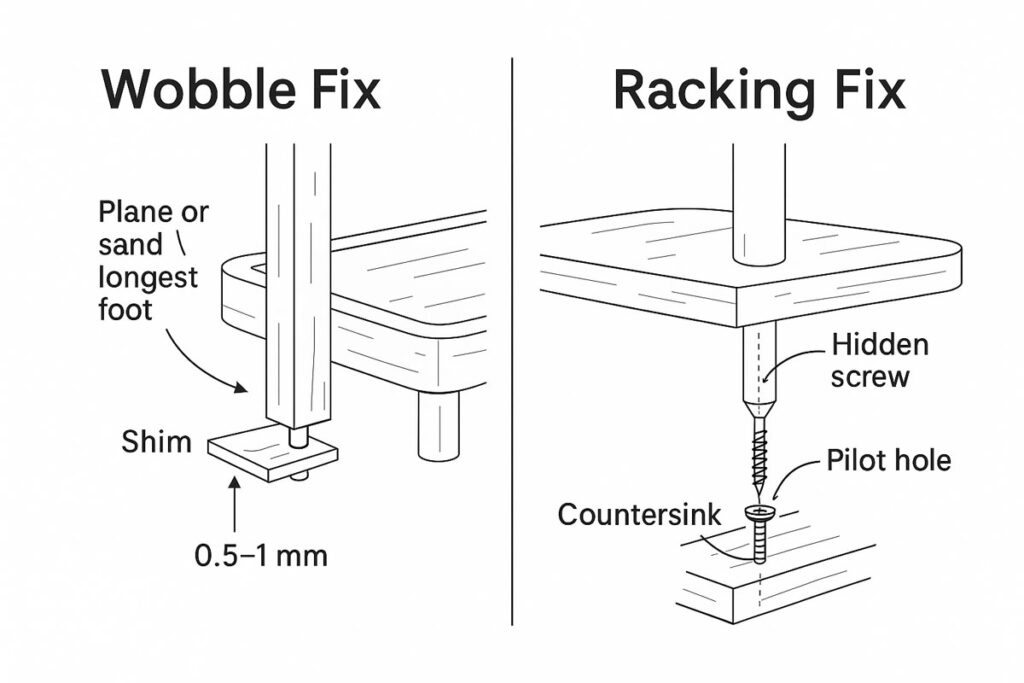
Wobble on the counter.
- Check the feet. Plane or sand the longest foot until stable.
- Add felt dots to fine-tune.
- If the post is out of plumb, loosen (rod method) or warm the glued joint with a hair dryer and re-seat, then re-tighten. Add a diagonal tap on the top tray to true it, then lock it down.
Racking (twist) when you move it:
- Install a hidden screw up from the underside into the dowel.
- On a 3-tier, use a larger post (3/4″) or switch to a rod with a locknut at each tier.
Uneven tiers:
- Shim the mortise with kraft paper and re-glue, or oval the hole slightly and tighten with hardware to square.
- Check tray flatness; a cup or bow will read as crooked. Clamp flat on a caul overnight.
Finish still tacky:
- You used too much oil. Wipe back to dry. Move it to a warm, ventilated spot and give it time to cure per the product’s schedule. For Rubio, plan the 5-day full cure; for oil/wax blends, thin coats with long open time.
Looks crowded: Remove one item per tier. Repeat one color twice. Add a bit of air.
Know more: Troubleshoot Tiered Tray Stand Problems
Upgrading to a 3-tier
When you want height:
- Base: 11″ × 17″ minimum.
- Tier spacing: 7–8″ clear between trays so mugs and small jars fit.
- Post: 3/4″ dowel or 3/8″ rod.
- Weighting: Glue a steel washer under the bottom tray, centered on the post, to lower the center of gravity.
- Visual balance: Largest tray at bottom, mid size in middle, smallest on top. Keep accents lighter on the top tier.
Maintenance & cleaning
- Dust with a dry cloth weekly.
- For oil/wax finishes, buff a thin renewal coat every 6–12 months or as needed.
- Wipe spills right away; standing water will gray raw wood and haze oil finishes.
- If it holds food directly, wash with a barely damp cloth and mild soap; dry immediately. Avoid soaking.
FAQs
Poplar and pine take paint nicely; maple and oak look great clear. For the farmhouse vibe, I like light-colored wood with a soft matte finish.
Yes—if you use a product formulated for food contact and let it fully cure. Otherwise, set foods on small plates or parchment. The “safe once cured” rule of thumb is widely accepted among finishing pros, but I still choose food-contact products when food will touch the wood.
Measure from counter to cabinet bottom and subtract 1–2″ so you can lift decor off the top tier. Most kitchens are 16–18″; so aim for a 15–16″ stand.
If you’ve got shallow counters or a backsplash, a two tier tray rectangle sits tight against the wall and frees space in front.
Absolutely. Scuff sand to 180, prime, paint matte or satin, then top with a water-based clear coat if you want durability. For food contact, keep foods on plates.
One-page build checklist (copy this)
- Cut: 10″ × 16″ bottom, 8″ × 12″ top, 9-1/2″ post, four feet.
- Drill: 5/8″ dowel mortises or 3/8″ rod holes, dead plumb.
- Sand: 120 → 150 → 180. Ease edges.
- Assemble: Glue post to bottom, screw from below, friction-fit the top.
- Finish: Oil/wax or hard-wax oil. Follow cure times.
- Style: Anchor + filler + green. Repeat one accent color twice.
Build essentials (hardware & tools)
- Hillman 3/8″‑16 Threaded Rod (3′ length)
- Westinghouse Solid Brass Lamp Finials (1/4‑27, 2‑pack)
- Freud PB‑004 5/8″ Forstner Bit or FISCH Wave Cutter 5/8″ Forstner Bit
- Milescraft 1318 DrillMate Portable Drill Guide
- Trend / Snappy 5‑Piece Countersink Set
- Titebond III Ultimate Wood Glue
Feet, pads, and anti‑slide
- 3M Bumpon SJ5302 Clear Rubber Feet
- SoftTouch 1″ Felt Pads
- Quakehold Museum Putty or Quakehold Clear Museum Gel
Finishes (pick one path)
- Tried & True Original (polymerized linseed oil + beeswax)
- Howard Cutting Board Oil (USP mineral oil) or John Boos Mystery Oil
- Rubio Monocoat Oil Plus 2C (hard‑wax oil)
Finishing helpers
- Scotch‑Brite 7445 White Hand Pads
Final thoughts
Farmhouse tiered tray decor works because it makes small stuff look intentional. Keep the structure solid, the finish cured, and the styling simple. If you’re short on time, start with a two tiered tray. If you’ve got headroom and love layers, step up to 3 tier tray farmhouse decor. Either way, you’ll end up with a flexible, good-looking hub that earns its space every day.
And if you want to push it further, build a second top tray sized for seasonal swaps—one stained, one painted. Same post, new look. That’s the beauty of DIY farmhouse tiered tray decor: you control the materials, the finish, and the vibe.