2 Tier Tray Stand: A Beginner-Friendly DIY Project
Hey there, fellow woodworking enthusiasts! It’s Wayne Kocher, and today I’m excited to walk you through the process of creating a simple and functional 2 tier tray stand. Whether you’re looking to craft a stylish centerpiece for your home or a practical storage solution, this project is both beginner-friendly and incredibly rewarding.
Creating a tiered tray stand from wood is not only fun but also allows you to add a personalized touch to your home decor. Plus, it’s a great way to practice and refine your woodworking skills while creating something you’ll be proud to display or use every day.
So, let’s get into it!
Tools and Materials You’ll Need for Create a 2 Tier Tray Stand
Before diving into the process, let’s make sure you’ve got everything you need to get started. Here’s a quick list of tools and materials you’ll want to gather:
Tools:
- Jigsaw – To cut out the shapes of your trays and other pieces.
- Drill – For making the holes needed for dowels or screws.
- Screwdriver – For assembling the parts.
- Sandpaper (or an electric sander) – To smooth out rough edges.
- Measuring Tape – To ensure accurate measurements.
- Wood Glue – To hold pieces together before securing with screws or nails.
- Paintbrush – To finish the wood and add a nice touch of color.
Materials:
- Wood (1/2” or 3/4” thick) – Plywood or solid wood works best for this type of project.
- Wooden Dowels – For supporting the two tiers.
- Screws or Nails – To secure the trays to the dowels.
- Wood Stain or Paint – To finish and protect your wood.
- Decorative Knobs or Handles (Optional) – To add a personal touch.
Once you’ve got your materials and tools ready, it’s time to start crafting your tiered tray stand!
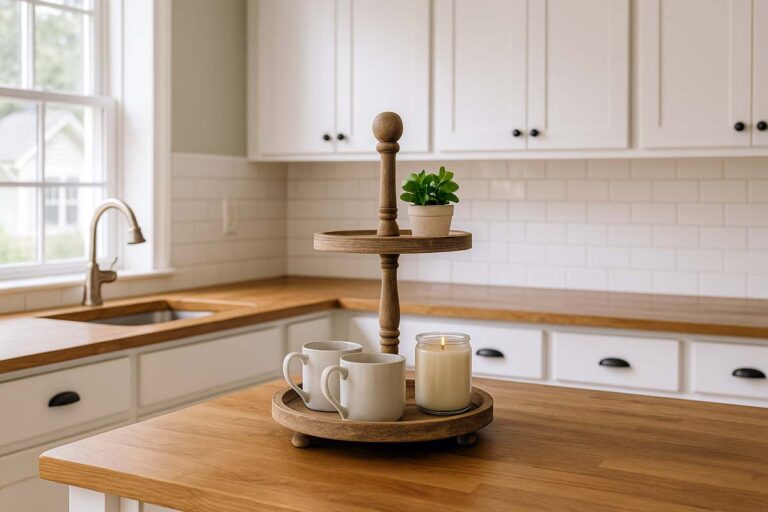
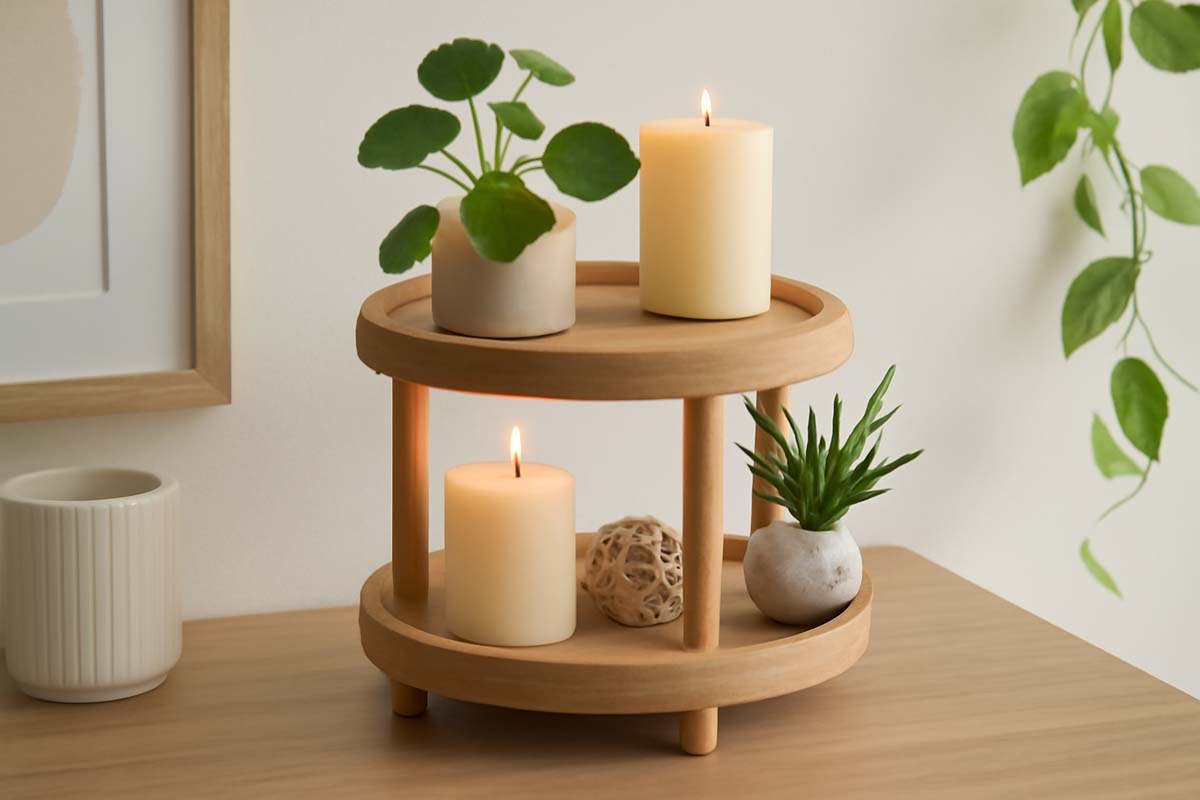
A countertop tray stand is perfect for keeping your kitchen essentials organized and accessible, while also adding a touch of elegance to your space.
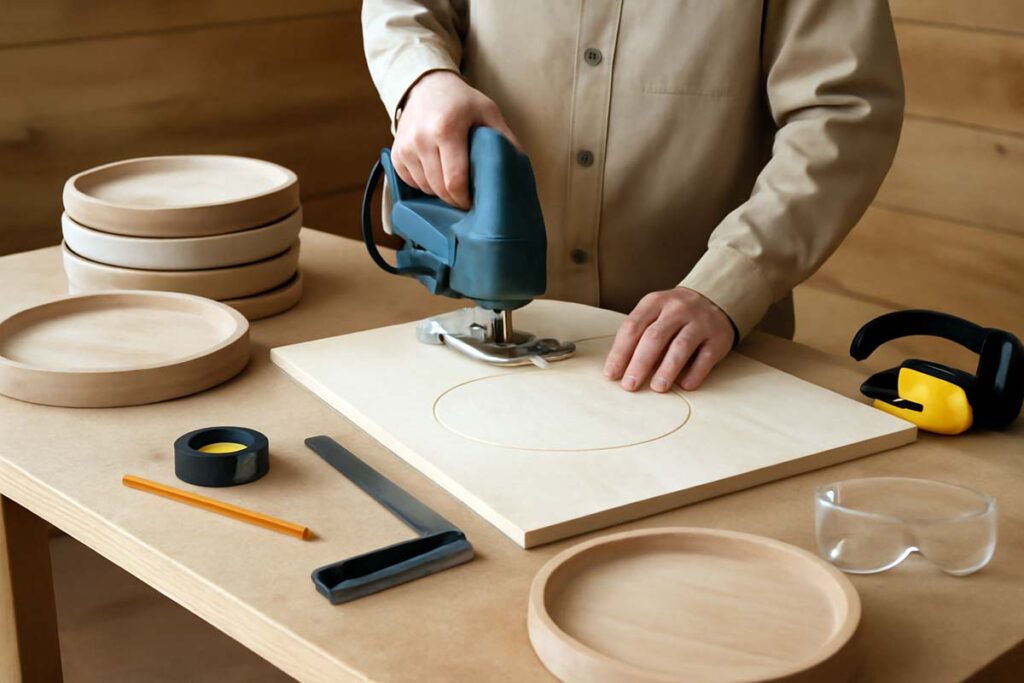
Step 1: Cutting the Wood for the Trays
The first step in any woodworking project is cutting your pieces to size. For your 2-tier tray stand, you’ll need two trays, each with a circular or square shape depending on your preference.
Here’s what to do:
Measure and Mark Your Wood:
Decide how large you want your trays. For this guide, let’s use an 18-inch diameter for the bottom tray and a 12-inch diameter for the top tray (you can adjust based on your preferences).
Use a compass or a piece of string and a pencil to draw perfect circles on your wood. If you prefer square trays, simply measure and mark equal sides (e.g., 18 inches for the bottom and 12 inches for the top).
Cut the Shapes:
Using your jigsaw or circular saw, carefully cut along the lines you marked. Go slowly to ensure clean, precise edges. If you’re working with plywood, make sure to support the wood to avoid any splintering.
Smooth the Edges:
Once you’ve cut out both trays, grab your sandpaper (or electric sander) and smooth the edges. This step ensures that your trays will have a polished, finished look. If you’re working with a round shape, take your time to ensure all edges are even and smooth.
Step 2: Preparing the Base and Support Dowels
Now that you have your trays ready, it’s time to think about the support structure for the two tiers. The dowels will hold the top tray above the bottom tray, so they need to be sturdy and precisely positioned.
Cut the Dowels:
- For a simple 2-tier tray stand, two dowels are typically sufficient. These dowels will serve as the vertical supports between the top and bottom trays.
- Measure the desired height of your stand. For a standard 2-tier tray, I recommend a height of 12 to 15 inches.
- Cut the dowels to your measured height using your saw.

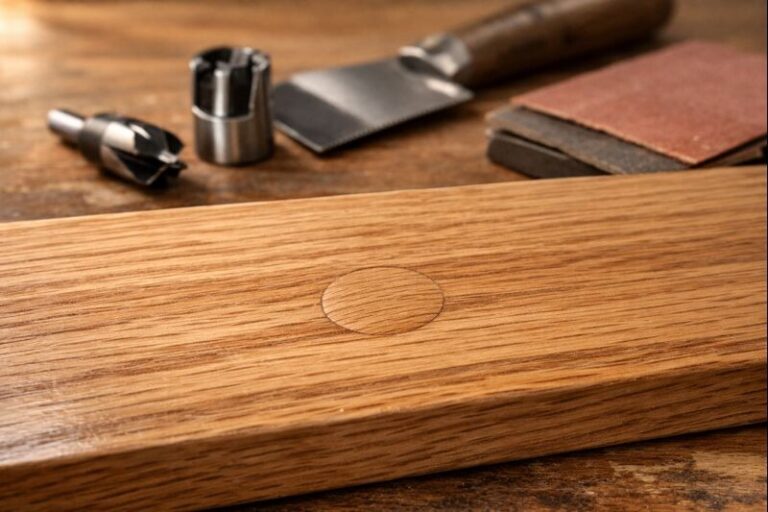
Create Holes for the Dowels:
- On both trays, measure and mark the center of where you want the dowels to sit. This should be around the edge of each tray to ensure stability.
- Using a drill, carefully create holes in both trays. The holes should match the diameter of your dowels, ensuring a snug fit.
- The holes on the bottom tray should go through the center, while the holes for the top tray should be slightly shallower, just enough to hold the dowels securely.
Step 3: Assembling the Tiered Tray Stand
Now, we’re getting to the fun part: putting it all together!
Attach the Dowels to the Bottom Tray:
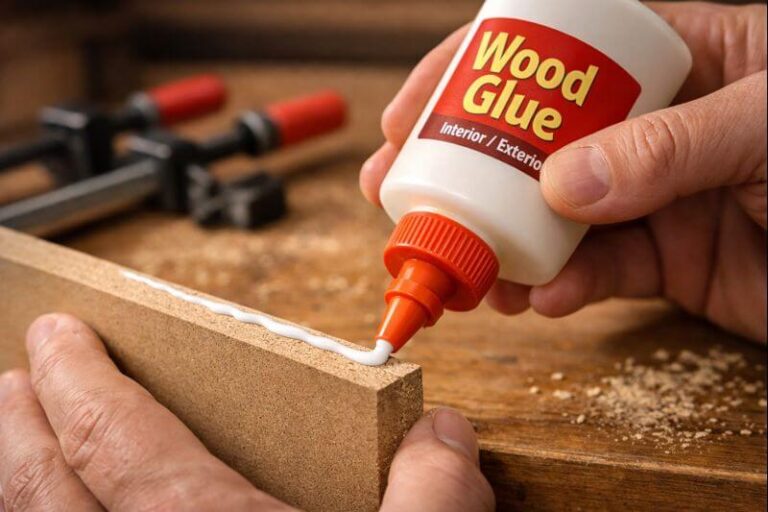
- Take one of your dowels and slide it through the hole in the bottom tray. Apply a small amount of wood glue around the edge of the hole before inserting the dowel to make sure it holds tightly.
- Repeat this for the second dowel.
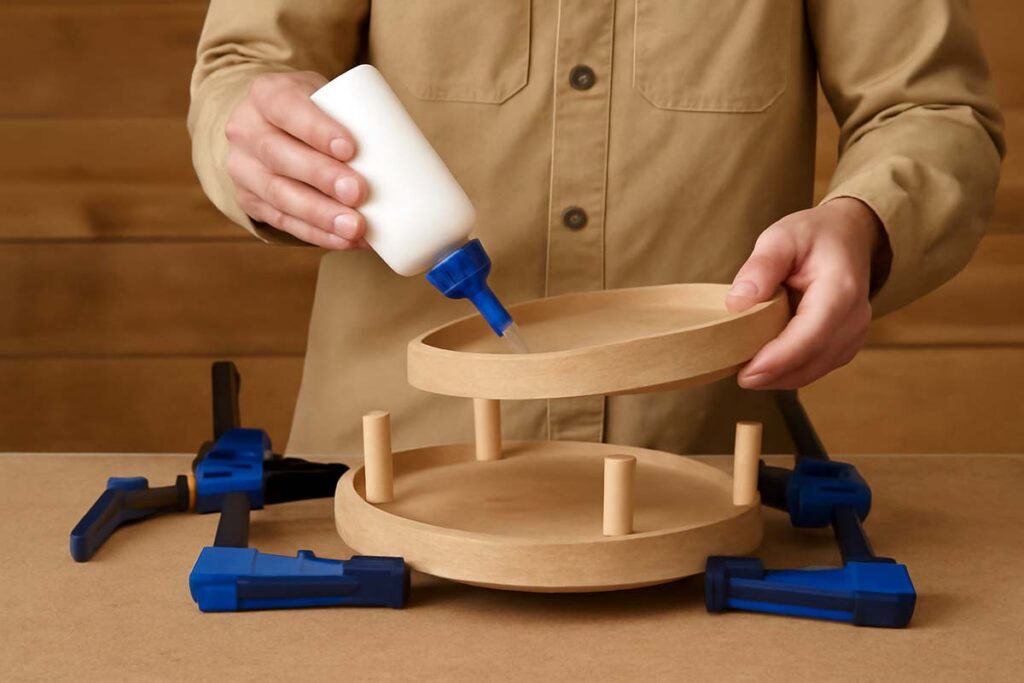
Attach the Top Tray:
- Apply glue to the top end of the dowels and carefully place the top tray on top. Make sure the dowels go through the corresponding holes in the top tray.
- You might want to temporarily clamp the trays in place while the glue dries to keep everything aligned. Let the glue set for at least 30 minutes before moving on.
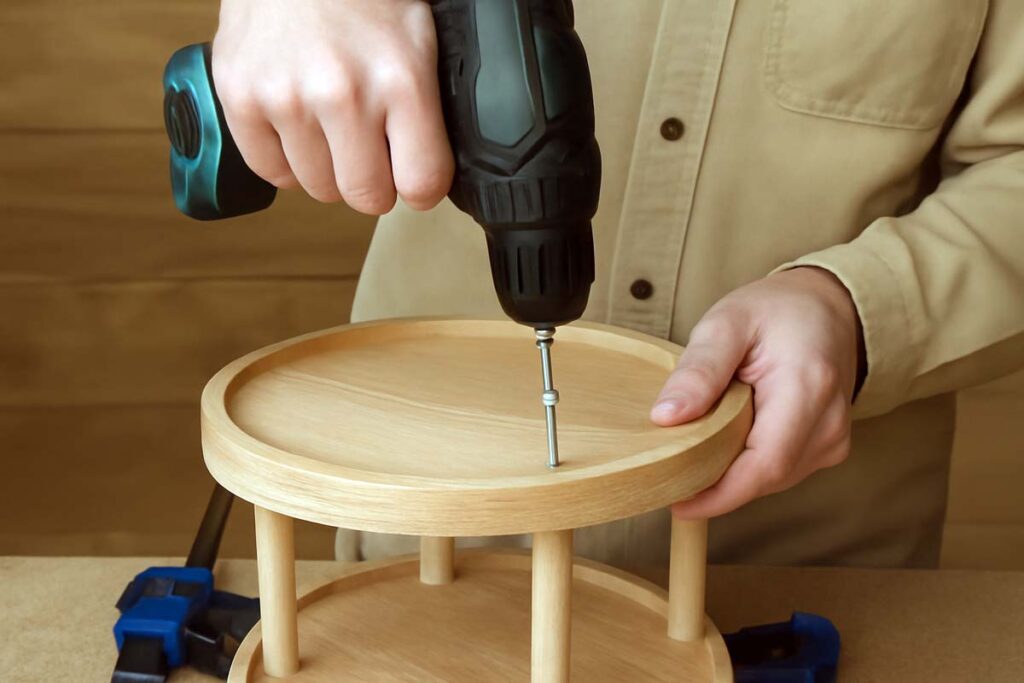
Step 4: Securing the Trays
To ensure your tiered tray stand is extra stable, you’ll want to reinforce the structure. Here’s how:
- Add Screws or Nails: Once the glue has dried, use a drill to make small pilot holes through the dowels and into the trays. Then, use screws or nails to secure the trays in place. This will give extra stability to the stand.
- Check for Stability: Give the stand a quick test to make sure the trays are securely in place and level. If everything looks good, you’re almost there!
Step 5: Sanding and Finishing
To give your 2-tier tray stand a professional, polished look, you’ll want to finish it with some sanding and a beautiful wood stain or paint.
Smooth Everything Out: Sand down any rough spots, especially around the edges and where the dowels meet the trays. A smooth finish makes all the difference in how your piece looks.

Apply Wood Stain or Paint:
- Choose a wood stain or paint color that suits your home decor. I love using a natural stain to bring out the wood’s grain, but you can go with a bold color or white paint for a more contemporary feel.
- Apply the stain or paint evenly, and let it dry according to the manufacturer’s instructions. If you’re using stain, you may want to apply a second coat for a deeper color.
Seal the Wood: Once your stain or paint has dried, apply a clear wood sealer to protect the finish. This will help prevent scratches and wear over time.
Step 6: Final Touches
With your tiered tray stand fully assembled and finished, it’s time to add your personal flair!
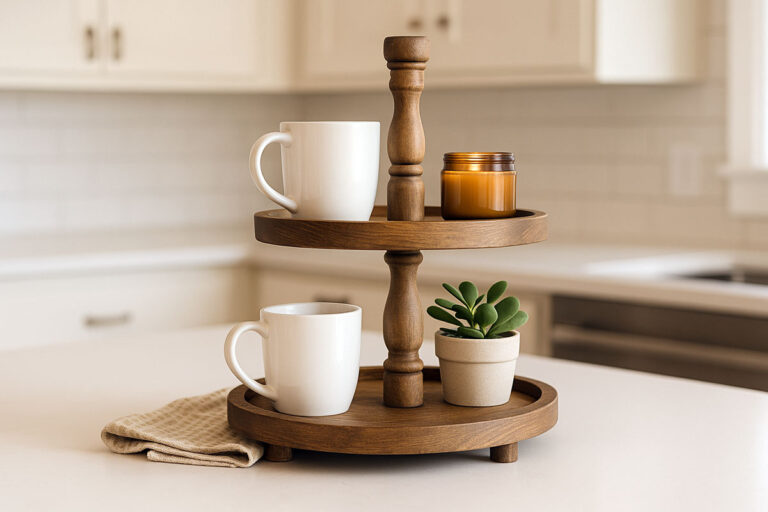
- Decorate Your Tray: Now comes the fun part – decorating your tray stand. You can use it to display seasonal decor, fresh flowers, candles, or even kitchen essentials. The possibilities are endless!
- Add Decorative Handles or Knobs (Optional): If you want to add an extra bit of charm, consider attaching decorative knobs or handles to the sides of the trays. This can make your stand look even more polished and functional.

FAQs about DIY 2 Tier Tray Stand
Conclusion
There you have it! You’ve now built a beautiful and functional 2-tier tray stand from scratch. Whether you use it to organize your home, showcase your favorite items, or just add some rustic charm to your living space, this stand is sure to be a hit.
Remember, woodworking is all about patience and practice. The more projects you complete, the more skilled and confident you’ll become. So, take your time, enjoy the process, and don’t hesitate to get creative with your designs!
If you enjoyed this tutorial, feel free to share it with others who might be interested in crafting their own tiered tray stand. And as always, if you have any questions or need further advice, don’t hesitate to reach out. Happy woodworking!